|
|
 Author Author |
 Strut Bar Fitting Guide (currently 544 views) Strut Bar Fitting Guide (currently 544 views) |
| steve |
Posted on: Friday, June 29th, 2012, 8:23:53pm
 Attachment: sb2.jpg - 56.87 KB (748 views) Attachment: sb2.jpg - 56.87 KB (748 views) |
  |
|
|
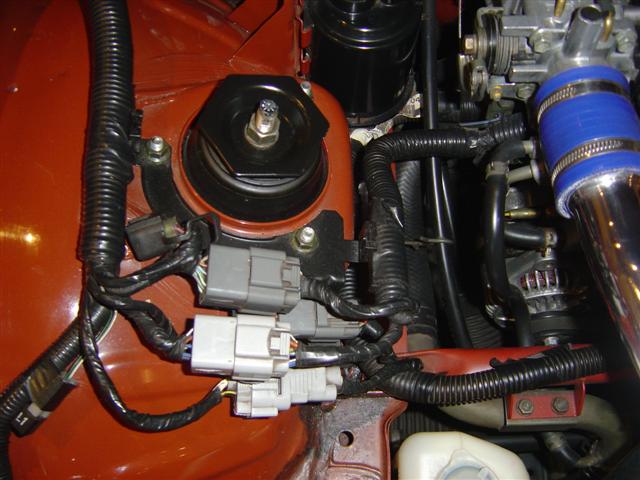
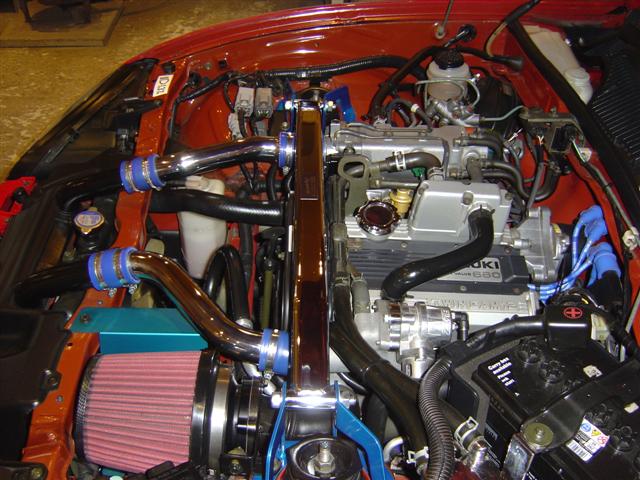
| Strut bar fitting guide. |
 |
|
 Logged Logged |
|
|
|
|
| steve |
Posted on: Friday, June 29th, 2012, 8:25:54pm
Attachment: sb3.jpg - 53.81 KB (188 views) |
|
|
|
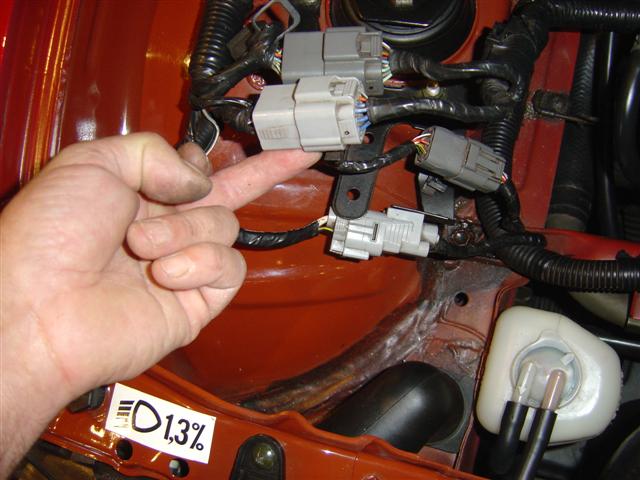
| Remove plugs from bracket. |
 |
|
| Logged |
|
|
 |
Reply: 1 - 30 |
|
|
| steve |
Posted on: Friday, June 29th, 2012, 8:31:46pm
Attachment: sb4.jpg - 65.64 KB (191 views) |
|
|
|
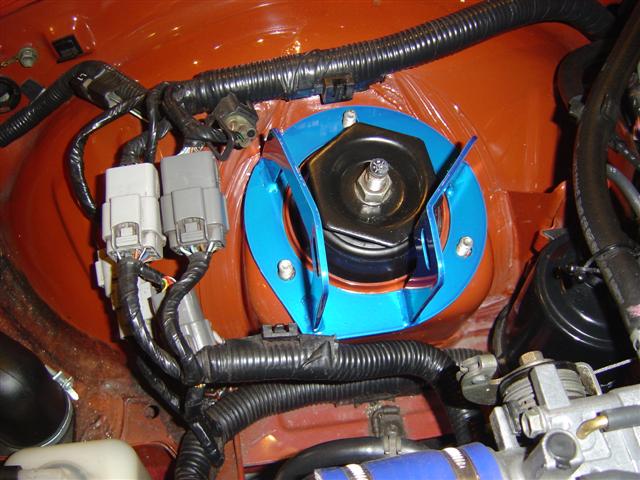
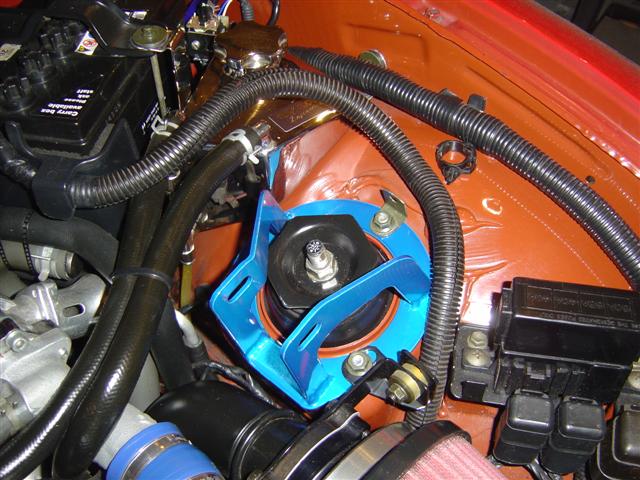
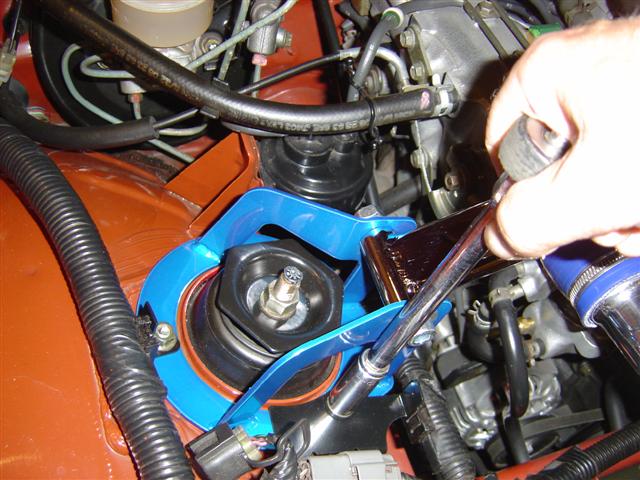
| Remove nuts and wire bracket and drop on strut bar bracket. Note the brackets are handed and the offset brings the bar forward over the front of the throttle body. |
 |
Last modified Saturday, June 30th, 2012, 12:21:33am by steve |
|
| Logged |
|
|
|
Reply: 2 - 30 |
|
|
| steve |
Posted on: Friday, June 29th, 2012, 8:38:17pm
Attachment: sb5.jpg - 35.81 KB (740 views) |
|
|
|
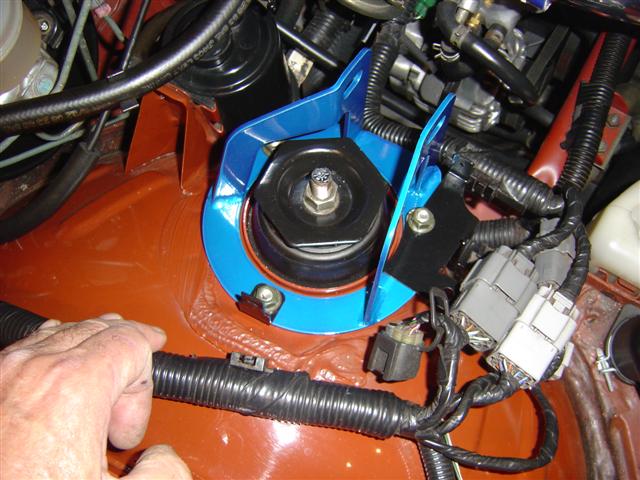
| Plastic clip needs transferring from old bracket to new bracket. |
 |
|
| Logged |
|
|
|
Reply: 3 - 30 |
|
|
| steve |
Posted on: Friday, June 29th, 2012, 8:44:27pm
Attachment: sb6.jpg - 67.26 KB (739 views) |
|
|
|
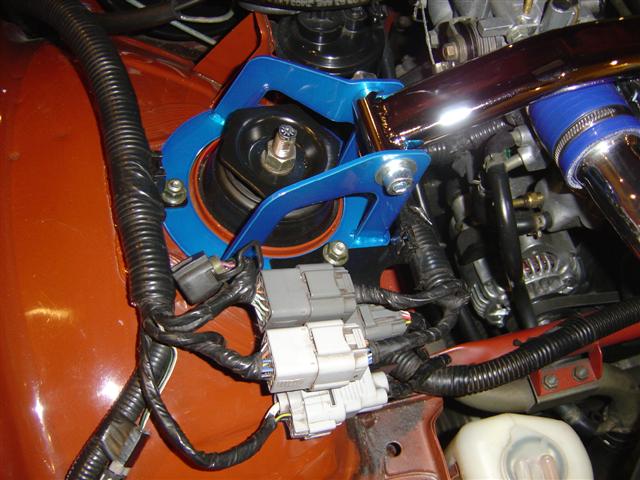
| Drop new wire bracket on and small angle bracket that holds the main harness and put nuts on only finger tight at this stage. |
 |
|
| Logged |
|
|
|
Reply: 4 - 30 |
|
|
| steve |
Posted on: Friday, June 29th, 2012, 8:48:58pm
Attachment: sb7.jpg - 73.99 KB (732 views) |
|
|
|
| Same on passenger side. Finger tight nuts and don't plug the wires on at this stage. |
 |
|
| Logged |
|
|
|
Reply: 5 - 30 |
|
|
| steve |
Posted on: Friday, June 29th, 2012, 8:53:52pm
Attachment: sb8.jpg - 81.12 KB (730 views) |
|
|
|
Mount over bar with nuts to the back. It looks better that way  |
 |
|
| Logged |
|
|
|
Reply: 6 - 30 |
|
|
| steve |
Posted on: Friday, June 29th, 2012, 8:57:31pm
Attachment: sb9.jpg - 38.22 KB (726 views) |
|
|
|
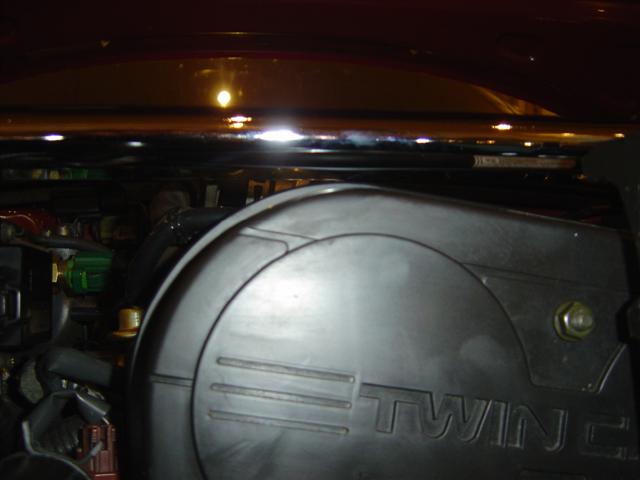
| This is where the clearance is small. |
 |
|
| Logged |
|
|
|
Reply: 7 - 30 |
|
|
| steve |
Posted on: Friday, June 29th, 2012, 9:00:02pm
Attachment: sb10.jpg - 49.46 KB (727 views) |
|
|
|
| Another shot to show how close it is. |
 |
|
| Logged |
|
|
|
Reply: 8 - 30 |
|
|
| steve |
Posted on: Friday, June 29th, 2012, 9:02:59pm
Attachment: sb11.jpg - 70.22 KB (725 views) |
|
|
|
| Tighten nuts on strut tops |
 |
|
| Logged |
|
|
|
Reply: 9 - 30 |
|
|
| steve |
Posted on: Friday, June 29th, 2012, 9:06:43pm
Attachment: sb12.jpg - 66.40 KB (723 views) |
|
|
|
| Place something under the bar to hold it high as it will go. |
 |
|
| Logged |
|
|
|
Reply: 10 - 30 |
|
|
| steve |
Posted on: Friday, June 29th, 2012, 9:13:55pm
Attachment: sb13_small.jpg - 80.11 KB (721 views) |
|
|
|
| Tighten end bolts. |
 |
|
| Logged |
|
|
|
Reply: 11 - 30 |
|
|
| steve |
Posted on: Friday, June 29th, 2012, 9:16:02pm
Attachment: sb14.jpg - 63.20 KB (191 views) |
|
|
|
| Clip all the wires back in place. |
 |
|
| Logged |
|
|
|
Reply: 12 - 30 |
|
|
| steve |
Posted on: Friday, June 29th, 2012, 9:18:16pm
Attachment: sb16.jpg - 30.59 KB (719 views) |
|
|
|
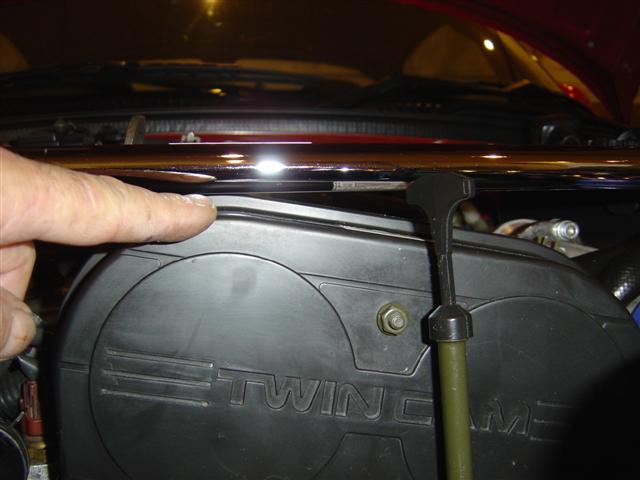
| Check clearance. |
 |
|
| Logged |
|
|
|
Reply: 13 - 30 |
|
|
| steve |
Posted on: Friday, June 29th, 2012, 9:19:38pm
Attachment: sb17.jpg - 83.40 KB (715 views) |
|
|
|
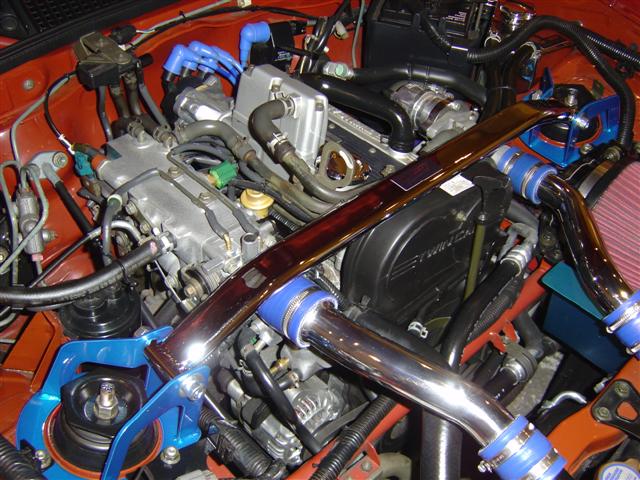
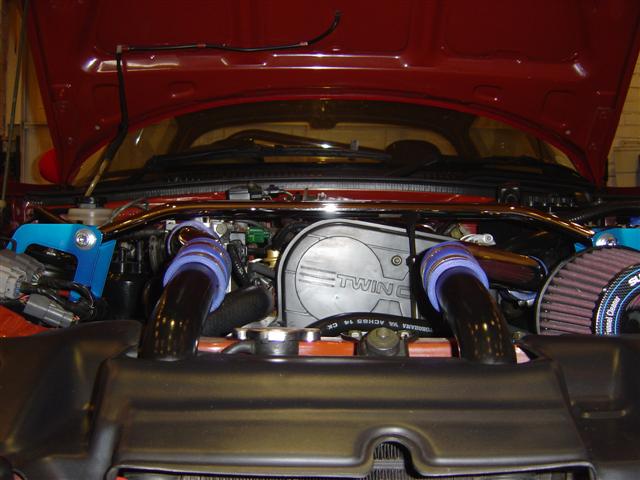
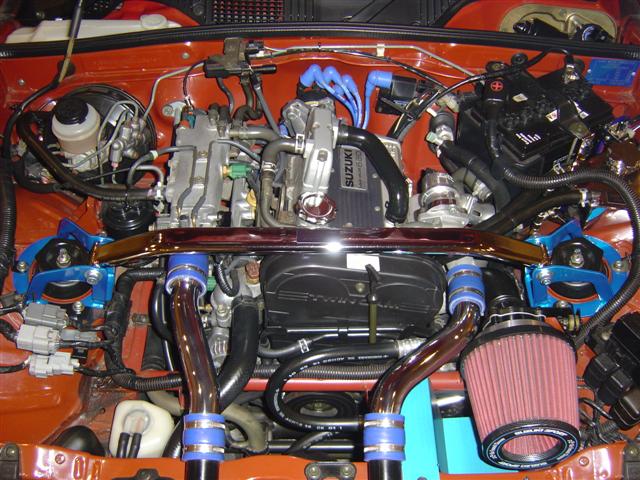
| Job done. |
 |
|
| Logged |
|
|
|
Reply: 14 - 30 |
|
|
| steve |
Posted on: Friday, June 29th, 2012, 9:22:53pm
Attachment: sb18_small.jpg - 72.08 KB (714 views) |
|
|
|
| Another. |
 |
|
| Logged |
|
|
|
Reply: 15 - 30 |
|
|
| steve |
Posted on: Friday, June 29th, 2012, 9:29:26pm
Attachment: sb19.jpg - 56.45 KB (707 views) |
|
|
|
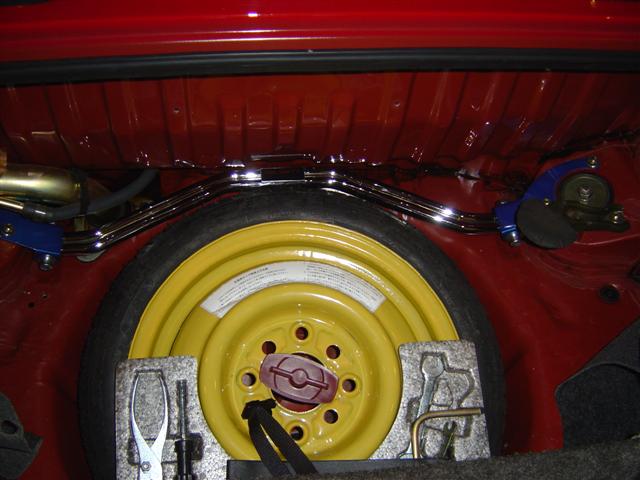
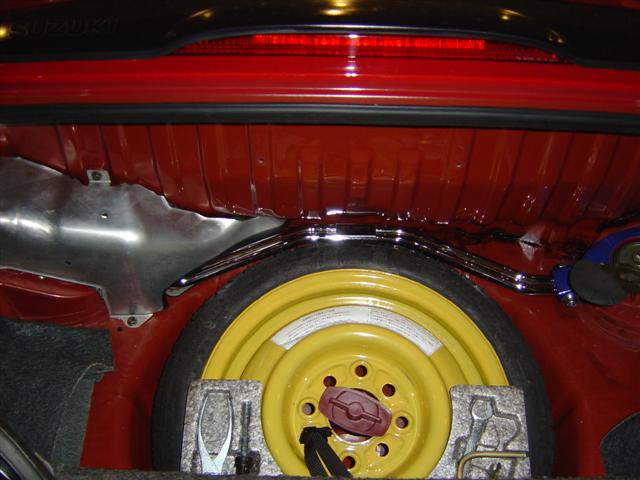
| rear brace fitting guide. Remove carpet and jack. |
 |
Last modified Friday, June 29th, 2012, 9:30:02pm by steve |
|
| Logged |
|
|
|
Reply: 16 - 30 |
|
|
| steve |
Posted on: Friday, June 29th, 2012, 9:33:21pm
Attachment: sb20_small.jpg - 46.27 KB (703 views) |
|
|
|
| Remove filler pipe cover. |
 |
|
| Logged |
|
|
|
Reply: 17 - 30 |
|
|
| steve |
Posted on: Friday, June 29th, 2012, 9:37:03pm
Attachment: sb21.jpg - 52.97 KB (702 views) |
|
|
|
| The back bar can be mounted with the end brackets in place but the bolts that hold the end brackets should be left slack at this stage. |
 |
|
| Logged |
|
|
|
Reply: 18 - 30 |
|
|
| steve |
Posted on: Friday, June 29th, 2012, 9:41:46pm
Attachment: sb22.jpg - 48.17 KB (189 views) |
|
|
|
| Remove the back two nuts from the struts on each side drop the strut bar on and replace the nuts and tighten them down. Finally tighten the end bar bolts. |
 |
Last modified Wednesday, July 11th, 2012, 9:06:44am by steve |
|
| Logged |
|
|
|
Reply: 19 - 30 |
|
|
| steve |
Posted on: Friday, June 29th, 2012, 9:46:22pm
Attachment: sb23.jpg - 47.46 KB (192 views) |
|
|
|
| The pipe cover needs to be cut to allow the strut bar to pass through. |
 |
|
| Logged |
|
|
|
Reply: 20 - 30 |
|
|
| steve |
Posted on: Friday, June 29th, 2012, 9:52:03pm
Attachment: sb28.jpg - 46.32 KB (187 views) |
|
|
|
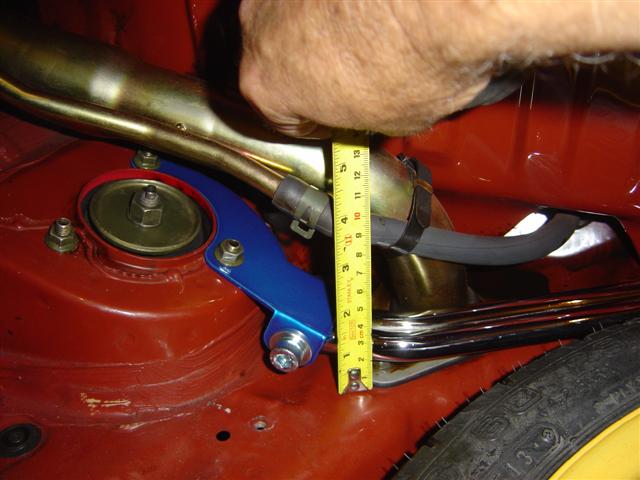
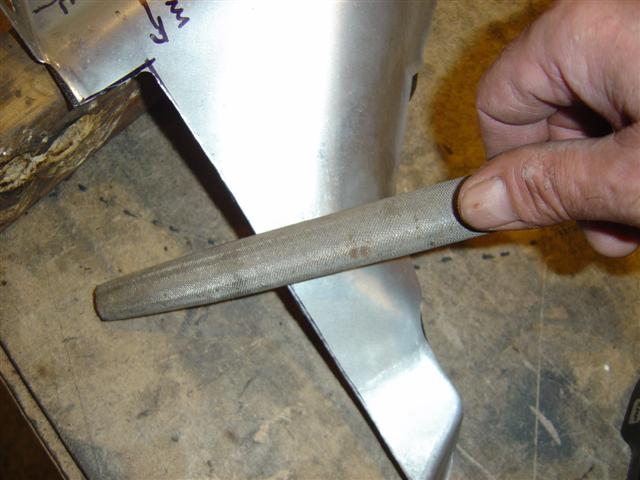
| 40mm top to bottom and 65mm from the centre of the boot floor mounting hole to the start of the cut out. |
 |
|
| Logged |
|
|
|
Reply: 21 - 30 |
|
|
| steve |
Posted on: Friday, June 29th, 2012, 9:53:38pm
Attachment: sb29.jpg - 49.37 KB (201 views) |
|
|
|
| Bolt cover back in place. |
 |
|
| Logged |
|
|
|
Reply: 22 - 30 |
|
|
| steve |
Posted on: Friday, June 29th, 2012, 9:56:48pm
Attachment: sb30.jpg - 48.27 KB (689 views) |
|
|
|
| I put a peace of edging i had kicking about but its not that important as its under the carpet. |
 |
|
| Logged |
|
|
|
Reply: 23 - 30 |
|
|
| steve |
Posted on: Friday, June 29th, 2012, 10:00:27pm
Attachment: sb31.jpg - 59.66 KB (687 views) |
|
|
|
| Replace carpet and jack. Job done. |
 |
|
| Logged |
|
|
|
Reply: 24 - 30 |
|
|
| Andy |
| Posted on: Friday, June 29th, 2012, 10:03:21pm |
|
|
Official C.O.C Contributor


Gender:  Male Male
Posts: 23604
Posts Per Day: 3.48 |
|
Great guides and pics. They look the dog's danglies them 
“ |
Quoted from steve, posted Friday, June 29th, 2012, 9:56:48pm at here |
” |
I put a peace of edging i had kicking about but its not that important as its under the carpet.
|
|
But it does stop you slicing your fingers open on the cover or it potentially scratching the rear bar  |
Drop me a PM if you would like to be added to the ClubCappo Member Map. More details can be found here.
We now have an official Facebook group as well as a page! See here |
|
| Logged |
|
|
 |
Reply: 25 - 30 |
|
|
| steve |
| Posted on: Friday, June 29th, 2012, 10:35:58pm |
|
|
|
It took longer to do this write up than it did to put them on  . It saves me doing fitting instructions for them though . It saves me doing fitting instructions for them though  ... ... |
|
| Logged |
|
|
|
Reply: 26 - 30 |
|
|
| lord |
| Posted on: Friday, June 29th, 2012, 10:42:49pm |
|
|
|
| Blinging hell. Im out for a meal and I've refreshed this watching it constantly. Looking really good ste and great pictures! |
|
| Logged |
|
|
|
Reply: 27 - 30 |
|
|
| steve |
| Posted on: Friday, June 29th, 2012, 11:07:22pm |
|
|
|
| Thanks. Its a bit bling but its my colour scheme. |
|
| Logged |
|
|
|
Reply: 28 - 30 |
|
|
| mattjohns |
| Posted on: Saturday, June 30th, 2012, 1:14:37am |
|
|
Maximum Member
Posts: 1652
Posts Per Day: 0.94 |
|
“ |
Quoted from steve, posted Friday, June 29th, 2012, 9:33:21pm at here |
” |
Remove filler pipe cover.
|
|
Then apply iodine and band-aids |
|
| Logged |
|
|
| |
Reply: 29 - 30 |
|
|
| steve |
Posted on: Saturday, June 30th, 2012, 3:05:38am
Attachment: sb27.jpg - 46.34 KB (647 views) |
|
|
|
Or  |
 |
|
| Logged |
|
|
|
Reply: 30 - 30 |
|
|
|
 Cappuccino Owners Club › Traders › Six Sixty Engineering › Strut Bar Fitting Guide (Moderators: , , )


