|
|
 Author Author |
 Six sixty track day car (currently 3067 views) Six sixty track day car (currently 3067 views) |
| steve |
| Posted on: Tuesday, July 16th, 2013, 11:50:59pm |
  |
|
|
For more years than i care to think about ive had a stipped cappo in my workshop and now its time to start a track car project. I will post pictures up as i go along and when funds permit. Help and suggestions along the way are always welcome  |
|
 Logged Logged |
|
|
|
|
| fuzz573 |
| Posted on: Tuesday, July 16th, 2013, 11:59:38pm |
|
|
|
| Fantastic idea and good exposure for cappos and your wonderful products |
|
| Logged |
|
|
 |
Reply: 1 - 92 |
|
|
| steve |
| Posted on: Wednesday, July 17th, 2013, 1:01:52am |
|
|
|
I've gone as far as i want to go with my road car and this is the most logical way to develop new parts. Yes you are correct fuzz i'm amazed at how many people never have seen a cappuccino and get asked about it nearly every time i go out in mine and its an excellent platform to show off new parts. I've got a takeoff body kit and the wheels will be the same size and offset as the takeoff track cars as will the brakes. Suspension not sure yet but coilovers. Inside full weld in cage which i'm having bent up in kit form and will install myself. One seat no interior and a boot mounted fuel system. Engine f6a but with a hell of a lot of one off parts on it but i've done my homework on that one. I get excited just talking about it but i've waited a long time to do it  |
Last modified Wednesday, July 17th, 2013, 8:34:45am by steve |
|
| Logged |
|
|
|
Reply: 2 - 92 |
|
|
| lord |
| Posted on: Wednesday, July 17th, 2013, 1:40:18pm |
|
|
|
| go on steve..... sounds like a plan to me!! |
|
| Logged |
|
|
|
Reply: 3 - 92 |
|
|
| steve |
| Posted on: Wednesday, July 17th, 2013, 10:55:28pm |
|
|
|
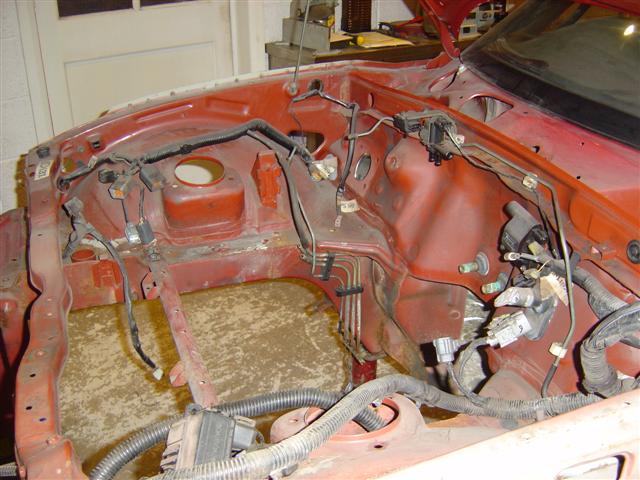
| First thing to do is empty the shell i've used it as a skip Next is make spit so i can spin the shell through 360 degrees. |
|
| Logged |
|
|
|
Reply: 4 - 92 |
|
|
| Ricou |
| Posted on: Thursday, July 18th, 2013, 10:00:17pm |
|
|
Maximum Member

Posts: 1110
Posts Per Day: 0.65 |
|
| This is gonna be awesome. Take pictures ! |
|
| Logged |
|
|
 |
Reply: 5 - 92 |
|
|
| steve |
| Posted on: Thursday, July 18th, 2013, 10:20:00pm |
|
|
|
| Yes i intend to take lots of pictures Ricou. I will try to take some pictures of her tomorrow and an intro to the project. |
|
| Logged |
|
|
|
Reply: 6 - 92 |
|
|
| steve |
| Posted on: Friday, July 19th, 2013, 10:46:53pm |
|
|
|
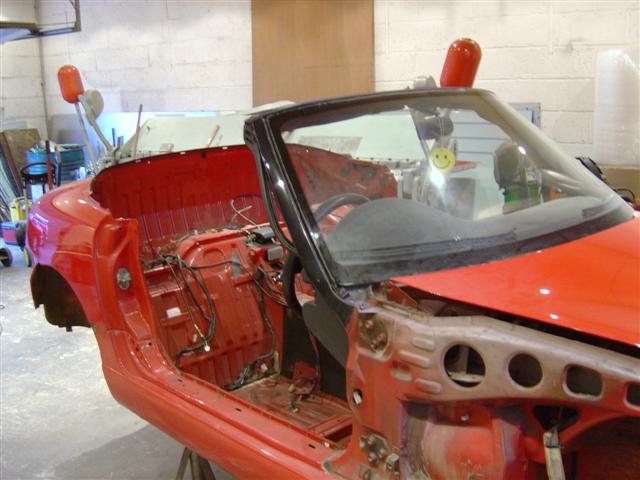
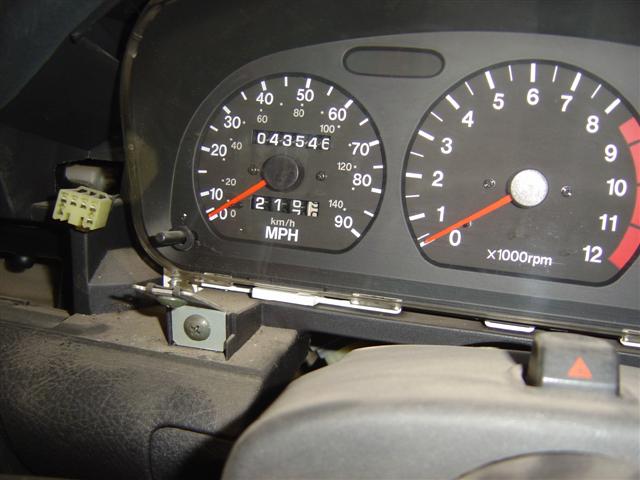
| Her names Maddison grace and she was road registered in the UK in 1994. One lady owner just over forty three thousand miles on the clock but never rust proofed which we all know is not a good idea in the UK. Bought as a birthday present for my wife but it was going to take too long to get it ready in time so that plan was scrapped shes been sat under a cover for eight years the car that is not the wife. |
Last modified Friday, July 19th, 2013, 10:49:30pm by steve |
|
| Logged |
|
|
|
Reply: 7 - 92 |
|
|
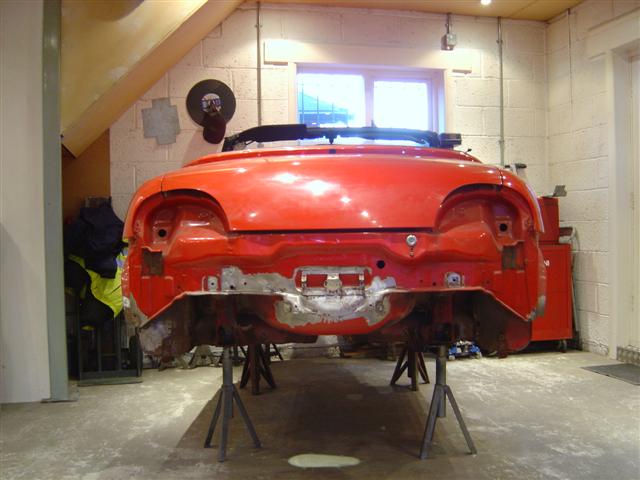
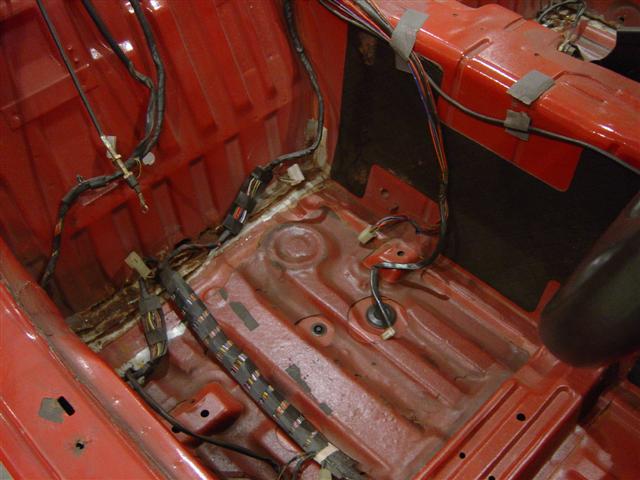
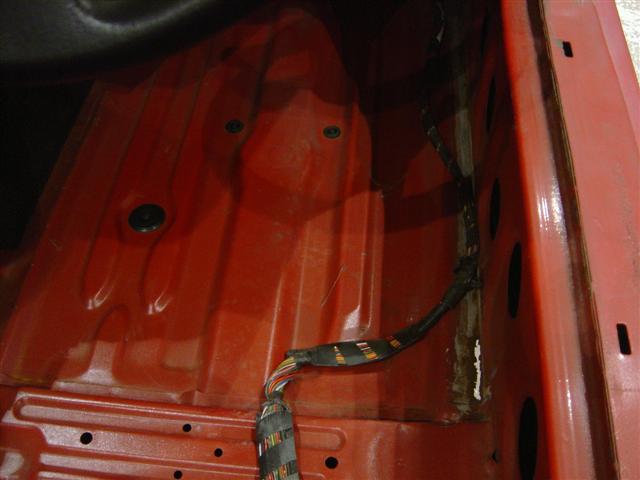
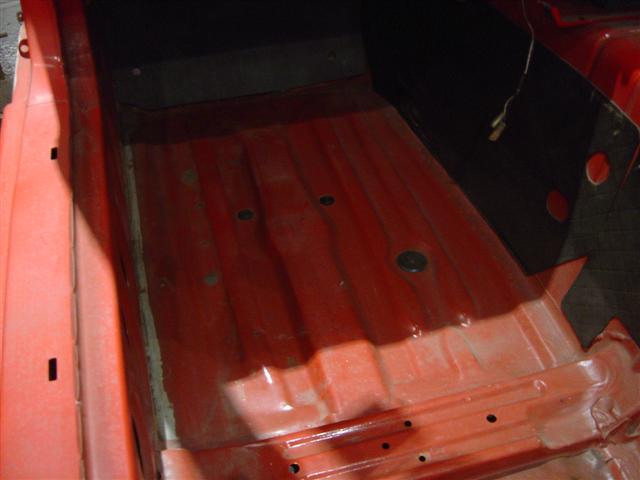
| steve |
Posted on: Friday, July 19th, 2013, 10:57:27pm
 Attachment: dsc04597_small.jpg - 47.27 KB (1367 views) Attachment: dsc04597_small.jpg - 47.27 KB (1367 views) |
|
|
|
| 1 |
 |
|
| Logged |
|
|
|
Reply: 8 - 92 |
|
|
| steve |
Posted on: Friday, July 19th, 2013, 10:58:04pm
Attachment: dsc04599_small.jpg - 51.75 KB (1364 views) |
|
|
|
| 2 |
 |
|
| Logged |
|
|
|
Reply: 9 - 92 |
|
|
| steve |
Posted on: Friday, July 19th, 2013, 10:58:37pm
Attachment: dsc04600_small.jpg - 35.18 KB (1366 views) |
|
|
|
| 3 |
 |
|
| Logged |
|
|
|
Reply: 10 - 92 |
|
|
| steve |
Posted on: Friday, July 19th, 2013, 10:59:15pm
Attachment: dsc04601_small.jpg - 32.09 KB (1364 views) |
|
|
|
| 4 |
 |
|
| Logged |
|
|
|
Reply: 11 - 92 |
|
|
| steve |
Posted on: Friday, July 19th, 2013, 11:00:03pm
Attachment: dsc04602_small.jpg - 47.28 KB (1361 views) |
|
|
|
| 5 |
 |
|
| Logged |
|
|
|
Reply: 12 - 92 |
|
|
| steve |
Posted on: Friday, July 19th, 2013, 11:01:01pm
Attachment: dsc04603_small.jpg - 50.86 KB (1359 views) |
|
|
|
| 6 |
 |
|
| Logged |
|
|
|
Reply: 13 - 92 |
|
|
| steve |
Posted on: Friday, July 19th, 2013, 11:01:52pm
Attachment: dsc04606_small.jpg - 44.84 KB (1358 views) |
|
|
|
| 7 |
 |
|
| Logged |
|
|
|
Reply: 14 - 92 |
|
|
| steve |
Posted on: Friday, July 19th, 2013, 11:02:40pm
Attachment: dsc04607_small.jpg - 60.89 KB (1355 views) |
|
|
|
| 8 |
 |
|
| Logged |
|
|
|
Reply: 15 - 92 |
|
|
| steve |
Posted on: Friday, July 19th, 2013, 11:03:42pm
Attachment: dsc04608_small.jpg - 63.97 KB (1354 views) |
|
|
|
| 9 |
 |
|
| Logged |
|
|
|
Reply: 16 - 92 |
|
|
| steve |
|
|
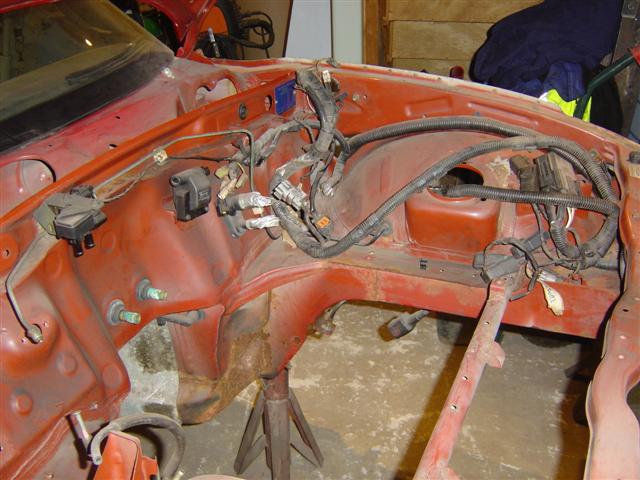
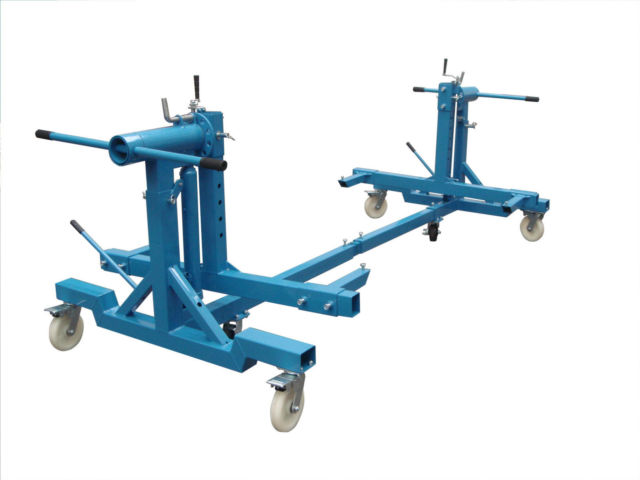
| Next up is to remove the few bits that are left on the shell and then build some sort of tilter on wheels. |
 |
Last modified Friday, July 19th, 2013, 11:46:20pm by steve |
|
| Logged |
|
|
|
Reply: 17 - 92 |
|
|
| Andy |
| Posted on: Saturday, July 20th, 2013, 10:58:06am |
|
|
Official C.O.C Contributor

Gender:  Male Male
Posts: 23604
Posts Per Day: 3.48 |
|
| Bet that took a while to empty out |
Drop me a PM if you would like to be added to the ClubCappo Member Map. More details can be found here.
We now have an official Facebook group as well as a page! See here |
|
| Logged |
|
|
| |
Reply: 18 - 92 |
|
|
| lord |
| Posted on: Saturday, July 20th, 2013, 11:49:05am |
|
|
|
That shelll is in good nick mate.... looking good... how long did it take to strip her?
Have you sand blasted parts of the shell? |
|
| Logged |
|
|
|
Reply: 19 - 92 |
|
|
| steve |
| Posted on: Saturday, July 20th, 2013, 8:24:56pm |
|
|
|
“ |
Quoted from Andy, posted Saturday, July 20th, 2013, 10:58:06am at here |
” |
Bet that took a while to empty out
|
|
Yes it did but i'm on a mission now  |
|
| Logged |
|
|
|
Reply: 20 - 92 |
|
|
| steve |
| Posted on: Saturday, July 20th, 2013, 9:22:18pm |
|
|
|
“ |
Quoted from lord, posted Saturday, July 20th, 2013, 11:49:05am at here |
” |
That shelll is in good nick mate.... looking good... how long did it take to strip her?
Have you sand blasted parts of the shell?
|
|
Its not the worst shell in the world. It was such an honest car i had to save it. I removed parts and restored them as they came off so stipping it was taking forever. Anything that was not too good i bought new from Suzuki. I ran up a bill with Suzuki of over £2500 and about another £500 in other bits like paints abrasives and a proper wheel refurb. I've got box upon box of refurbed or brand new parts. enough to build what would look like a brand new car. Only the shell escaped being done. The bits i've cleaned up on the shell were mechanically cleaned but to be honest i want better so i'm going to get a pressure blaster rig up a temporary booth and do a proper job. |
Last modified Monday, July 29th, 2013, 12:20:53am by steve |
|
| Logged |
|
|
|
Reply: 21 - 92 |
|
|
| Keanoid |
| Posted on: Sunday, July 21st, 2013, 6:19:37am |
|
|
|
| Sounds like your literally rebuilding the cappo! |
|
| Logged |
|
|
|
Reply: 22 - 92 |
|
|
| bullfrog |
| Posted on: Sunday, July 21st, 2013, 5:44:58pm |
|
|
Big Member

Posts: 362
Posts Per Day: 0.21 |
|
| Mmmm.....whats going to power the car????? i wonder.. |
|
| Logged |
|
|
| |
Reply: 23 - 92 |
|
|
| steve |
| Posted on: Monday, July 22nd, 2013, 7:09:17am |
|
|
|
Yes its a ground up rebuild. The inner sills and edges of the floor are not too brilliant so i'm going to replace them along with a few minor repairs here and there. If i use the factory gearbox casing engine block and original head casting i can use the car for sprints and hill climbs in the modified production class. Everything else on the car is more or less unlimited  |
|
| Logged |
|
|
|
Reply: 24 - 92 |
|
|
| doodlepugg |
| Posted on: Thursday, August 15th, 2013, 10:38:33am |
|
|
|
| Make the cage kit first please, so I can buy one from you |
|
| Logged |
|
|
|
Reply: 25 - 92 |
|
|
| steve |
| Posted on: Saturday, August 17th, 2013, 7:16:49am |
|
|
|
| It will be one of the first things after the shells sorted out. |
|
| Logged |
|
|
|
Reply: 26 - 92 |
|
|
| lord |
| Posted on: Thursday, December 26th, 2013, 12:59:04pm |
|
|
|
| Any progress in this bad bad boy |
|
| Logged |
|
|
|
Reply: 27 - 92 |
|
|
| steve |
| Posted on: Thursday, December 26th, 2013, 1:30:11pm |
|
|
|
Erm... not much. Works got in the way and i've had to buy a new van so the bank balance took a kicking  . I'll have to pick it up now though because i need the floors out .... . I'll have to pick it up now though because i need the floors out .... |
|
| Logged |
|
|
|
Reply: 28 - 92 |
|
|
| lord |
| Posted on: Thursday, December 26th, 2013, 6:29:40pm |
|
|
|
| Step by step! I wanna see x |
|
| Logged |
|
|
|
Reply: 29 - 92 |
|
|
| steve |
|
|
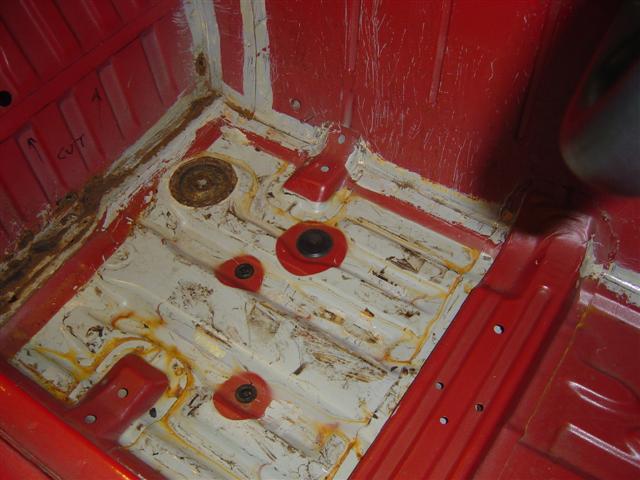
| OK step by step it is. First off stip the seam sealer so you can find the spot welds. I've stripped the sound deadening pads from the rear floor pan so i can take more measurements for the new floor pans. I was quite surprised that it was in good order under the sound deadening. |
 |
|
| Logged |
|
|
|
Reply: 30 - 92 |
|
|
| steve |
Posted on: Tuesday, January 7th, 2014, 6:47:41pm
Attachment: rust_in_seams.jpg - 58.64 KB (1037 views) |
|
|
|
| The rust has crept into the seam all the way round the floor pan. |
 |
Last modified Tuesday, January 7th, 2014, 6:48:56pm by steve |
|
| Logged |
|
|
|
Reply: 31 - 92 |
|
|
| steve |
Posted on: Tuesday, January 7th, 2014, 6:53:56pm
Attachment: seat_belt_mount.jpg - 43.29 KB (668 views) |
|
|
|
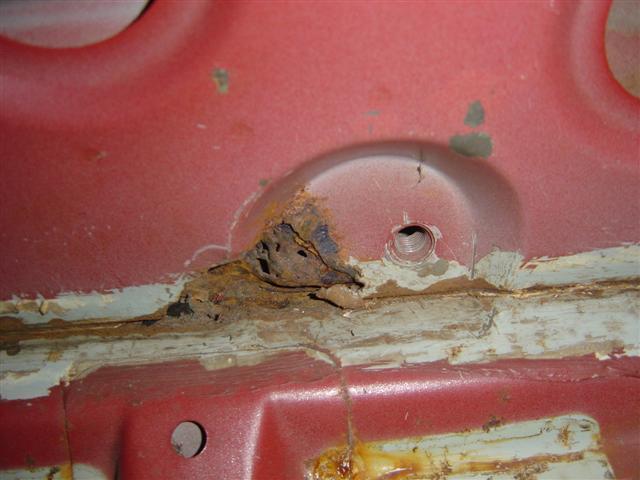
| Rust in the inner and middle sills. For some reason really bad at the seat belt mounting point. |
 |
|
| Logged |
|
|
|
Reply: 32 - 92 |
|
|
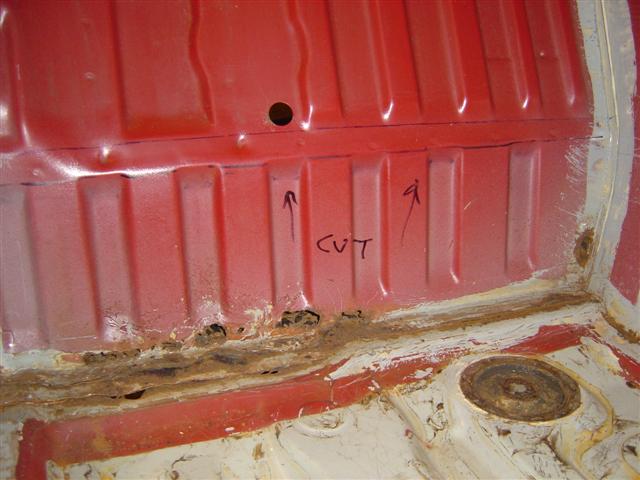
| steve |
|
|
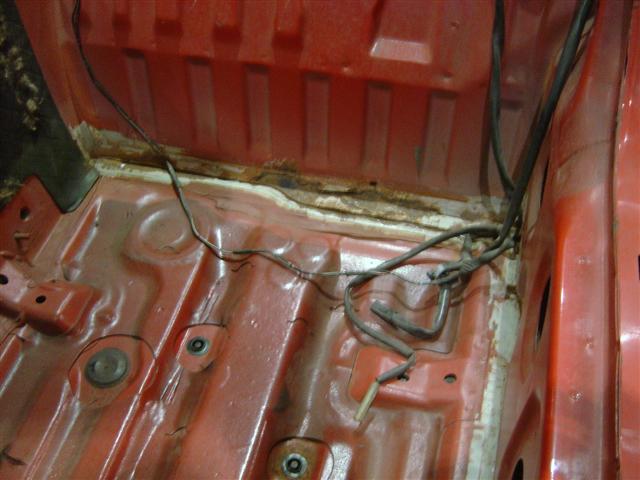
| Rust on the rear bulkhead. One of the cappos favorite rot spots. The full lower section as marked is to be removed so i can clean out and re-paint the rear crossmember and then a new lower panel is to be installed using a more substantial material than the original. |
 |
|
| Logged |
|
|
|
Reply: 33 - 92 |
|
|
| lord |
| Posted on: Tuesday, January 7th, 2014, 11:06:41pm |
|
|
|
Thanks Steve...
Looking good so far! I'll delete this post later but wht about making the lower panel also or is that a stupid idea? Like the one you have marked. |
|
| Logged |
|
|
|
Reply: 34 - 92 |
|
|
| steve |
| Posted on: Wednesday, January 8th, 2014, 12:03:11am |
|
|
|
| First chance i've had to get back to it but i can now finish the drivers side floor pan. Well the prototype. I really need to get the spit made after that. Yes fully intend to make repair sections for the front and rear bulkheads. The front bulkheads a similar design with box section/cavity That rots from the inside out. Also i'll have look at making full length sill repair repair sections. I'm putting all new factory sills on this and can copy them before i fit them. Things like this could save a few cappos and make it a cheaper way to restore. Dont you dare delete your comments. I want input from other owners it keeps me fired up..... |
|
| Logged |
|
|
|
Reply: 35 - 92 |
|
|
| fuzz573 |
| Posted on: Wednesday, January 8th, 2014, 12:20:43am |
|
|
|
| Looking good Steve, I wish my floor was as solid as yours, I can see through mine |
|
| Logged |
|
|
|
Reply: 36 - 92 |
|
|
| lord |
| Posted on: Wednesday, January 8th, 2014, 12:28:22am |
|
|
|
you know when i took mine out just after christmas the floor was rotten as sh*t and i know I shouldn't have drove it but I sat on the floor and my a*se was ready to fall through it lol
talk about fred flinstone! a*se powered cappo lol |
|
| Logged |
|
|
|
Reply: 37 - 92 |
|
|
| steve |
| Posted on: Wednesday, January 8th, 2014, 12:49:07am |
|
|
|
| Its a crying shame because both your cars look very tidy on top.... |
|
| Logged |
|
|
|
Reply: 38 - 92 |
|
|
| mattjohns |
| Posted on: Wednesday, January 8th, 2014, 5:24:14am |
|
|
Maximum Member
Posts: 1652
Posts Per Day: 0.94 |
|
| When you get around to making the 'spit', I'd be interested to know where the axis of rotation is for a Cappuccino shell. |
|
| Logged |
|
|
| |
Reply: 39 - 92 |
|
|
|
 Cappuccino Owners Club › Traders › Six Sixty Engineering › Six sixty track day car (Moderators: , , )


