|
|
 Author Author |
 Short shifter fitting guide. (currently 1035 views) Short shifter fitting guide. (currently 1035 views) |
| steve |
Posted on: Thursday, August 22nd, 2013, 2:30:30am
 Attachment: dsc04723_small.jpg - 41.98 KB (763 views) Attachment: dsc04723_small.jpg - 41.98 KB (763 views) |
  |
|
|
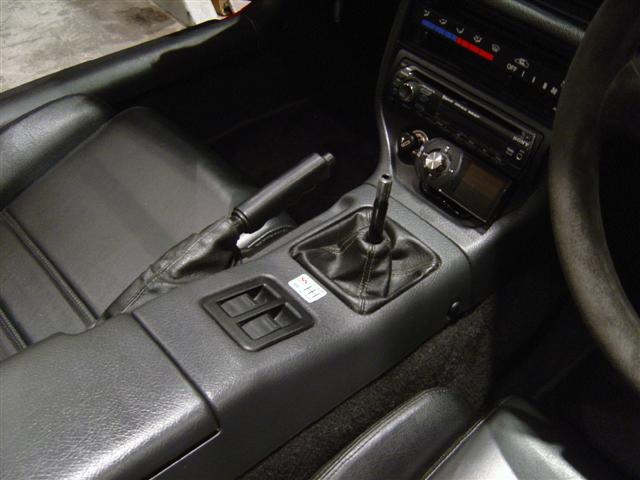
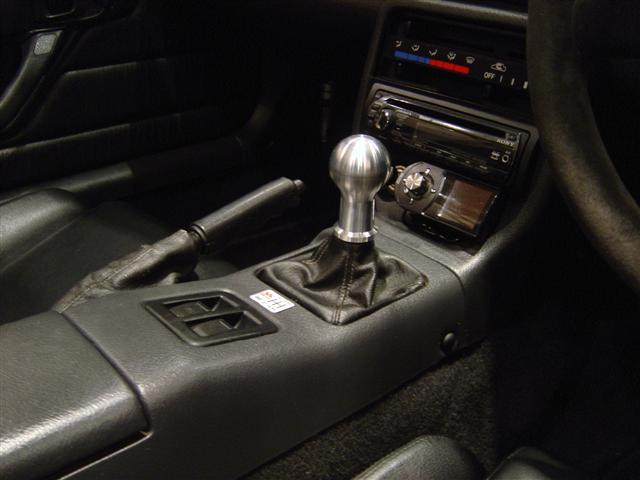
| Set the car in neutral hand brake on and remove the gear knob. |
 |
|
 Logged Logged |
|
|
|
|
| steve |
Posted on: Thursday, August 22nd, 2013, 2:33:12am
Attachment: dsc04724_small.jpg - 29.68 KB (762 views) |
|
|
|
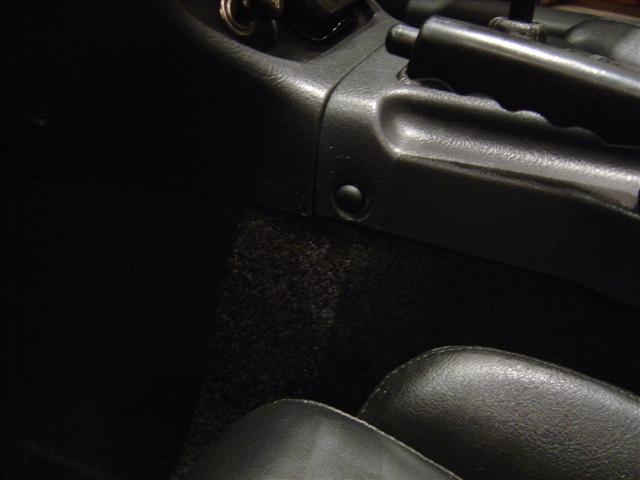
| Remove the screws from the centre console. here. |
 |
|
| Logged |
|
|
 |
Reply: 1 - 43 |
|
|
| steve |
Posted on: Thursday, August 22nd, 2013, 2:33:47am
Attachment: dsc04725_small.jpg - 39.20 KB (758 views) |
|
|
|
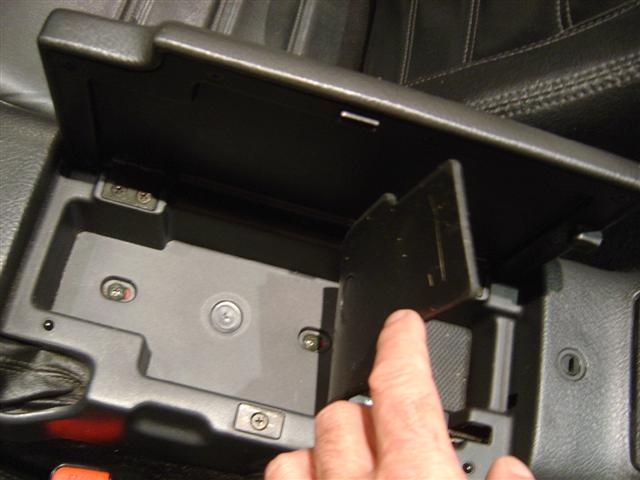
| Here. |
 |
|
| Logged |
|
|
|
Reply: 2 - 43 |
|
|
| steve |
Posted on: Thursday, August 22nd, 2013, 2:34:23am
Attachment: dsc04726_small.jpg - 37.10 KB (756 views) |
|
|
|
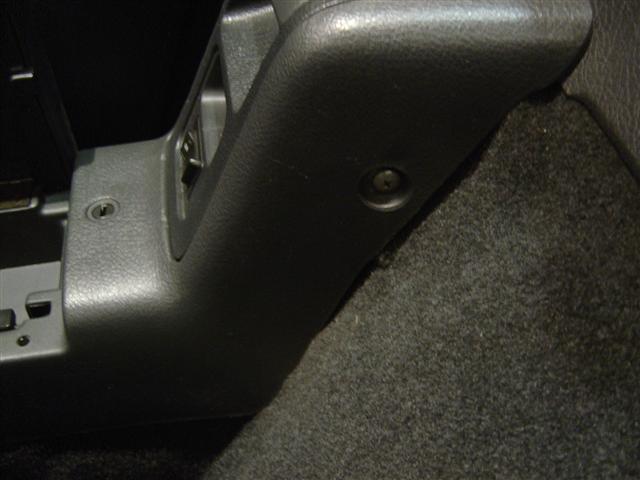
| And here |
 |
|
| Logged |
|
|
|
Reply: 3 - 43 |
|
|
| steve |
Posted on: Thursday, August 22nd, 2013, 2:39:10am
Attachment: dsc04727_small.jpg - 37.33 KB (758 views) |
|
|
|
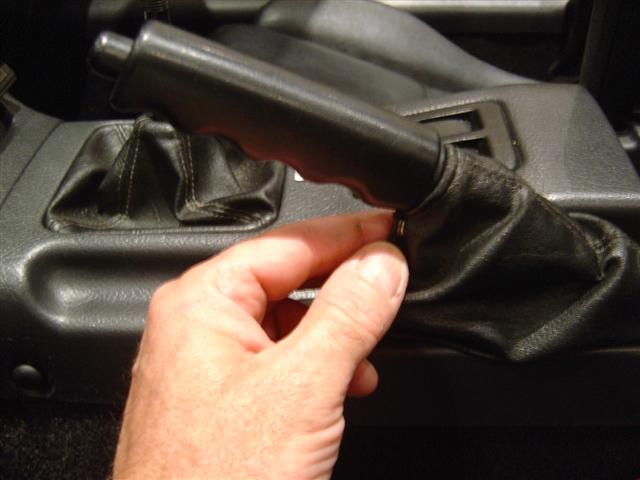
| Lift the hand brake lever as high as it will go and undo the poper and part the velcro. |
 |
|
| Logged |
|
|
|
Reply: 4 - 43 |
|
|
| steve |
Posted on: Thursday, August 22nd, 2013, 2:47:48am
Attachment: dsc04728_small.jpg - 34.44 KB (757 views) |
|
|
|
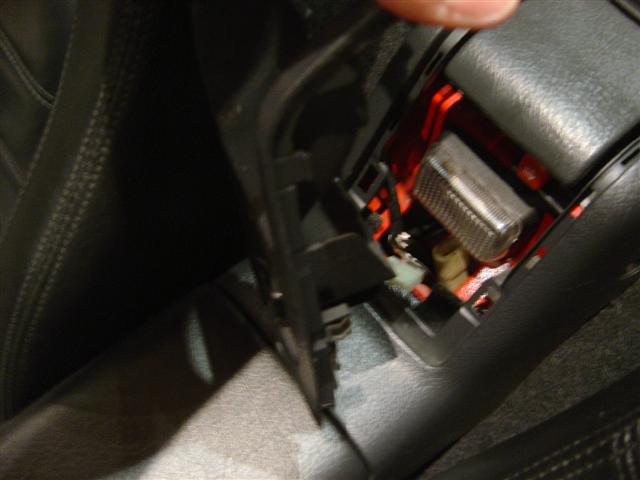
| Unclip the elbow light housing. This is on push clips at the bottom and just location pegs higher up. You will have to lift the roof lever to remove it from the console fully and unplug the light switch socket. |
 |
|
| Logged |
|
|
|
Reply: 5 - 43 |
|
|
| steve |
Posted on: Thursday, August 22nd, 2013, 2:55:55am
Attachment: dsc04730_small.jpg - 28.03 KB (753 views) |
|
|
|
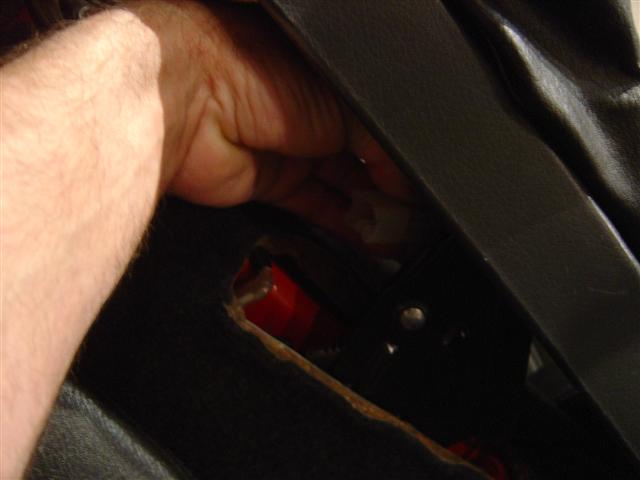
| Lift the front of the centre console and unplug the window switch socket. Remove the centre console by lifting at the front end and unhooking from the hand brake lever at the same time. The higher the hand brake is on the easer it is. |
 |
|
| Logged |
|
|
|
Reply: 6 - 43 |
|
|
| steve |
Posted on: Thursday, August 22nd, 2013, 3:00:54am
Attachment: dsc04731_small.jpg - 57.87 KB (751 views) |
|
|
|
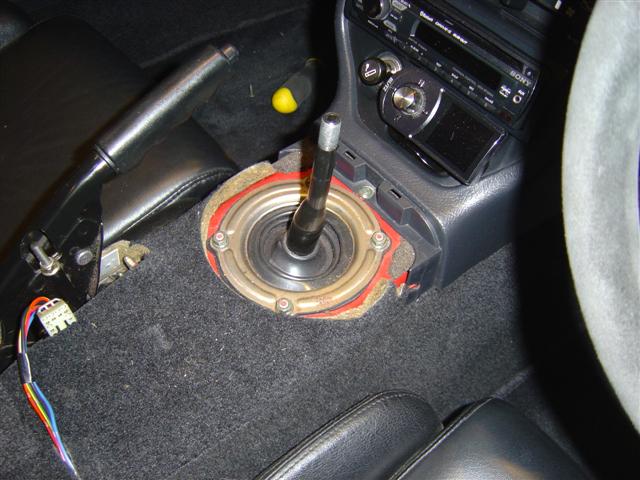
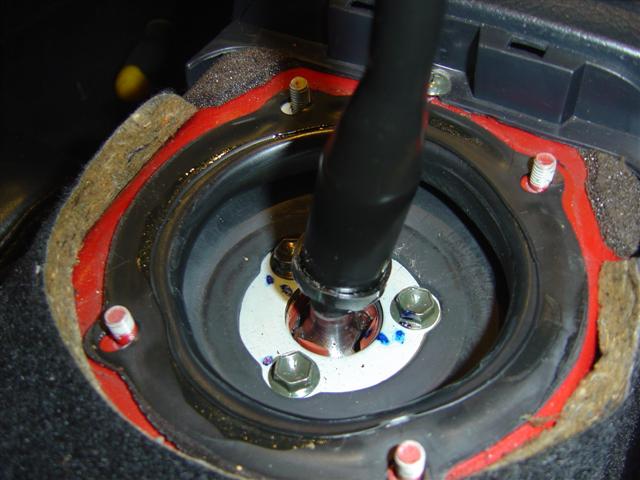
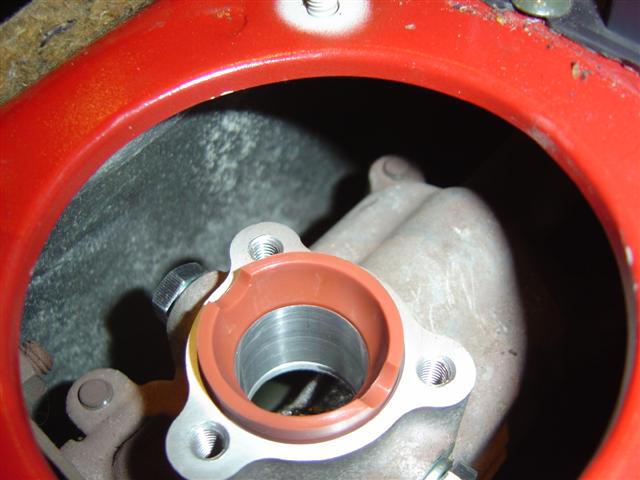
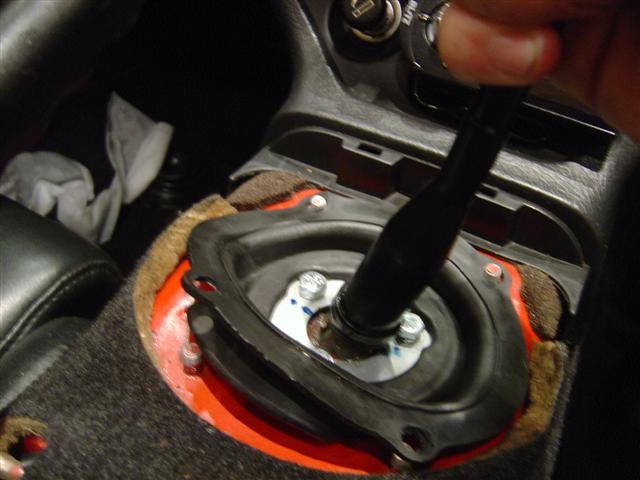
| With the centre console set to one side remove the four nuts on the gear lever gaiter. 10mm spanner. |
 |
|
| Logged |
|
|
|
Reply: 7 - 43 |
|
|
| steve |
Posted on: Thursday, August 22nd, 2013, 3:04:30am
Attachment: dsc04732_small.jpg - 48.88 KB (752 views) |
|
|
|
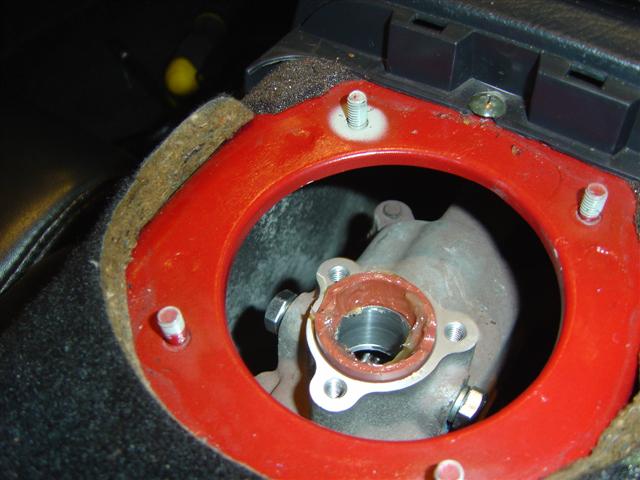
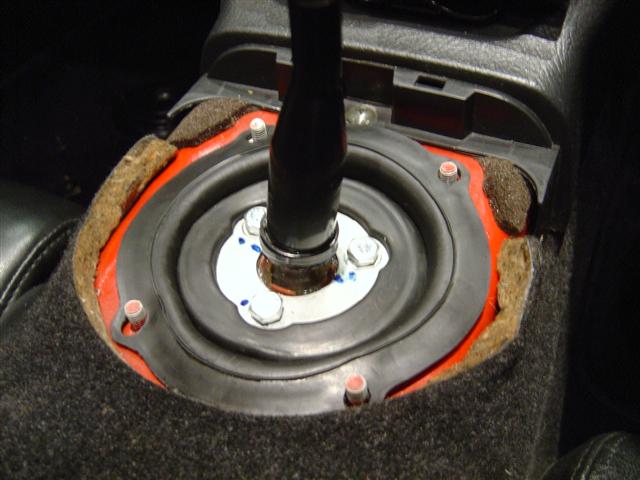
| Remove the three nuts on the lower gaitor. 10mm spanner. |
 |
|
| Logged |
|
|
|
Reply: 8 - 43 |
|
|
| steve |
Posted on: Thursday, August 22nd, 2013, 3:10:46am
Attachment: dsc04733_small.jpg - 45.95 KB (749 views) |
|
|
|
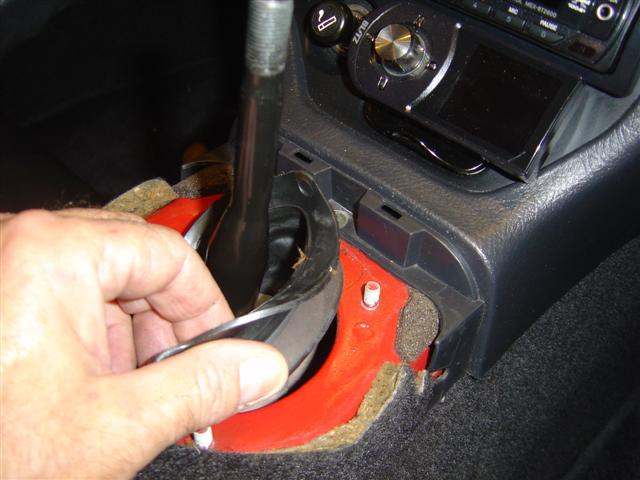
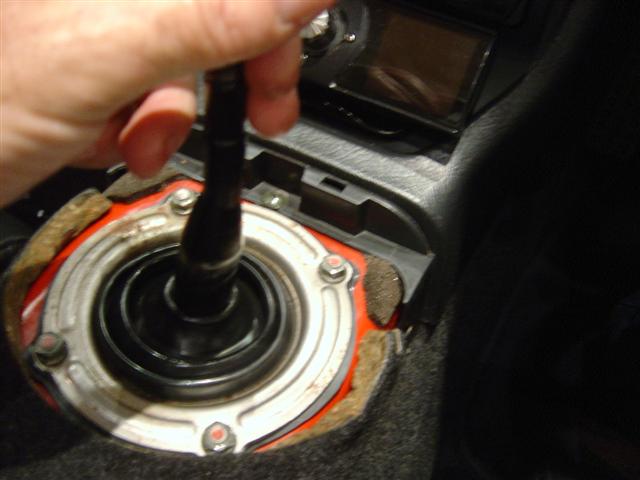
| Carefully unhook the lower gaiter from the transmission tunnel. Its advisable to put one hand on top of the gear lever and keep downward pressure on it just so the lever stays put till the lower gaitor is removed. |
 |
|
| Logged |
|
|
|
Reply: 9 - 43 |
|
|
| steve |
Posted on: Thursday, August 22nd, 2013, 3:13:59am
Attachment: dsc04734_small.jpg - 54.10 KB (752 views) |
|
|
|
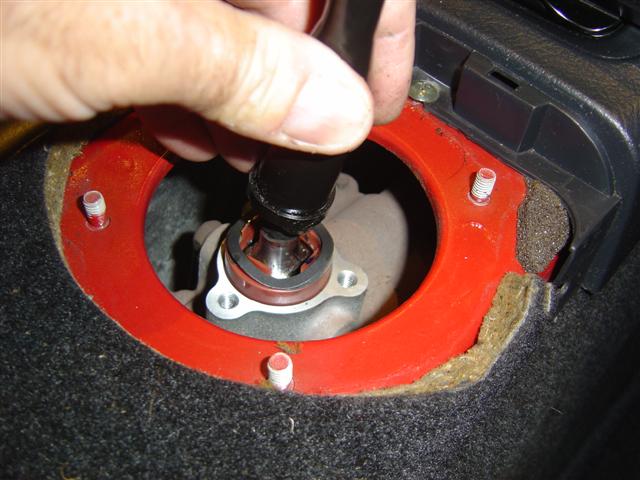
| With the lower gaiter removed carefully lift out the gear stick. |
 |
|
| Logged |
|
|
|
Reply: 10 - 43 |
|
|
| steve |
Posted on: Thursday, August 22nd, 2013, 3:21:30am
Attachment: dsc04735_small.jpg - 39.44 KB (749 views) |
|
|
|
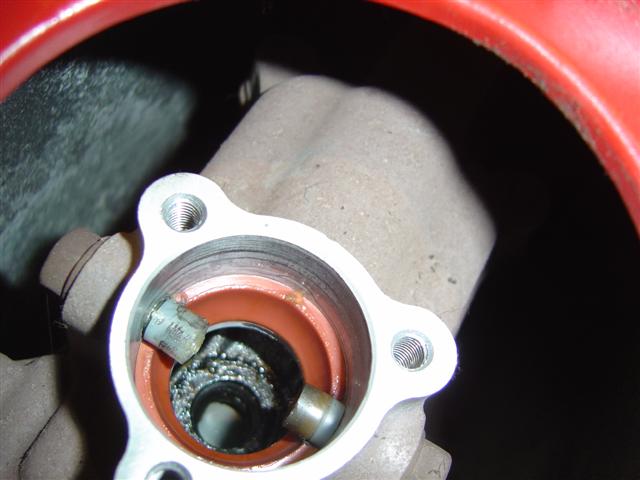
| With the gear lever remove just check that the plastic sock in the selector rod as not become dislodged. Its only sat in an eye and its party peace is jumping out without you noticing. |
 |
|
| Logged |
|
|
|
Reply: 11 - 43 |
|
|
| steve |
Posted on: Thursday, August 22nd, 2013, 3:28:32am
Attachment: dsc04736_small.jpg - 41.45 KB (751 views) |
|
|
|
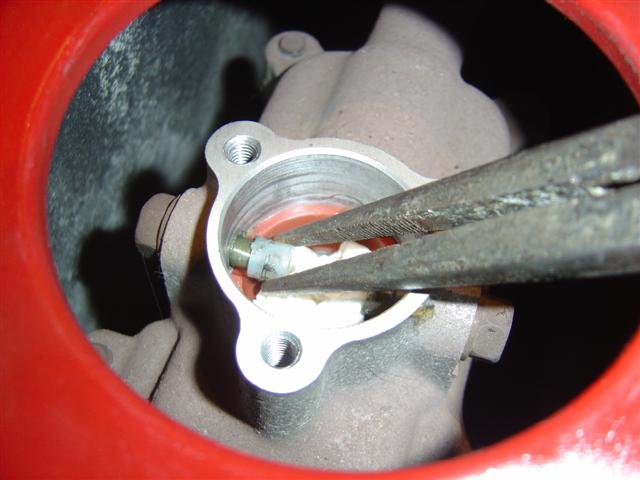
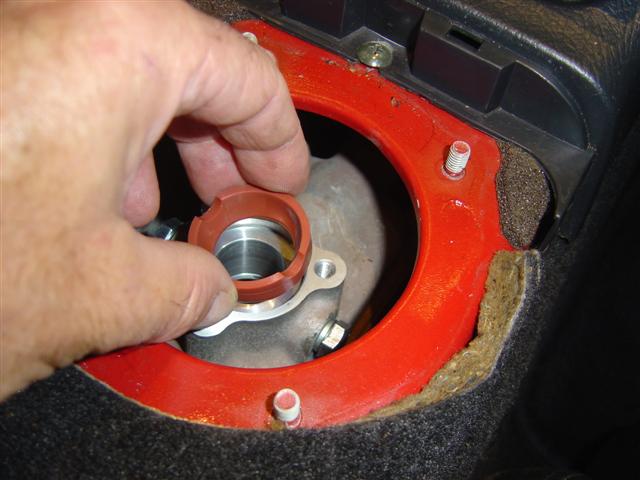
| Stick a piece of kitchen towel down into the lower half of the socket but be careful not to knock the nylon guide pin covers off when doing so. Then pull the nylon guide pin covers off with some long nose pliers. |
 |
|
| Logged |
|
|
|
Reply: 12 - 43 |
|
|
| steve |
Posted on: Thursday, August 22nd, 2013, 3:31:14am
Attachment: dsc04738_small.jpg - 48.65 KB (747 views) |
|
|
|
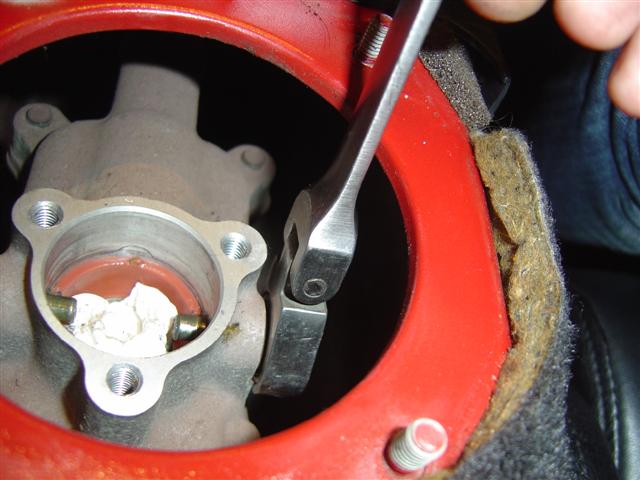
| Remove the guide pins. 12mm spanner. |
 |
|
| Logged |
|
|
|
Reply: 13 - 43 |
|
|
| steve |
Posted on: Thursday, August 22nd, 2013, 3:33:26am
Attachment: dsc04739_small.jpg - 40.33 KB (745 views) |
|
|
|
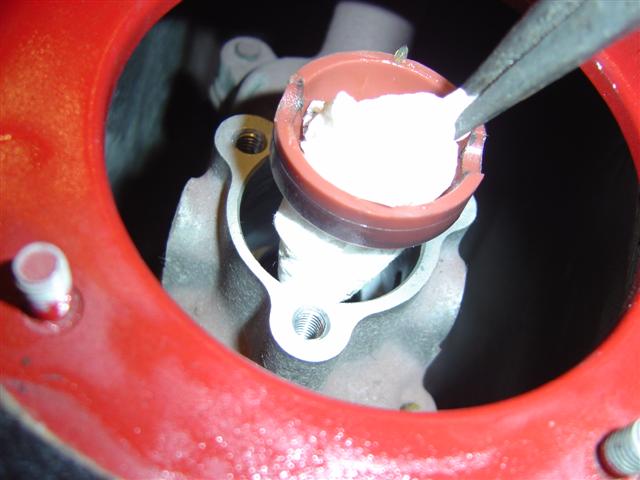
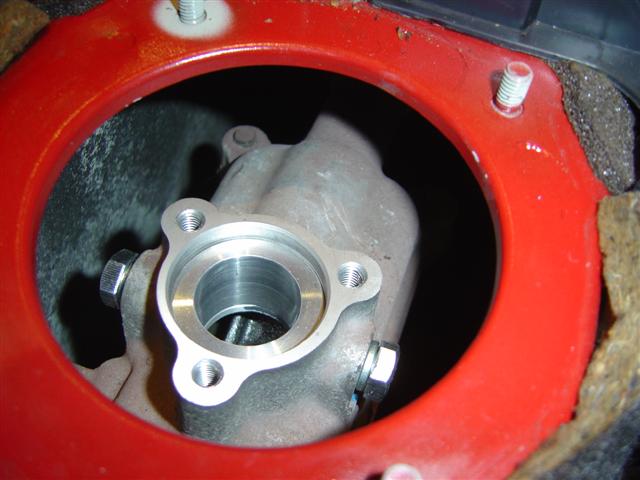
| Remove the lower socket and kitchen roll. |
 |
|
| Logged |
|
|
|
Reply: 14 - 43 |
|
|
| steve |
Posted on: Thursday, August 22nd, 2013, 3:36:42am
Attachment: dsc04740_small.jpg - 37.51 KB (742 views) |
|
|
|
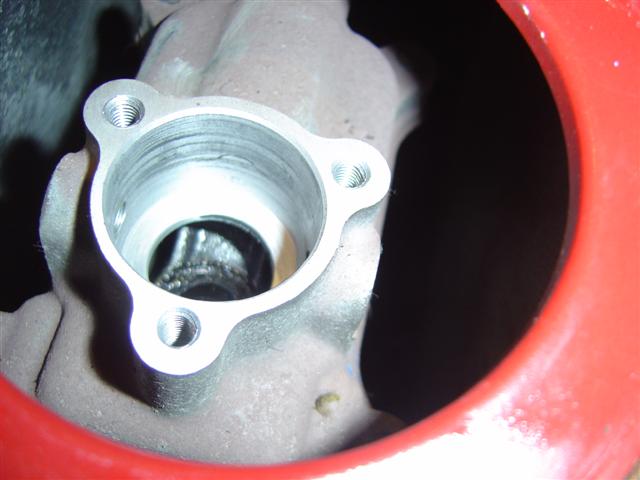
| Make sure everything's nice and clean. |
 |
|
| Logged |
|
|
|
Reply: 15 - 43 |
|
|
| steve |
Posted on: Thursday, August 22nd, 2013, 3:40:51am
Attachment: dsc04741_small.jpg - 38.24 KB (744 views) |
|
|
|
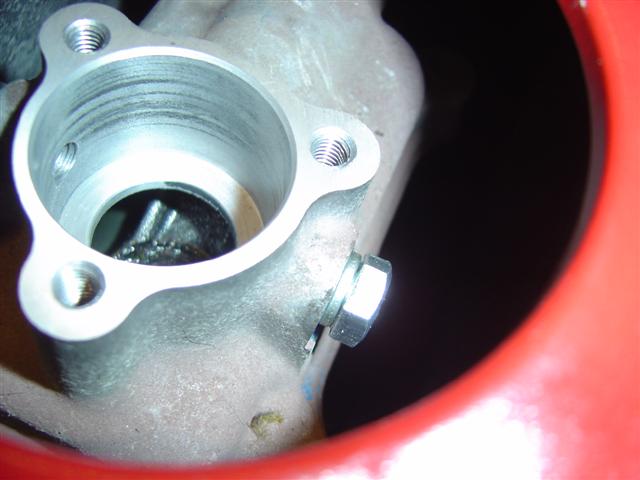
| Fit the supplied blanking screws to the original guide pin holes. Not easy if you have big fingers. 13mm spanner. |
 |
Last modified Thursday, August 22nd, 2013, 3:47:00am by steve |
|
| Logged |
|
|
|
Reply: 16 - 43 |
|
|
| steve |
Posted on: Thursday, August 22nd, 2013, 3:45:42am
Attachment: dsc04742_small.jpg - 42.23 KB (742 views) |
|
|
|
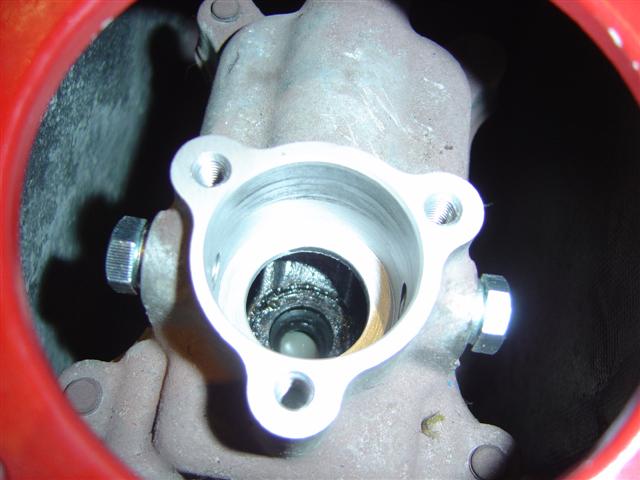
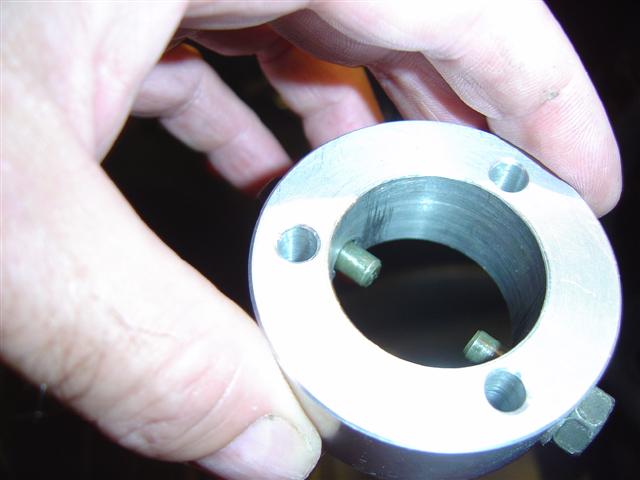
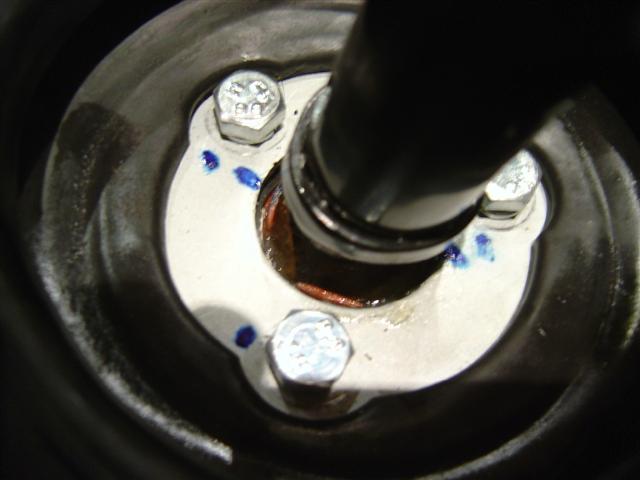
| Another shot with both blanking screws in and in the middle you can see the plastic socket in place in the selector rod. |
 |
|
| Logged |
|
|
|
Reply: 17 - 43 |
|
|
| steve |
Posted on: Thursday, August 22nd, 2013, 3:49:29am
Attachment: dsc04744_small.jpg - 44.38 KB (741 views) |
|
|
|
| Fit the small spacer that comes with the kit into the gear lever hole. |
 |
|
| Logged |
|
|
|
Reply: 18 - 43 |
|
|
| steve |
Posted on: Thursday, August 22nd, 2013, 3:52:23am
Attachment: dsc04745_small.jpg - 45.53 KB (739 views) |
|
|
|
| Fit the lower socket on top of the spacer so the guide pin cut outs are left and right. |
 |
|
| Logged |
|
|
|
Reply: 19 - 43 |
|
|
| steve |
Posted on: Thursday, August 22nd, 2013, 3:55:19am
Attachment: dsc04746_small.jpg - 44.70 KB (736 views) |
|
|
|
| Another shot. Put a little grease on the socket now. |
 |
|
| Logged |
|
|
|
Reply: 20 - 43 |
|
|
| steve |
Posted on: Thursday, August 22nd, 2013, 3:58:36am
Attachment: dsc04748_small.jpg - 47.25 KB (737 views) |
|
|
|
| Greased up and ready for the top spacer. |
 |
|
| Logged |
|
|
|
Reply: 21 - 43 |
|
|
| steve |
Posted on: Thursday, August 22nd, 2013, 4:00:44am
Attachment: dsc04747_small.jpg - 35.33 KB (733 views) |
|
|
|
| Fit the original guide pins in the new top spacer. |
 |
|
| Logged |
|
|
|
Reply: 22 - 43 |
|
|
| steve |
Posted on: Thursday, August 22nd, 2013, 4:04:40am
Attachment: dsc04751_small.jpg - 33.45 KB (733 views) |
|
|
|
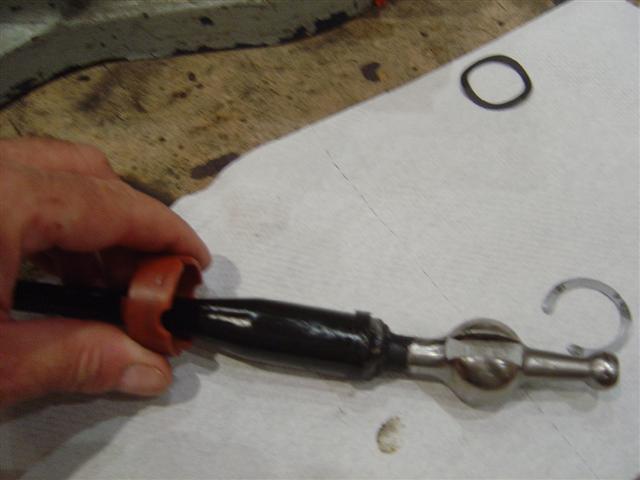
| Carefully remove the shim spring washer and top plastic socket from the original gear lever. |
 |
|
| Logged |
|
|
|
Reply: 23 - 43 |
|
|
| steve |
Posted on: Thursday, August 22nd, 2013, 4:09:10am
Attachment: dsc04753_small.jpg - 32.91 KB (737 views) |
|
|
|
| The plastic socket is quite soft so does come up the gear stick but be careful not to damage the four small teeth on the top of it. |
 |
|
| Logged |
|
|
|
Reply: 24 - 43 |
|
|
| steve |
Posted on: Thursday, August 22nd, 2013, 4:11:35am
Attachment: dsc04754_small.jpg - 50.52 KB (734 views) |
|
|
|
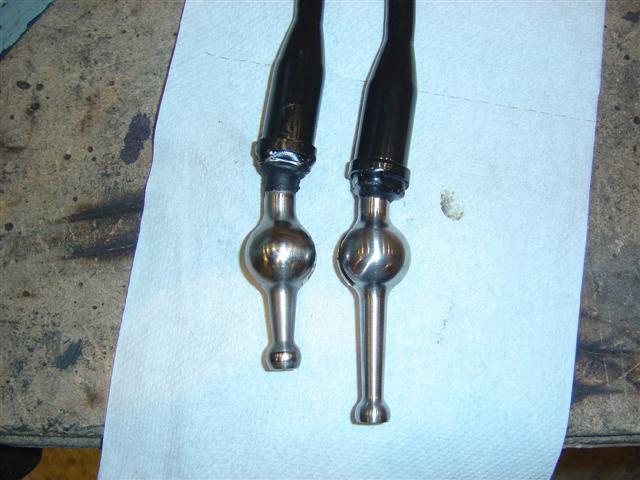
| The difference in size between the original and new one. |
 |
|
| Logged |
|
|
|
Reply: 25 - 43 |
|
|
| steve |
Posted on: Thursday, August 22nd, 2013, 4:15:50am
Attachment: dsc04755_small.jpg - 39.54 KB (729 views) |
|
|
|
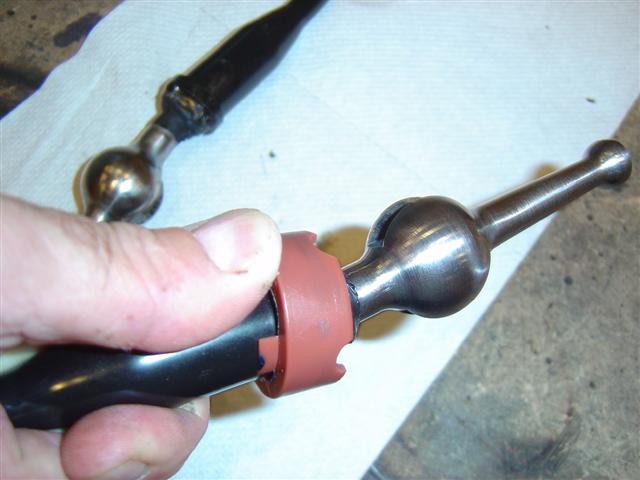
| Fit the top socket over the new gear lever again be careful not to damage the teeth. |
 |
|
| Logged |
|
|
|
Reply: 26 - 43 |
|
|
| steve |
Posted on: Thursday, August 22nd, 2013, 4:34:41am
Attachment: dsc04762_small.jpg - 43.48 KB (727 views) |
|
|
|
| Grease the guide pins that are bolted in the top spacer and fit the nylon covers. Fit the top spacer to the remote housing and fit the gear lever making sure the cut outs line up with the guide pins. fit the shim and spring washer. |
 |
|
| Logged |
|
|
|
Reply: 27 - 43 |
|
|
| steve |
Posted on: Thursday, August 22nd, 2013, 4:38:47am
Attachment: dsc04763_small.jpg - 45.67 KB (728 views) |
|
|
|
| Gear lever cranked towards the driver and the four small teeth on the top socket all coming past the shim and spring washer. |
 |
|
| Logged |
|
|
|
Reply: 28 - 43 |
|
|
| steve |
Posted on: Thursday, August 22nd, 2013, 4:43:54am
Attachment: dsc04766_small.jpg - 33.09 KB (729 views) |
|
|
|
| Refit the lower gaiter with the new bolts supplied but only do them finger tight at this stage. |
 |
|
| Logged |
|
|
|
Reply: 29 - 43 |
|
|
| steve |
Posted on: Thursday, August 22nd, 2013, 4:47:45am
Attachment: dsc04767_small.jpg - 51.23 KB (729 views) |
|
|
|
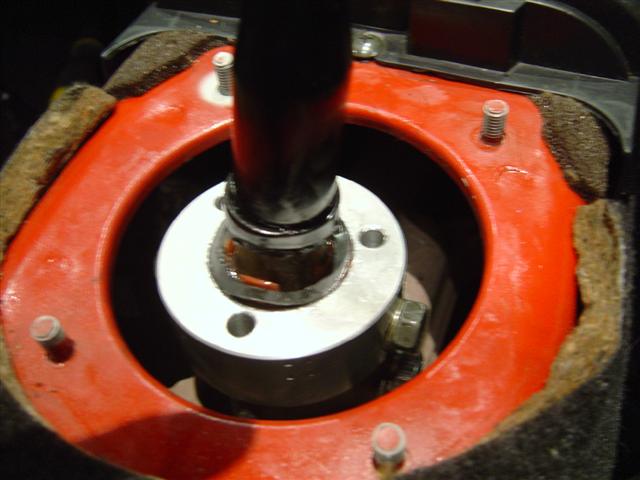
| Again the four teeth on the top socket should be protruding through to line things up. |
 |
|
| Logged |
|
|
|
Reply: 30 - 43 |
|
|
| steve |
Posted on: Thursday, August 22nd, 2013, 4:53:18am
Attachment: dsc04768_small.jpg - 43.34 KB (720 views) |
|
|
|
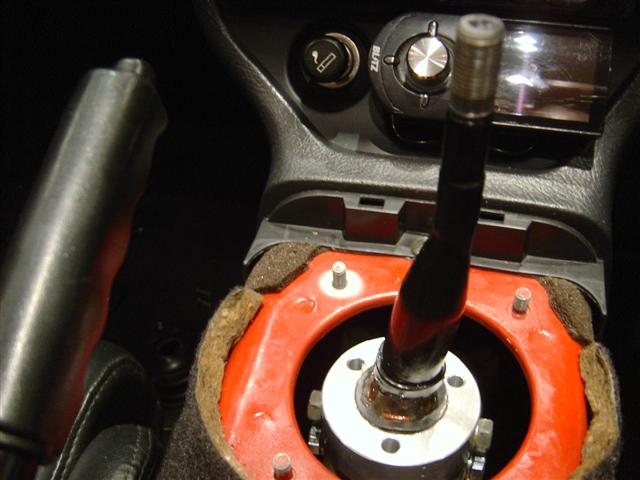
| Tuck the lower gaiter into the transmission tunnel. Pushing the gear lever left and right creates a little more room to get the gaiter back in. |
 |
|
| Logged |
|
|
|
Reply: 31 - 43 |
|
|
| steve |
Posted on: Thursday, August 22nd, 2013, 4:57:32am
Attachment: dsc04769_small.jpg - 46.92 KB (724 views) |
|
|
|
| Tighten down the three centre bolts 10mm socket making sure you still have all four teeth from the top socket protruding. |
 |
|
| Logged |
|
|
|
Reply: 32 - 43 |
|
|
| steve |
Posted on: Thursday, August 22nd, 2013, 4:59:41am
Attachment: dsc04770_small.jpg - 38.45 KB (722 views) |
|
|
|
| Fit the top gaiter. |
 |
|
| Logged |
|
|
|
Reply: 33 - 43 |
|
|
| steve |
Posted on: Thursday, August 22nd, 2013, 5:02:31am
Attachment: dsc04771_small.jpg - 36.32 KB (721 views) |
|
|
|
| Refit the centre console and fit the gear knob. |
 |
Last modified Thursday, August 22nd, 2013, 5:03:15am by steve |
|
| Logged |
|
|
|
Reply: 34 - 43 |
|
|
| steve |
Posted on: Thursday, August 22nd, 2013, 5:09:33am
Attachment: dsc04772_small.jpg - 37.03 KB (713 views) |
|
|
|
| I may of made it sound complicated but its not. Just a little bit fiddly. |
 |
|
| Logged |
|
|
|
Reply: 35 - 43 |
|
|
| mattjohns |
| Posted on: Thursday, August 22nd, 2013, 7:12:35am |
|
|
Maximum Member

Posts: 1652
Posts Per Day: 0.94 |
|
| I think you need to give the Haynes manual people some pointers on how to write instructions |
|
| Logged |
|
|
 |
Reply: 36 - 43 |
|
|
| lord |
| Posted on: Thursday, August 22nd, 2013, 11:00:44am |
|
|
|
| whats it feel like though?>? Whats the travel like?? |
|
| Logged |
|
|
|
Reply: 37 - 43 |
|
|
| steve |
| Posted on: Thursday, August 22nd, 2013, 11:20:03am |
|
|
|
A lot less travel 30% or more and the force to change gear is more heavy but i knew that would happen thats why i supplied a more heavy gear knob. You can not just waggle the gear stick and say yes its in neutral because it doesn't waggle no more . A lot more precise. Five small clicks and everyone's a gear if that makes sense. . A lot more precise. Five small clicks and everyone's a gear if that makes sense. |
Last modified Saturday, September 14th, 2013, 9:05:54am by steve |
|
| Logged |
|
|
|
Reply: 38 - 43 |
|
|
| steve |
| Posted on: Thursday, August 22nd, 2013, 11:23:54am |
|
|
|
“ |
Quoted from mattjohns, posted Thursday, August 22nd, 2013, 7:12:35am at here |
” |
I think you need to give the Haynes manual people some pointers on how to write instructions
|
|
I'm surprised you managed to stay awake reading it all |
|
| Logged |
|
|
|
Reply: 39 - 43 |
|
|
|
 Cappuccino Owners Club › Traders › Six Sixty Engineering › Short shifter fitting guide. (Moderators: , , )


