1955 Standard Eight - 660cc Turbo (currently 2906 views)
2002gimp
Posted on: Thursday, September 27th, 2012, 4:22:46pm
Guest User
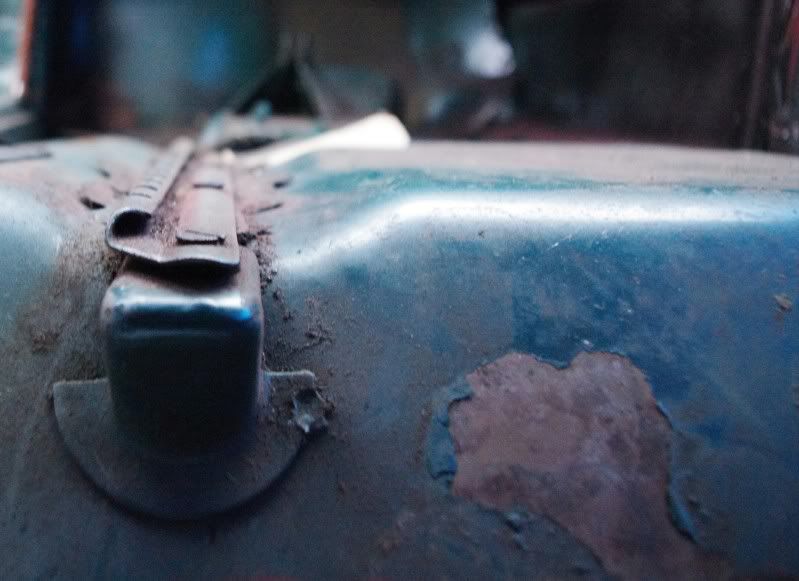
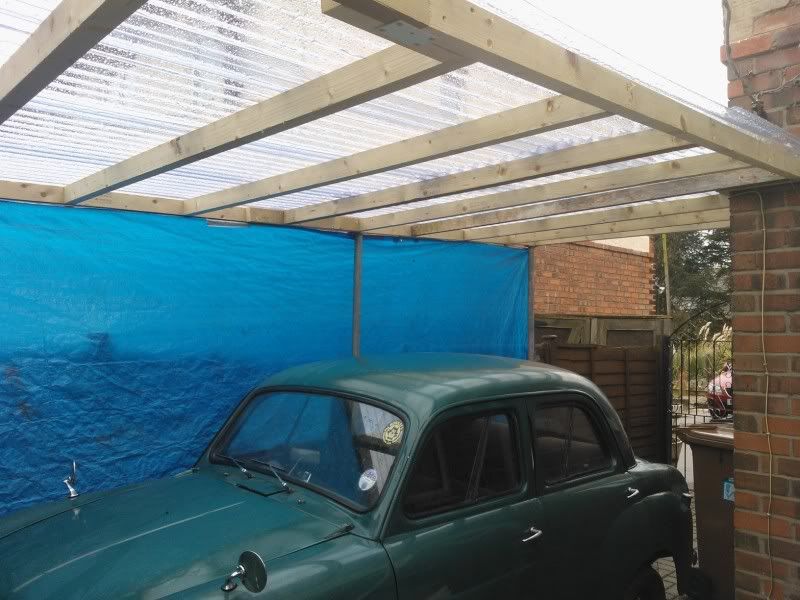
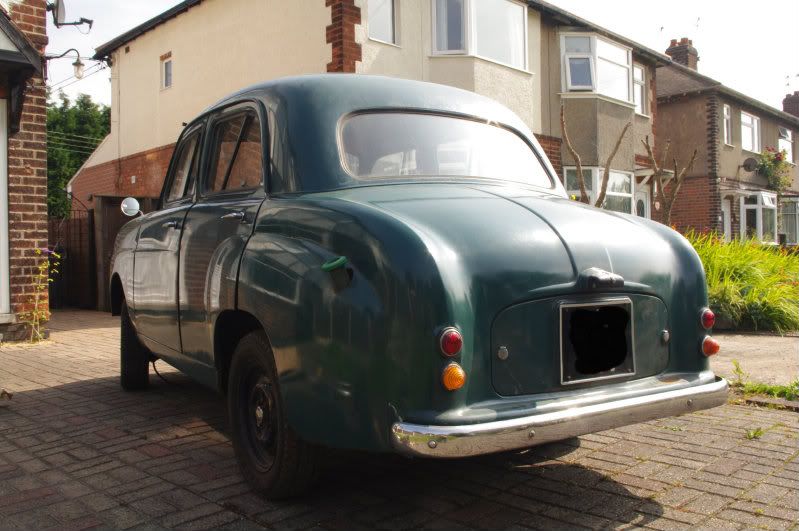
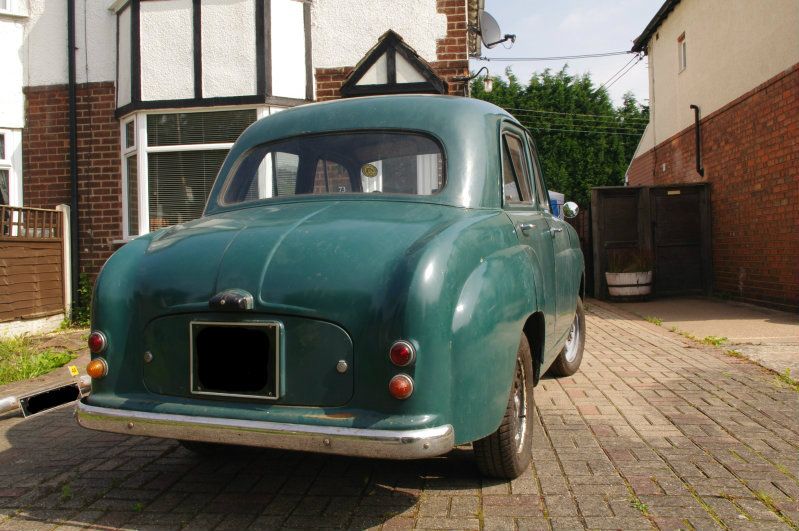
Let me introduce you to Daisy, my 1955 Standard Eight
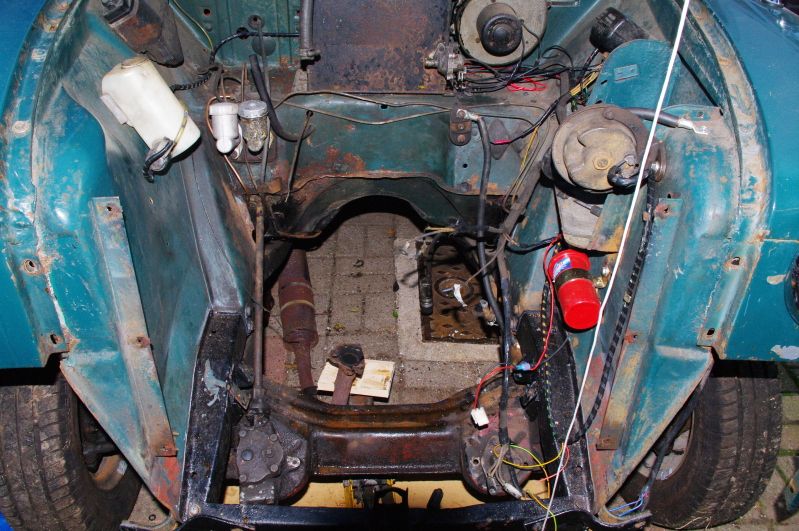
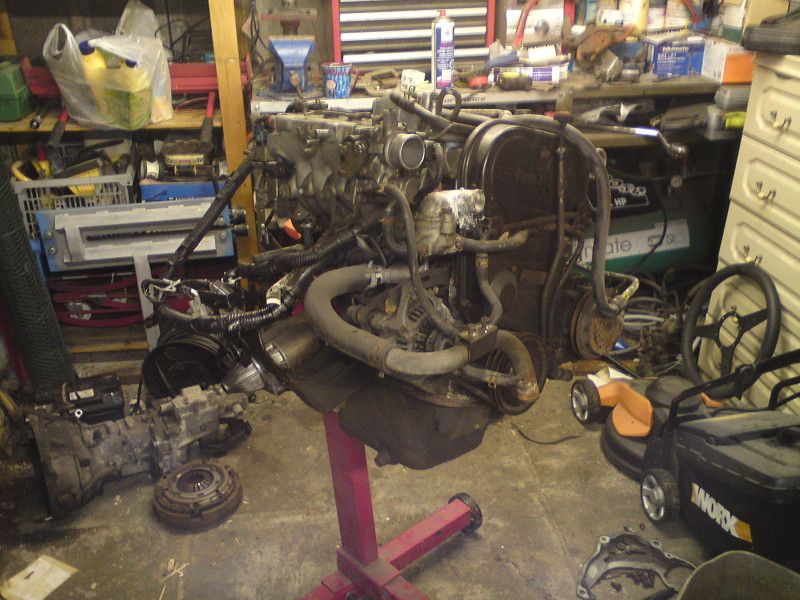
Bought engineless, i need something to fill the gap, luckily for me i have a Cappuccino engine, gearbox, loom etc sitting in my garage from my recently expired Capp.
Thought i'd best get started sorting the engine before I do anything else, I want to get it on the stand and have it running before it goes in so I know the wirings right.
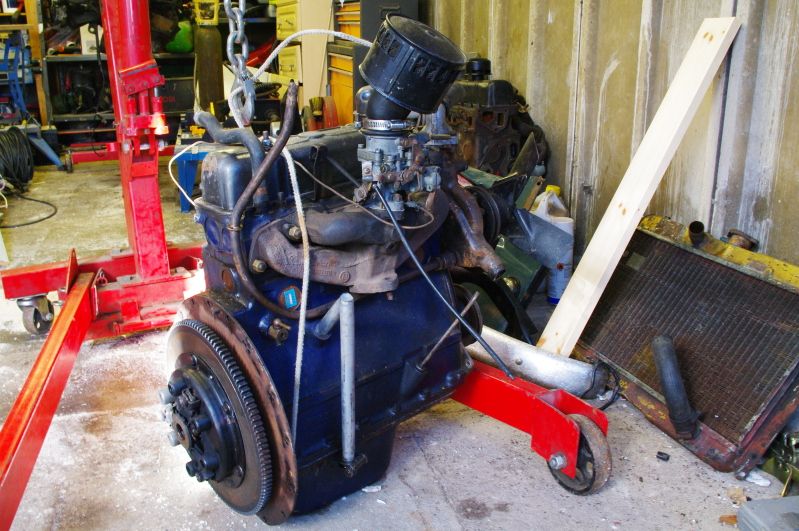
Seperated the engine from the box and hauled it onto the stand
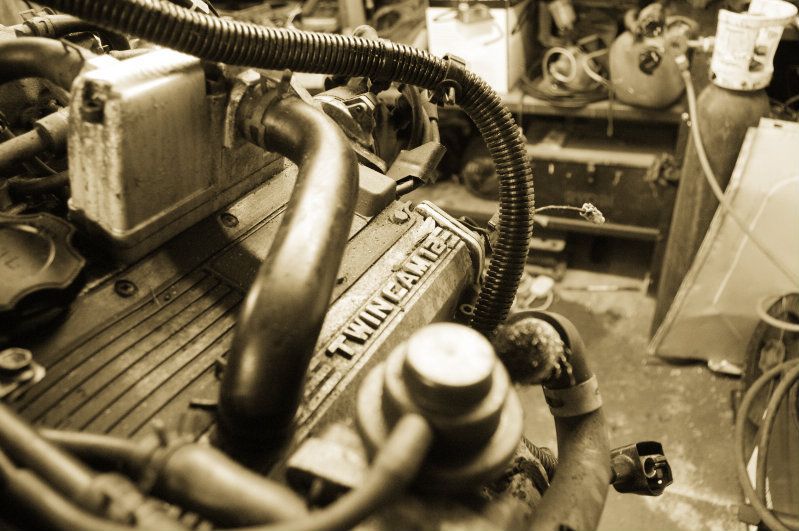
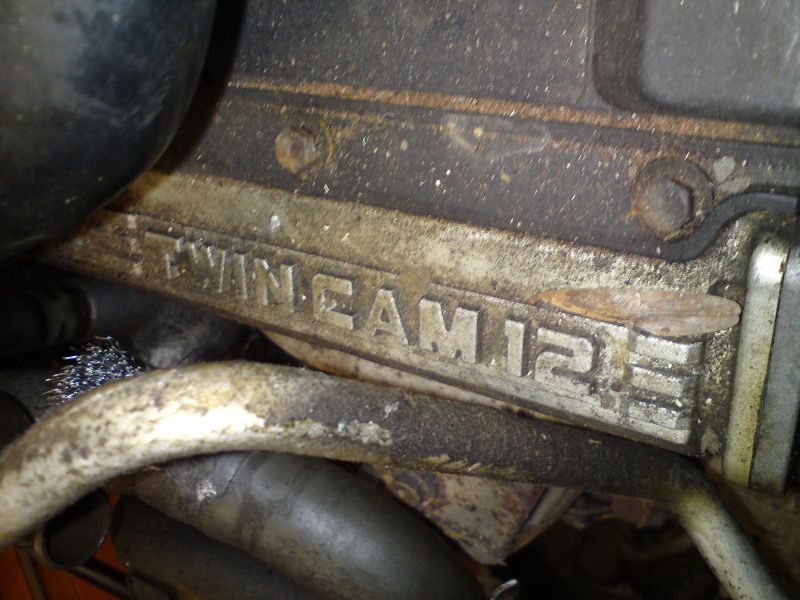
Twincam 12!!!
Anyways, that's where i'm at, next job is to start pairing down the wiring to seperate whats needed to run the engine from the crap that turns lights on when you open a door etc, so i have all this to sort through, joys
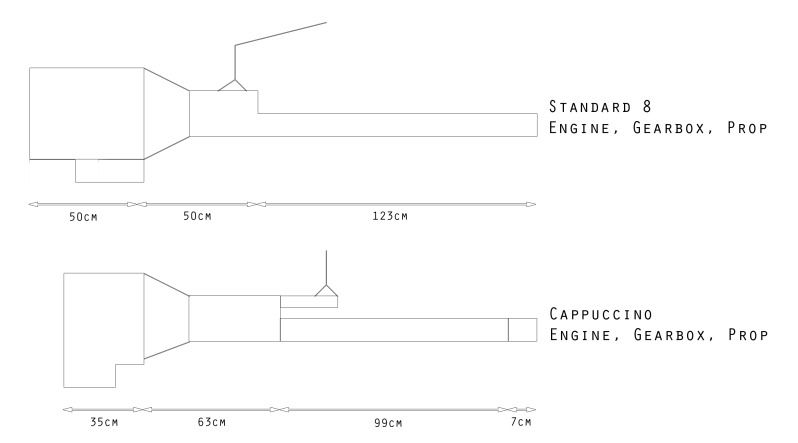
Took some rough measurements and came up with this
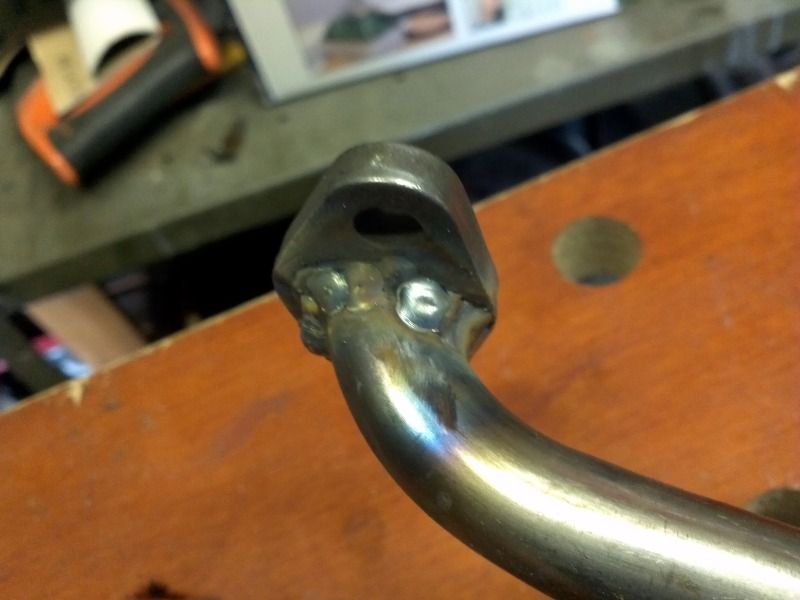
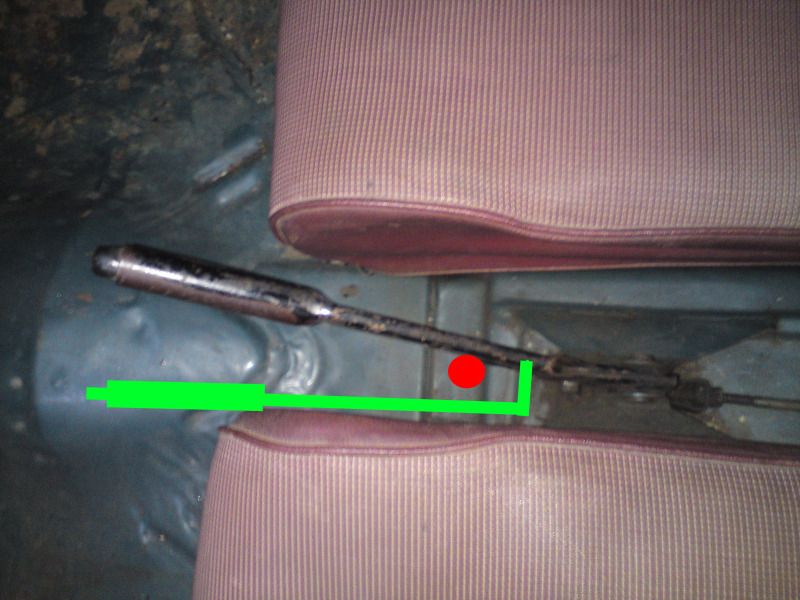
It would appear with a prop spacer that the whole lot will fit in rather well, the only problem I think I'll encounter is the gearstick will now come up where the handbrake lever is, so I was thinking about cutting it off and making it curve around the stick, like this? (red dot shows stick location)
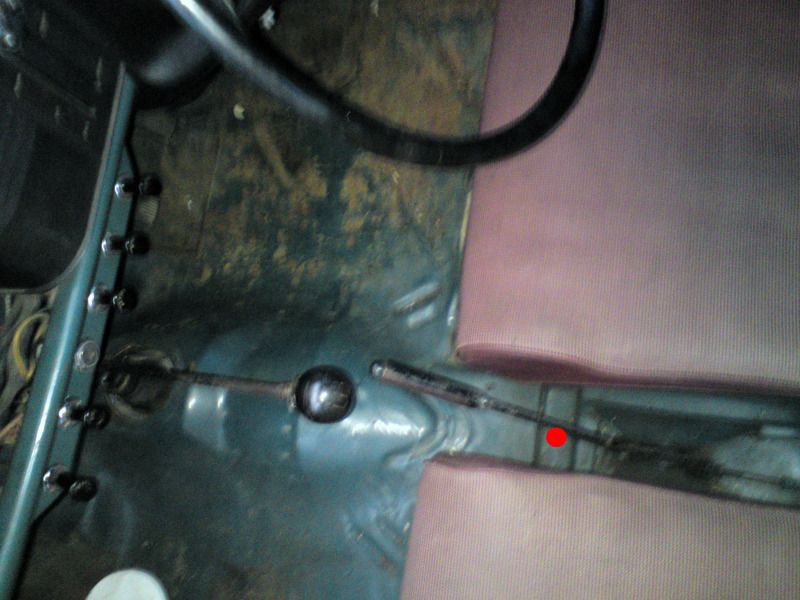
The new stick location will actually be a lot better than the old one, as originally it was tight to the bulkhead with a rather long, bent gearstick and changing gear was a lot like stirring soup! Have a pic to demonstrate
also, maybe some engineery type could advise me, would having a 50-100mm steel prop spacer at the diff end be of any detriment? It will allow me to match the Suzuki prop to the Standard diff and give me the extra length I need, one like this?
Last modified Thursday, September 27th, 2012, 4:24:03pm by 2002gimp
Logged
lord
Posted on: Thursday, September 27th, 2012, 5:34:48pm
Guest User
So thats what your doing with this car then...
whats happened to the cappo shell??
Logged
Reply: 1 - 97
2002gimp
Posted on: Thursday, September 27th, 2012, 5:40:44pm
Guest User
Shell went scrappies mate, i'd almost got everything off it before the wagon arrived...
Logged
Reply: 2 - 97
lord
Posted on: Thursday, September 27th, 2012, 6:07:04pm
Guest User
wanna get rid for cheap?
Logged
Reply: 3 - 97
2002gimp
Posted on: Thursday, September 27th, 2012, 8:24:35pm
Guest User
Rid of what?
Logged
Reply: 4 - 97
lord
Posted on: Thursday, September 27th, 2012, 11:09:30pm
Guest User
Them interior panels remember
Logged
Reply: 5 - 97
2002gimp
Posted on: Sunday, September 30th, 2012, 7:23:45pm
Guest User
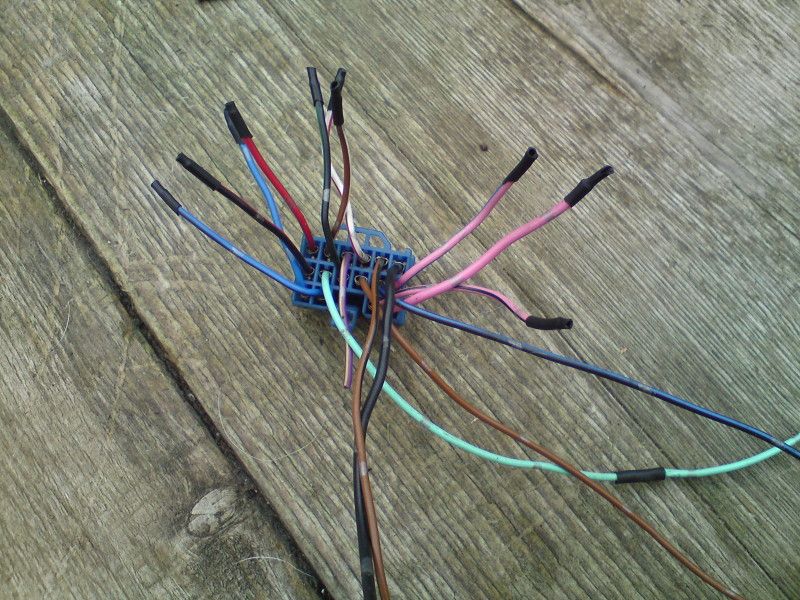
Have another small update, nothing fancy, but its a way of me documenting the build
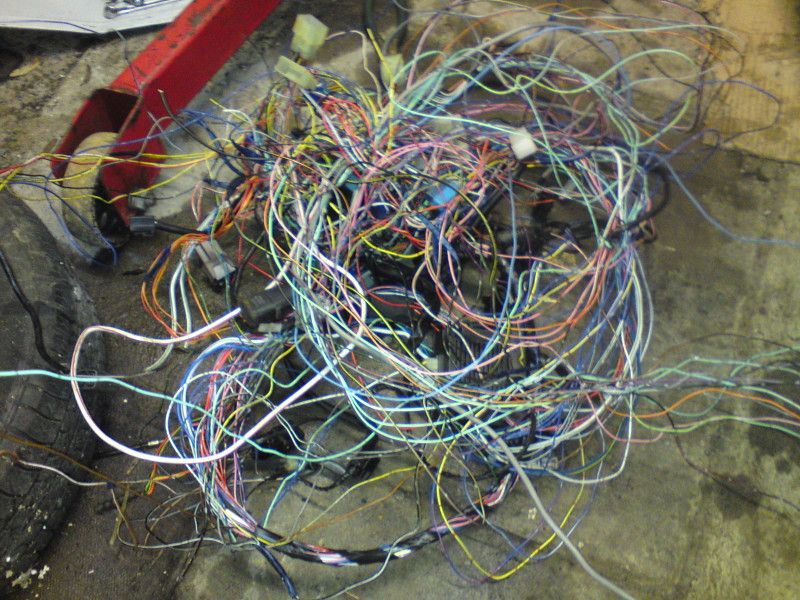
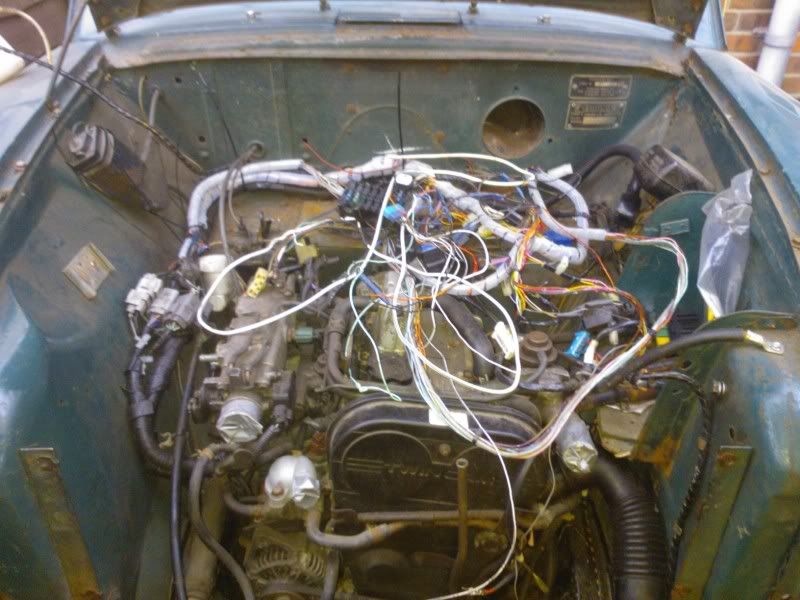
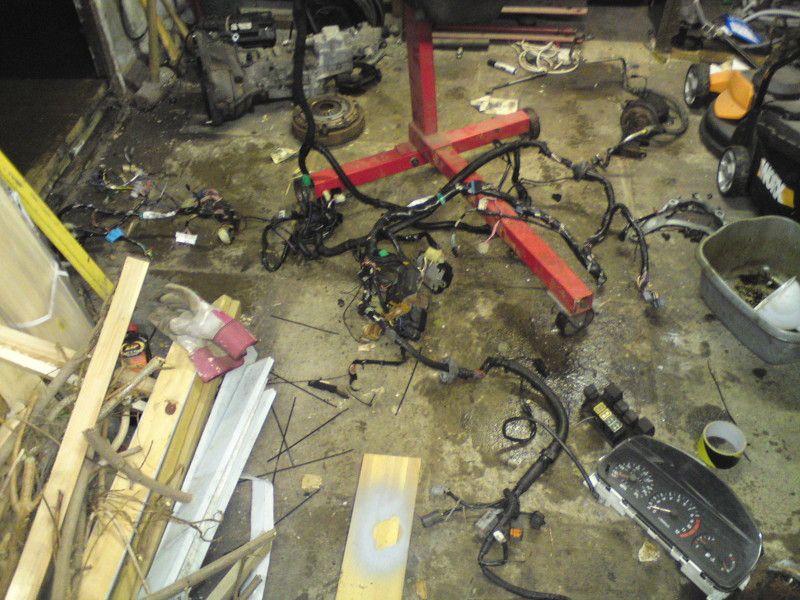
I stripped all the tape from the loom, this was not a good idea, it went from a neat loom to this
The fact that, most things share an earth and wires interconnect meant as soon as I tried sorting it, it tangled horribly.
I pondered over this for hours
Before deciding to cut most of it and start over, at the end of play today I have most of the wiring done from the ecu to the engine plugs.
This makes me happy, though I do feel i'll be insane by the time i've finished tracing the wires across from the diagram...
Posted on: Sunday, September 30th, 2012, 10:55:42pm
Maximum Member
Posts: 1110 Posts Per Day: 0.65
Good job, and good luck with that wiring
Logged
Reply: 7 - 97
2002gimp
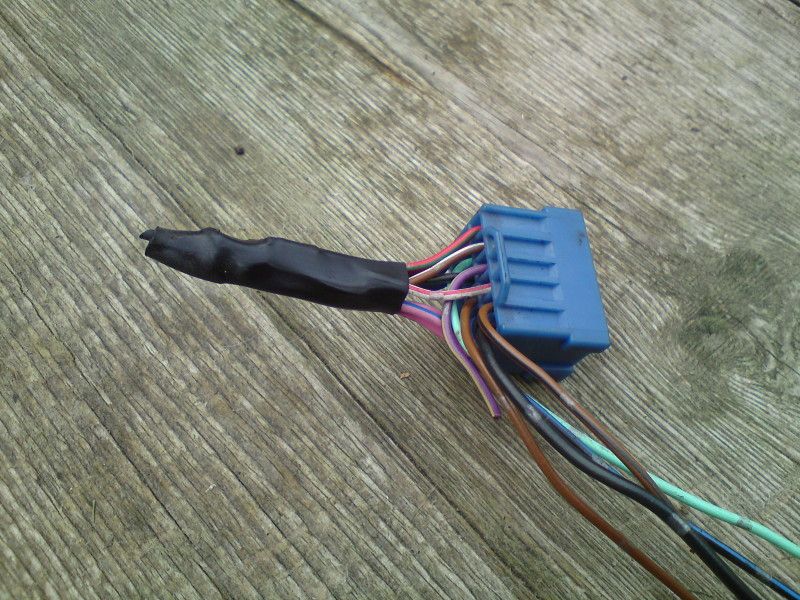
Posted on: Sunday, October 7th, 2012, 6:58:21pm
Guest User
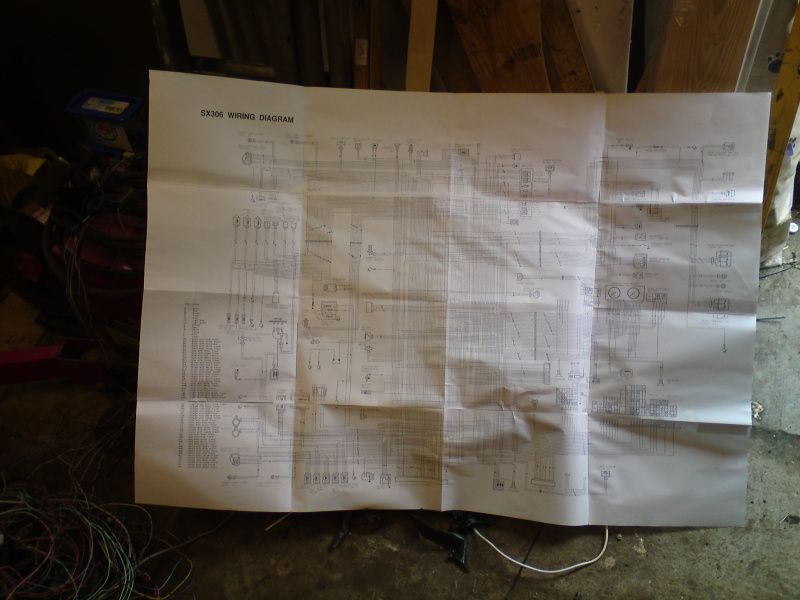
Still wiring i'm afraid, taking its time due to house related stuff and the fact its a fecking wiring loom from a turbo, injection car!
After studying the diagram for many hours I thought it was best to spend many more in photoshop removing all the not needed stuff, lights, heaters etc.
This got me to this, much better (compare it to the diagram in a previous post)
The blue bits are when i've traced a wire back to its plug, that way anything not highlighted needs my attention, still lots to do then!
Trying to be really thourough so any wire not used has its end cut and shrink wrapped
Then any groups are, err, grouped
Look, the bit that spiral wrapped is done
Another few hours and i'll have me a loom...
Logged
Reply: 8 - 97
2002gimp
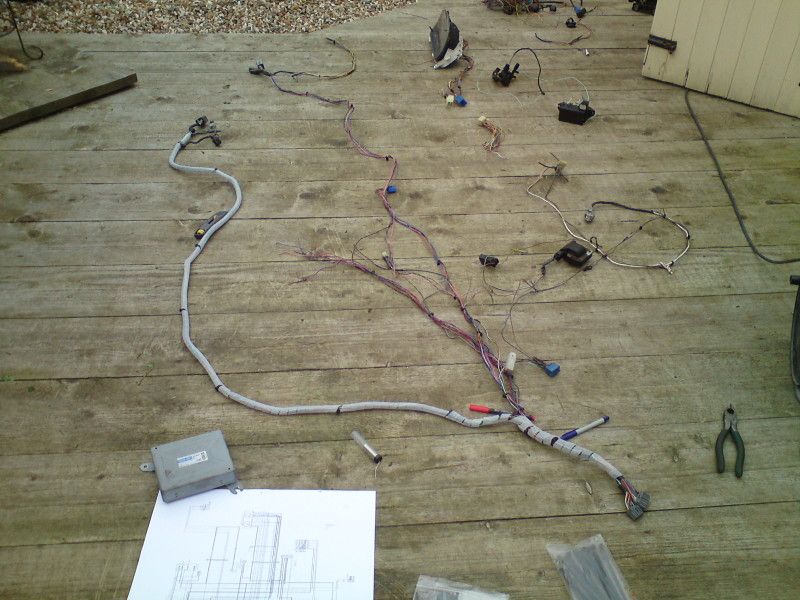
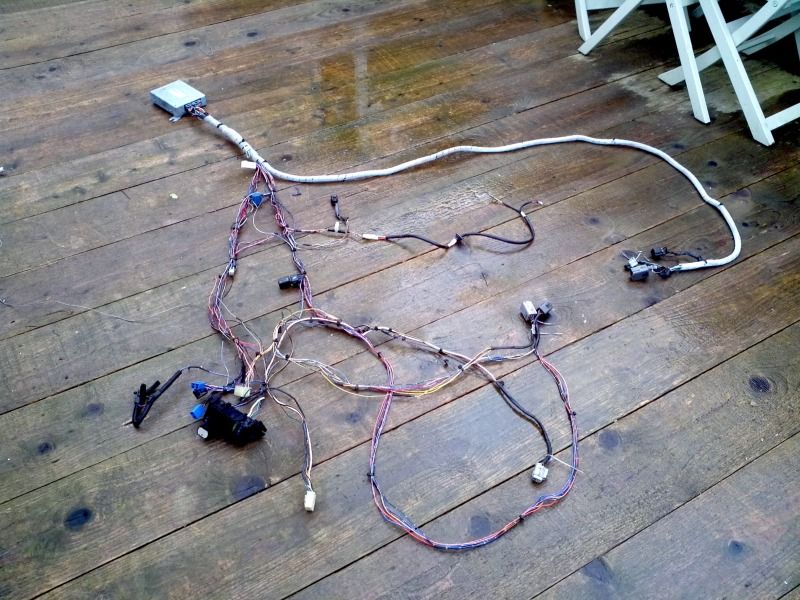
Posted on: Saturday, October 13th, 2012, 6:38:18pm
Guest User
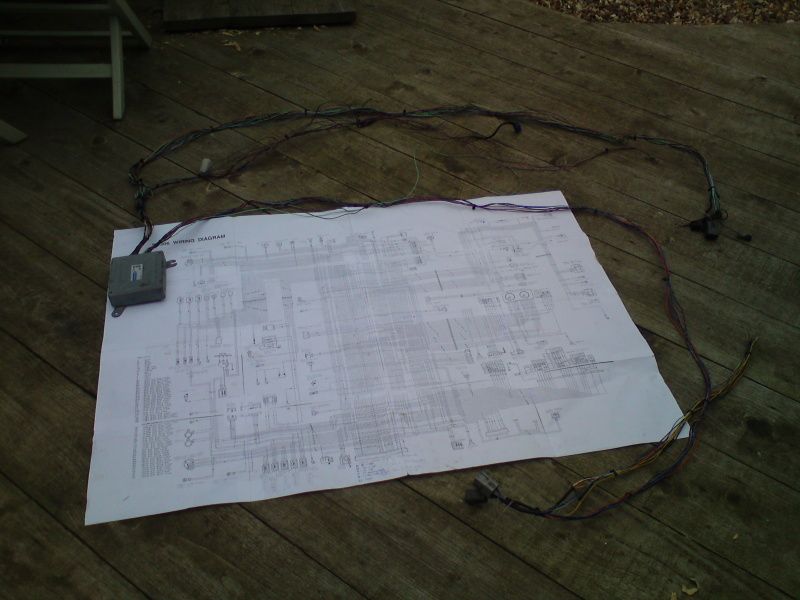
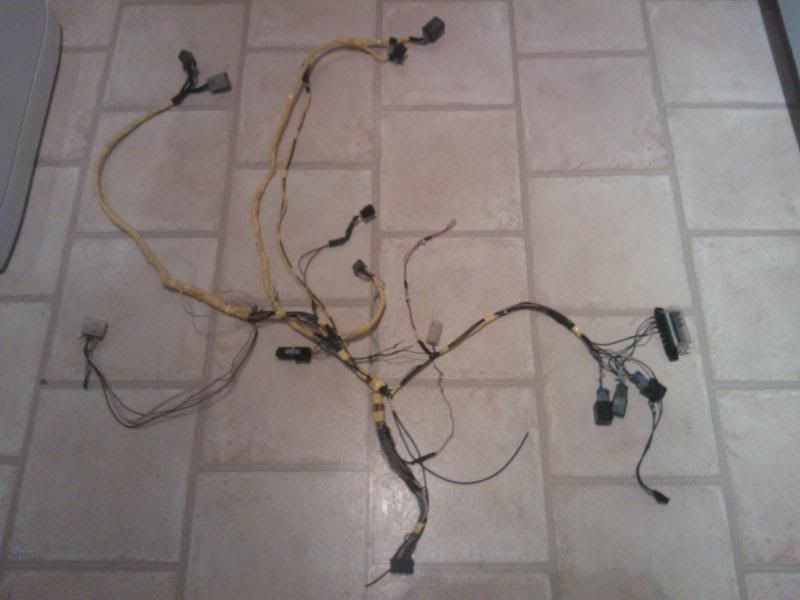
Using my method of colouring each wire blue as I traced and soldered it I now habe a loom
Here she is, bit messy mind
And here we go, temporarily spiral wrapped
This now allows me to check the loom on the engine, get it running before I put it in the car.
Unfortunatly the loom will need to be cut, spliced, shortened, lengthened, re-routed etc once in the car, but at least i'll know what i've got is right...
Logged
Reply: 9 - 97
Cappo_Ash
Posted on: Sunday, October 14th, 2012, 6:44:33am
Guest User
Wow.....dont suppose u fancy permenently de immobising my very annoying immobiliser that cuts the spark and power to the fuel pump!!!!!
Logged
Reply: 10 - 97
2002gimp
Posted on: Sunday, October 14th, 2012, 8:49:45am
Guest User
Any alarm fitter worth his salt should remove an alarm for about 25 quid, though its pretty easy to trace wires back if you're methodical about it
Logged
Reply: 11 - 97
2002gimp
Posted on: Saturday, October 27th, 2012, 3:41:15pm
Guest User
Right lets get some work done
First up, remove the Herald engine
Took forever as I didnt want to drop the subframe which you really have to, but in my own special way I got it out!
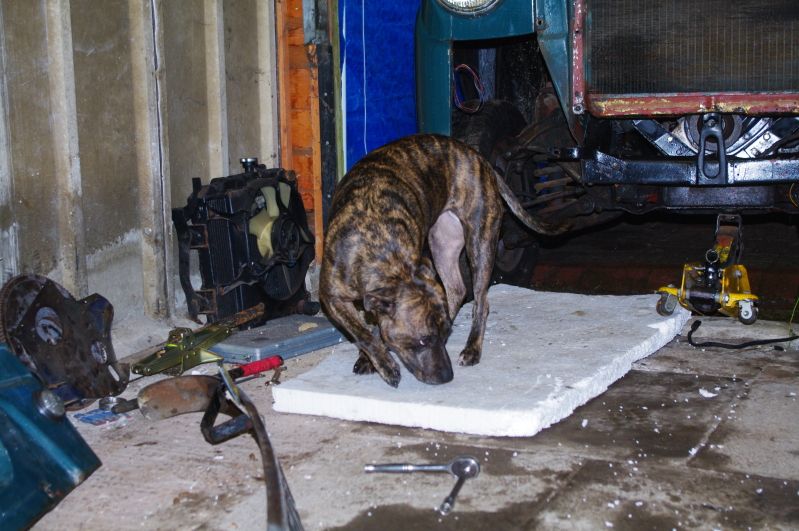
Un-helpful Staffy was being un-helpful
Finally, a hole and a liberated engine - soon forsale
Right lets get this in
Almost there
Fits reasonably well, wider than the old engine mind. Pulled it back out, thought whilst i'm at this stage I would cut out the rotten tunnel, unfortunatly its thst crusty I have nothing to go buy, so will have to create my own repair panel
Thats it for today as I was summoned to do house related work! I'm sure it would of been done weeks ago if the missus didnt moan so much...
Logged
Reply: 12 - 97
2002gimp
Posted on: Saturday, October 27th, 2012, 7:28:18pm
Guest User
Snook another half hour in
More rotten tunnel came out allowing the engine to sit back like it should
Gearbox in the rightish position
Engine will sit at the right angle and fit lovely once an inch and a half is taken off the sump
Its finally happening
Logged
Reply: 13 - 97
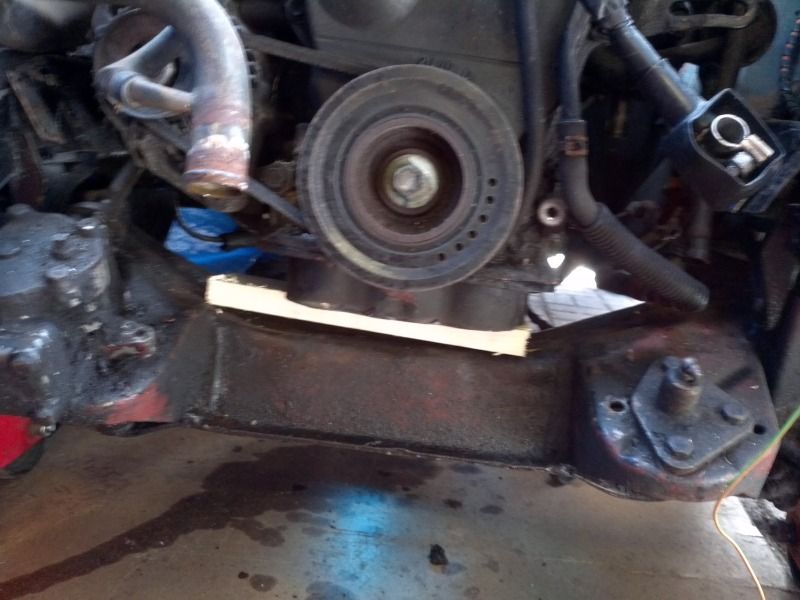
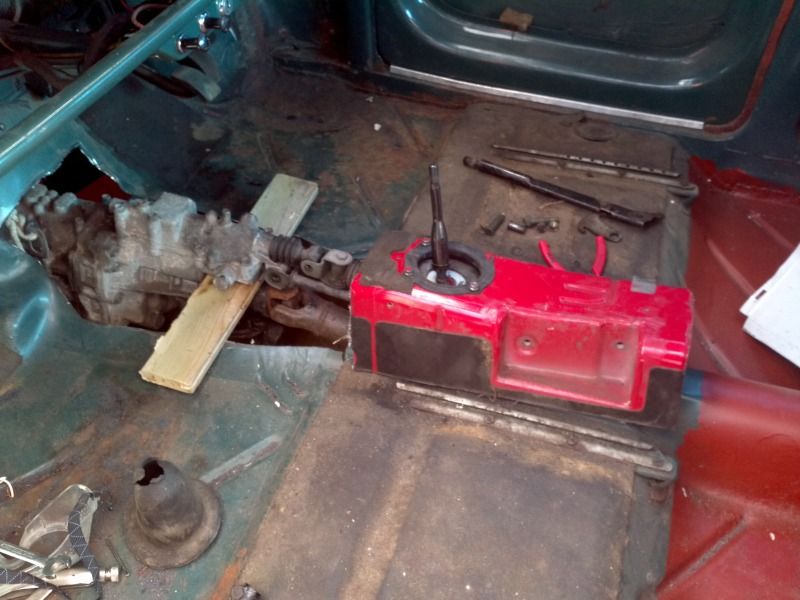
2002gimp
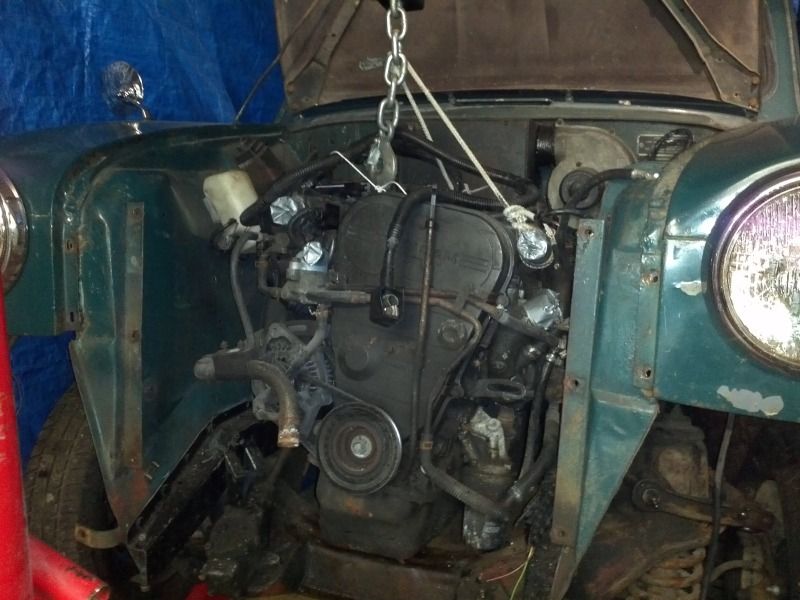
Posted on: Saturday, November 3rd, 2012, 5:32:31pm
Guest User
Its in........ ish
By that I mean the engine and box now sit exactly where I want them.
40.26 cubic inches in its new home
Clearances
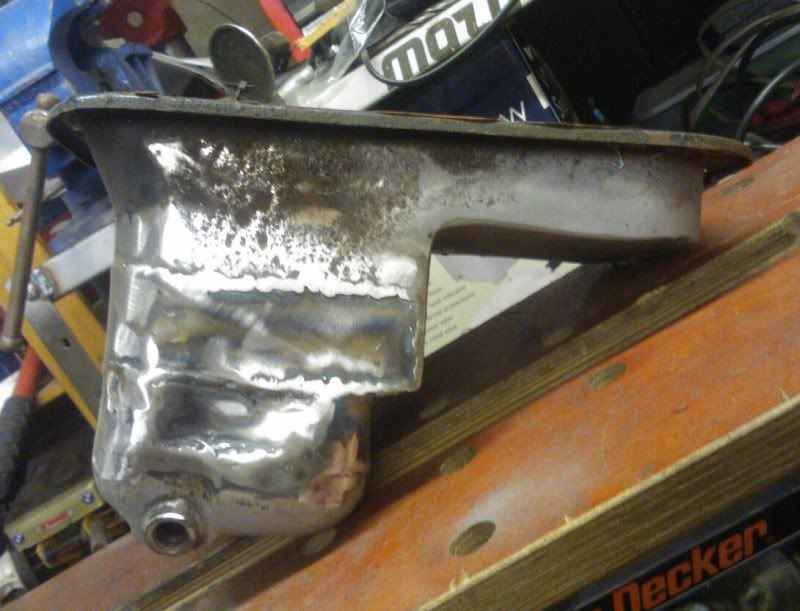
Notice in the above pic the dizzy sits on the back of a cam, this effectivly took my 3cyl engine to 4cyl in length, not ideal
Remember before I needed to mod the sump to sit the engine level, about 2 inches I said, well no, turn out I took most of it off
From
To
Cut 2 inches off like I said, it wasnt enough at all, ended up taking it pretty much back to the windage plate, no pic of that though, have a first cut pic instead
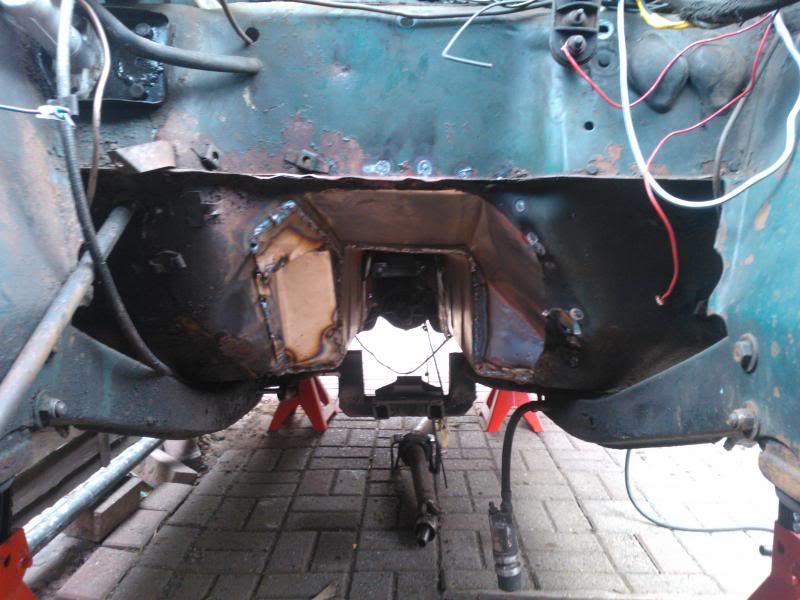
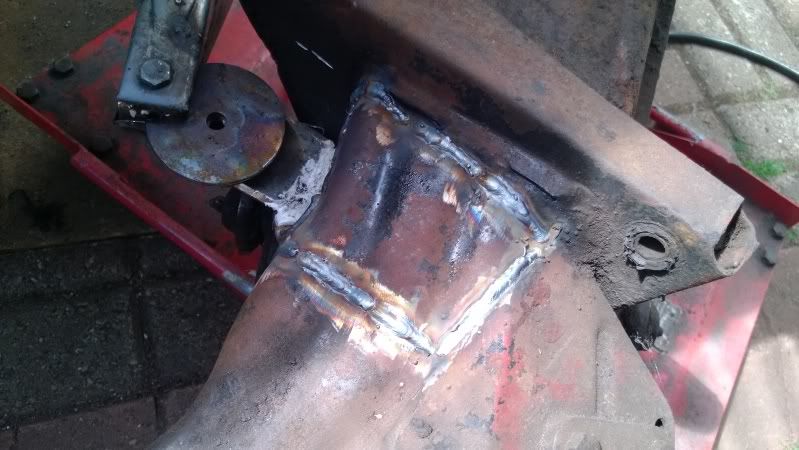
The pickup hung low, so cut and welded that
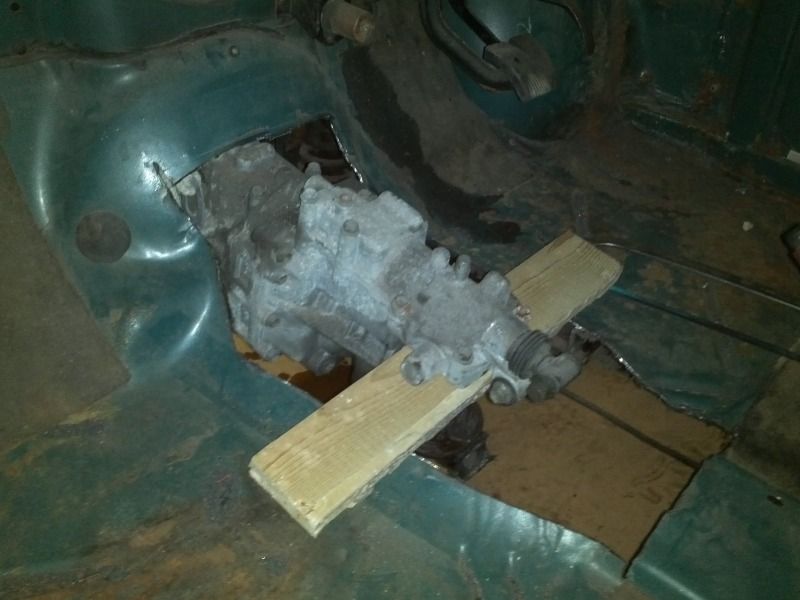
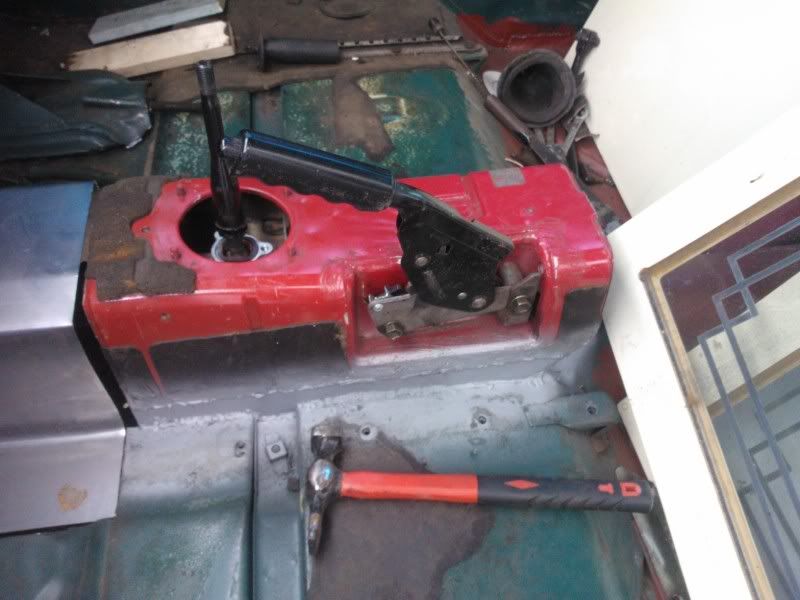
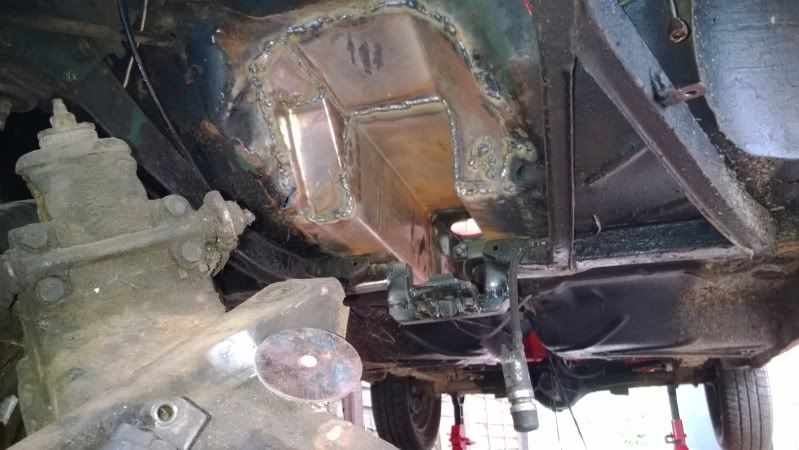
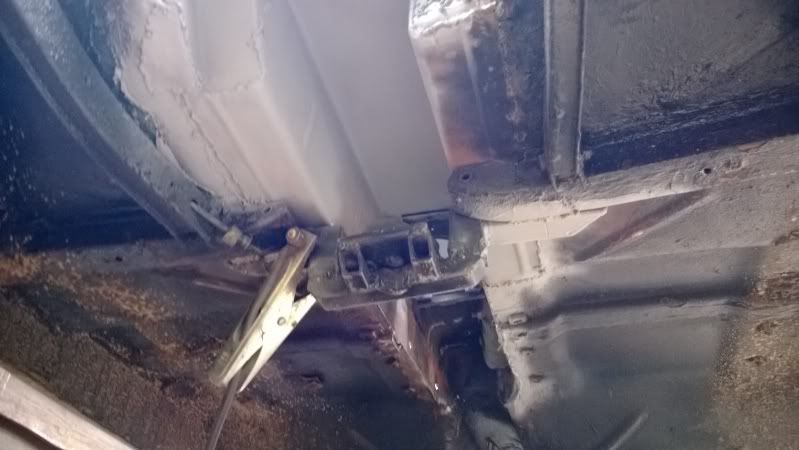
Lastly i've sorted half the tunnel and my handbrake issue in one, whilst having a move around I found the tunnel i'd cleverly cut from the Capp, this holds the remote selector and contains the handbrake, which is currently unbolted, but you can see the cutout. This fits perfectly between the seats
Logged
Reply: 14 - 97
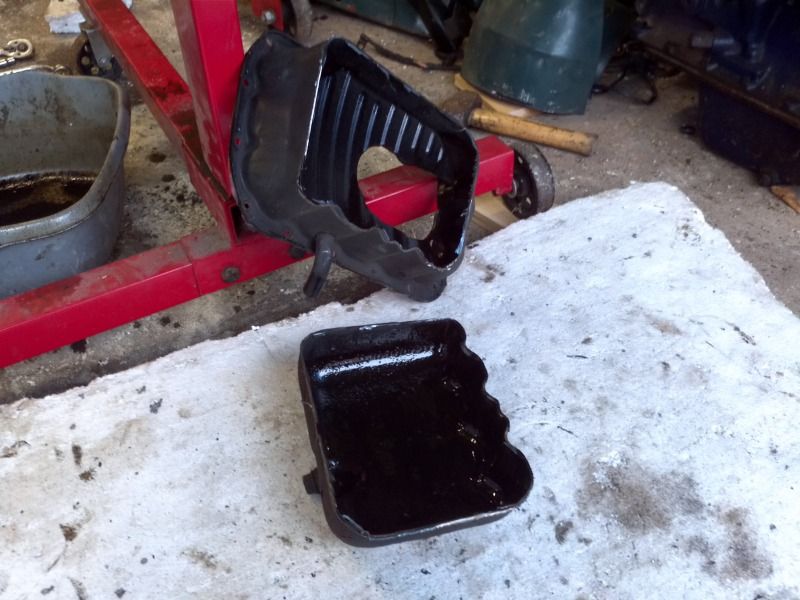
2002gimp
Posted on: Wednesday, November 14th, 2012, 10:02:09pm
Guest User
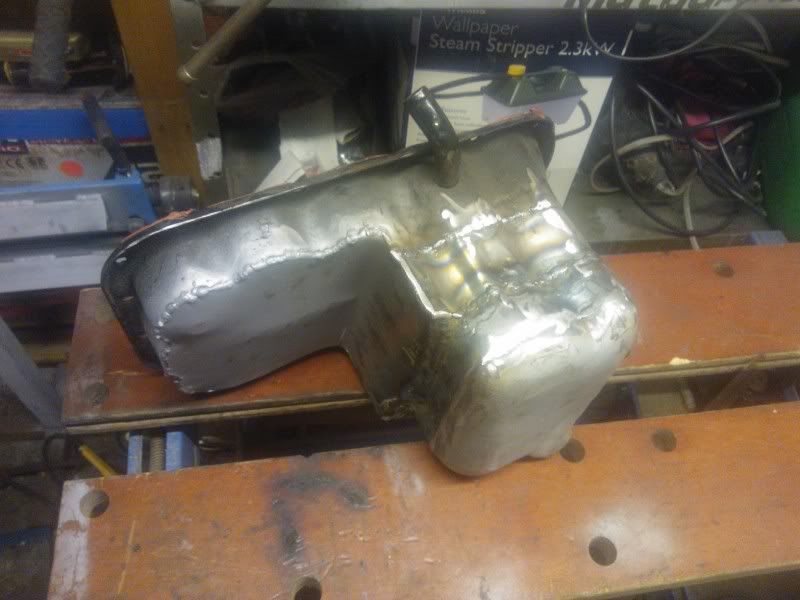
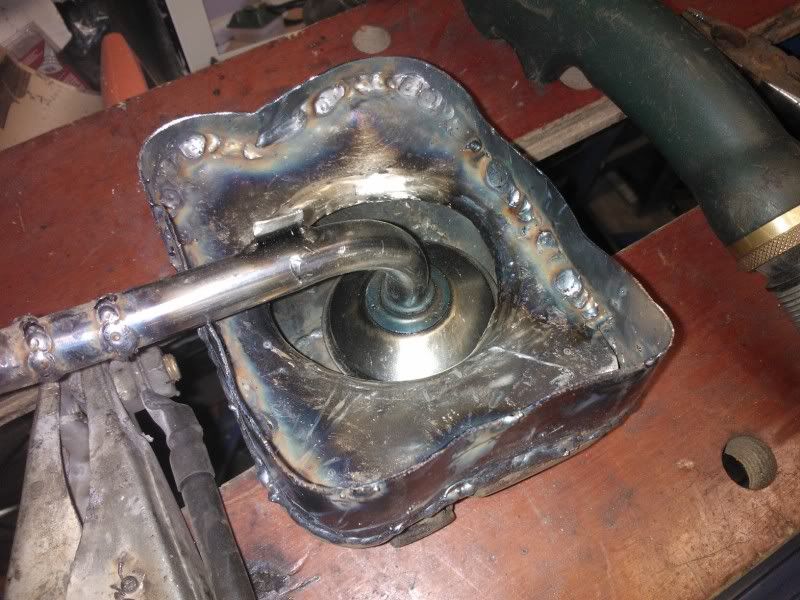
I'd love to give you teh epic updates involving engine mounts, wiring, random fabrication and test drives, but as i'm currently getting so little work time I can only show you my sump
Its taken me 3 nights to make, it now sports a nice deep bowl that fits around the subframe,i reckon i'm prob just over 1/2 litre down in capacity, but i'll be running a remote oil filter and cooler so that should give me that back
Anyway, pics
All welded up
Ground welds back, think i'll leave it like this, no point making them flush and risking leaks
I put this baffle in, dont think I really need it as the bowls so deep and narrow, but better safe than sorry
Now thats done I can finally make engine mounts, expect another rivetting installment soon
Posted on: Thursday, November 15th, 2012, 1:20:10am
Maximum Member
Posts: 1110 Posts Per Day: 0.65
Wow, nice work.
I wish I knew how to work metal like this !
Logged
Reply: 16 - 97
lord
Posted on: Thursday, November 15th, 2012, 11:53:57am
Guest User
That is class! You could have welded your cap. But this is more interesting!i.
Logged
Reply: 17 - 97
2002gimp
Posted on: Friday, November 30th, 2012, 12:24:09pm
Guest User
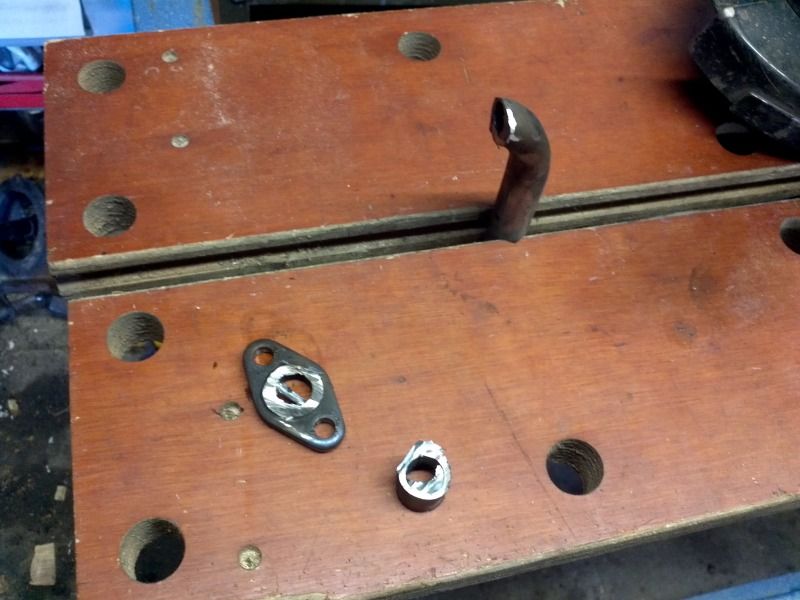
Not an update as such, but it might interest some of you
I've had a flange made up that fits to the turbo, its 10mm thick, allows me to bin the cat and make up a custom exhaust
The company will make others and its perfect if you dont want to spend hundreds having an inferior exhaust shipped from Japan. Buy one of these take it to your local exhaust maker and get a system made to your spec from the turbo back.
Logged
Reply: 18 - 97
Capposteve
Posted on: Friday, November 30th, 2012, 10:34:50pm
Guest User
Love this story
Logged
Reply: 19 - 97
2002gimp
Posted on: Saturday, February 23rd, 2013, 5:38:02pm
Guest User
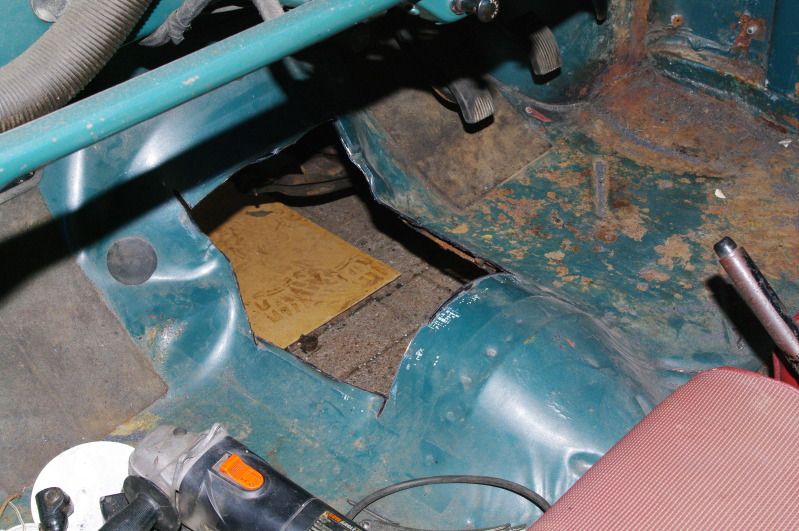
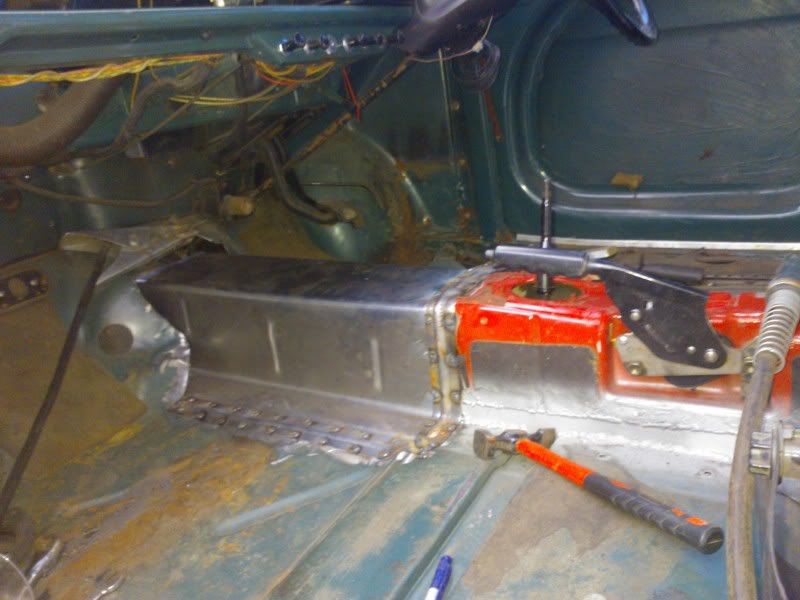
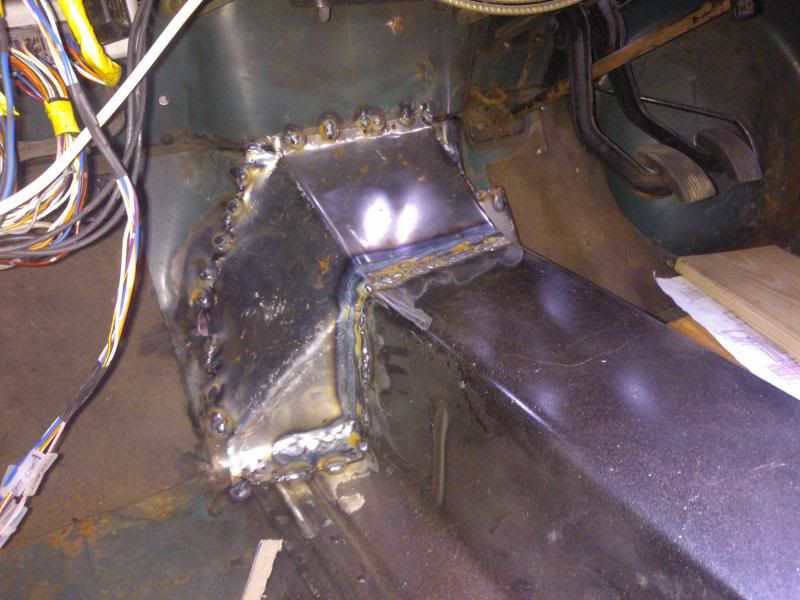
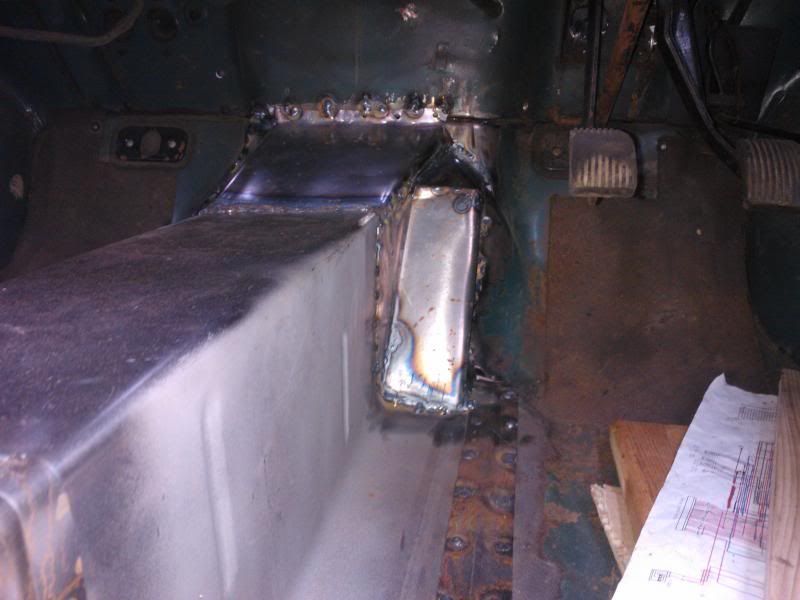
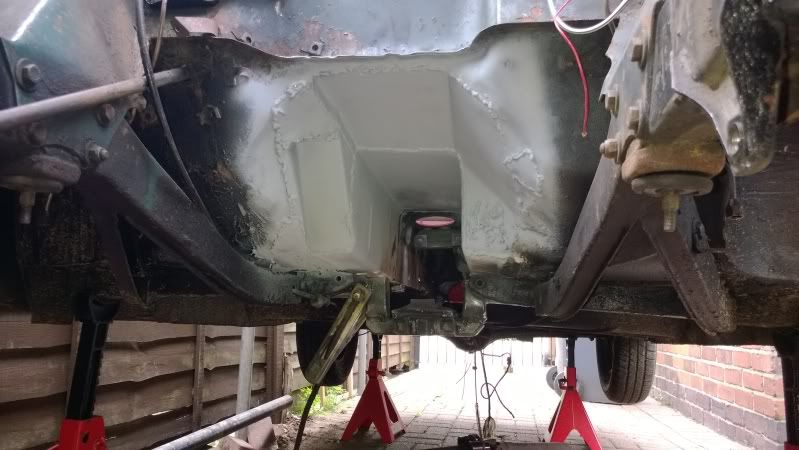
I started the tunnel today, first up was to extend the bit cut from the Cap downwards with a little steel, then bolt it to the remote selector, this gave me its position, so I tacked it in, happy, I then seamed it.
Next was to cut and bend some sheet to make the forward part, this was offered up and tweeked
Happy, I took it to the bead roller and put a few ribs in, unfortunatly as it was bent I couldn't get any in the top.
I welded it in, like a tit I cut it to butt weld and this wasnt ideal, yeah the most part was welded good, but I blew a few holes etc so I made some trim pieces and plugged them in, they might be seamed at a later date.
Logged
Reply: 20 - 97
Capposteve
Posted on: Saturday, February 23rd, 2013, 9:08:17pm
Guest User
Amazing work this. Can't wait to see it finished.
Logged
Reply: 21 - 97
2002gimp
Posted on: Sunday, February 24th, 2013, 5:59:14pm
Guest User
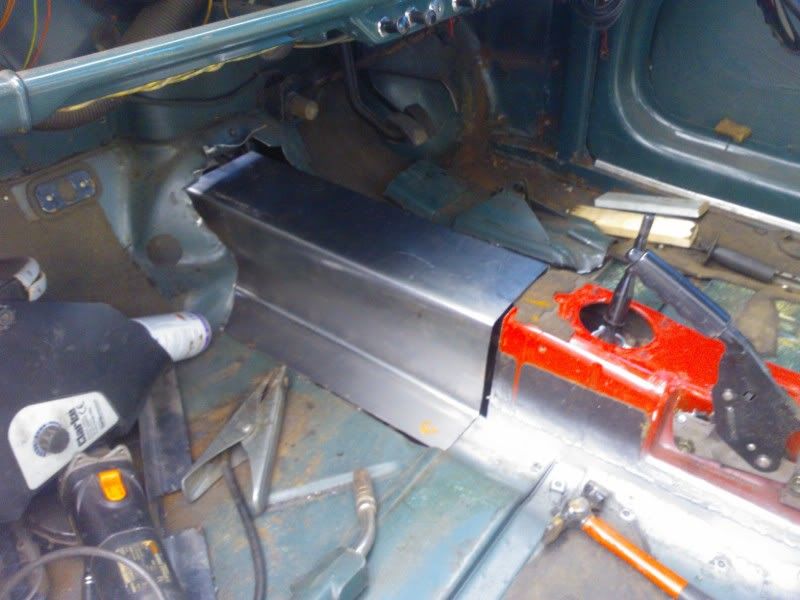
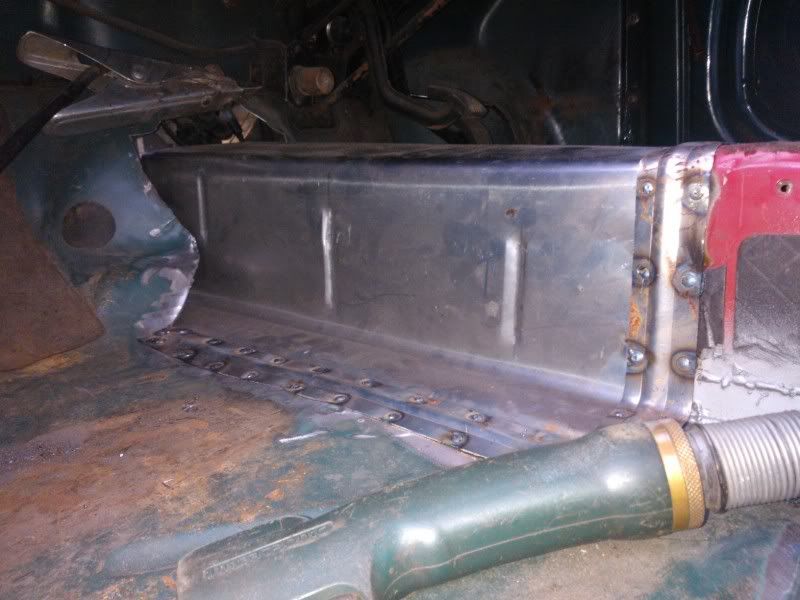
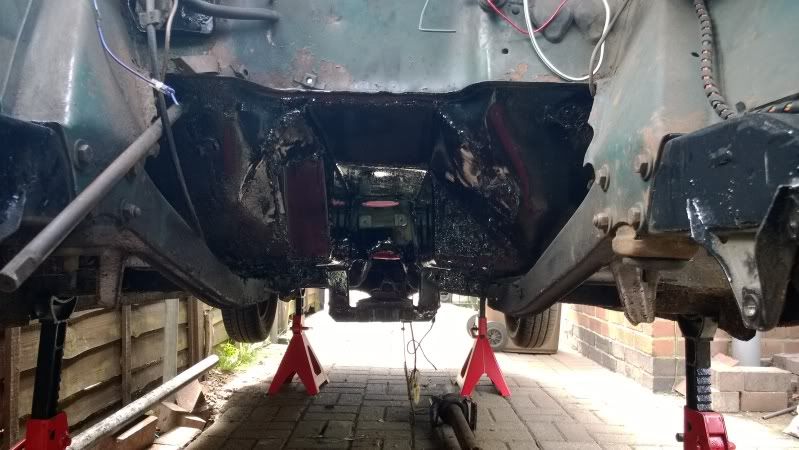
Finished the rear part of the tunnel today, its finally complete.
Once its all one colour and the welds dressed i'd be happy to roll carpetless, i'm not mind.
Also cut both props to get the diameters andwall thickness, by some amazing chance, despite being built 40 years apart, they bothhve the exact same prop dimensions, happy days
Logged
Reply: 22 - 97
lord
Posted on: Sunday, February 24th, 2013, 6:49:42pm
Guest User
This is really interesting....
Makes me think why you didn't finish the cappuccino??
Logged
Reply: 23 - 97
2002gimp
Posted on: Sunday, February 24th, 2013, 7:16:53pm
Guest User
My hearts with older metal, plus, they aint that well built...
Logged
Reply: 24 - 97
2002gimp
Posted on: Sunday, March 3rd, 2013, 8:37:20pm
Guest User
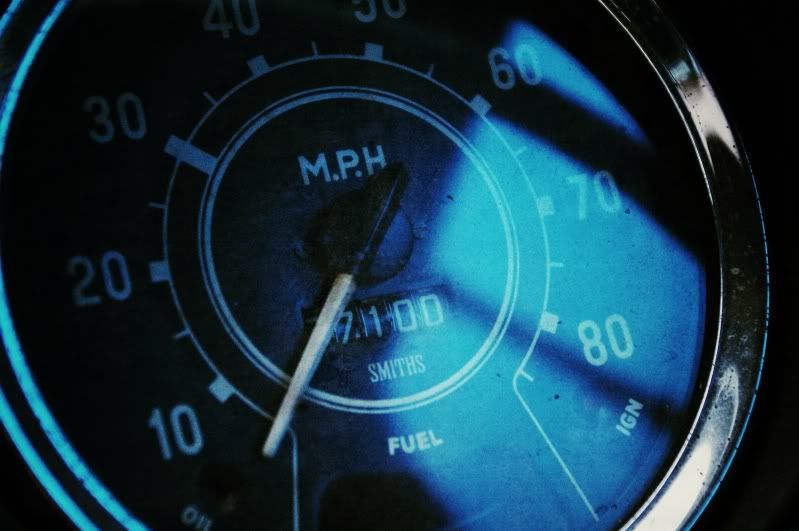
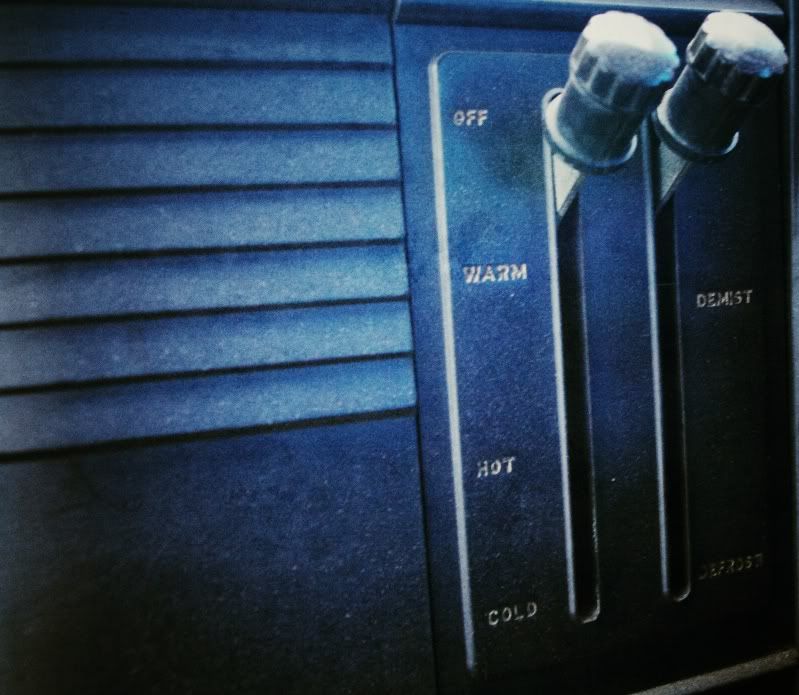
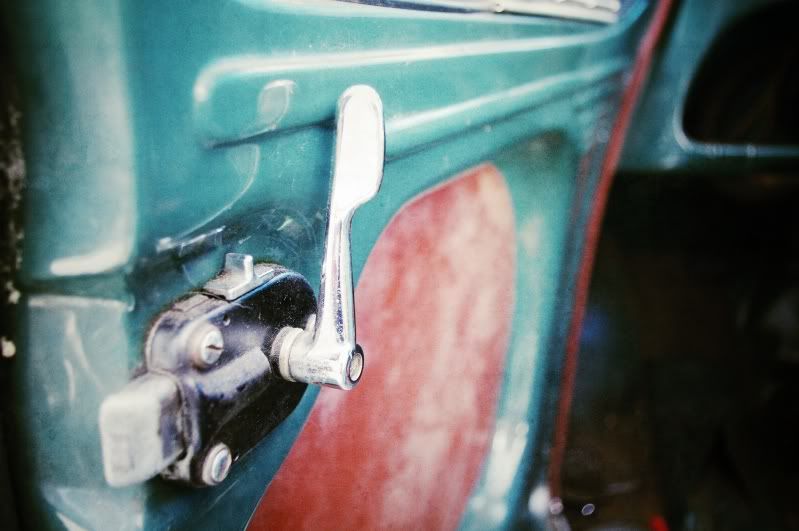
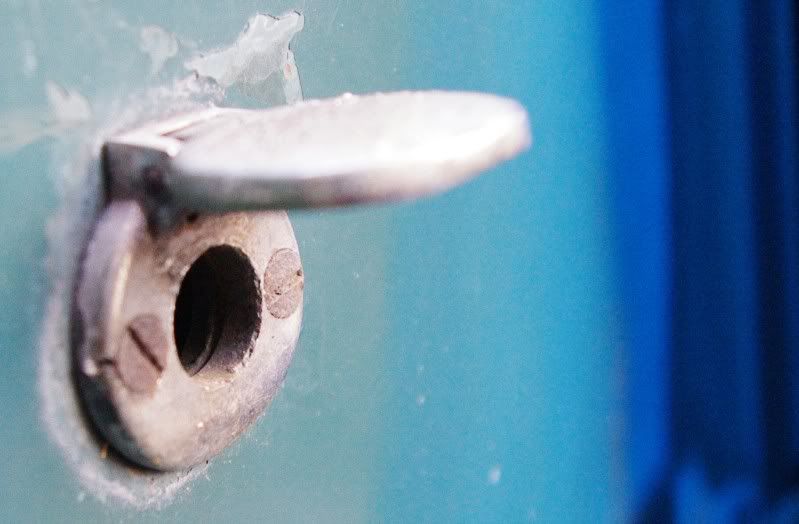
Just some pics of what attracts me to older cars
They felt the need to put 80 on the speedo, when in reality 40 would of surficed
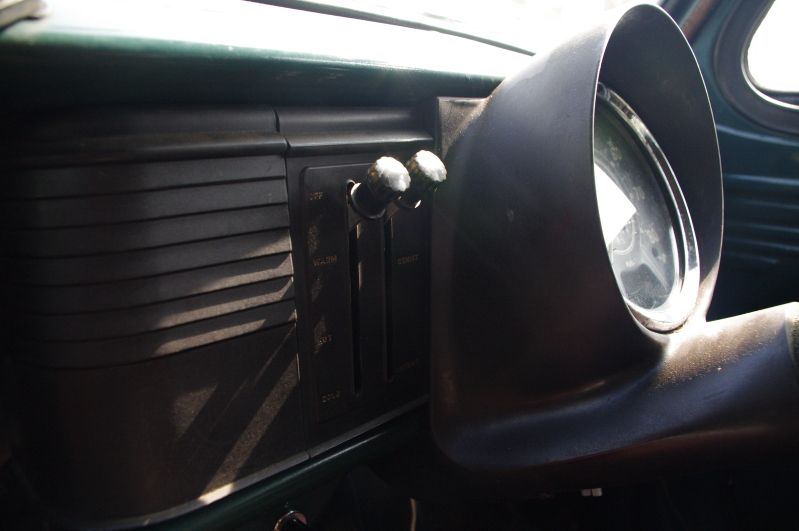
This was an option, in what was a daily car! Demist does the windscreen, defrost does the car, I guess it was common to freeze inside, seals weren't what they are now
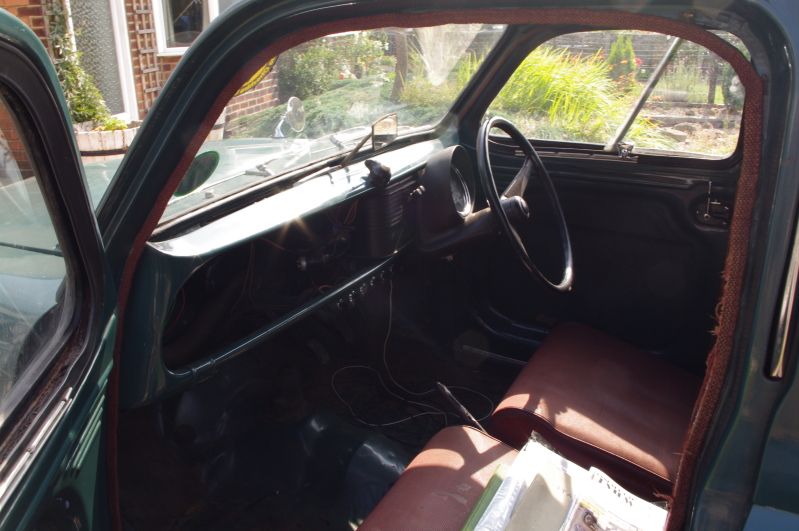
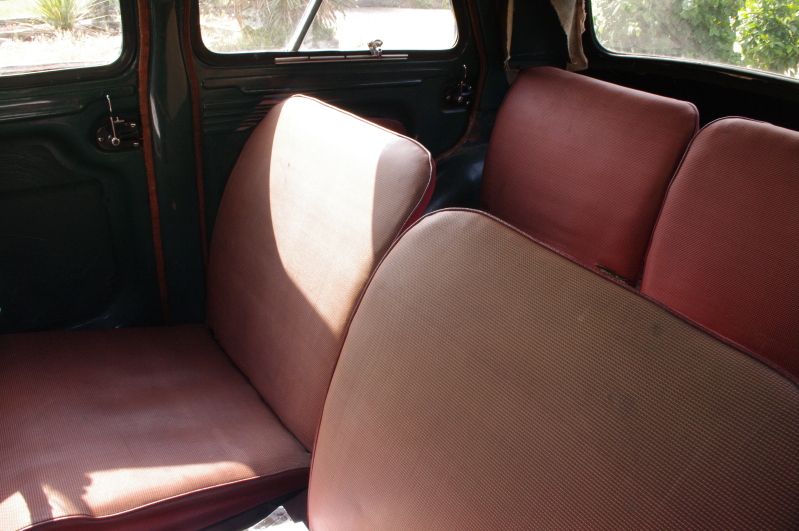
Interior light, glass no less, doesn't actually put out much light, but its pretty
Look at that, simple, the lock just stops the lever moving, easy
The boot lock, there's 2 of these, there not actually locks, anything reasonably square will undo them
Sliding window lock, fully adjustable ventalation, well as long as you want the window open where there's a slit in the rail
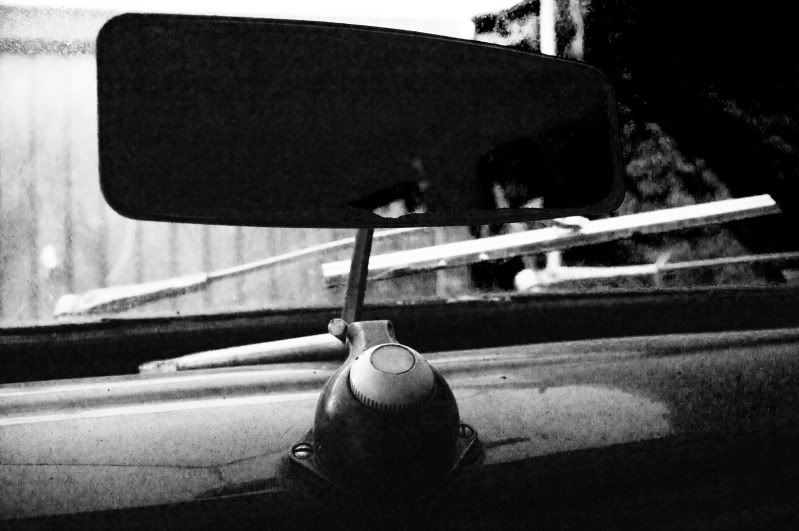
Rear view mirror bolted to the dash, why not? The knob is for the trafficators, left or right, thats your options
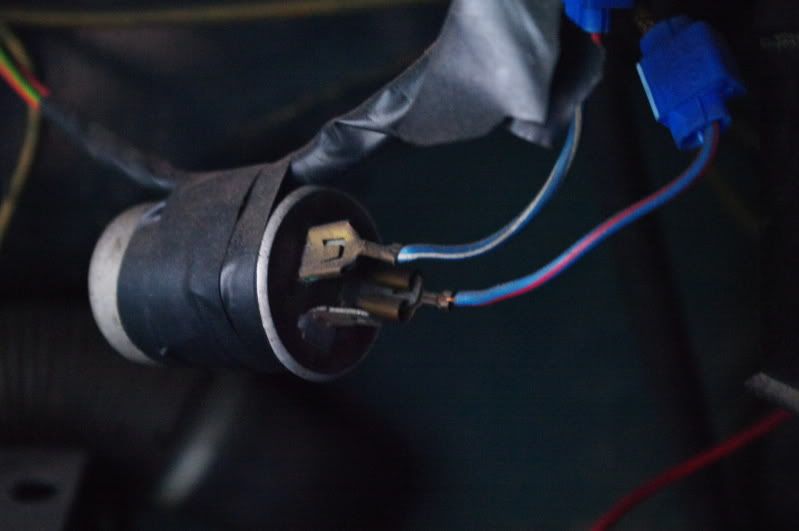
Which leads me to this, its a flasher unit, fitted with scotch locks and tape, now it serves no purpose, as I mentioned they're trafficators. I like things like this as its rewarding to put right
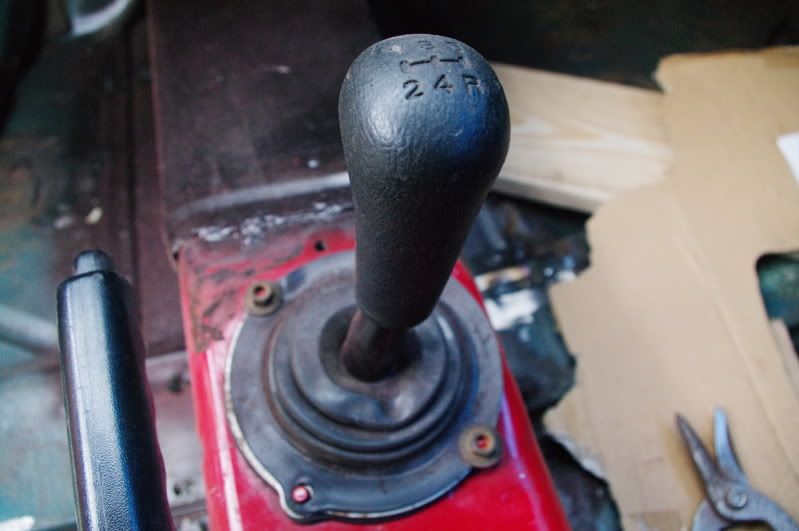
5 speed, short shift gearbox... err, no, wait...
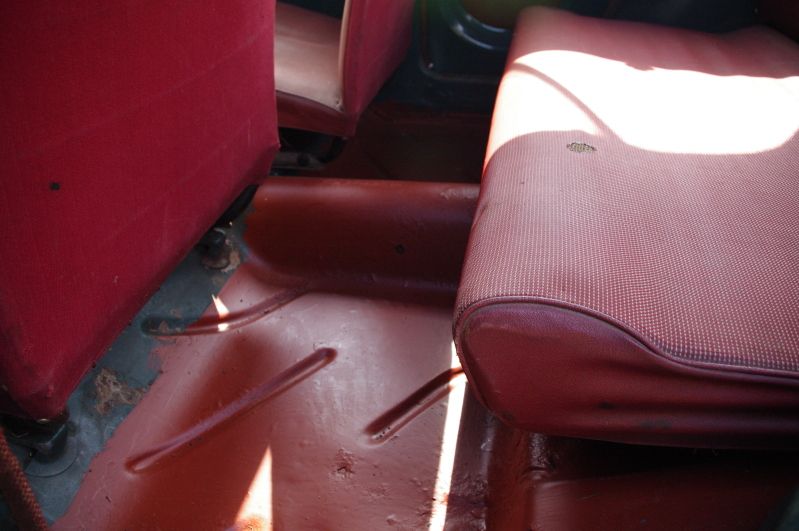
Its not all fun and games though, the seat is held in with this flimsy rail which is held to the floor with some self tappers, original as well...
Logged
Reply: 25 - 97
lord
Posted on: Monday, March 4th, 2013, 9:06:10am
Guest User
Quite interesting to read these little quirks lol
Logged
Reply: 26 - 97
2002gimp
Posted on: Sunday, April 14th, 2013, 8:46:08pm
Guest User
Welcome to another riveting installment,
To start, I built this, I was annoyed greatly at getting wet, now I dont, happy days
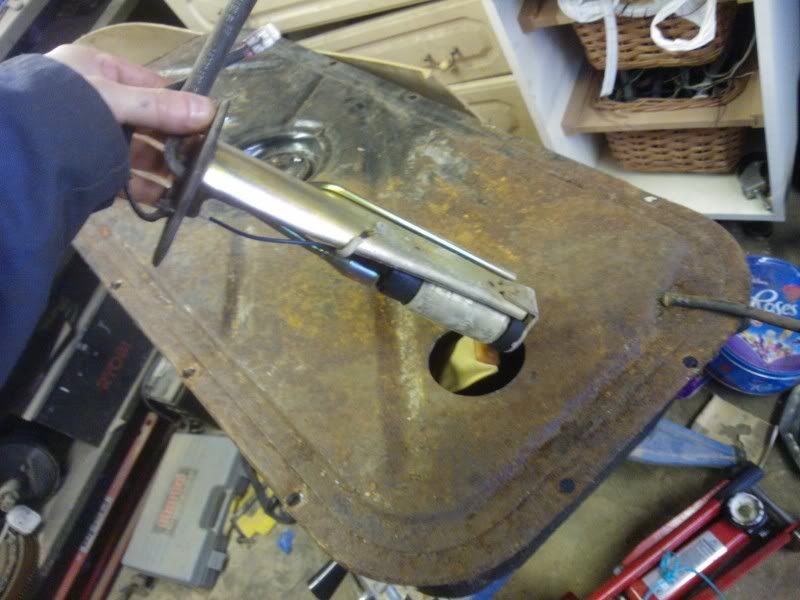
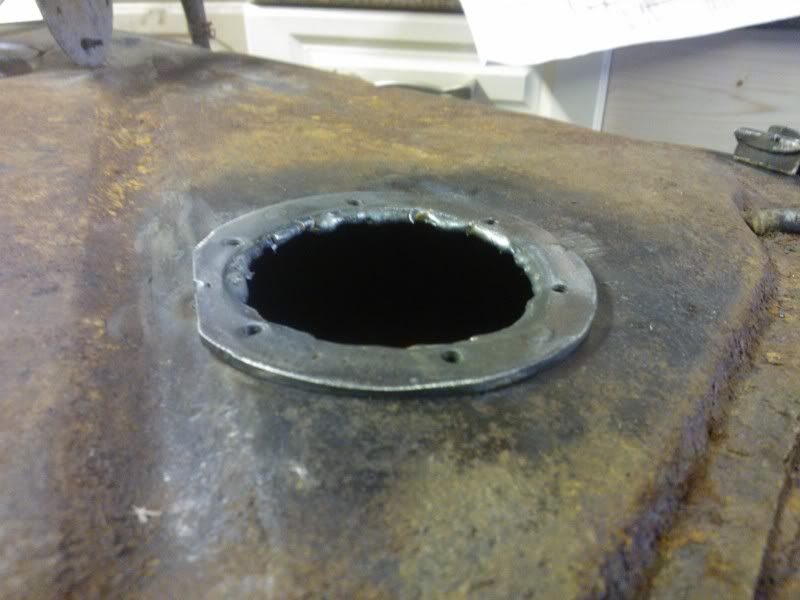
Back to the car; now the engine and box are in, I wanted to get her running before pulling the lot and seam welding, paint etc. I figured fuel would be a good start, obviously I need to change the tank to an injection one.
Now ideally i'd fit the Cap tank, unfortunatly Mr Standard thought that would be a retarded idea and decided to make his tank part of the floor, the spare wheel well and just miss vital components like the diff and lever arm dampers.
Hmmm, I guess i'll have to fit the pump and shiznet to this. I drilled a hole, but remembering safety I first went online and checked how to stop it exploding, it seemed a right faff so I held my Zippo at the filler neck, a small pop and I was ready to go.
You can see the pump above, its deep, so I drilled a hole in the bottom as well
Ok, I drilled 2 cause I didn't measure and as it proves my eye is a little out.
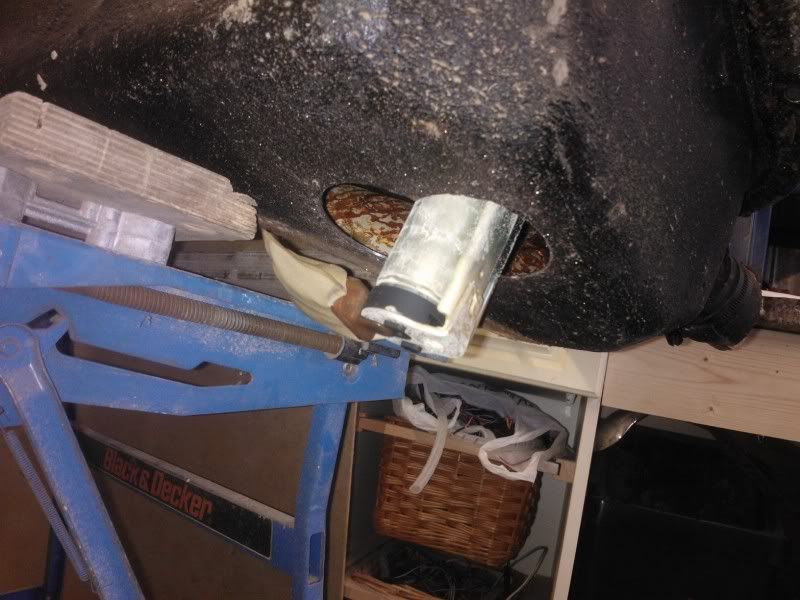
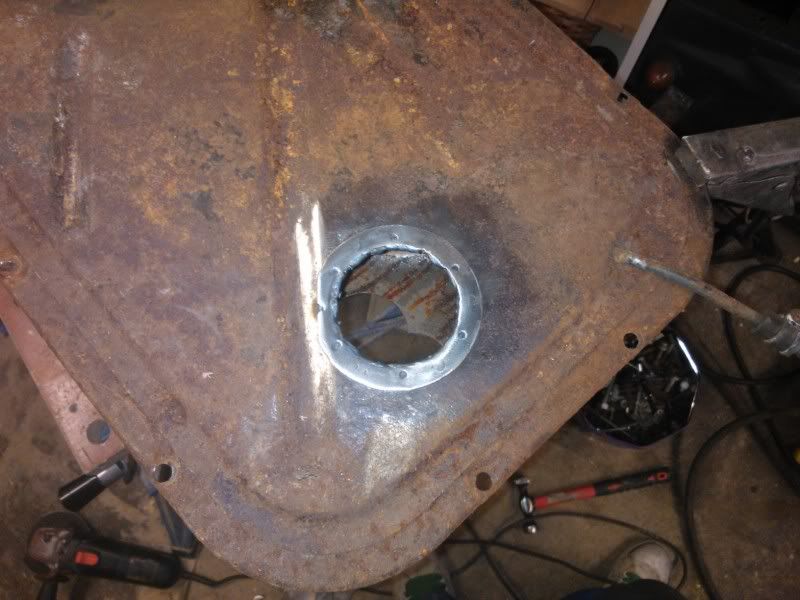
I drilled the spot welds out of the flange on the Cap tank and welded it in place, I decided to seam this to stop vapour leaks
And pump in place, looks factory
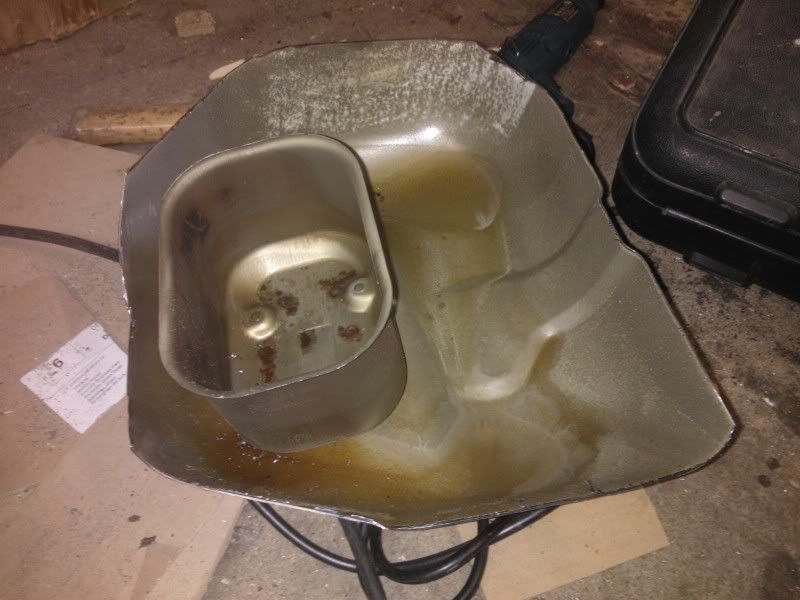
That was as far as I got, next up, to make a bowl, fit this baffle and seam weld it all up
All in all its a neat little job
Logged
Reply: 27 - 97
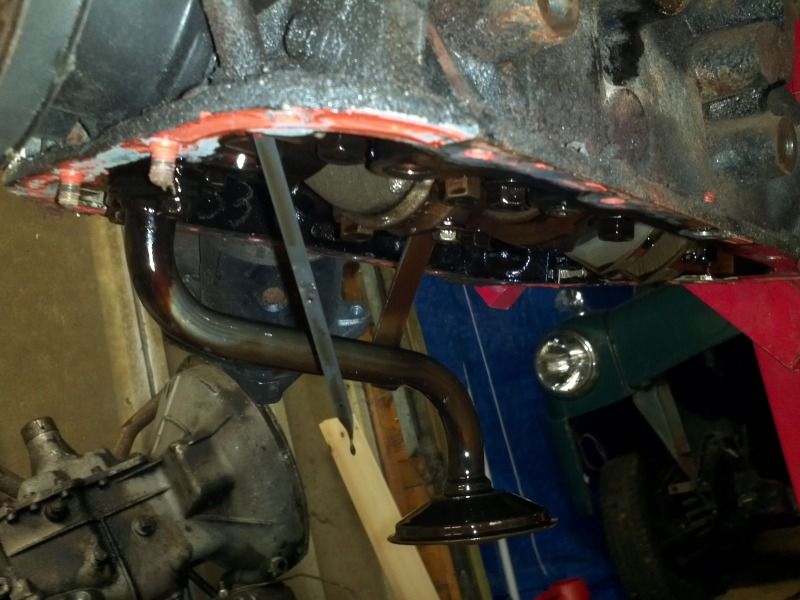
2002gimp
Posted on: Sunday, April 21st, 2013, 8:21:04am
Guest User
Today was an odd day, I unbolted everything and took the engine out...
As I was un happy with the mounts i'd made, they're awkward as one side holds the clutch cable and the other surrounds the oil filter.
I got hold of some range rover bobbins and set to work, this is the outcome, the engine is mounted rock solid now, they just need seam welding next time I pull it out.
I made the turbo downpipe
And the exhaust, if you can call a foot of tube an exhaust
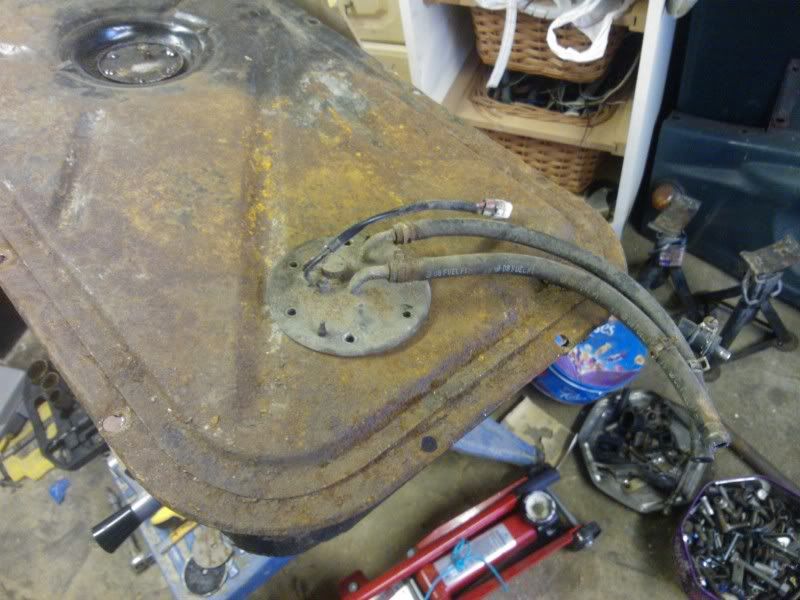
Finally (actually I did it first thing so it would dry) I painted and fitted the tank, its a little hint of things to come...
Logged
Reply: 28 - 97
Capposteve
Posted on: Sunday, April 21st, 2013, 5:11:35pm
Guest User
mate. so impressed with your work. loving the progress
Logged
Reply: 29 - 97
2002gimp
Posted on: Thursday, April 25th, 2013, 8:20:04pm
Guest User
Expect no updates for a month, cause this is happening
Logged
Reply: 30 - 97
Capposteve
Posted on: Tuesday, May 7th, 2013, 8:47:33pm
Guest User
could i ask a favour. could you tell me where you got that masive print of wiring loom from. im desprate for one many thanks
Logged
Reply: 31 - 97
2002gimp
Posted on: Tuesday, May 7th, 2013, 8:50:33pm
Guest User
I printed it myself, its the wiring diagram pdf - I can email it if you dont have it - adobe reader has a poster print option, I chose 16 pages, boooom its fecking huge!
The prob is you have to tape it together
Last modified Tuesday, May 7th, 2013, 8:51:41pm by 2002gimp
Logged
Reply: 32 - 97
Capposteve
Posted on: Tuesday, May 7th, 2013, 8:58:58pm
Guest User
yea iv got that but doesnt look no where near as clear as yours. hmmmm. i might just do what you did and tape the lot together . hows it all going anyway. running yet
Logged
Reply: 33 - 97
2002gimp
Posted on: Tuesday, May 7th, 2013, 9:05:06pm
Guest User
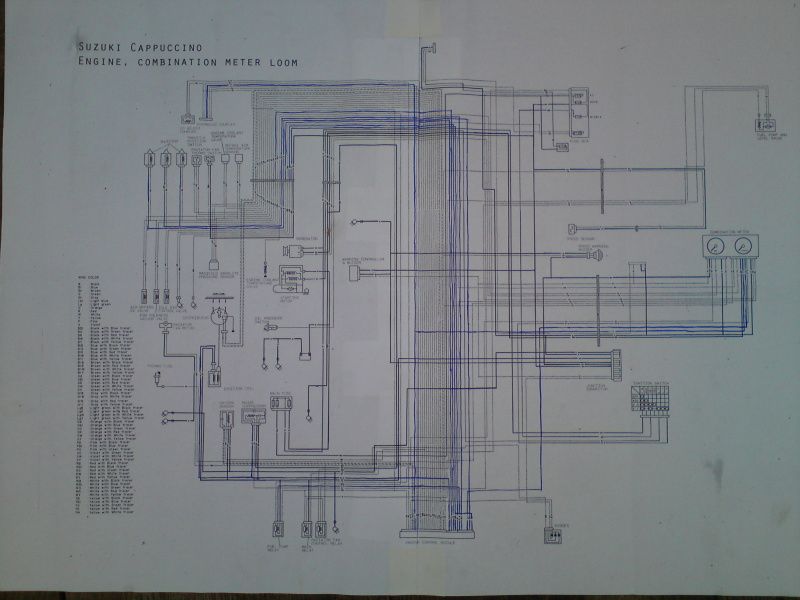
Ah right, got ya, this is one I spent hours photoshopping out all the none needed stuff, lights, heaters, a/c etc hence it looking clearer.
Its only any good for engine only wiring
Logged
Reply: 34 - 97
Capposteve
Posted on: Sunday, May 19th, 2013, 11:03:23am
Guest User
Update update update update
Logged
Reply: 35 - 97
2002gimp
Posted on: Sunday, May 19th, 2013, 1:59:56pm
Guest User
Everything work, relays clicked, fuel pump ran
I turned her over, nothing, then I remembered the flywheels on a shelf in the garage so gotta pull engine and refit that
Might as well do all the welding whilst its out
Logged
Reply: 36 - 97
Capposteve
Posted on: Sunday, May 19th, 2013, 4:59:07pm
Guest User
Lol. So it wouldn't turn over because of the lack of flywheel. Haha. Classic
Logged
Reply: 37 - 97
2002gimp
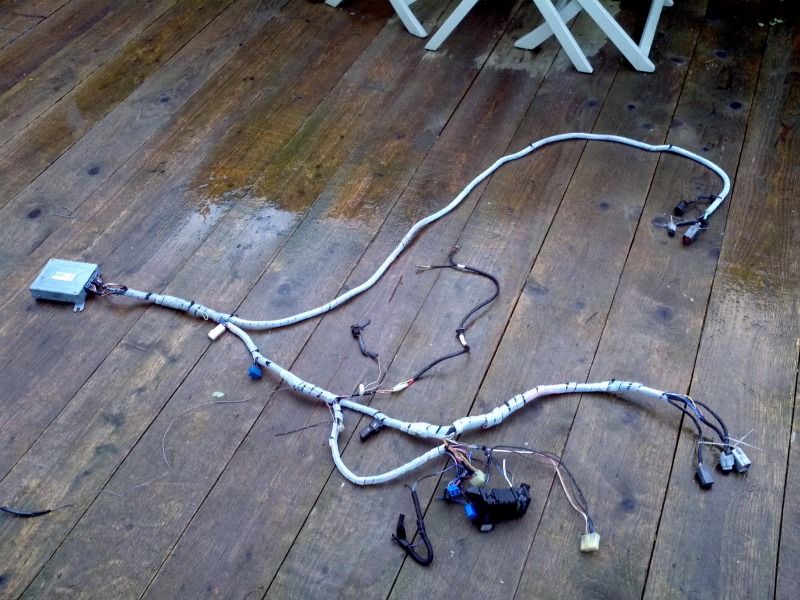
Posted on: Sunday, June 30th, 2013, 5:38:37pm
Guest User
I've not been hiding away, progress is being made.
I took the mess above into my kitchen and turned it into this
Which then went into the car and looked like this, the yellow tape is temporary
After some checks and the like I turned the key, success lots of clicking relays, fuel pump wirring away. Next step, pull the starter knob, wooooooooooooo, starter moptor fires into life, engine doesn't turn though, hmpf, try again, nothing, just the starter spinning frantically.
At that point I remembered I'd removed the flywheel to allow the block to be bolted to an engine stand and neglected to put it back, ah well, its gotta come out again anyways to finish the tunnel
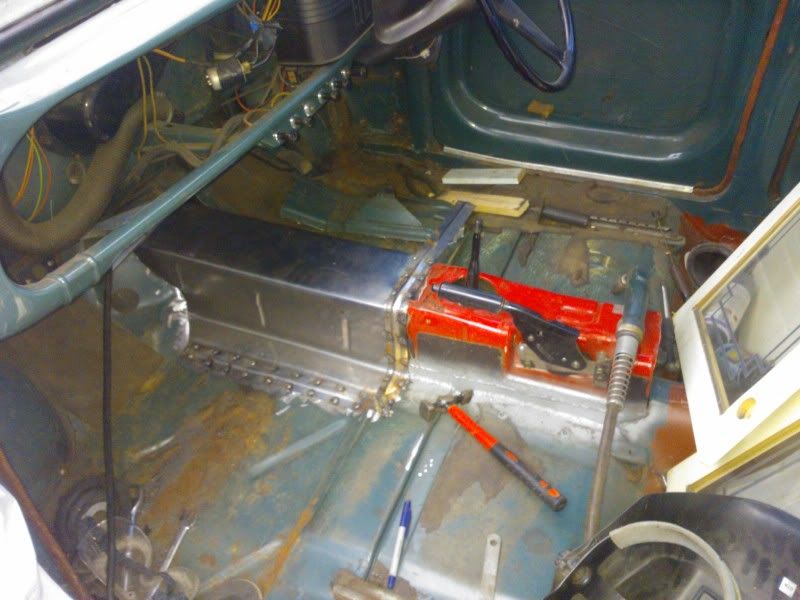
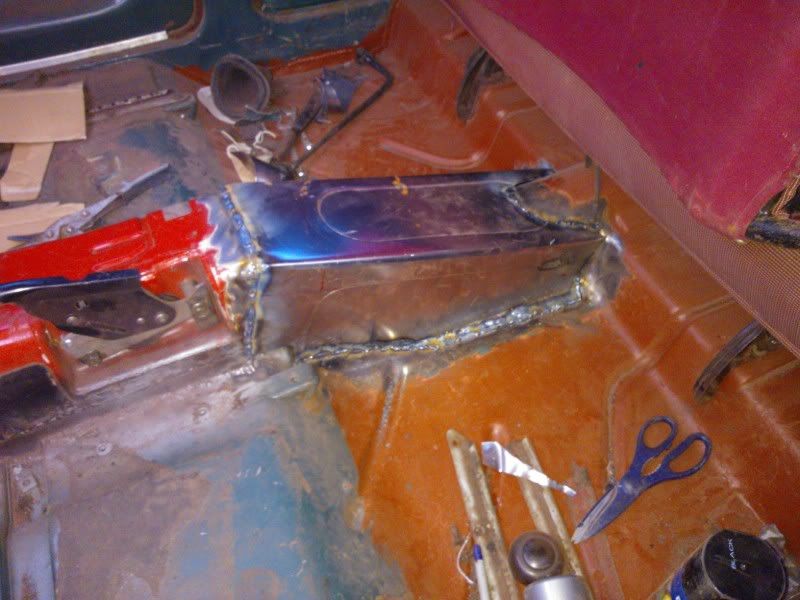
I made the last bit of the tunnel and tacked it in, I also added a foot rest which will be covered with something I've not stole yet
Lots of seam welding, underneath is never fun, but its all done
I brushed on some seam sealer, superbly messy stuff, needs some more paint then the engine can go back in.
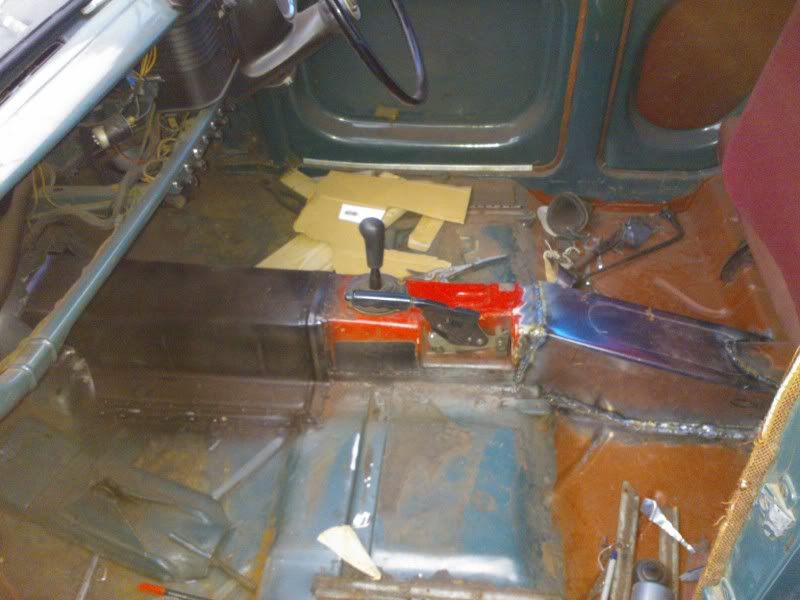
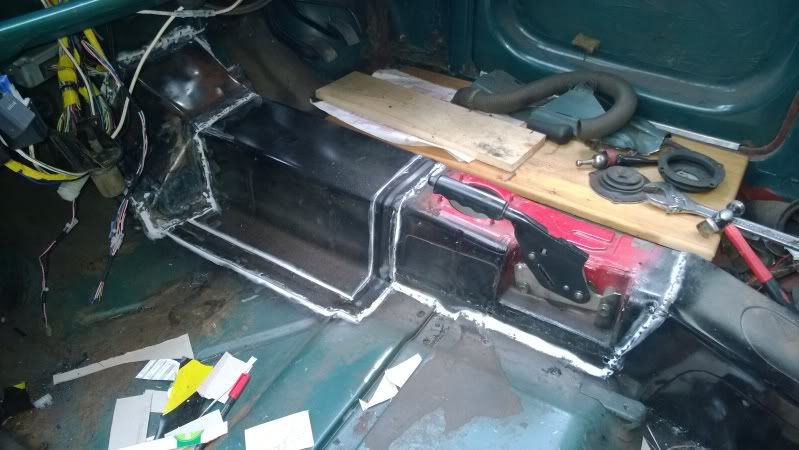
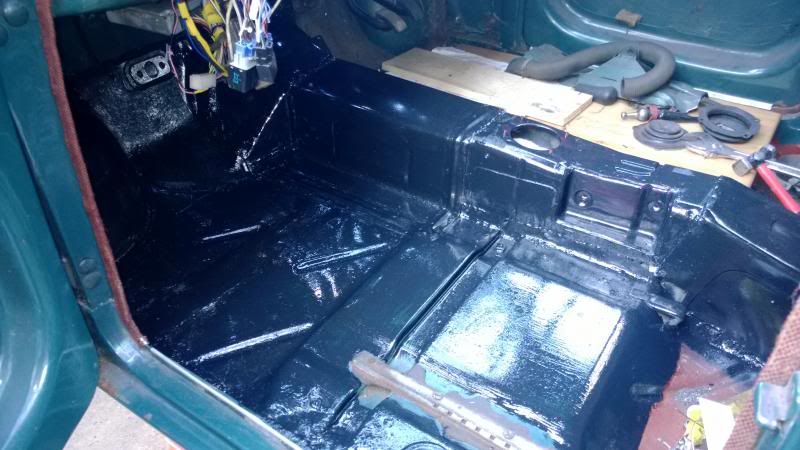
I'm awaiting the engine crane from a mate so I'm doing some little jobs in the mean time, got the first coat of black on the inside, amazing how a uniform colour makes everything come together. The tunnel no longer looks like I've made it
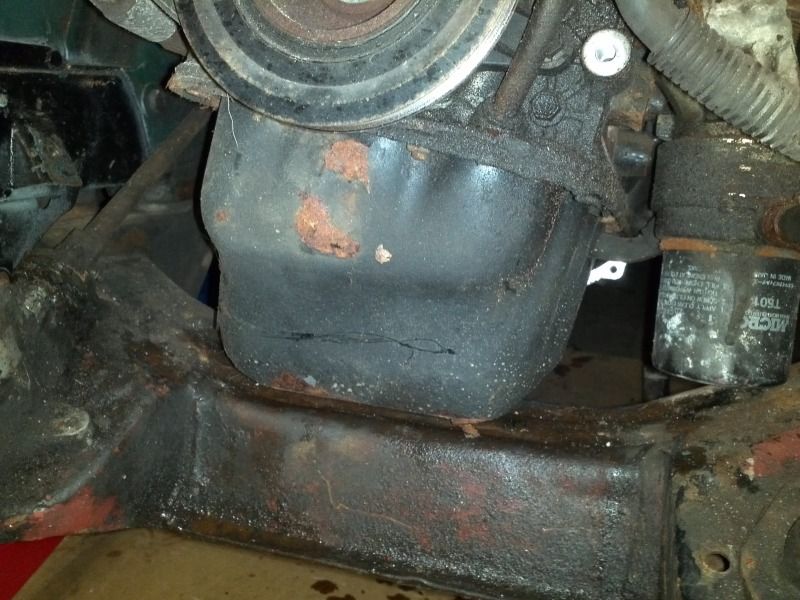
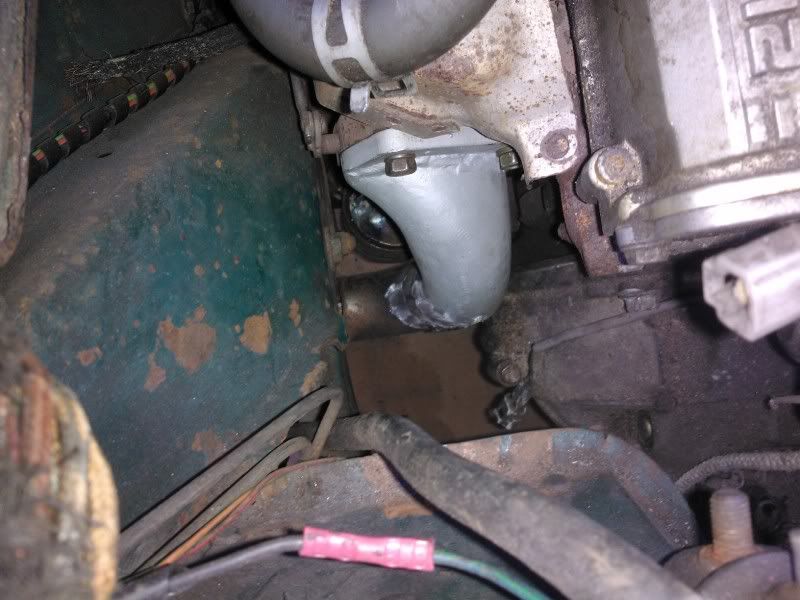
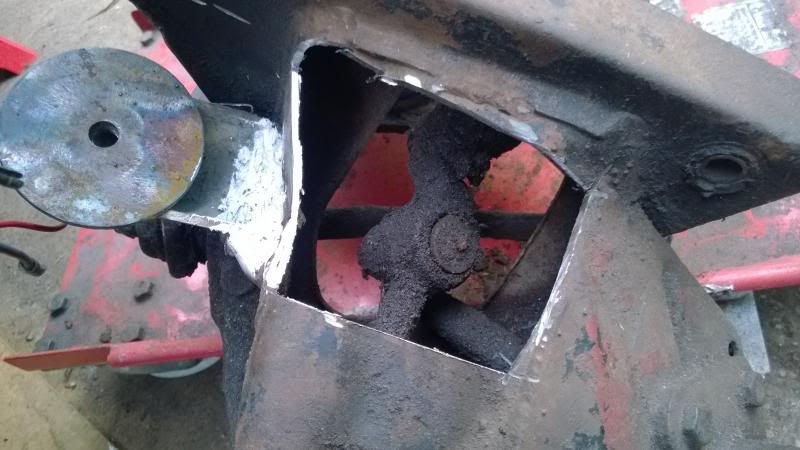
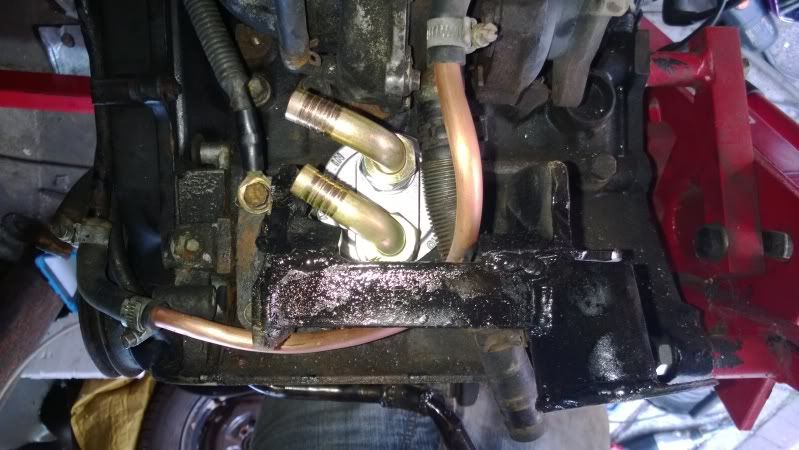
I'm having issues with the oil filter location, you can see here it sits right on top of the cross member
I thought I'd just notch the cross member and put a shallower filter on, but it appears to be full of steering
So I've had to put my hand in my pocket and order an oil take off plate and remote filter
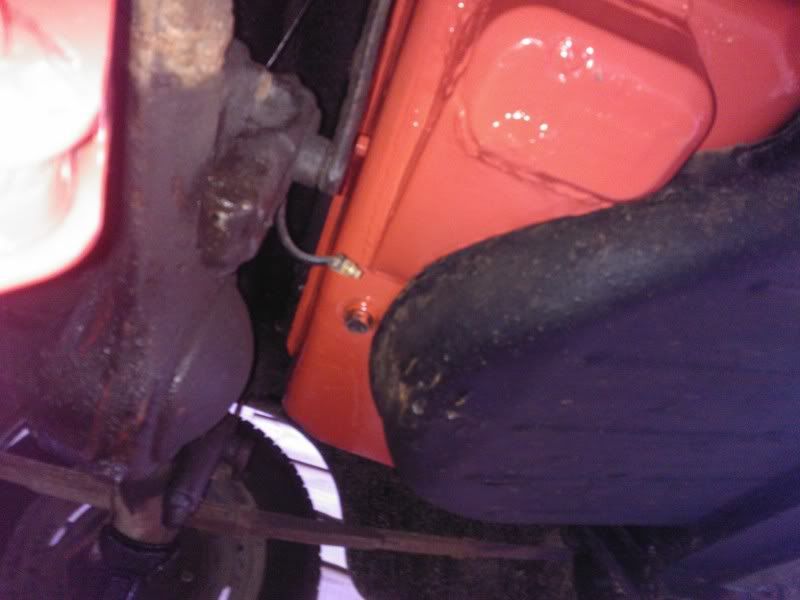
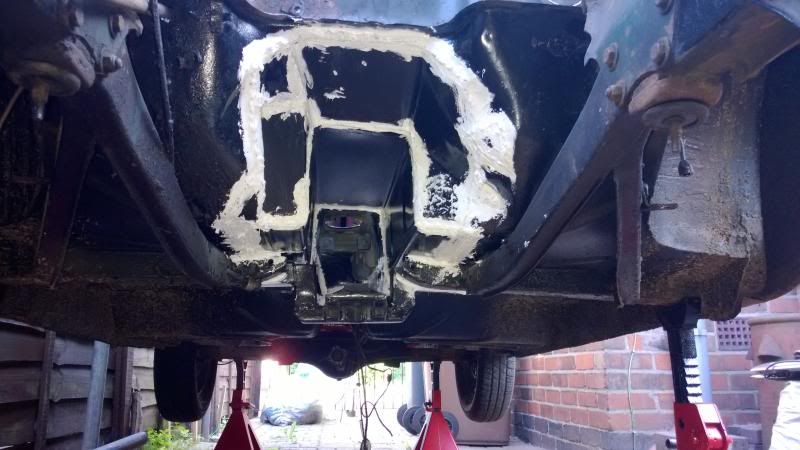
I blue glued the hole I made in the subframe
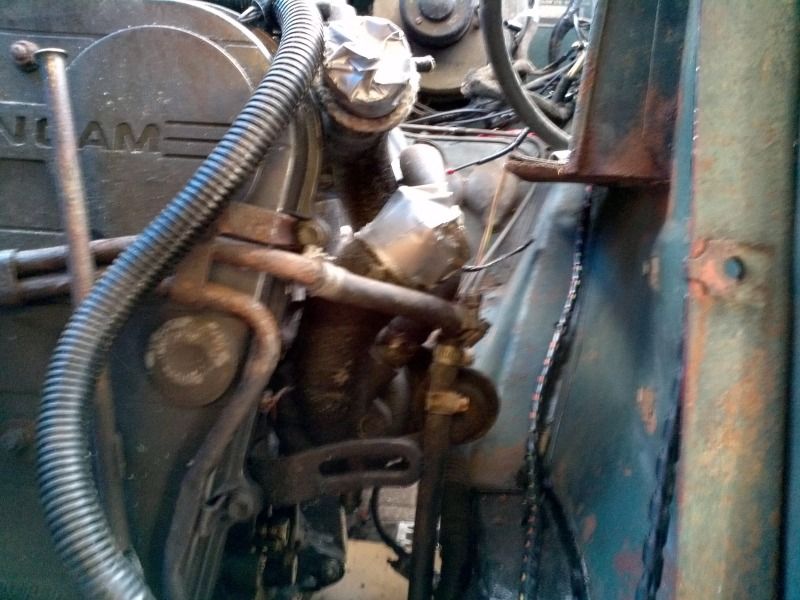
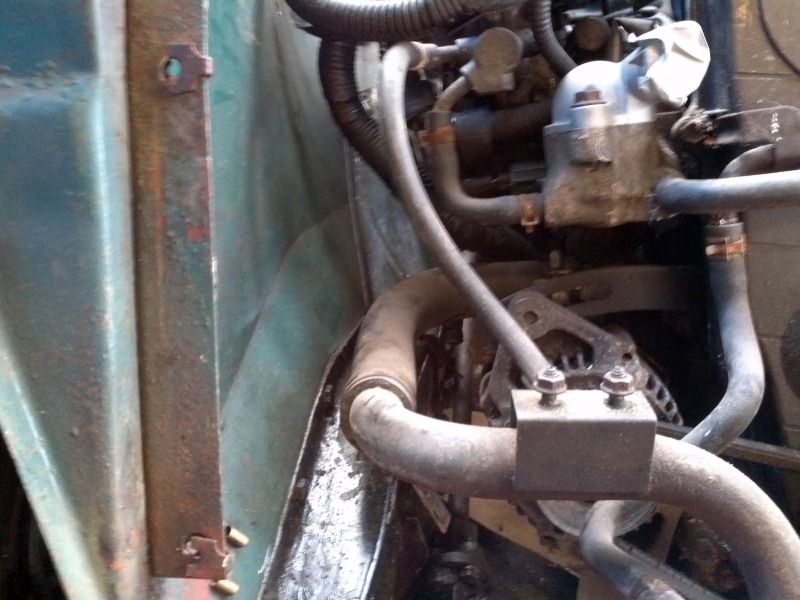
Fitted the oil take off, had to modify the engine mount and some water pipes
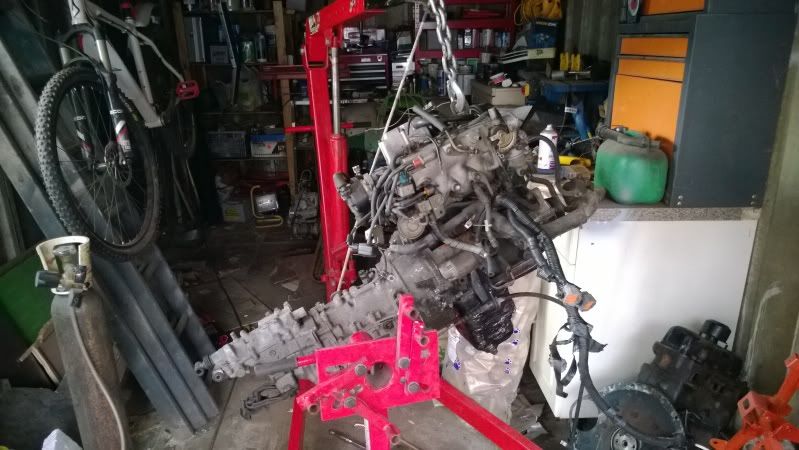
Threw everything back together ready to install
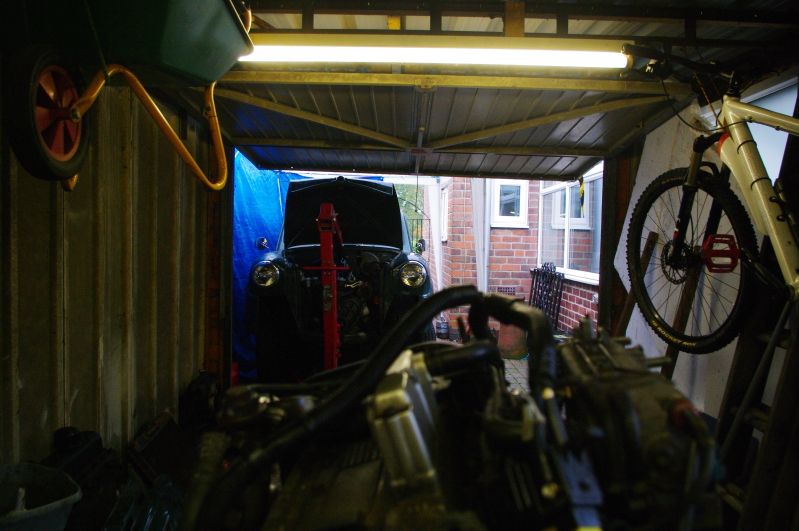
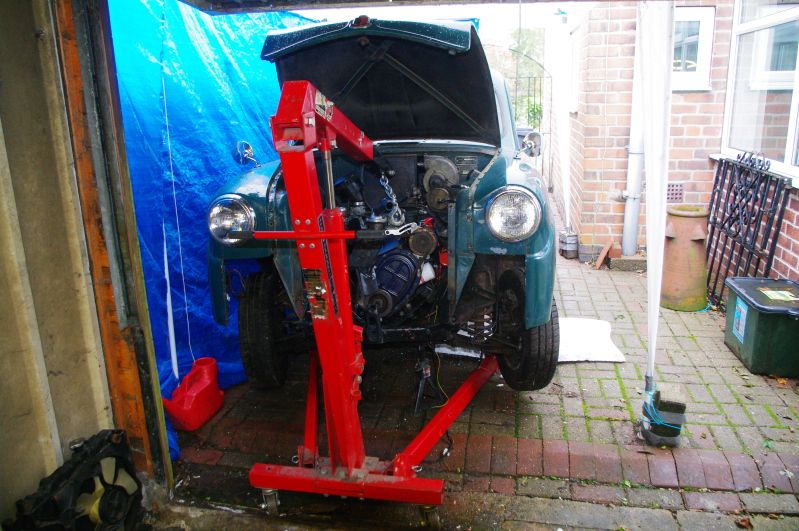
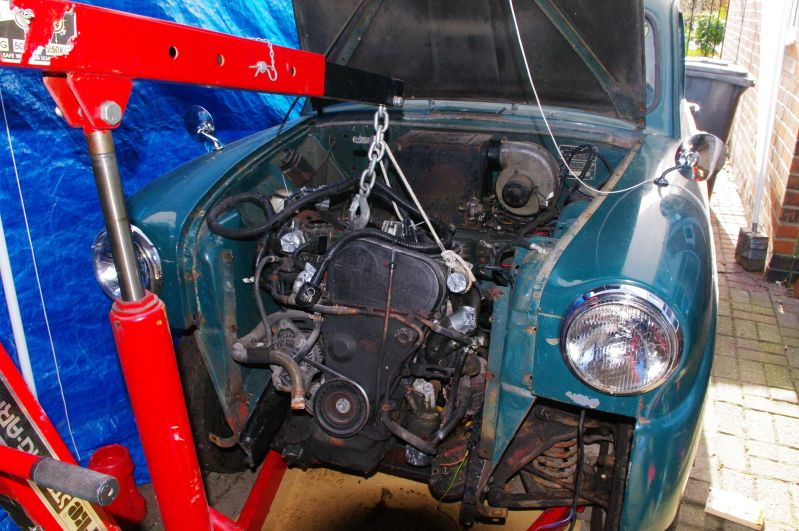
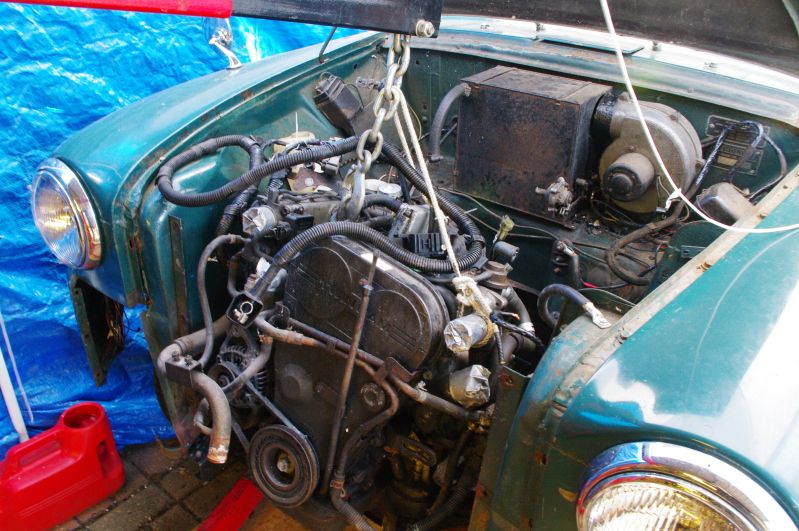
Which I did, now if nothing drastic goes wrong in the next 50 days this lump is staying put for the gathering
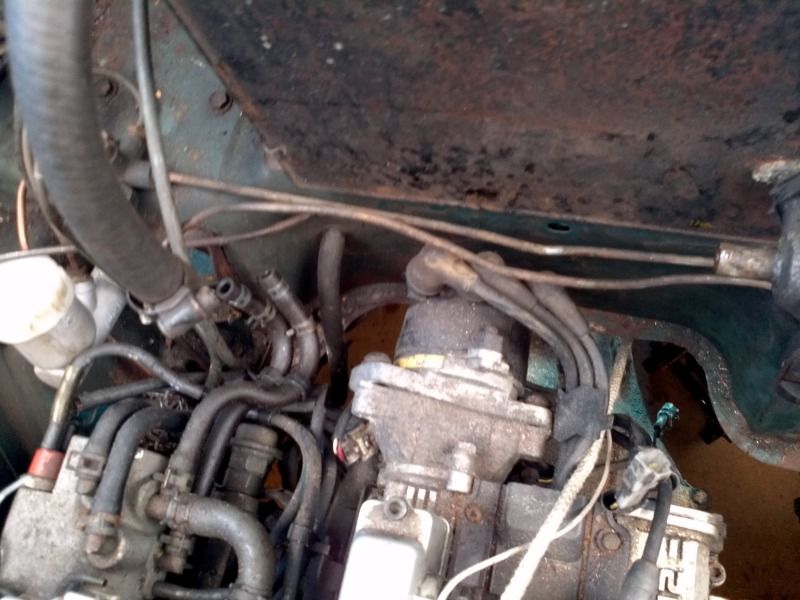
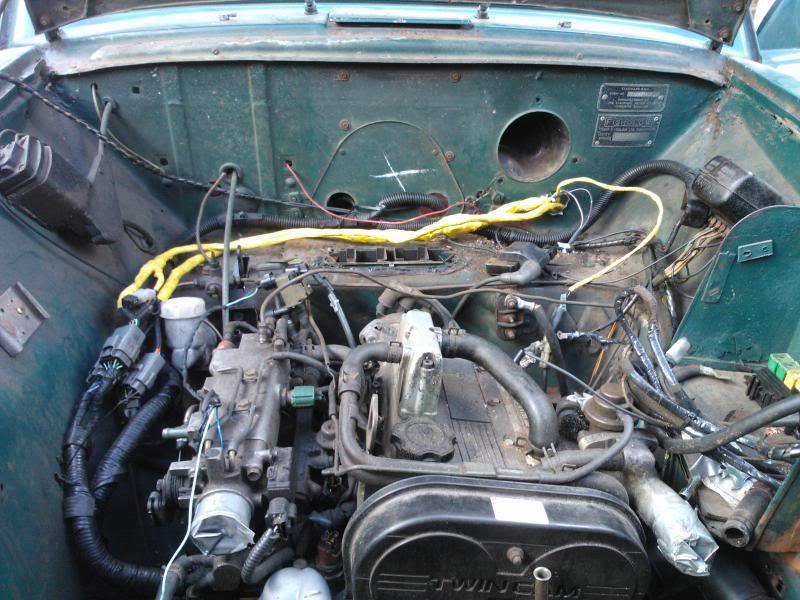
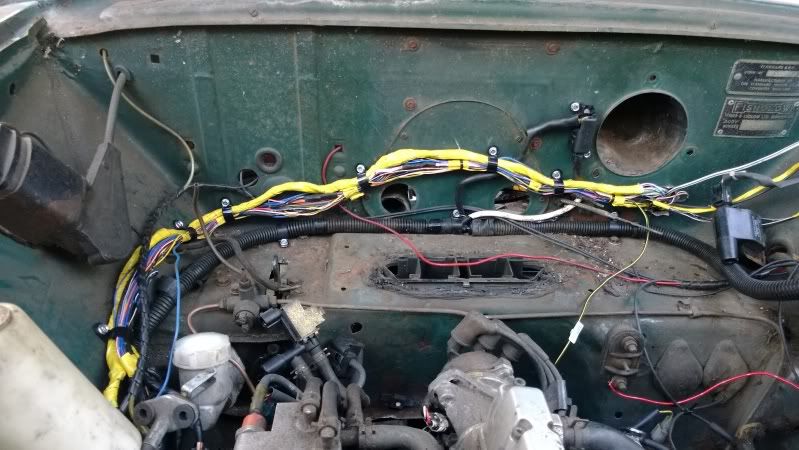
Routed all the wiring, it just needs wrapping once I'm happy everything works
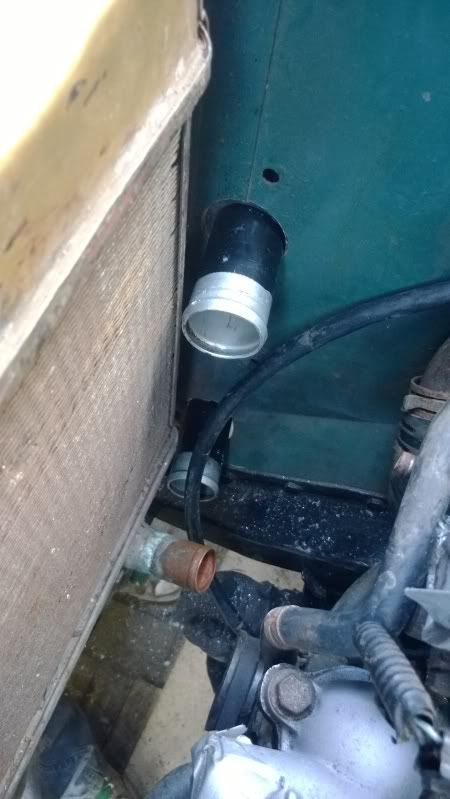
Refitted the rad and mocked up some hoses and the electric fan
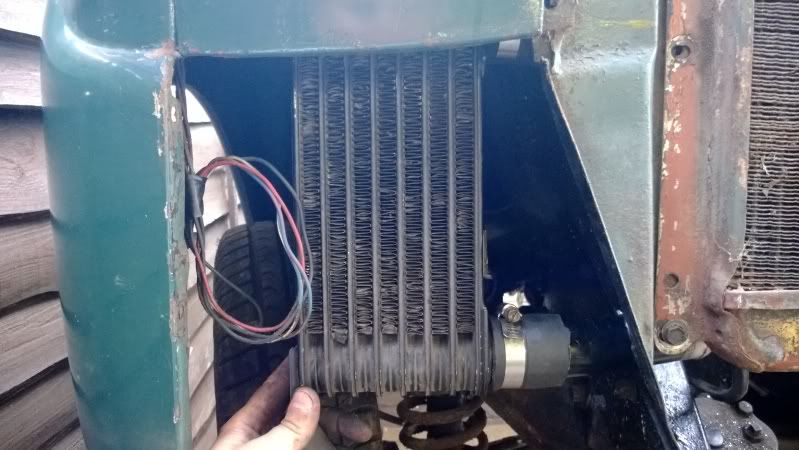
Decided to mount the tiny intercooler in the inner wing as its the easiest place to route the pipework
Through the inner wing
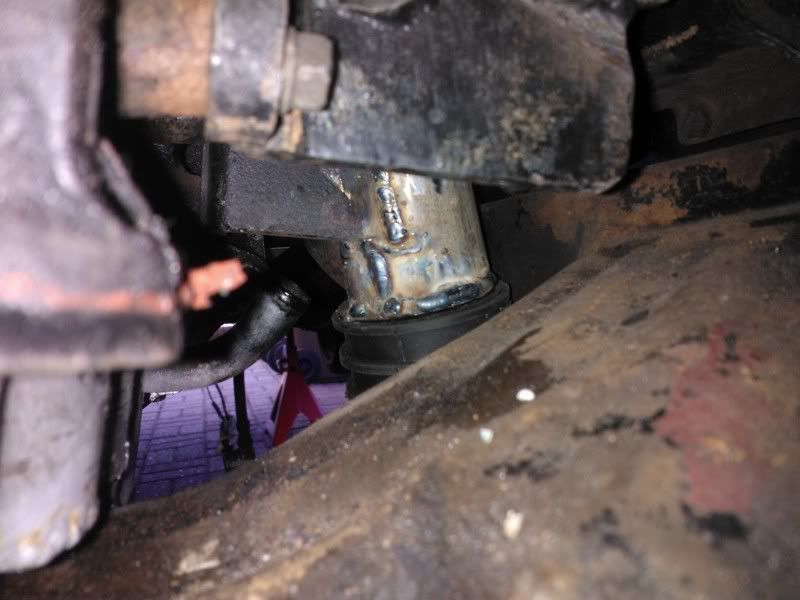
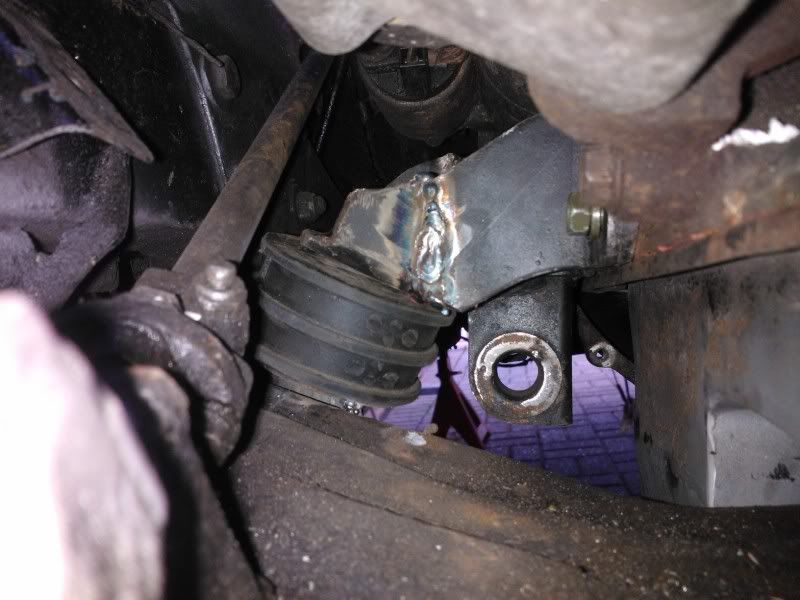
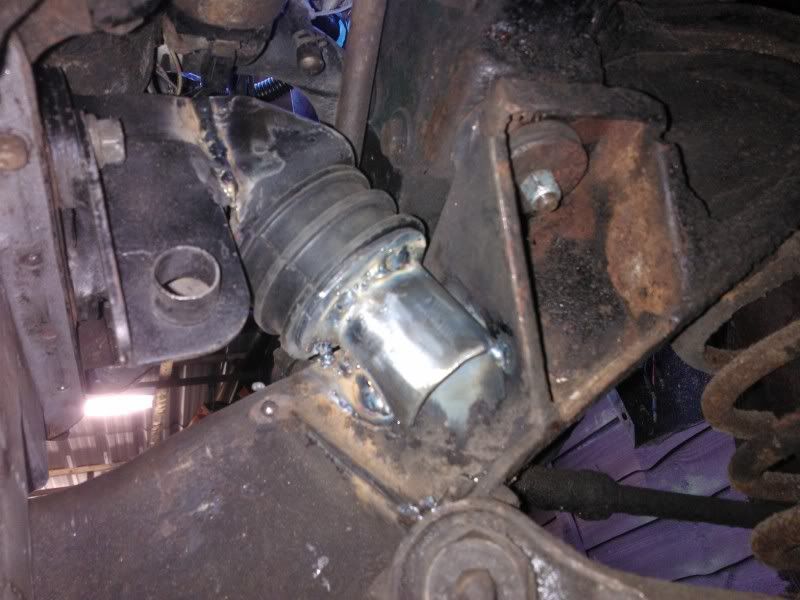
Gearbox is fully mounted and the stick is sealed with the relavent gaskets
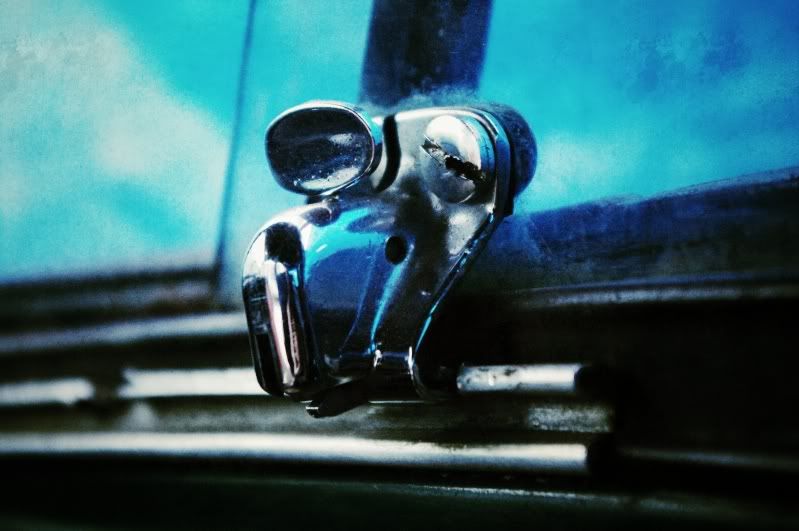
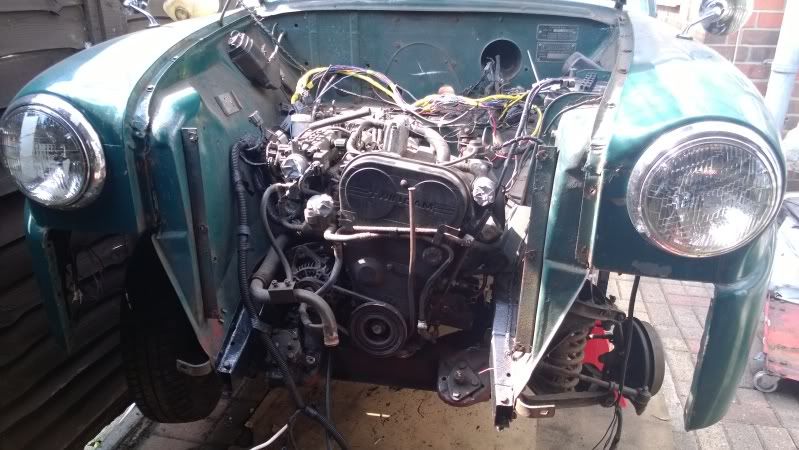
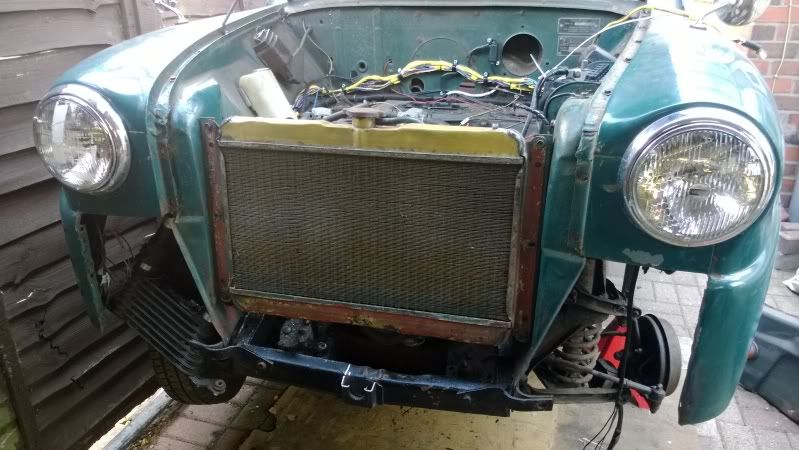
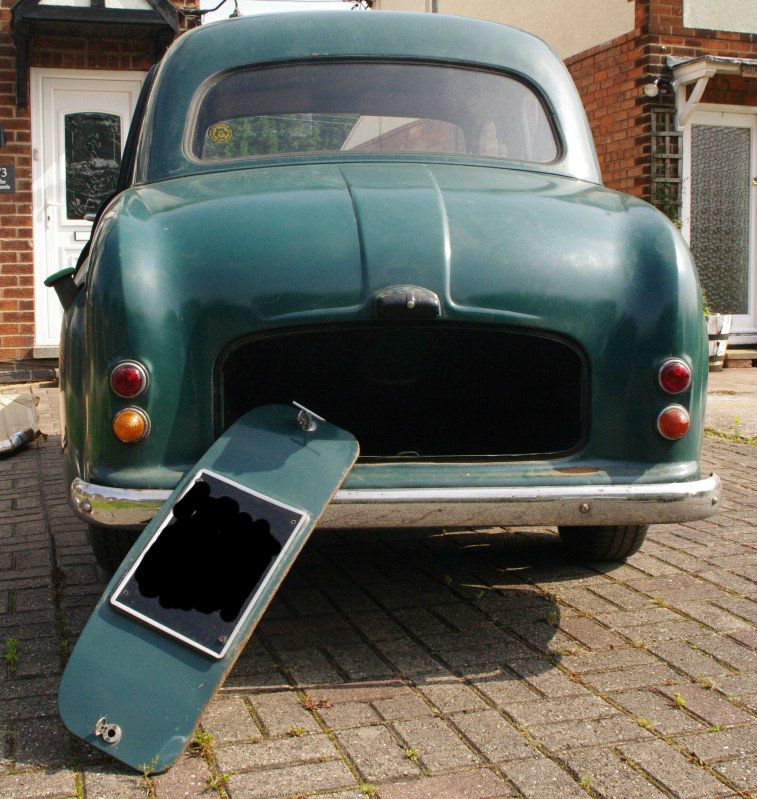
Lastly, as I had to get it out for mocking up, and I've not seen it on for almost a year, I put her face back on
Last modified Sunday, June 30th, 2013, 6:18:22pm by 2002gimp
Logged
Reply: 38 - 97
lord
Posted on: Sunday, June 30th, 2013, 9:54:56pm
Guest User
That's a class little project....
Just made me wonder why you didn't finish off the cappuccino. You should have. Lol
 Cappuccino Owners Club › Gallery › What Else Have You Got? › 1955 Standard Eight - 660cc Turbo (Moderators: )
 Author
 1955 Standard Eight - 660cc Turbo (currently 2906 views)


 Logged