|
|
 Author Author |
 Nick's cappo project (Espresso conversion!) (currently 3736 views) Nick's cappo project (Espresso conversion!) (currently 3736 views) |
| clemdobain |
| Posted on: Monday, March 23rd, 2015, 10:39:43am |
  |
|
|
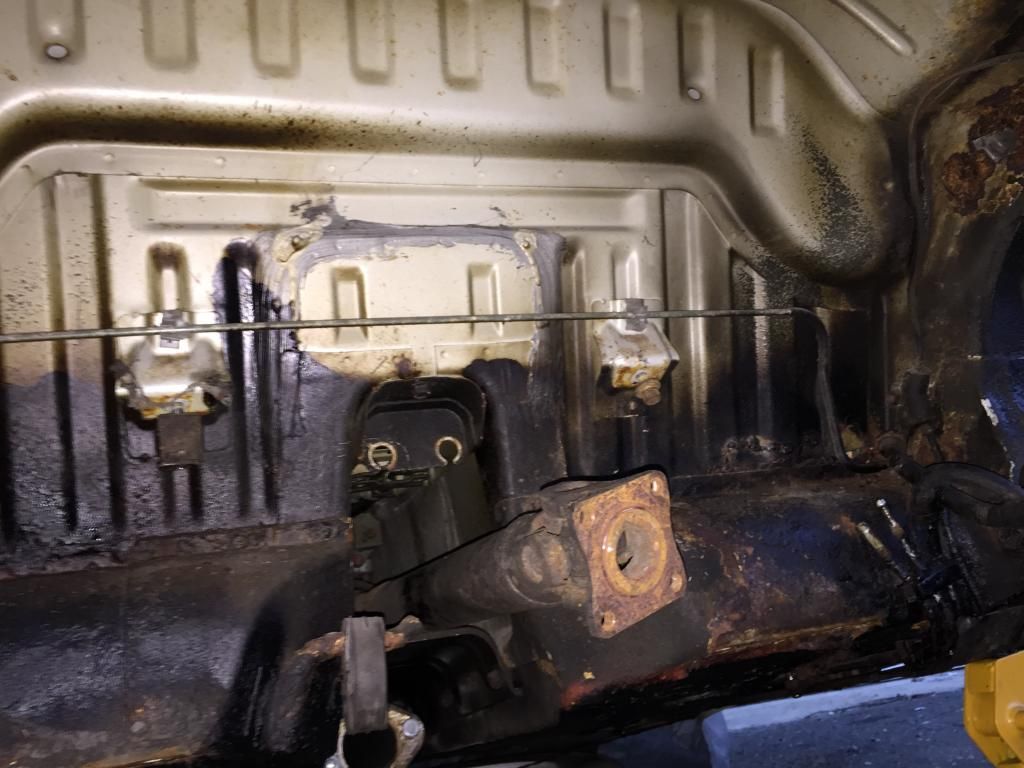
These subframe bolts were an absolute a*se to remove. Backwards and forwards half a turn at a time and LOADS of WD40 to help.
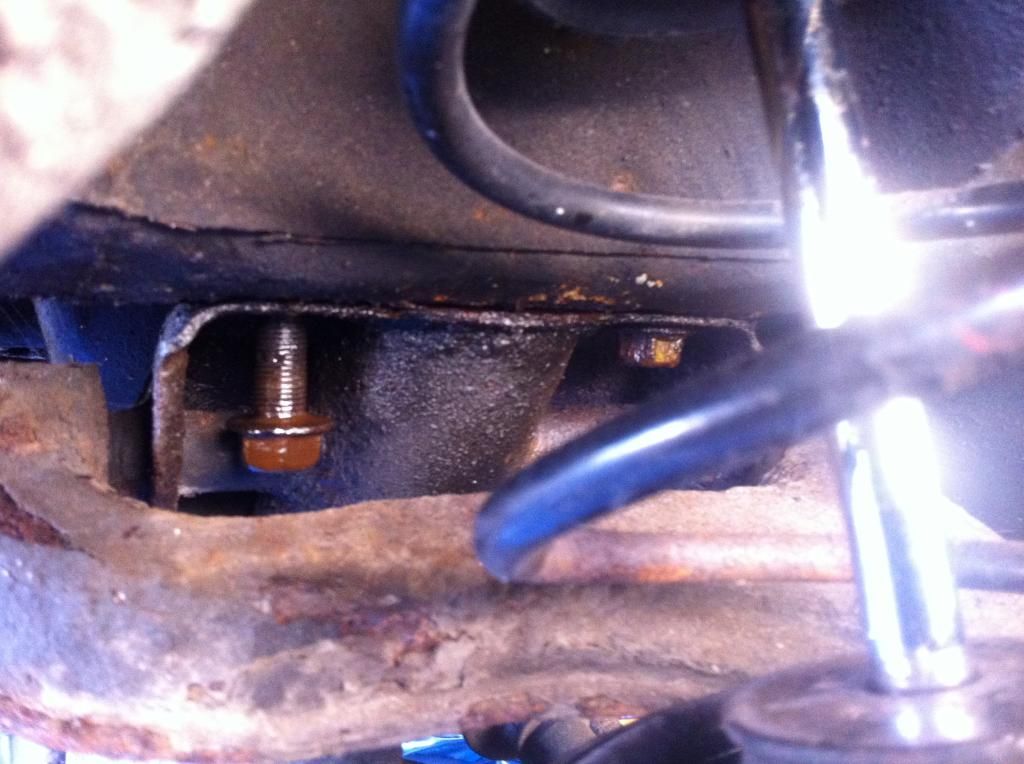
My face behind the camera is like this...

Got them out eventually and this quickly followed...
 |
|
 Logged Logged |
|
|
 |
Reply: 40 - 86 |
|
|
| clemdobain |
| Posted on: Monday, March 23rd, 2015, 10:45:50am |
|
|
|
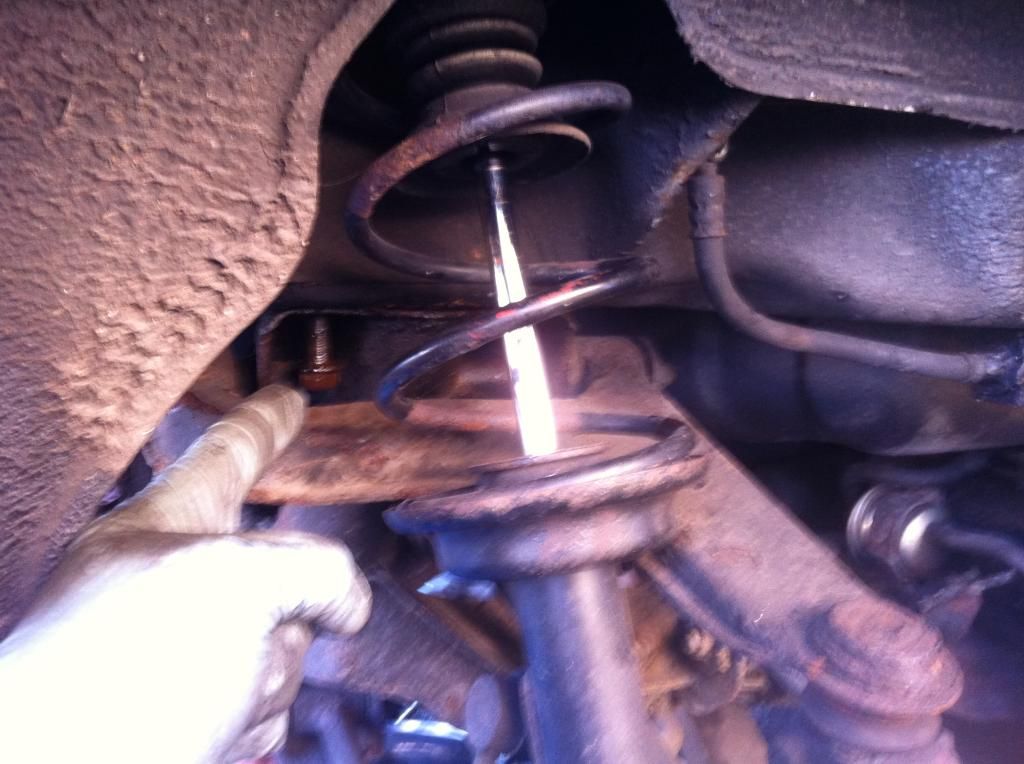
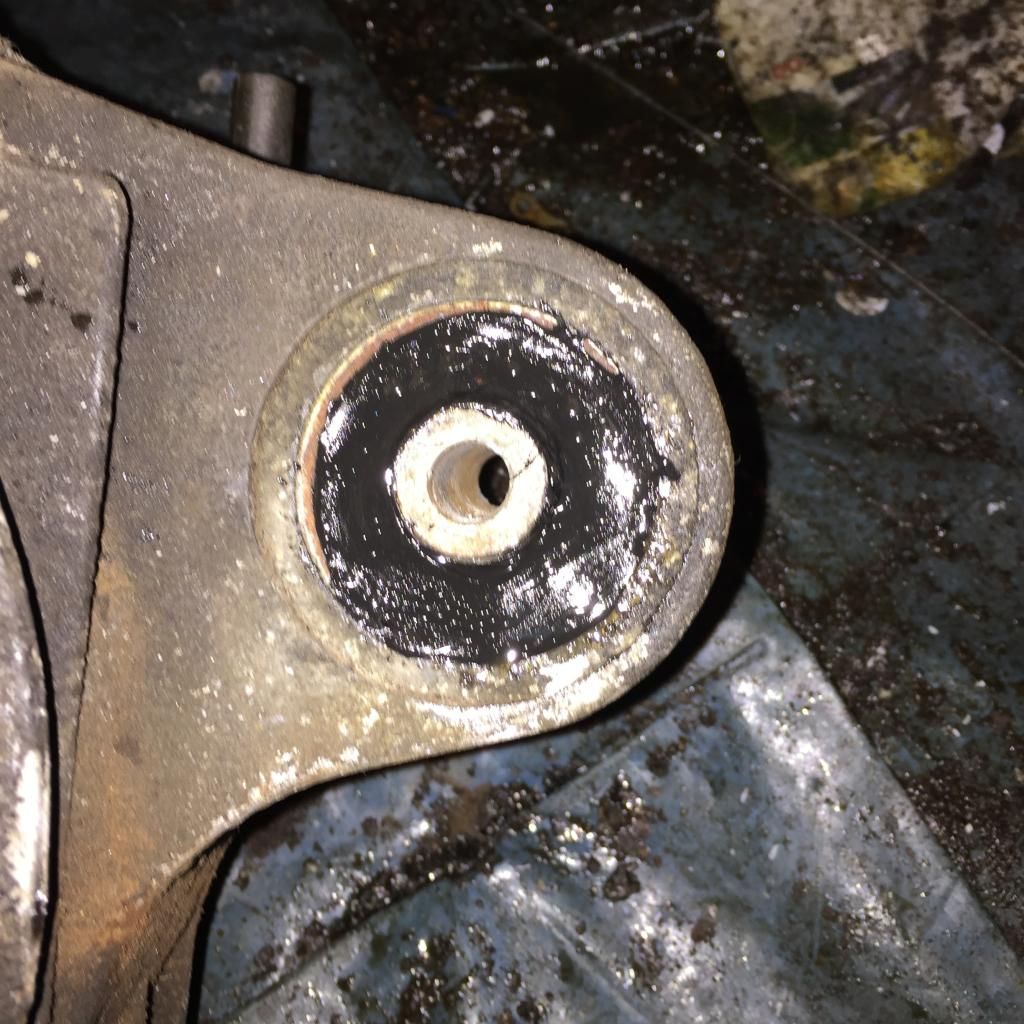
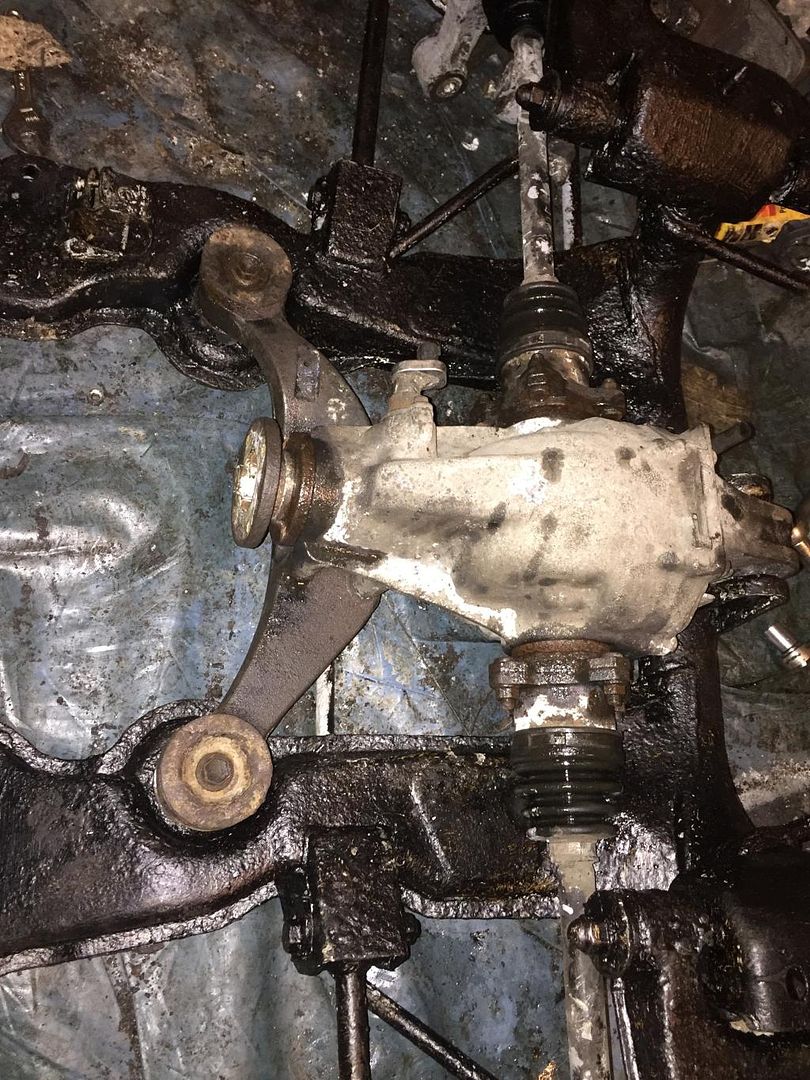
As expected there were some lovely treats waiting to be discovered..
Nackered diff bushes..
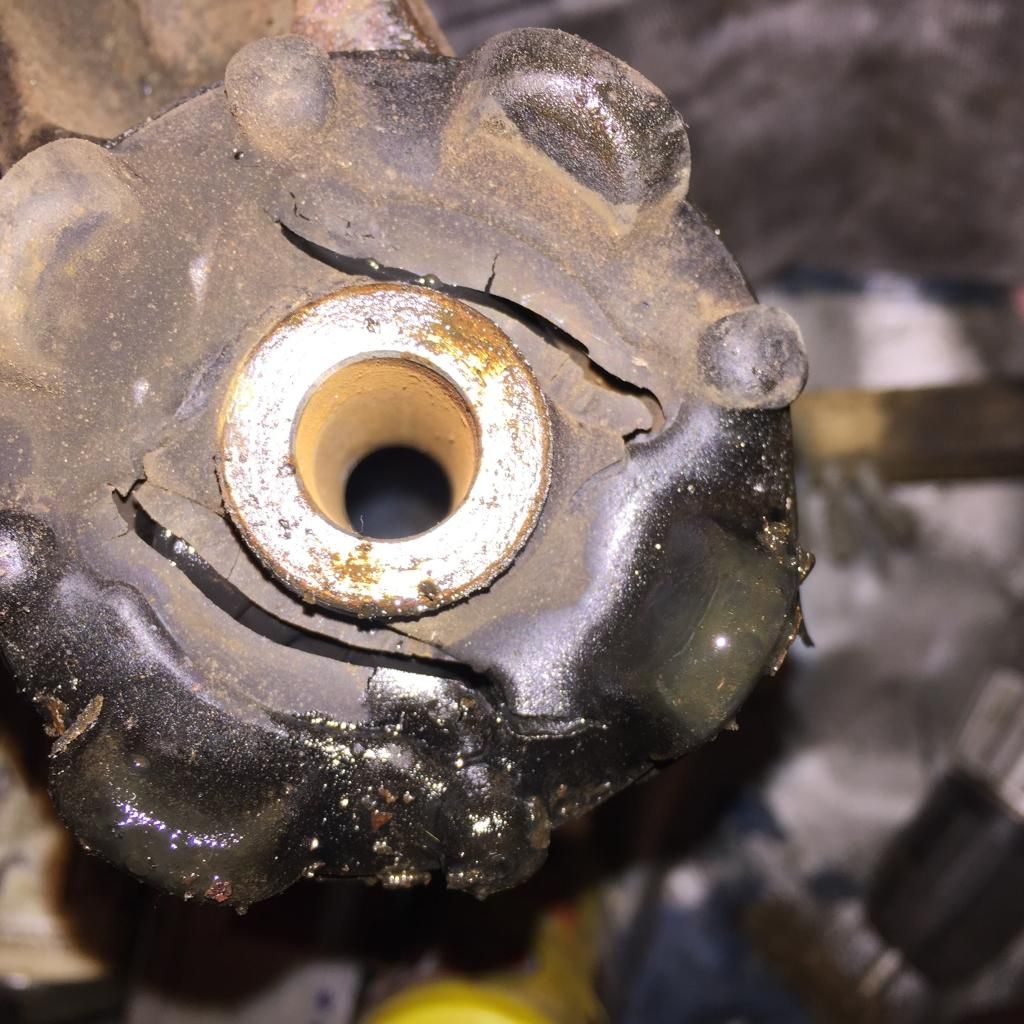
Signs of old underseal has helped a bit at least!
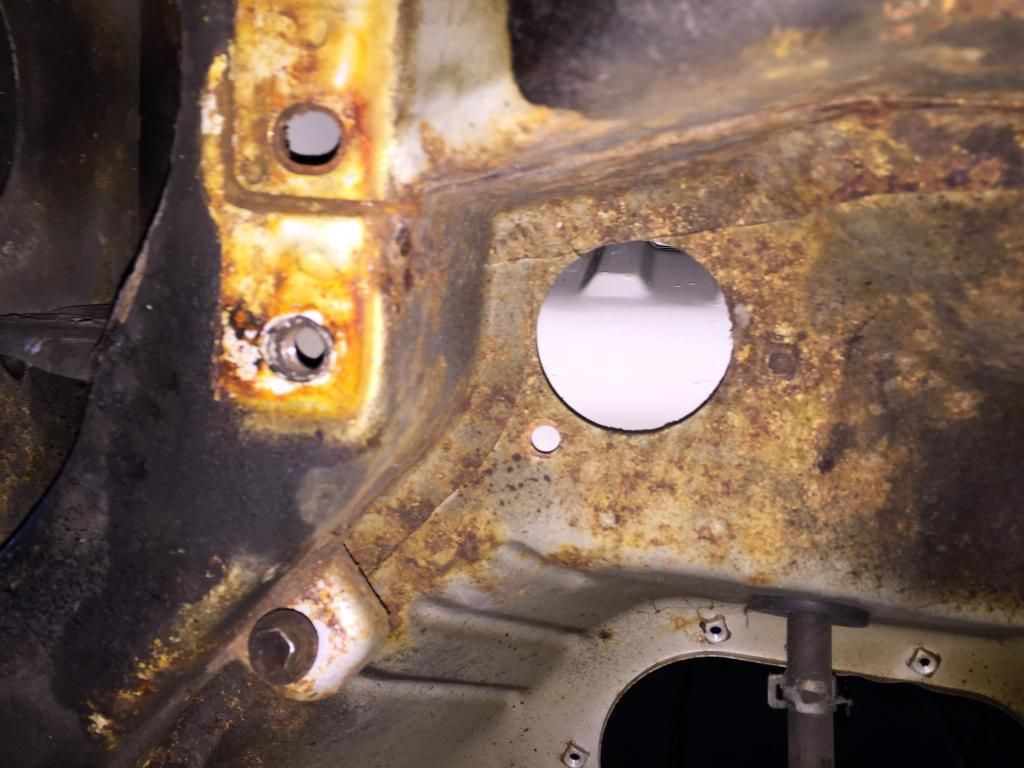
Ouch ...
Usual places...
|
|
| Logged |
|
|
|
Reply: 41 - 86 |
|
|
| clemdobain |
| Posted on: Monday, March 23rd, 2015, 10:52:49am |
|
|
|
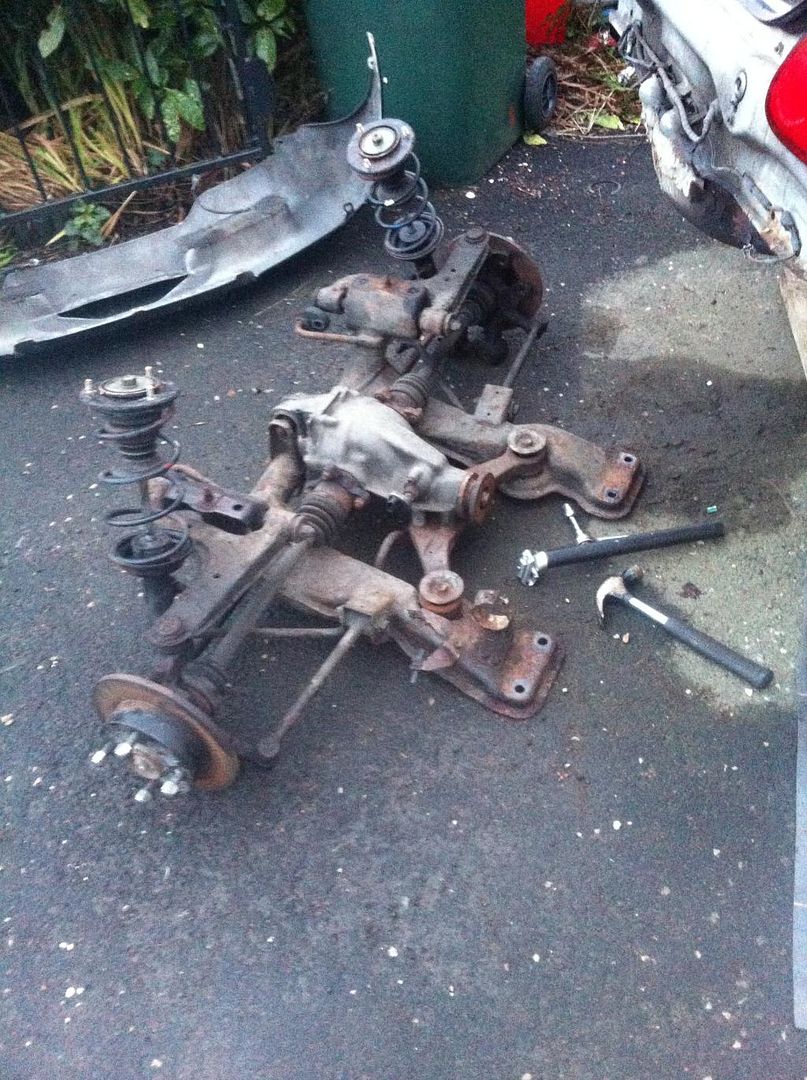
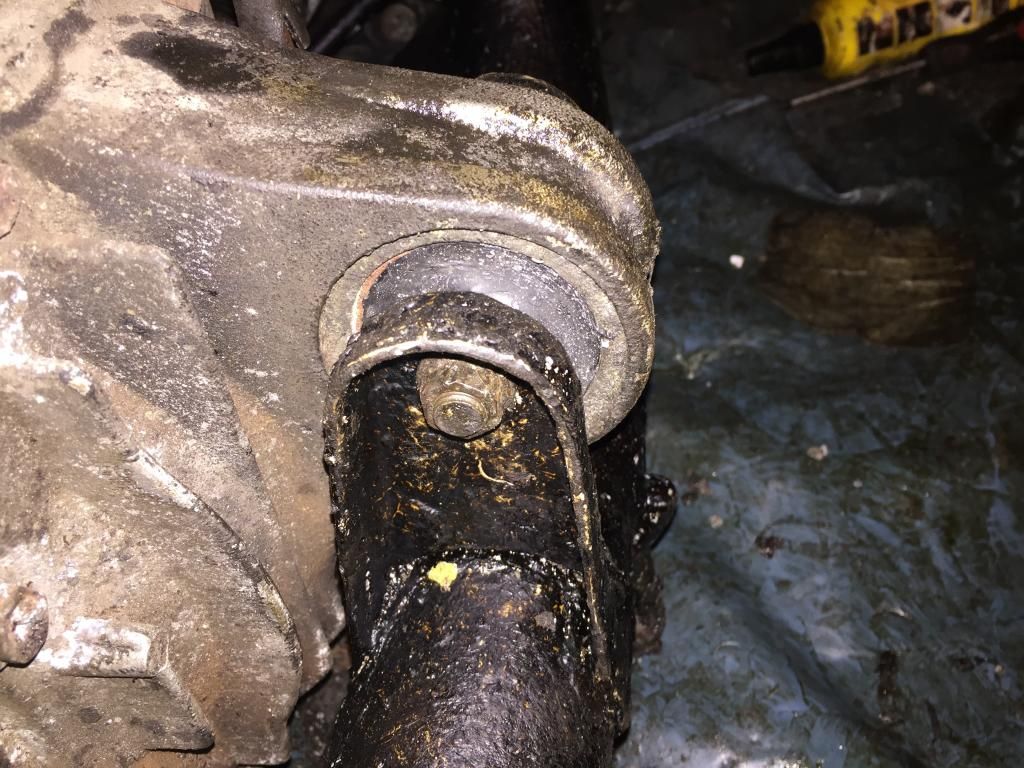
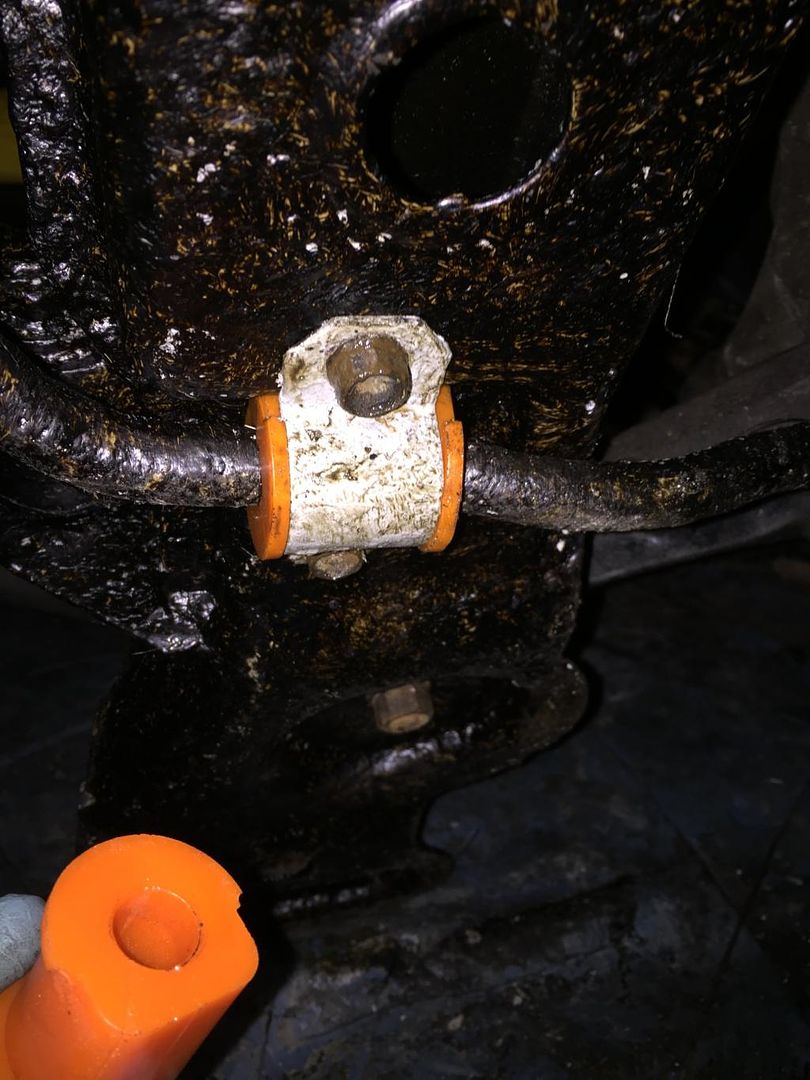
CHALLENGE ACCEPTED!!
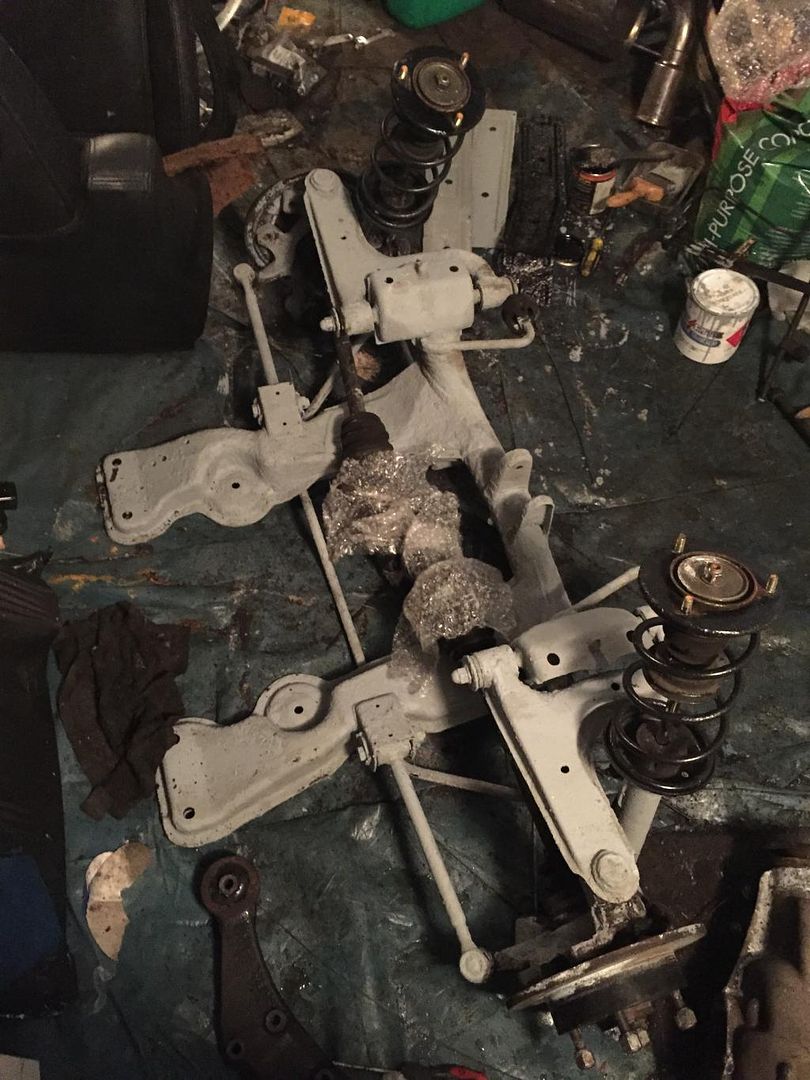
Diff bushes (along with nearside engine mount all remade with Polyurethane..

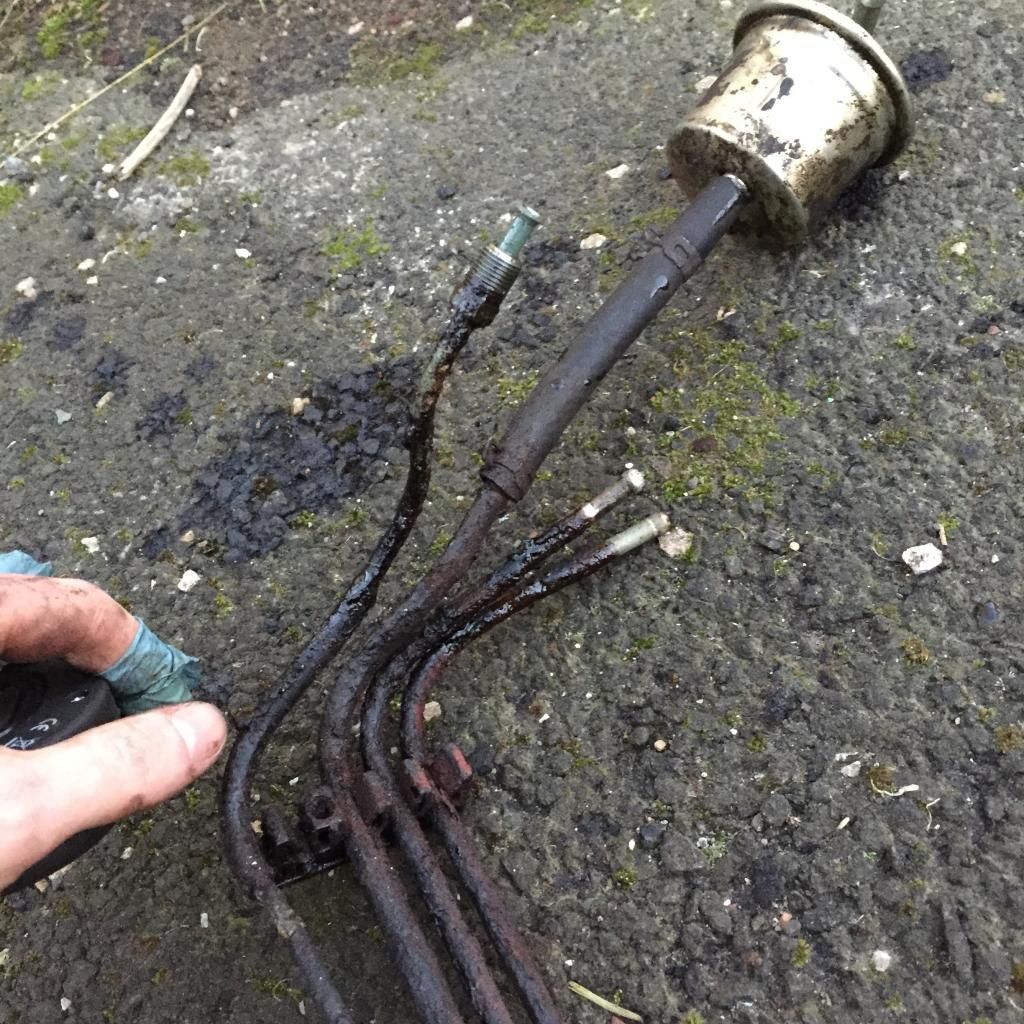
Got the fuel and brake lines removed (copper replacements made up)
Tank wire brushed, phosphoric acid rust killer applied then zinc phosphate primer applied with a final top coat of waxoil for good measure!!
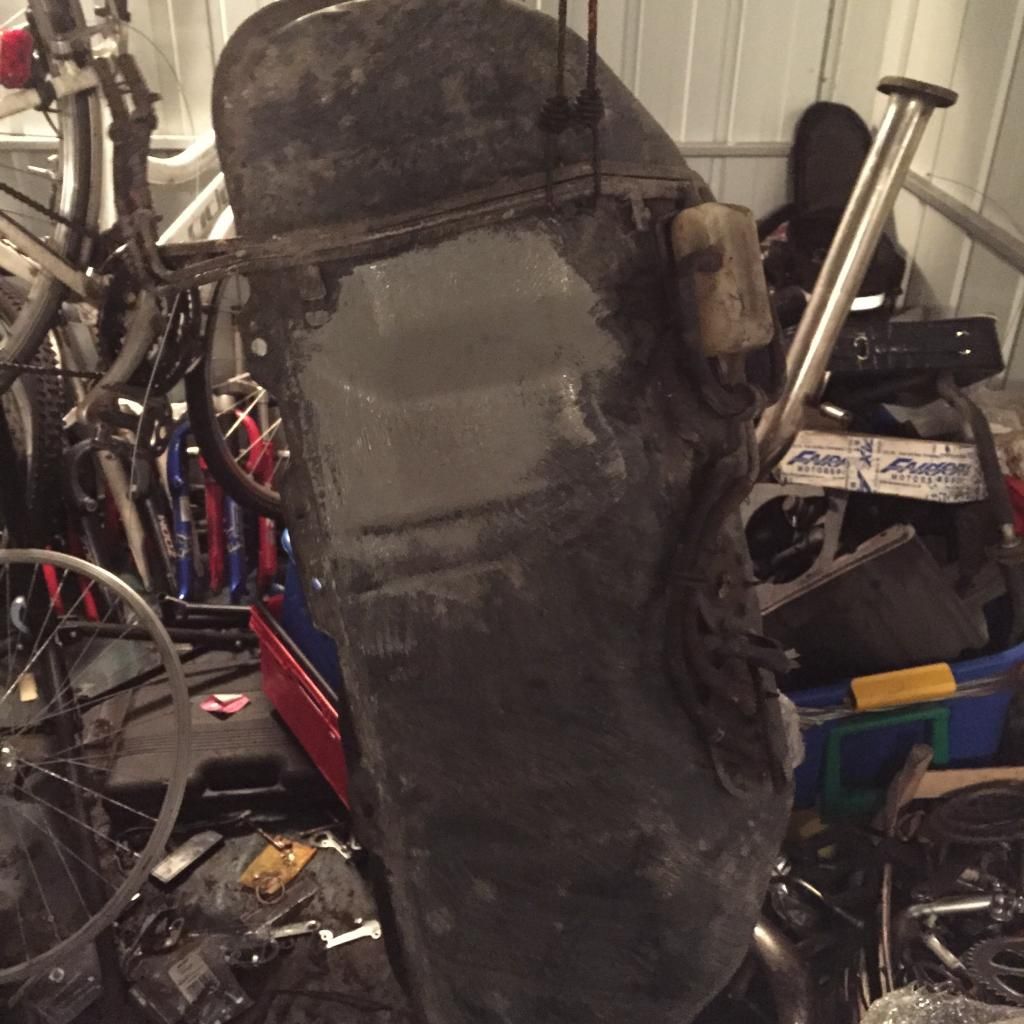
All done!
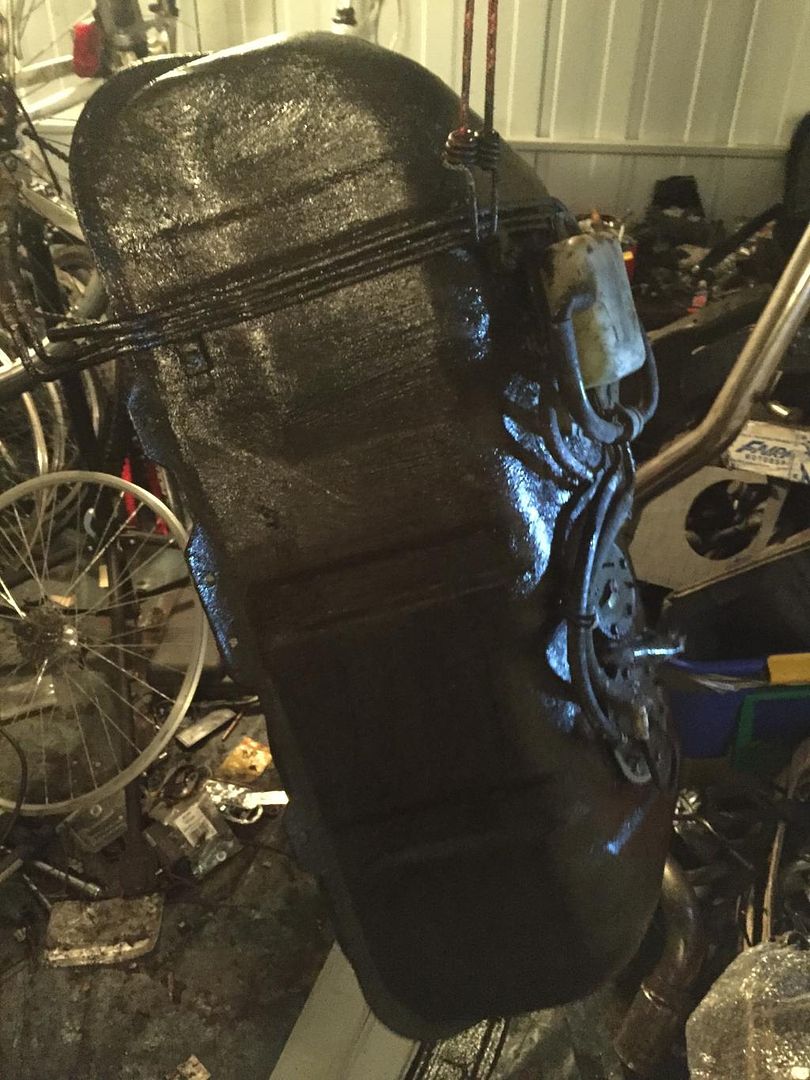
Same treatment for the brake and fuel line protector trays..
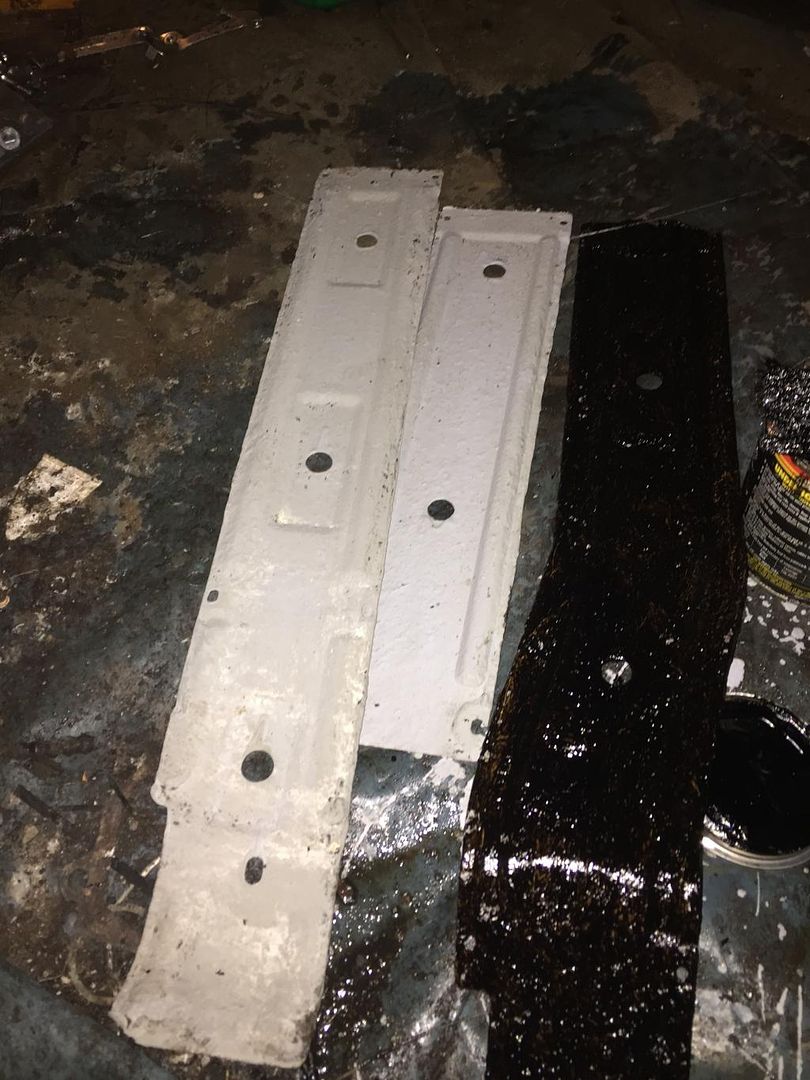
And the same for the subframe!
This took AGES btw 
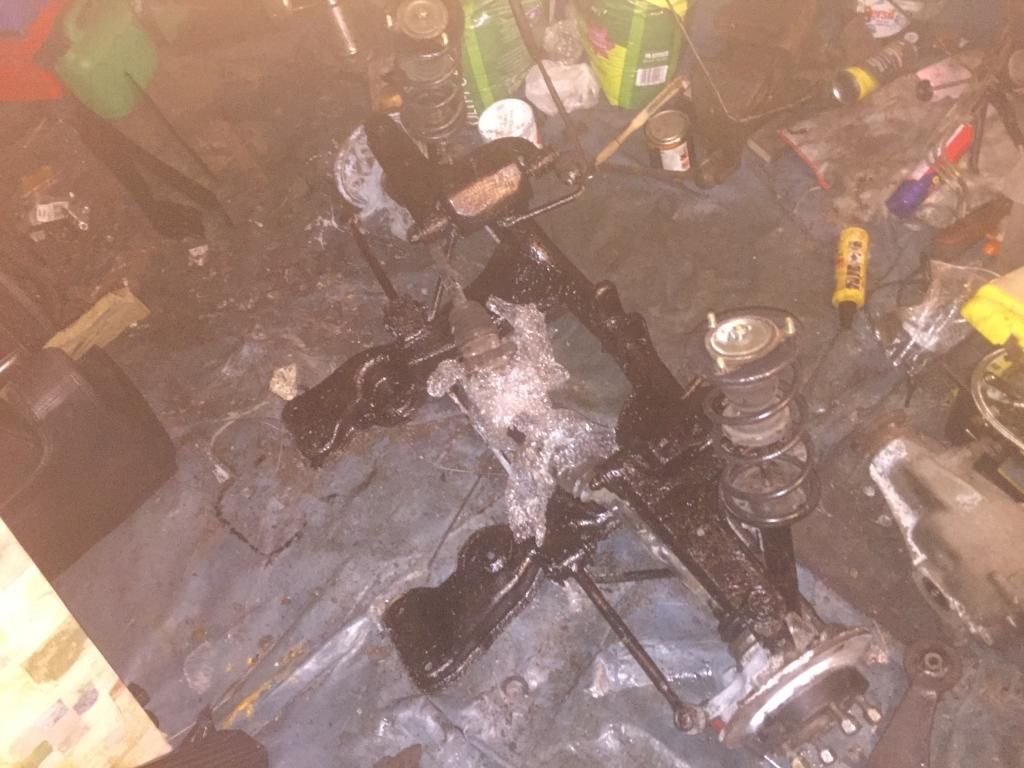
I don't really care about the finish just knowing it has lots of anti rust protection makes me happy!!
Diff back on the subframe with some lovely fresh oil
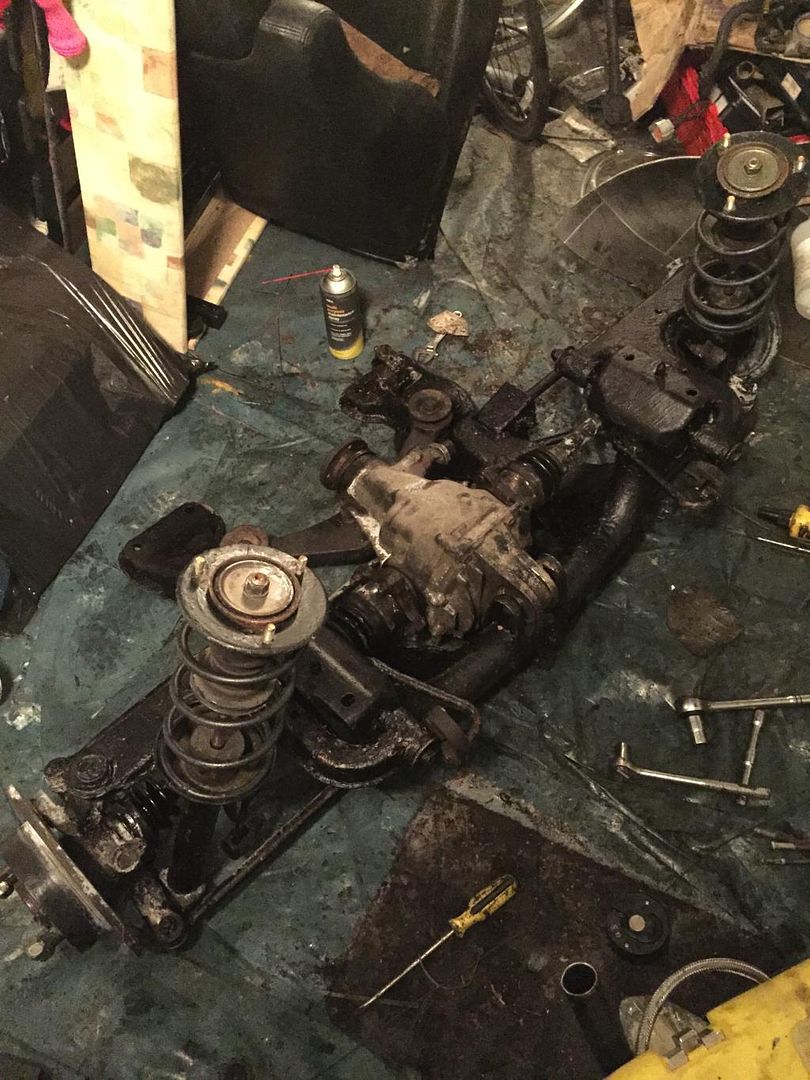
Looking good
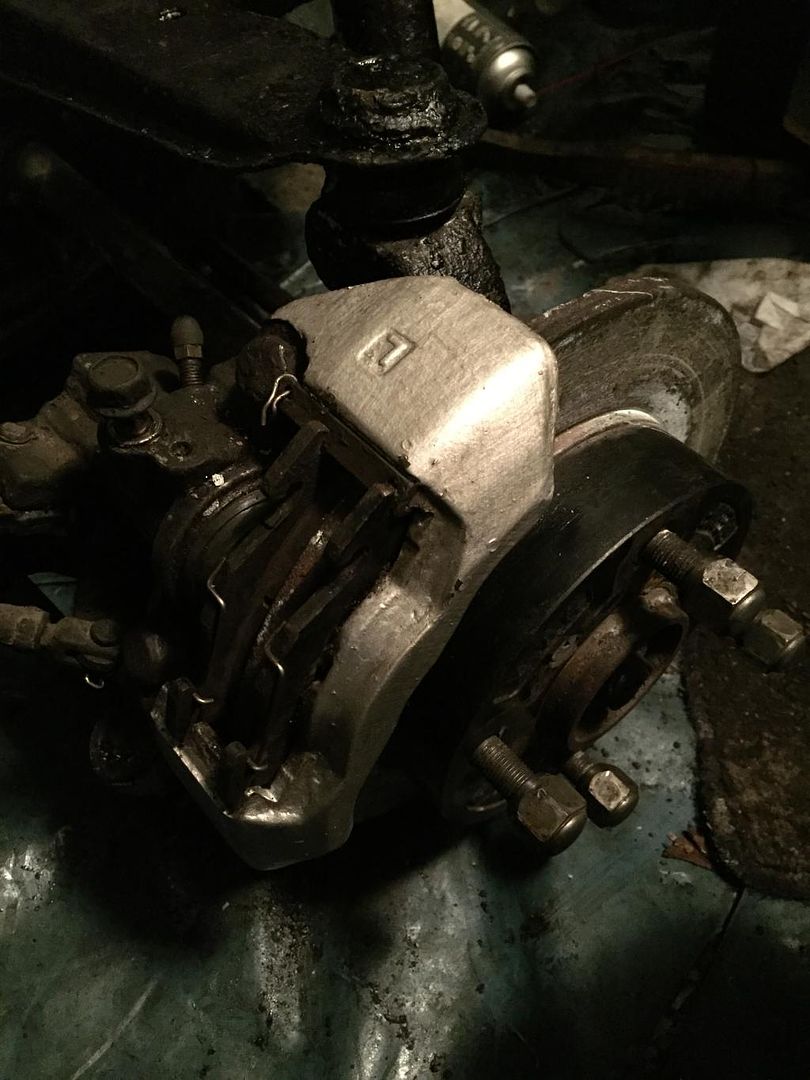
The calipers benefited from some nice clean boots and seals and a full strip down, clean up and lube! Oh and a quick lick of paint
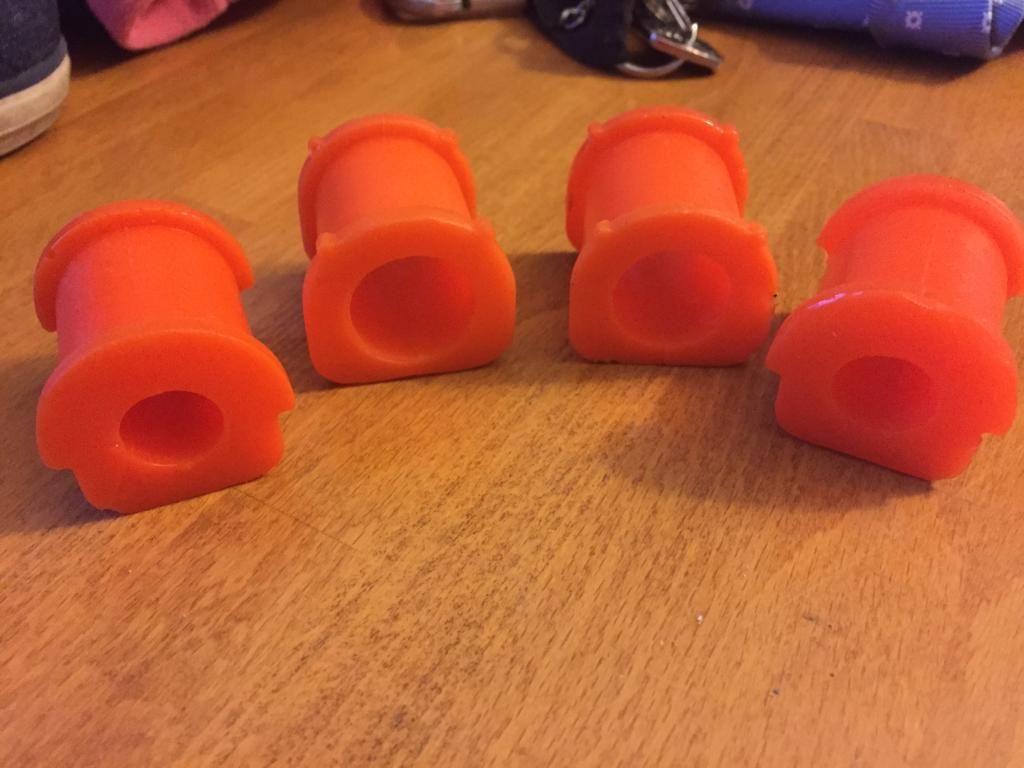
New polyurethane anti roll bar bushes going in!
 |
Last modified Monday, March 23rd, 2015, 10:54:46am by clemdobain |
|
| Logged |
|
|
|
Reply: 42 - 86 |
|
|
| clemdobain |
| Posted on: Monday, March 23rd, 2015, 11:00:53am |
|
|
|
Right rust lets be havin yeeee!
New brake lines are in also.
|
Last modified Monday, March 23rd, 2015, 11:02:13am by clemdobain |
|
| Logged |
|
|
|
Reply: 43 - 86 |
|
|
| clemdobain |
| Posted on: Monday, March 23rd, 2015, 11:07:33am |
|
|
|
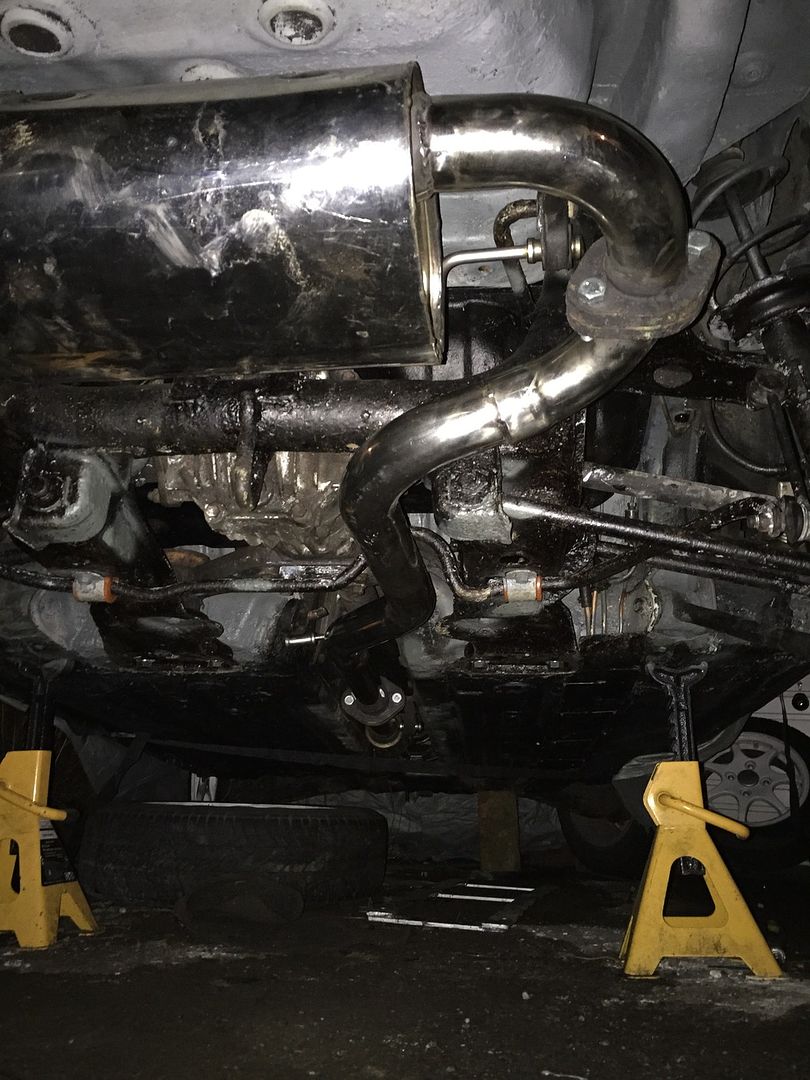
Subframe back in!! With exhaust just about (was very late at night at this point!) Also got some high tensile bolts and stainless spring washers for the subframe bolts
Lots of different colours of zinc primer and underseal but ill get them all tied in with a top coat once i get easier access and get use of my mates garage pit!
Getting very close to finishing the rear end after being off the road for the whole winter. Can't wait to get her out again!!
Thats the interior all put back together (apart form the hand brake gaiter since i need to adjust it) Notice the mold on the steering wheel (7 months of sitting closed up in the Scottish winter) Luckily Lord has a nice Nardi wheel he has kindly donated to the cause!

|
Last modified Tuesday, March 24th, 2015, 11:00:28am by clemdobain |
|
| Logged |
|
|
|
Reply: 44 - 86 |
|
|
| clemdobain |
| Posted on: Monday, March 23rd, 2015, 11:11:45am |
|
|
|
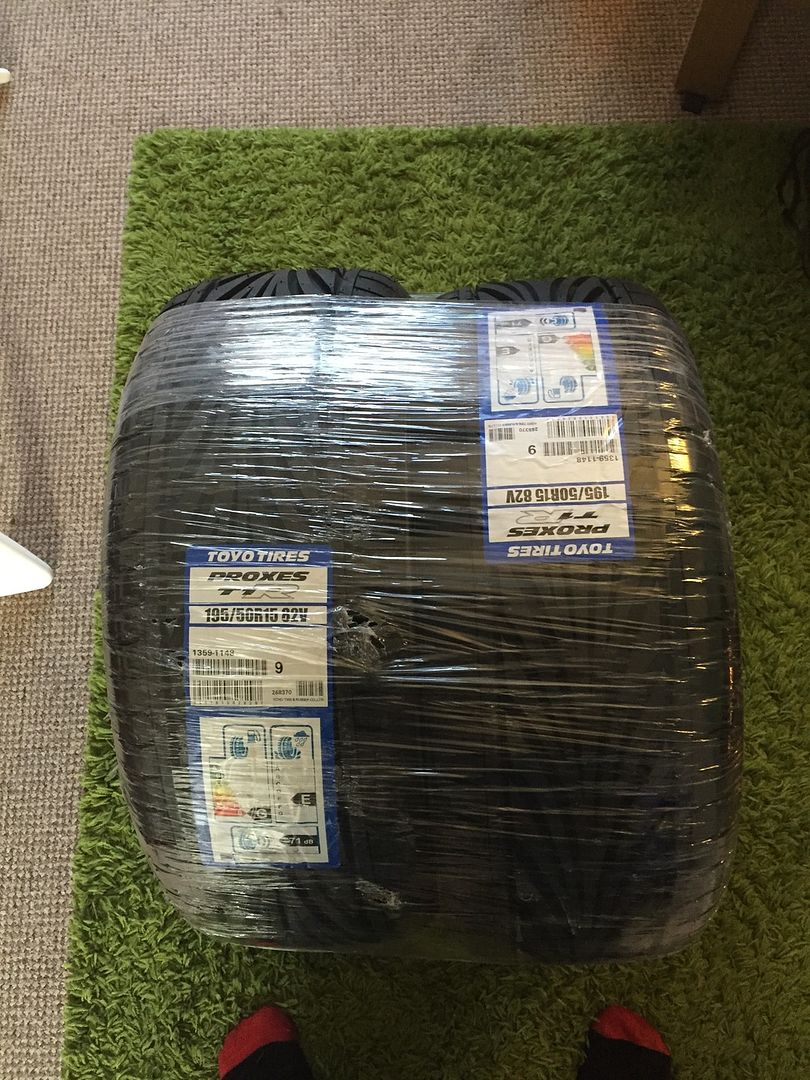
Next item on the agenda is to sort these out!!
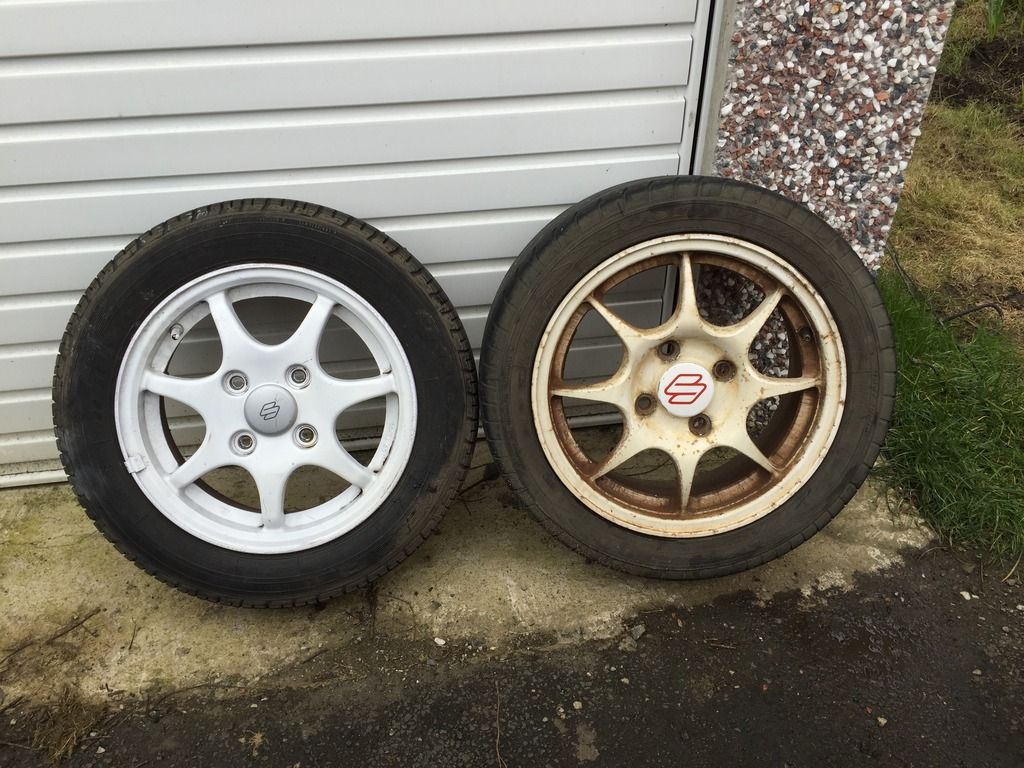
Going for black with a silver lip paint job.
Also got some brand new Toyo Proxes T1R in 195 50 15 on the way!
Should get a bit more grip
Also trying out my own underbody brace design, got it bolted in and it feels really solid so we shall see how it goes..
 |
Last modified Monday, March 23rd, 2015, 11:12:09am by clemdobain |
|
| Logged |
|
|
|
Reply: 45 - 86 |
|
|
| Andy |
| Posted on: Monday, March 23rd, 2015, 1:27:54pm |
|
|
Official C.O.C Contributor


Gender:  Male Male
Posts: 23604
Posts Per Day: 3.48 |
|
Nice rebuild of the thread too  Hopefully it won't get lost again! I will do a full back up when I get home tonight!!!!! Hopefully it won't get lost again! I will do a full back up when I get home tonight!!!!! |
Drop me a PM if you would like to be added to the ClubCappo Member Map. More details can be found here.
We now have an official Facebook group as well as a page! See here |
|
| Logged |
|
|
 |
Reply: 46 - 86 |
|
|
| clemdobain |
| Posted on: Monday, March 23rd, 2015, 5:01:33pm |
|
|
|
| Haha aye cheers Andy!! It actually helped me make sense of what I've done so far too!! |
|
| Logged |
|
|
|
Reply: 47 - 86 |
|
|
| clemdobain |
| Posted on: Wednesday, March 25th, 2015, 11:19:54pm |
|
|
|
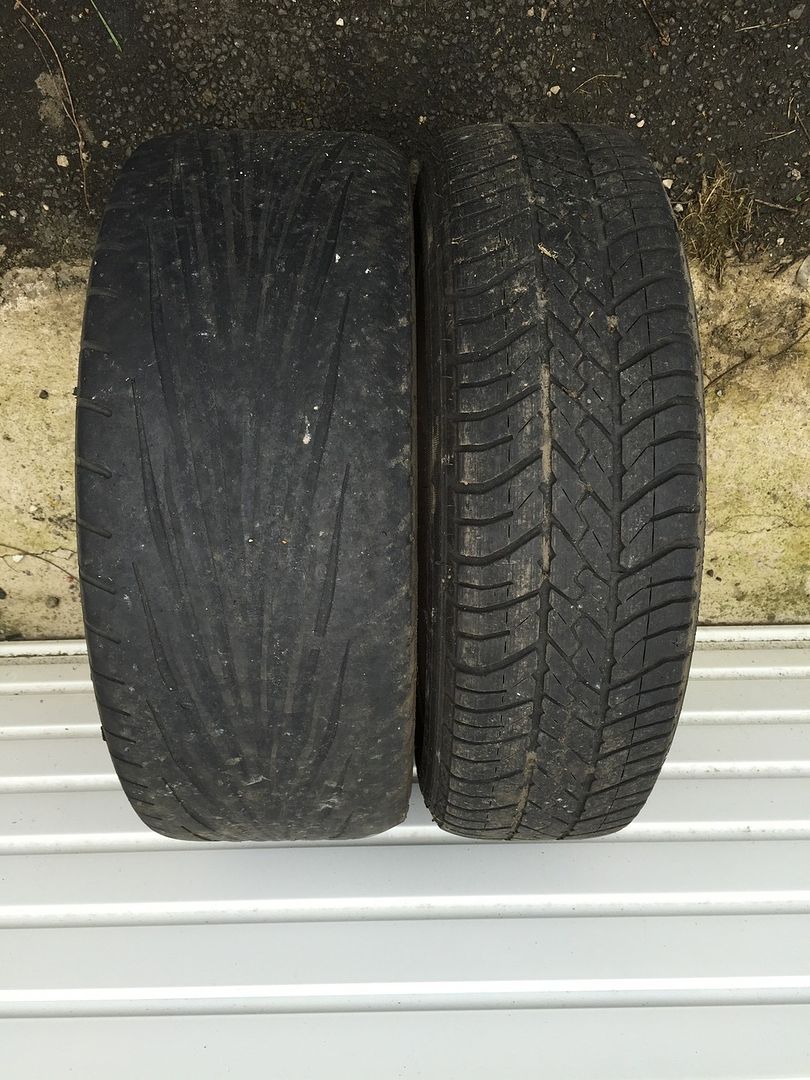
New shoes arrived!!
 |
|
| Logged |
|
|
|
Reply: 48 - 86 |
|
|
| clemdobain |
| Posted on: Monday, March 30th, 2015, 11:14:00am |
|
|
|
|
| Logged |
|
|
|
Reply: 49 - 86 |
|
|
| clemdobain |
| Posted on: Monday, March 30th, 2015, 11:26:30am |
|
|
|
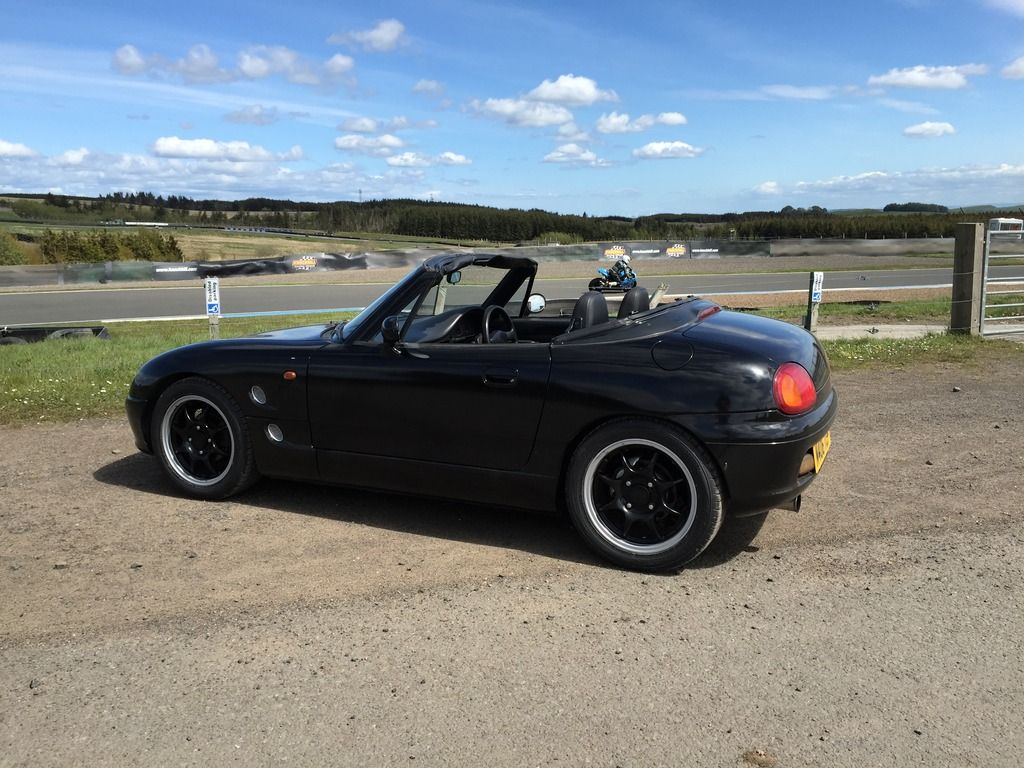
Got the tyres fitted on Saturday morning and got my first drive in her after the 7 month lay up/ rear end rebuild and LOVED EVERY MINUTE OF IT!!! Its easy to forget how awesome these cars are when you drive a 2.0 non turbo Subaru Forester family wagon every day!!
The new poly diff mounts, poly anti roll bar bushes, new diff oil, fresh rear calipers, new brake fluid throughout, wider wheels with sticky new tyres, and my home made tunnel brace all added together have made a HUGE difference to the feel of the car. It is a real pleasure to drive now and the best part is with the new boost controller its boosting nicely up to 1.0 bar AND HOLDING IT CONSTANT Its pretty terrifying at full chat on full boost! I gave an Audi S3 TFSI a real shock on the motorway
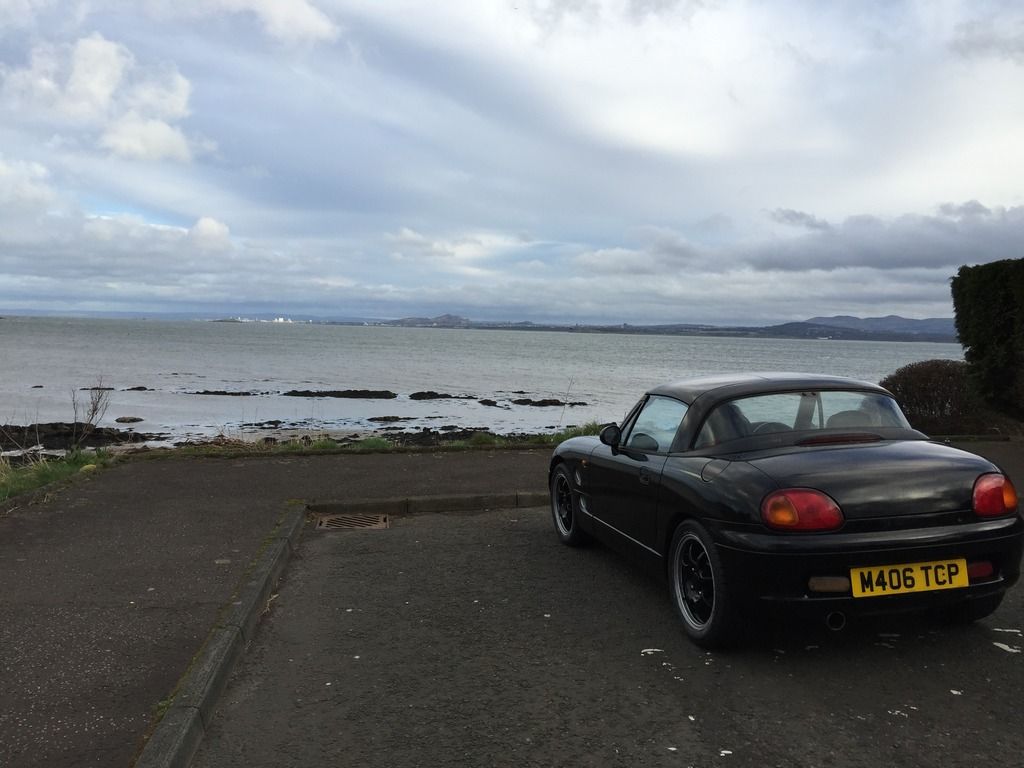
I'm a happy chappy, bring on the summer!!
|
|
| Logged |
|
|
|
Reply: 50 - 86 |
|
|
| lord |
| Posted on: Monday, March 30th, 2015, 3:05:12pm |
|
|
|
| That looks nice I have to say...... |
|
| Logged |
|
|
|
Reply: 51 - 86 |
|
|
| lord |
| Posted on: Monday, March 30th, 2015, 3:18:46pm |
|
|
|
How much would you at the boost controller adds to the 0-60 ?
Or General feel from the engine? |
|
| Logged |
|
|
|
Reply: 52 - 86 |
|
|
| clemdobain |
| Posted on: Tuesday, March 31st, 2015, 9:45:09pm |
|
|
|
| I had only driven the car a few times with the standard turbo and without the boost controller so obviously there is no comparison now that I have the CT9 fitted with the controller. However the original bleed vavle type I had previously was absolute turd in comparison to the new spring and ball type controller I have now. The bleed type did allow me to up the boost to 1 bar but it would quickly leak or bleed it off just as quickly as it built it up. The spring and ball type does spool up the turbo faster it seems and the main thing is it holds full boost right through the rev range which is AWESOME |
|
| Logged |
|
|
|
Reply: 53 - 86 |
|
|
| clemdobain |
| Posted on: Tuesday, March 31st, 2015, 9:46:33pm |
|
|
|
|
| Logged |
|
|
|
Reply: 54 - 86 |
|
|
| clemdobain |
| Posted on: Thursday, April 2nd, 2015, 4:07:23pm |
|
|
|
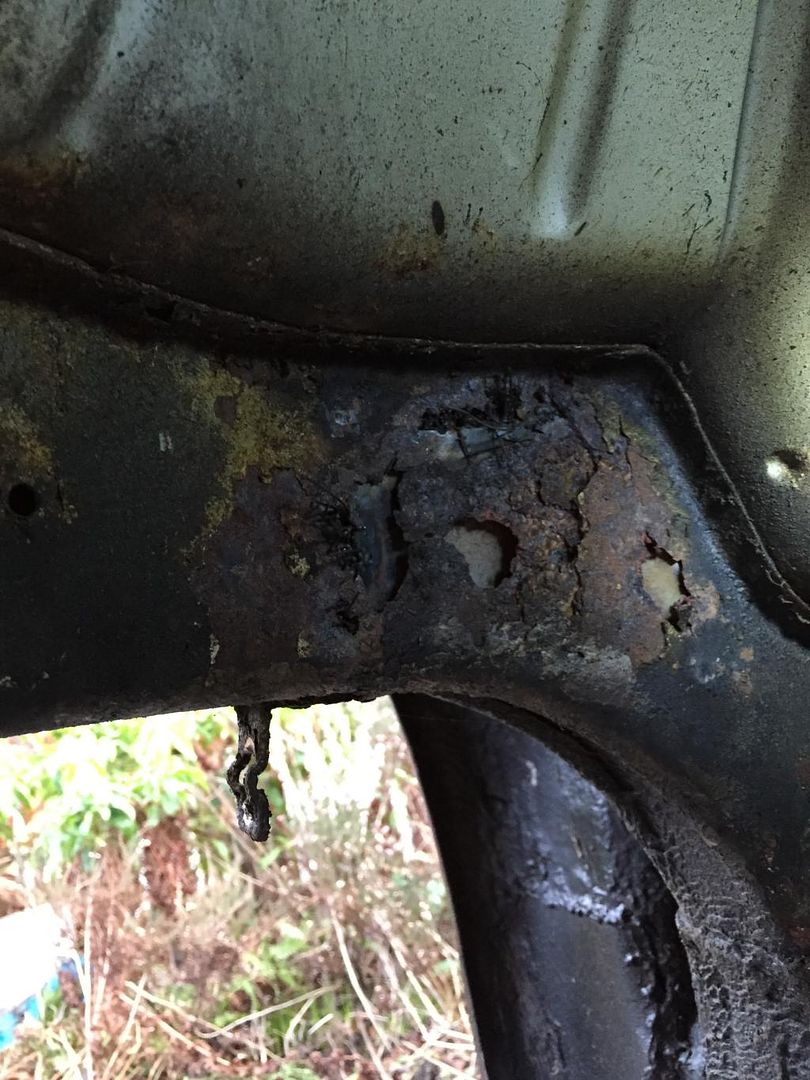
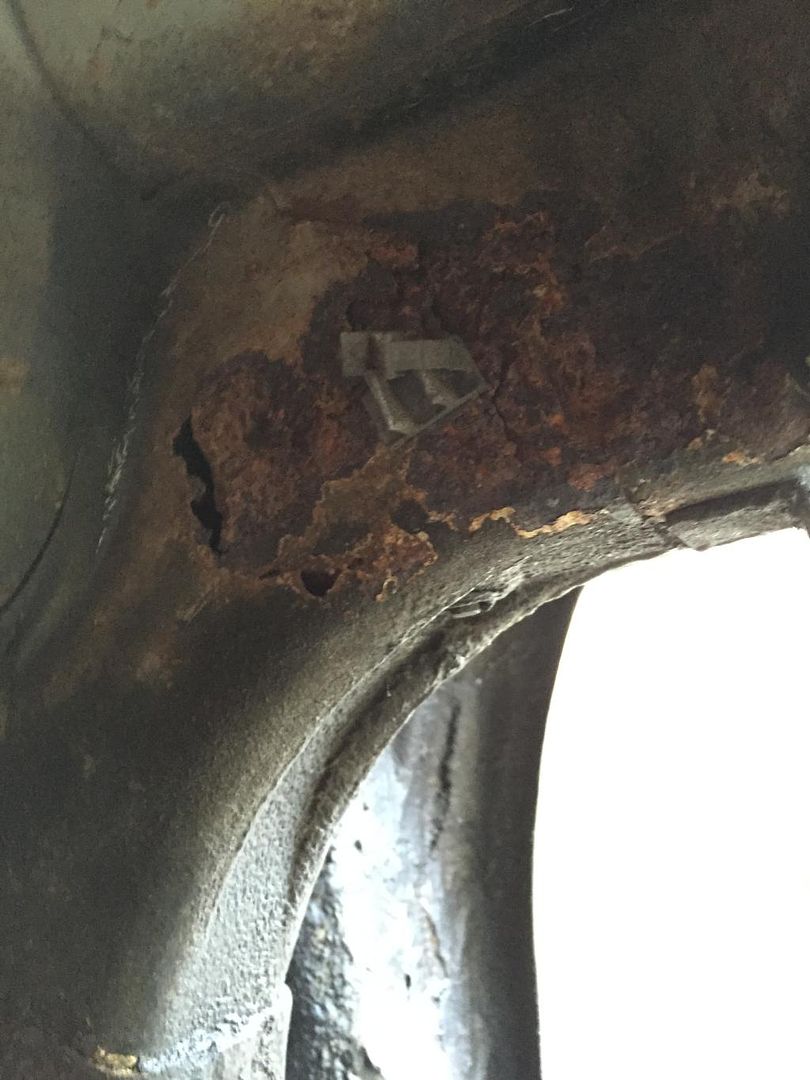
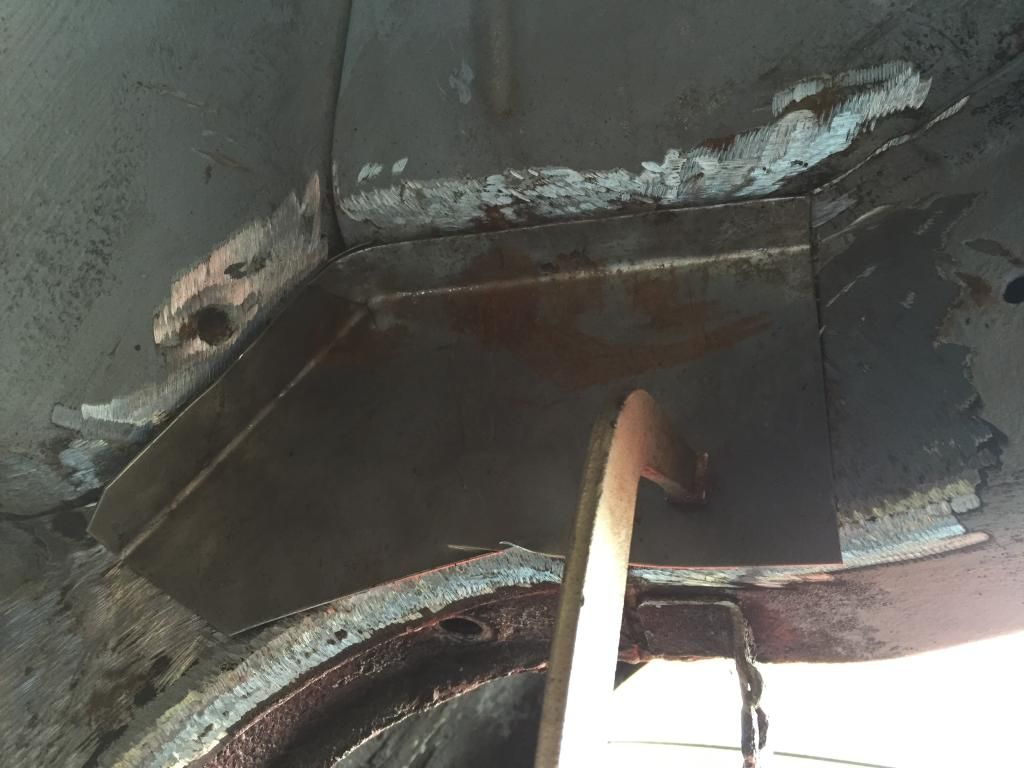
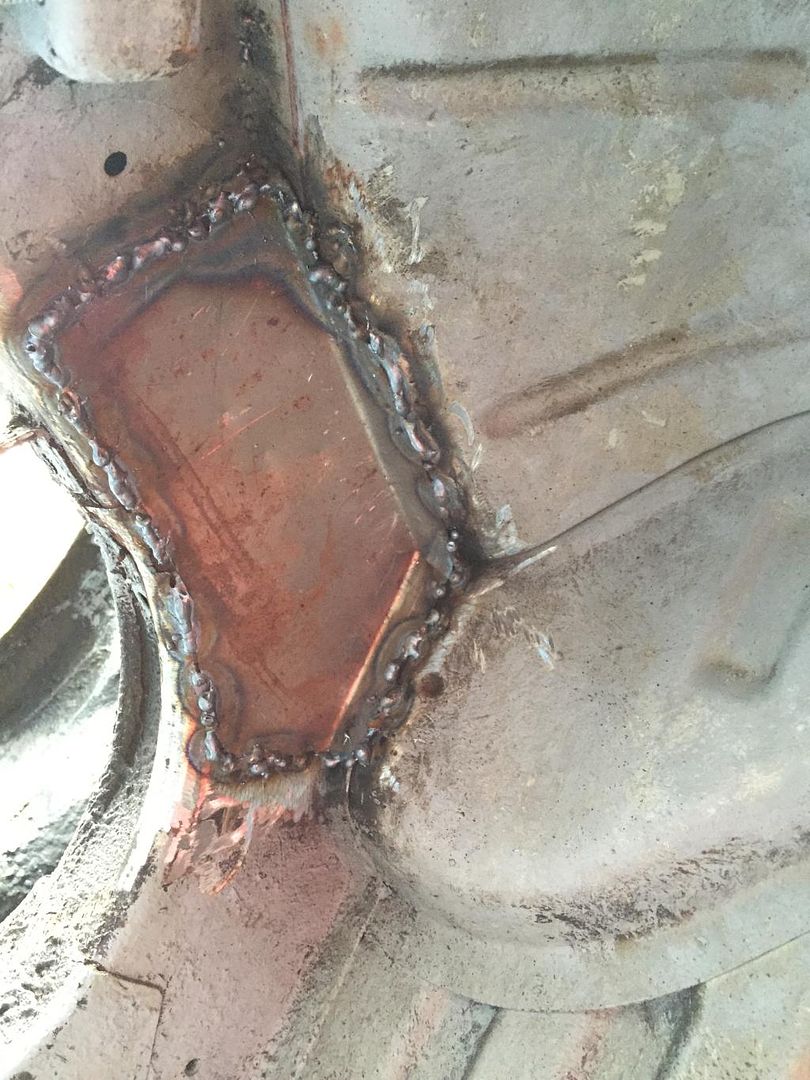
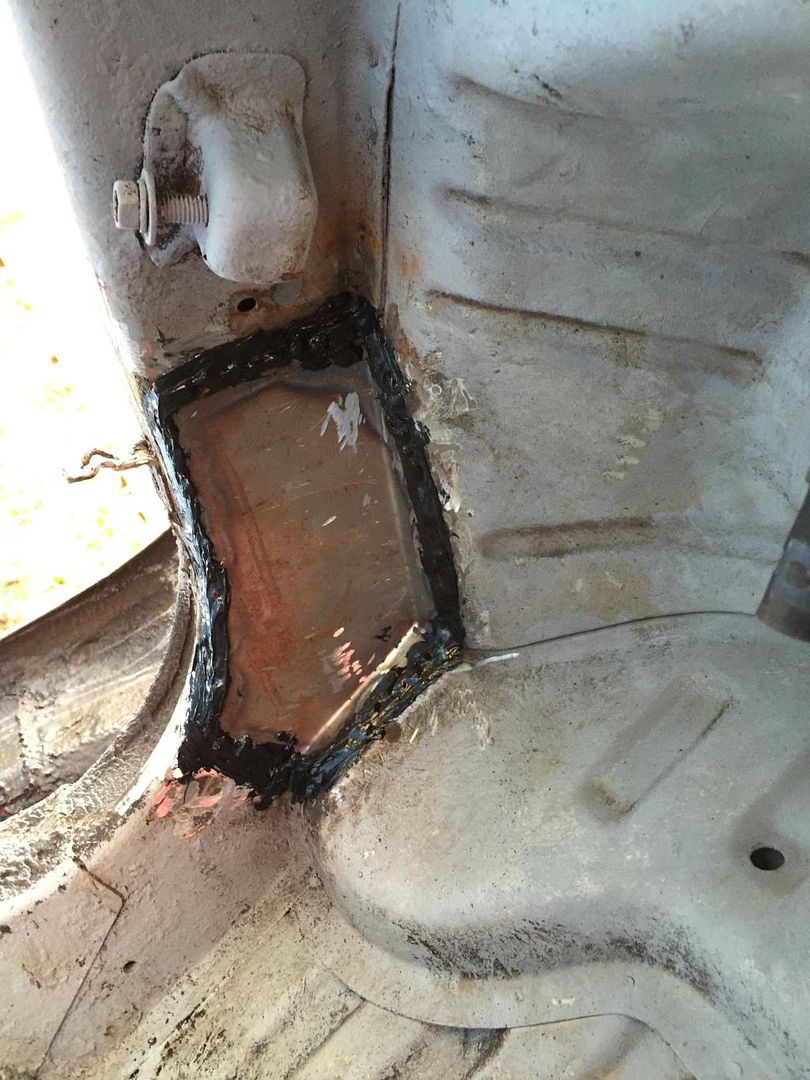
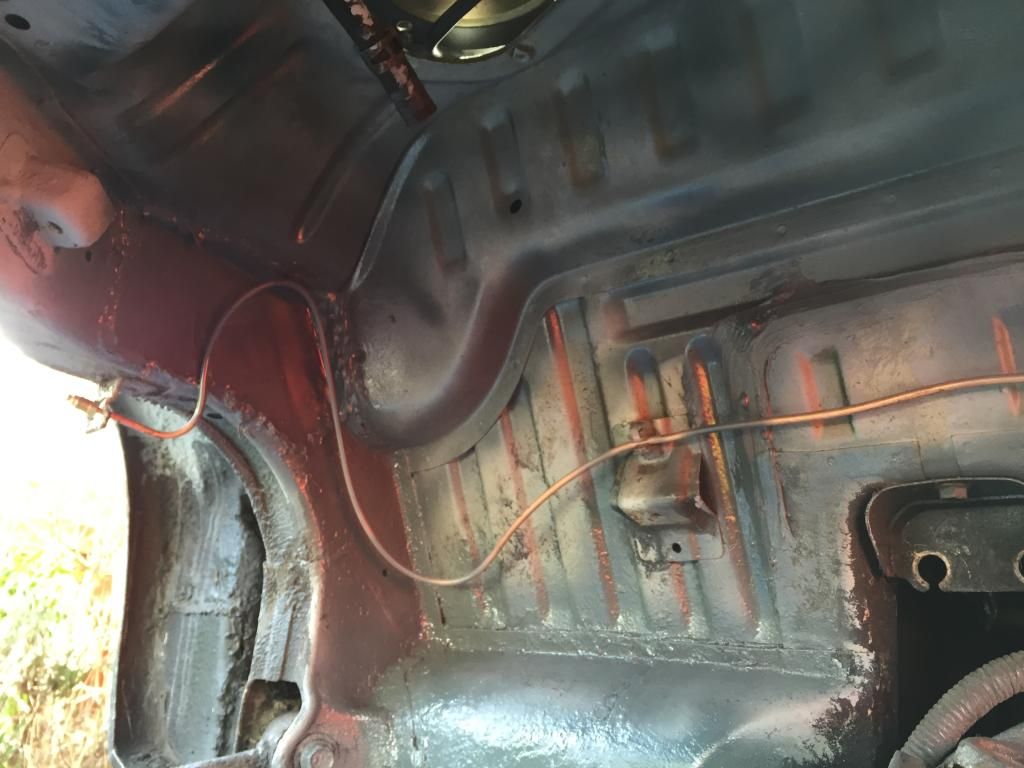
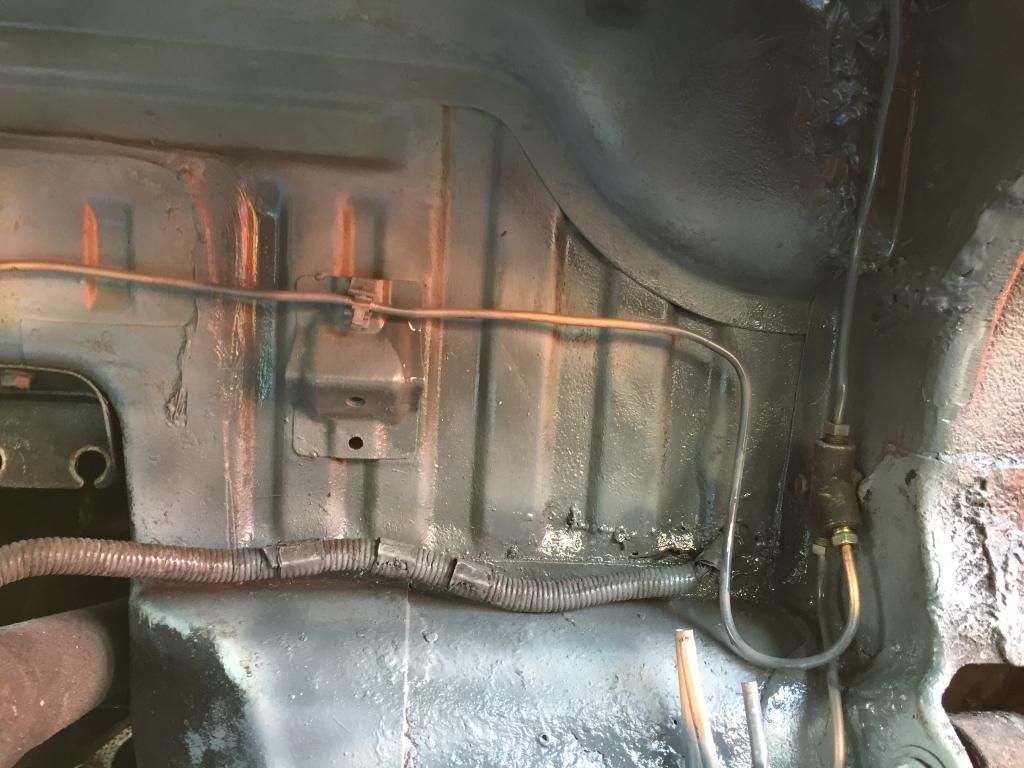
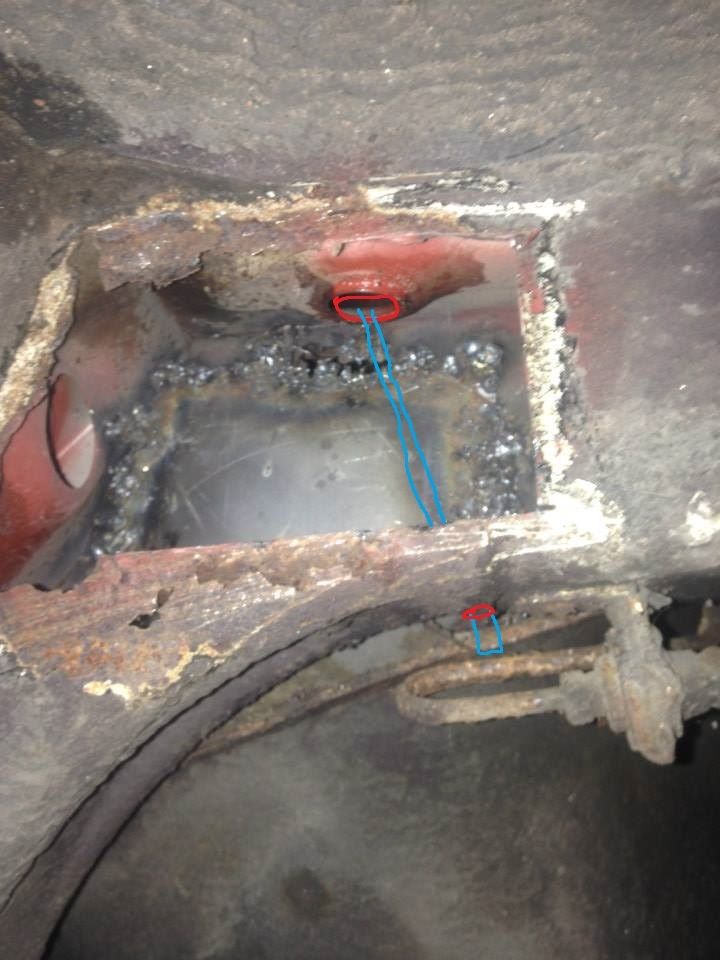
Just a little update... I've been experimenting with the rear window drainage holes I.E. the sole reason the cappuccino rots like hell behind the seats and around the rear sub frame mounting points on the floor.
Waaaaay back during the initial restoration we had cut a whole in the side of the one the rear chassis legs to remove the rotten metal and noticed the drainage funnel which drains any water that has collected away from the area where the rear window folds into / parcel shelf, directly into the rear chassis legs causing the ideal conditions for the rear end to rot from the inside out. As most if not all of you are already aware of this design flaw I'm sure you've either thought about doing or have done something to cure this problem.
I decided to run a simple rubber hose from the upper drainage funnel down through the chassis leg and out the bottom to allow water to drain through and keep the insides dry!
I have sealed the hose in both ends with polyurethane sealant so no more internal rusting of the chassis legs!!
The pic below shows the route of the hose through the leg. Conveniently Suzuki actually left a small drainage hole directly below so that's where the hose will emerge!
I will post up more pics of the completed job when done.
 |
|
| Logged |
|
|
|
Reply: 55 - 86 |
|
|
| lord |
| Posted on: Thursday, April 2nd, 2015, 6:37:33pm |
|
|
|
| That's very interesting that is......let us know how you get on |
|
| Logged |
|
|
|
Reply: 56 - 86 |
|
|
| clemdobain |
| Posted on: Saturday, April 4th, 2015, 10:53:10am |
|
|
|
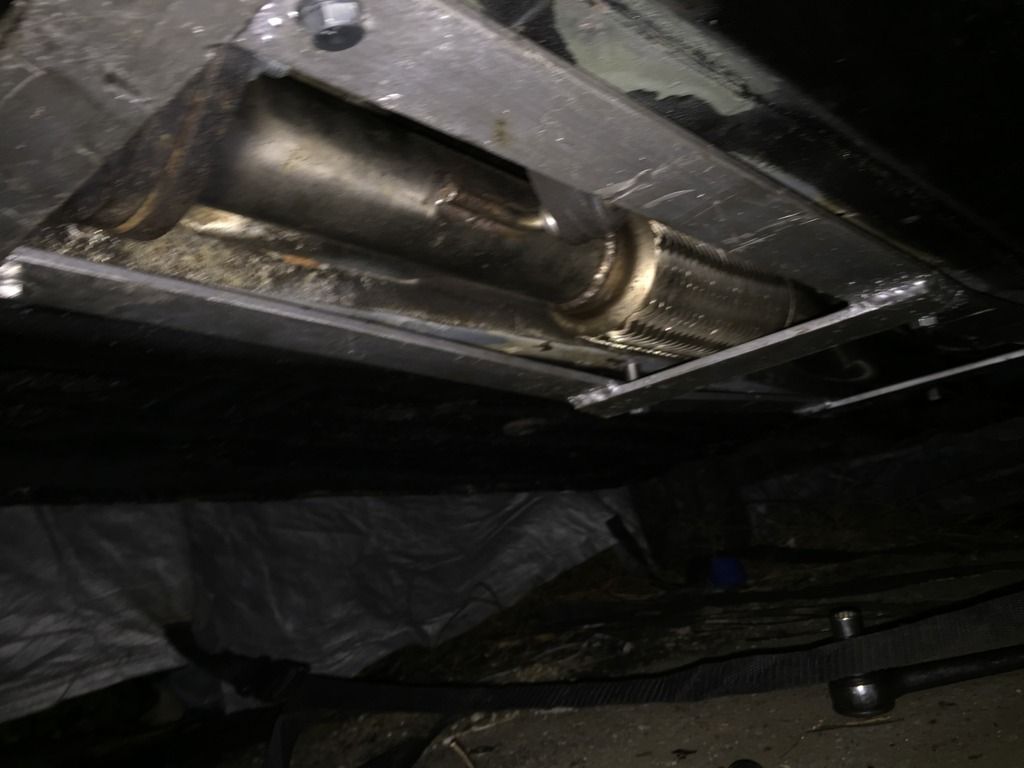
..... Out for an early morning blast
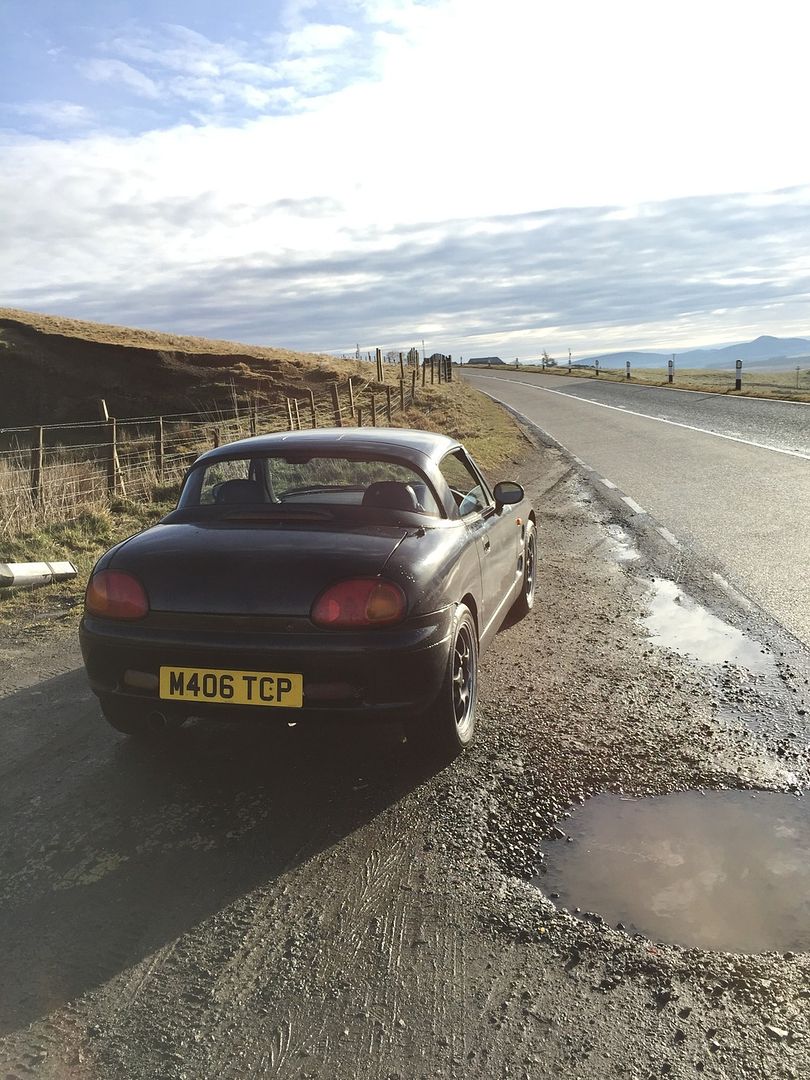
Exhaust clip...
 |
|
| Logged |
|
|
|
Reply: 57 - 86 |
|
|
| clemdobain |
| Posted on: Wednesday, April 22nd, 2015, 11:30:31am |
|
|
|
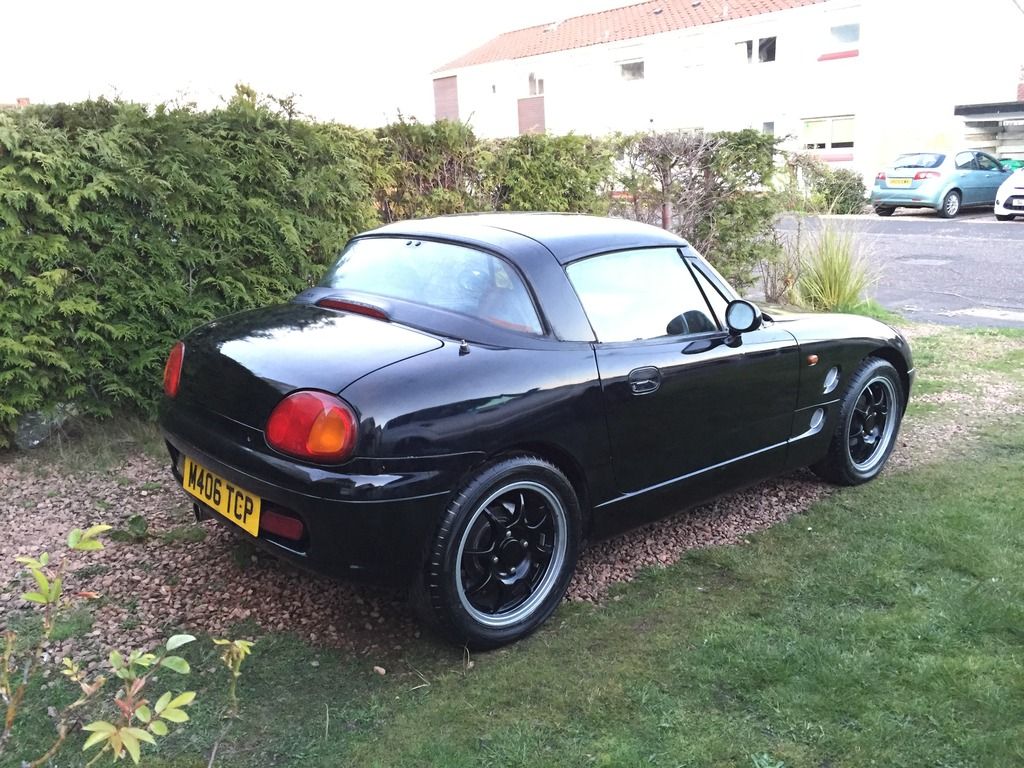
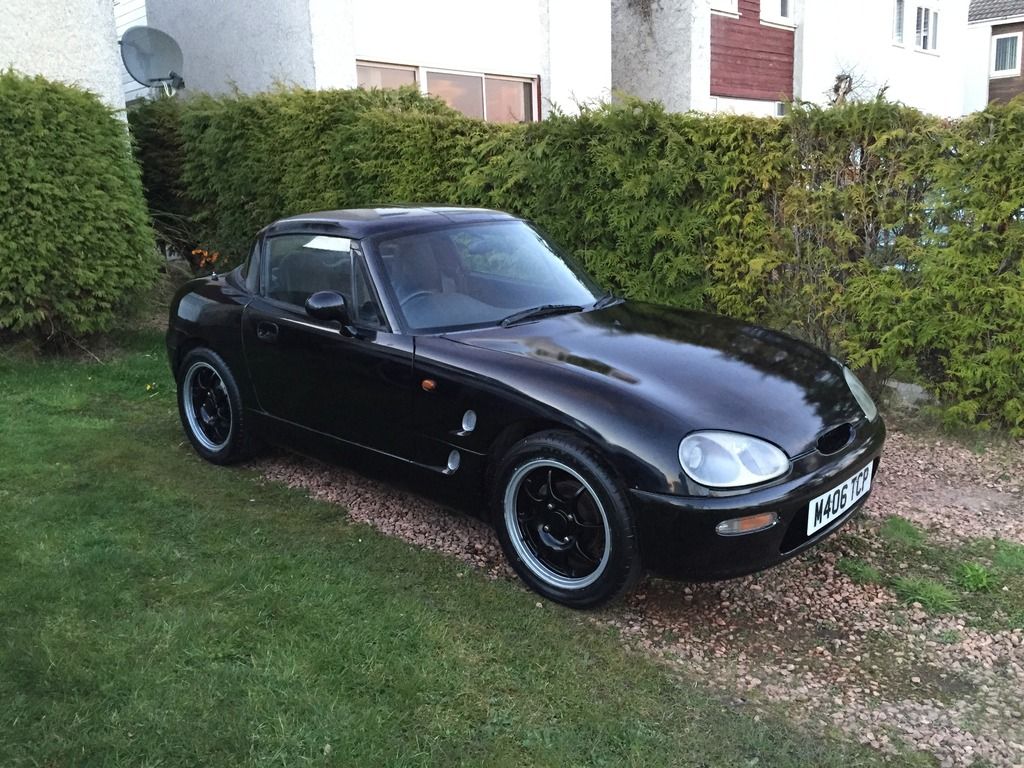
She's had some polishing love for a local car show....
 |
Last modified Thursday, May 14th, 2015, 11:01:05pm by clemdobain |
|
| Logged |
|
|
|
Reply: 58 - 86 |
|
|
| lord |
| Posted on: Wednesday, April 22nd, 2015, 5:39:31pm |
|
|
|
Looking decent that is
Well done
I'm putting my dc2 wheels on our new one! |
|
| Logged |
|
|
|
Reply: 59 - 86 |
|
|
| clemdobain |
| Posted on: Thursday, May 14th, 2015, 10:59:49pm |
|
|
|
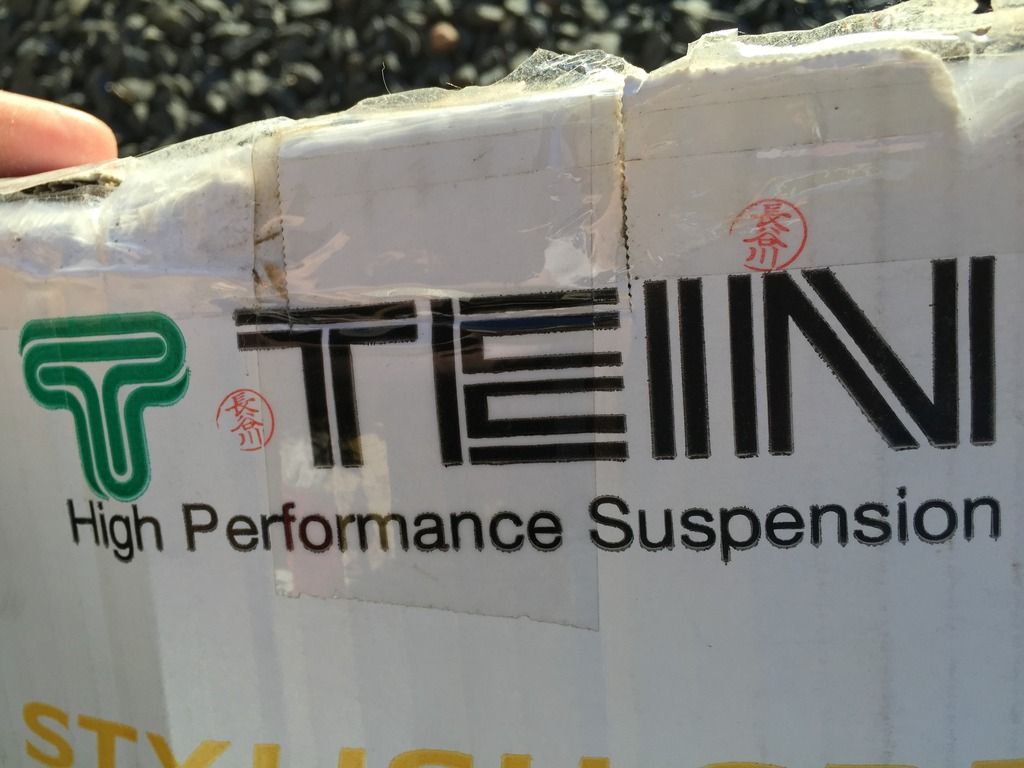
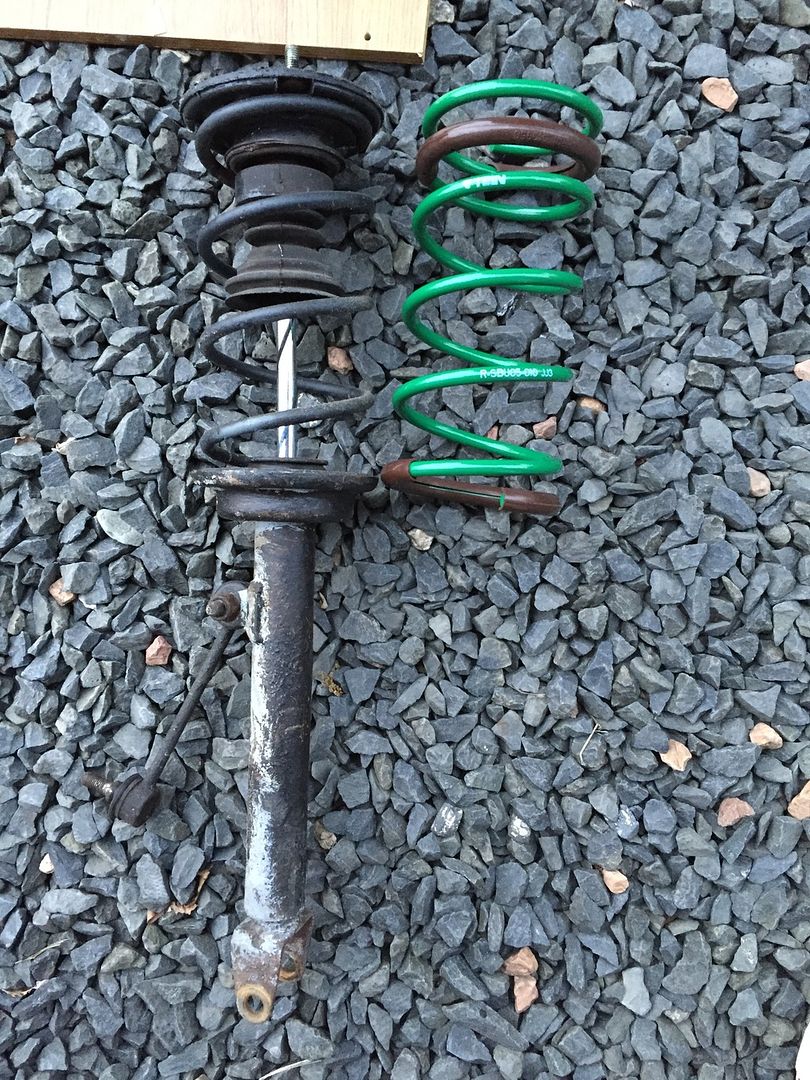
Spring update; a few more miles done now and even a few days commuting in the Cappo and all is well. I've now got myself a set of Tein lowering springs and have begun fitting them, starting with the rear.... 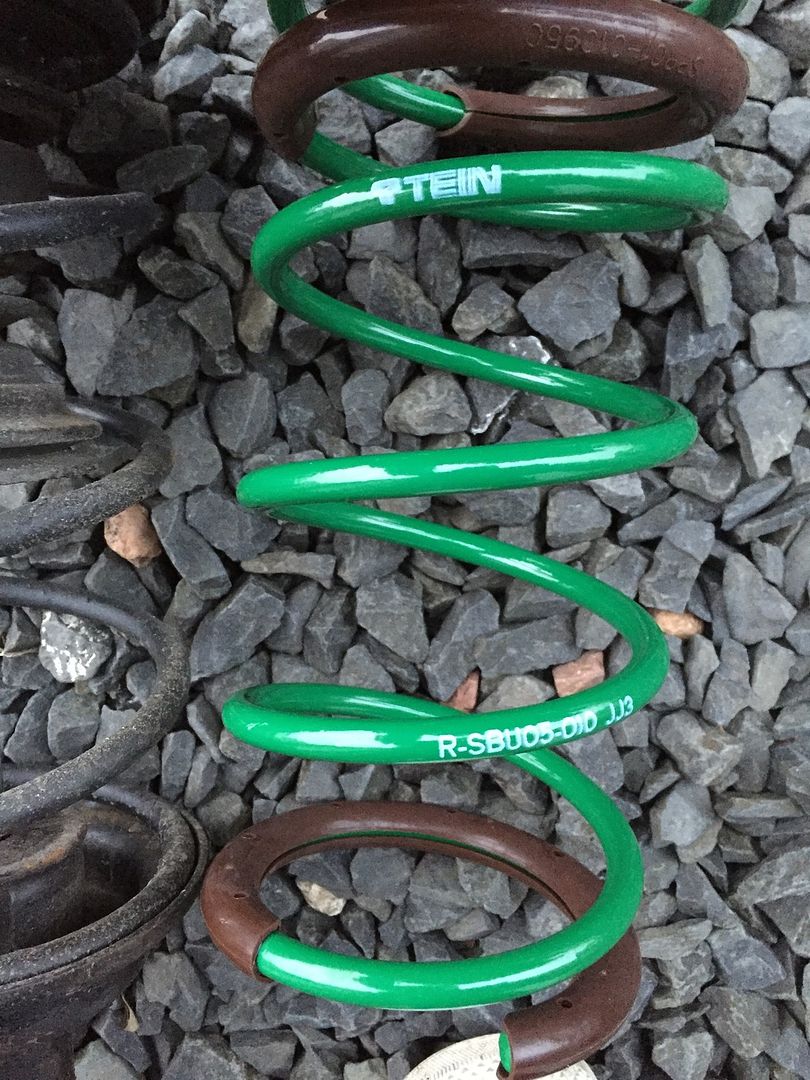
I am aiming to take the car out on knock hill circuit for a few hours at the start of June so I intend on getting the springs in and tested/bedded in before then 😀 |
|
| Logged |
|
|
|
Reply: 60 - 86 |
|
|
| suzukswiftgti |
| Posted on: Tuesday, May 19th, 2015, 4:14:32pm |
|
|
|
always liked tein keep going i would like to see this on a dyno
|
|
| Logged |
|
|
|
Reply: 61 - 86 |
|
|
| clemdobain |
| Posted on: Tuesday, June 2nd, 2015, 4:19:25pm |
|
|
|
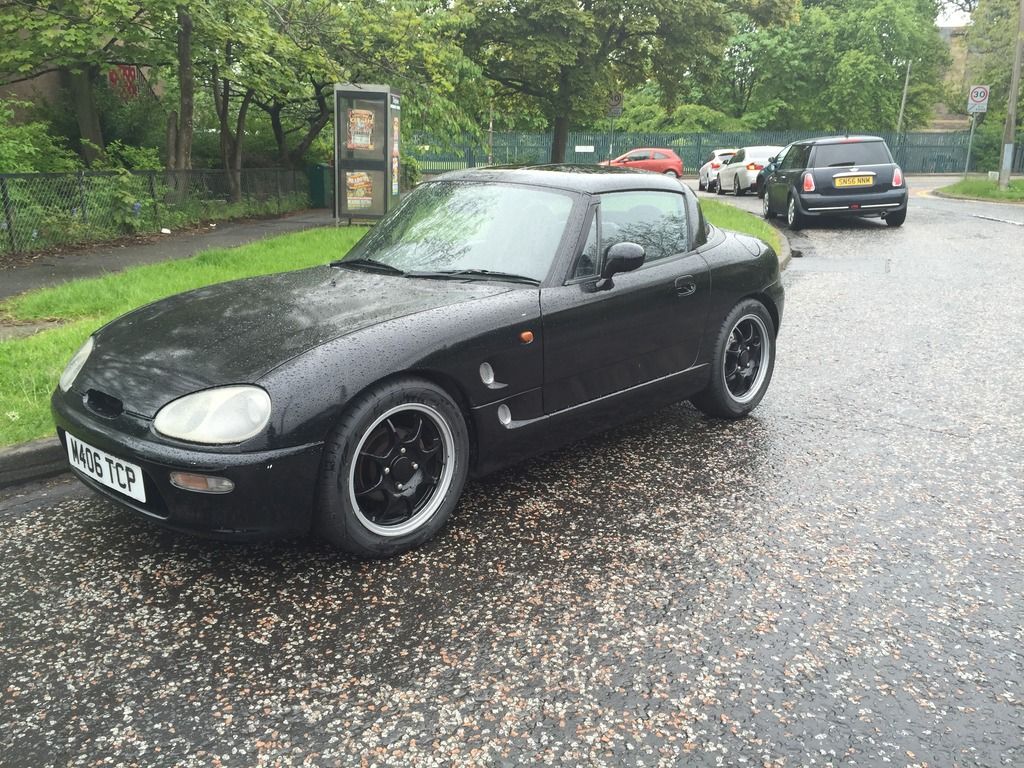
Springs fitted and the handling has hugely improved (not like it was bad with the last springs!) It is also siting nicely on the wheels with no rubbing noticed so far.
 |
|
| Logged |
|
|
|
Reply: 62 - 86 |
|
|
| clemdobain |
| Posted on: Monday, June 15th, 2015, 9:43:03am |
|
|
|
The day has finally arrived! DYNO TEST!!

As you can see from the glowing manifold she had a great time (and so did I watching!) We did two runs and on the first she managed 106bhp at the flywheel and around 80hp at the wheels (I will upload the dyno graph asap) so I'm over the moon with that result!! Considering the engine has 77k miles on it and I've basically bolted on the modifications she performed brilliantly. She peaked at around 1.1 bar and we could tell the turbo (CT9) was running at its maximum efficiency. The operator was amazed when I explained it was a 21 year old 657cc 3 cylinder
 |
Last modified Monday, June 15th, 2015, 10:09:22am by clemdobain |
|
| Logged |
|
|
|
Reply: 63 - 86 |
|
|
| Ricou |
| Posted on: Monday, June 15th, 2015, 5:47:57pm |
|
|
Maximum Member
Posts: 1110
Posts Per Day: 0.65 |
|
| Nice result ! |
|
| Logged |
|
|
| |
Reply: 64 - 86 |
|
|
| mattjohns |
| Posted on: Tuesday, June 16th, 2015, 7:53:05am |
|
|
Maximum Member
Posts: 1652
Posts Per Day: 0.94 |
|
| 80hp at the wheels is nice. 106 at the flywheel? This seems a bit much, you are not losing 26hp in the gearbox/diff. How did they arrive at this figure? |
|
| Logged |
|
|
| |
Reply: 65 - 86 |
|
|
| clemdobain |
| Posted on: Tuesday, June 16th, 2015, 10:33:27am |
|
|
|
| To be honest every dyno is set up differently to interpret the drivetrain drag by measuring the amount of time the wheels take to come to rest after the power run. The only way to get a reliable flywheel power figure is on an engine dyno so I'm sticking with my 80hp at the wheels figure and going by how quick and fun the car is thats enough for now haha! |
Last modified Tuesday, June 16th, 2015, 10:35:47am by clemdobain |
|
| Logged |
|
|
|
Reply: 66 - 86 |
|
|
| clemdobain |
| Posted on: Wednesday, June 17th, 2015, 6:28:11pm |
|
|
|
On another note I fitted my take off copy front splitter and I likey!!
 |
|
| Logged |
|
|
|
Reply: 67 - 86 |
|
|
| lord |
| Posted on: Wednesday, June 17th, 2015, 7:00:09pm |
|
|
|
I'm really loving your cappo!!!
Looks sporty but very simple. It's the wheels |
|
| Logged |
|
|
|
Reply: 68 - 86 |
|
|
| Bulletproof kimono |
| Posted on: Wednesday, June 17th, 2015, 7:38:26pm |
|
|
Big Member

Posts: 142
Posts Per Day: 0.11 |
|
I've enjoyed this thread enormously.
I've often been amazed at the way you (and your dad) just got on with getting it right and were unfazed (is that how you spell it?) when you found holes and yet another nest of rust where you were hoping for metal.
Then, when you get it all welded and put back together you make it go, stop, handle and look far better than it did when it left Mr Suzuki.
Now after all that greasing the least you can do is tell me where I'll get a splitter just like yours or preferably you could just take it off and post it to me. 
It's threads like yours, Low Standards and Suzukiswiftgti that keep a few of us sane while we're phoning the welder on speed-dial.
Anyway, it's better than giving up  |
|
| Logged |
|
|
| |
Reply: 69 - 86 |
|
|
| suzukswiftgti |
| Posted on: Wednesday, June 17th, 2015, 10:51:36pm |
|
|
|
| great stuff i m also always checking your tread for updates still waiting for mine from the welders hope to continue soon |
|
| Logged |
|
|
|
Reply: 70 - 86 |
|
|
| clemdobain |
| Posted on: Thursday, June 18th, 2015, 7:58:47am |
|
|
|
Thanks folks!! That means a lot! I can never tell if I'm just writing a diary for myself or if people are actually following the "story!" Well there is plenty more to come, especially in the months ahead as when winter hits again the engine will be coming out and getting some internal treats!! I'd really love to get 100hp to the wheels...
I love your honesty kimono!!! Haha! The splitter is a copy of the Take Off one that a member made from fibreglass some time ago, I forget exactly who it was but i know they made a few and they are doing the rounds among the Cappo community!! My advice for any random or rare parts is to keep an eye on eBay and the forum for members passing on their goods, I've got all my parts this way. |
Last modified Thursday, June 18th, 2015, 7:59:22am by clemdobain |
|
| Logged |
|
|
|
Reply: 71 - 86 |
|
|
| clemdobain |
| Posted on: Tuesday, September 15th, 2015, 1:24:19pm |
|
|
|
Just a little update as the "summer" comes to an end! I've had the car out as much as possible and made it to a few shows around Scotland (not entered just attended). She's been running perfectly and I've even turned up the boost recently to around 1.2/1.3 bar but I think the turbo is really at its peak so a hybrid may be on its way eventually!!!
I realised I hadn't uploaded my dyno graph also so here it is....
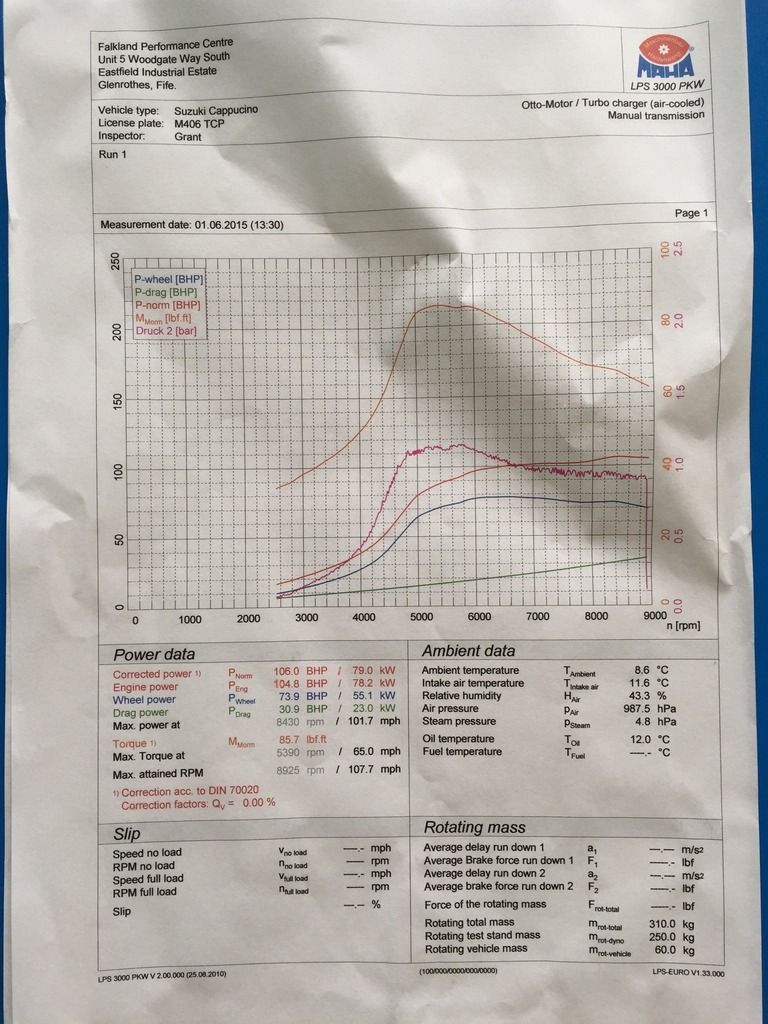
Any dyno geniuses feel free to analyse the graph and let me know your thoughts on making more power!!!
Also here are a few more pics of the summer fun!!

Also fitted the new polyurethane front anti roll bar bushes and cleaned up the front end slightly
|
Last modified Tuesday, September 15th, 2015, 1:25:03pm by clemdobain |
|
| Logged |
|
|
|
Reply: 72 - 86 |
|
|
| marcains |
| Posted on: Monday, October 12th, 2015, 9:21:02pm |
|
|
|
| what ECU are you running? seems like the boost is dropping off.....should be able to hold peak boost well on the CT9, running closed loop or open loop control? I'd be interested in having the car in our workshop to get some mapping done on the dyno if you ever need to! |
|
| Logged |
|
|
|
Reply: 73 - 86 |
|
|
| clemdobain |
| Posted on: Tuesday, October 13th, 2015, 10:16:13am |
|
|
|
I'm currently using the N2 ECU (closed loop) which by the looks of it has an OK map to handle the CT9 however i'm sure a fully mapable ECU would give better results. The previous owner of this kit had the AFR's checked with the N2 and it was fueling well at 1.0 bar but obviously it can't handle the increased flow higher up in the revs.
I've considered selling the N2 on to fund a standalone ECU purchase but haven't looked into finding local tuners or ECU options quite yet.
Where is your workshop and do you have any ECU recommendations? I know an ECU is only as good as the tuner who maps it so I don't really mind what is used as long as the tuner has experience in setting it up. Also having plans for more internal engine work in the future, a mapable ecu would be great to allow the freedom of tweaking!
Any comments and suggestions welcome!
|
|
| Logged |
|
|
|
Reply: 74 - 86 |
|
|
| marcains |
| Posted on: Wednesday, October 14th, 2015, 9:44:44pm |
|
|
|
We're based in Winchester, possibly a little too far for you to come, we're specialised in the Megasquirt application and have fitted and mapped to many different cars as it's effective and generally fits within our customers price range and does everything you need it to, there are many options on the ECU though and I've noticed alot of people use the Adaptronic with these little things, however, I personally wouldn't rate a Adaptronic over an MS2, and the MS3 is an excellent ECU which is much better still (although obviously higher cost). With a cappuccino and the lack of needing anything overly complex personally I'd suggest (and I'm actually going to use myself when I get time to play on my own car) would be the MS2. If the car is set up using high octane using a knock sensor (one for the tuner to actually listen to the engine, you can essentially have an incredibly safely tuned car, running decent power and no knock. Run a wideband just to keep an eye for any major changes (most widebands are never completely accurate)
Ideally if you build a forged engine you will want a standalone as you'll then be able to extract the most from the engine. You'll also be able to tweak it to suit the engine specifically (every engine runs differently. you can never run a base map and have it run perfectly, we tune MX5's on a daily basis and can never just use a previous map for the same setup on a different engine, how an engine has been run in, assembled, tolerances, everything makes a difference to the end tune result.
I can suggest the use of Autotronix in Sheffield which would be closer for you, Clive is a very good tuner and has mapped and installed pretty much every ECU on the market. He's pretty much the only guy I would recommend other than where I work (we hear alot of horror stories about other tuners, and after seeing alot of their work when it comes to mapping, it can be pretty dire! A common mistake is tuners who run "safe tunes" which usually means running rich to avoid knock, which actually has a more detrimental effect as it ends up borewashing ect.) |
|
| Logged |
|
|
|
Reply: 75 - 86 |
|
|
| clemdobain |
| Posted on: Friday, April 8th, 2016, 5:45:17pm |
|
|
|
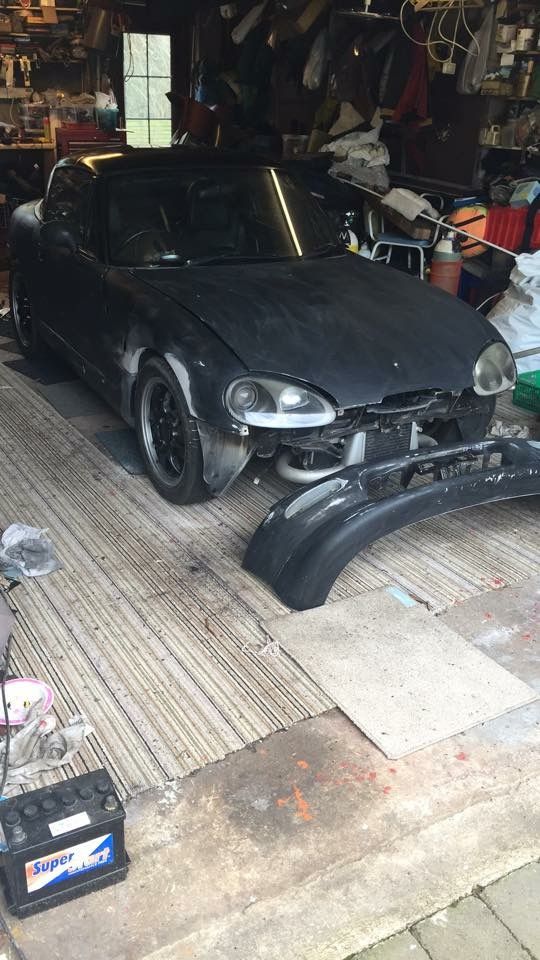
So the Cappo has been tucked up over winter and I've been on some adventures in my daily driver...
But Spring has sprung and I thought what better way to welcome her out of hibernation than a nice fresh paint job! So off she goes to get some love...
Now this is the look i'm going for...

Getting prepped...
And the first coats going on!!

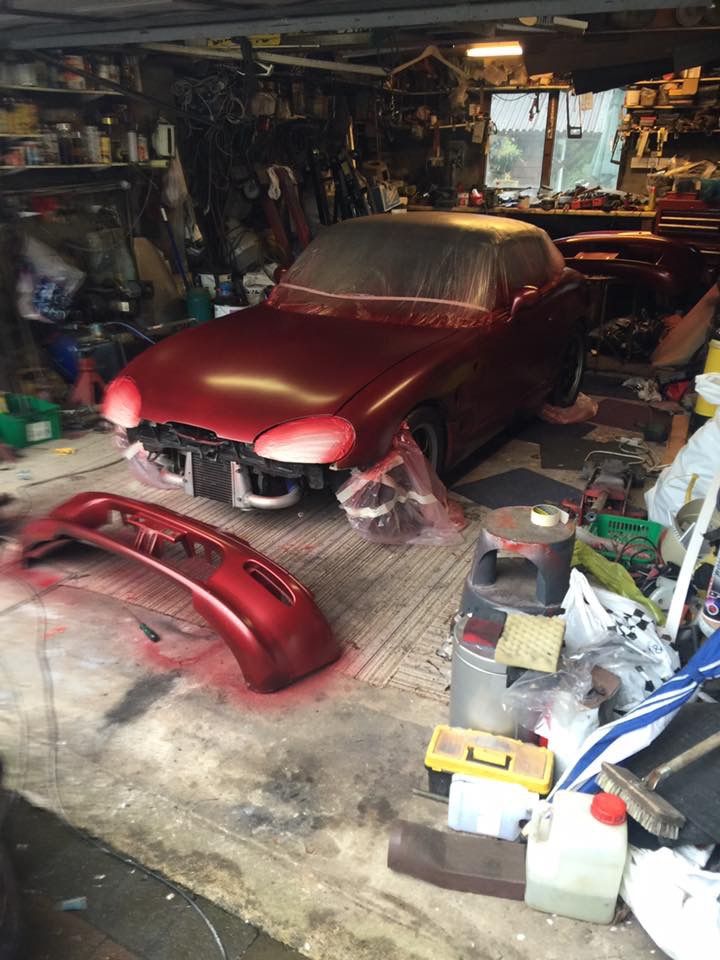
A few little spots of very early tin worm making a unwelcome return so a few small areas were repaired and filled. We also removed the aerial and filled the whole as I have a new internal amplified aerial and hated the look of the old unit.
Looking great so far!
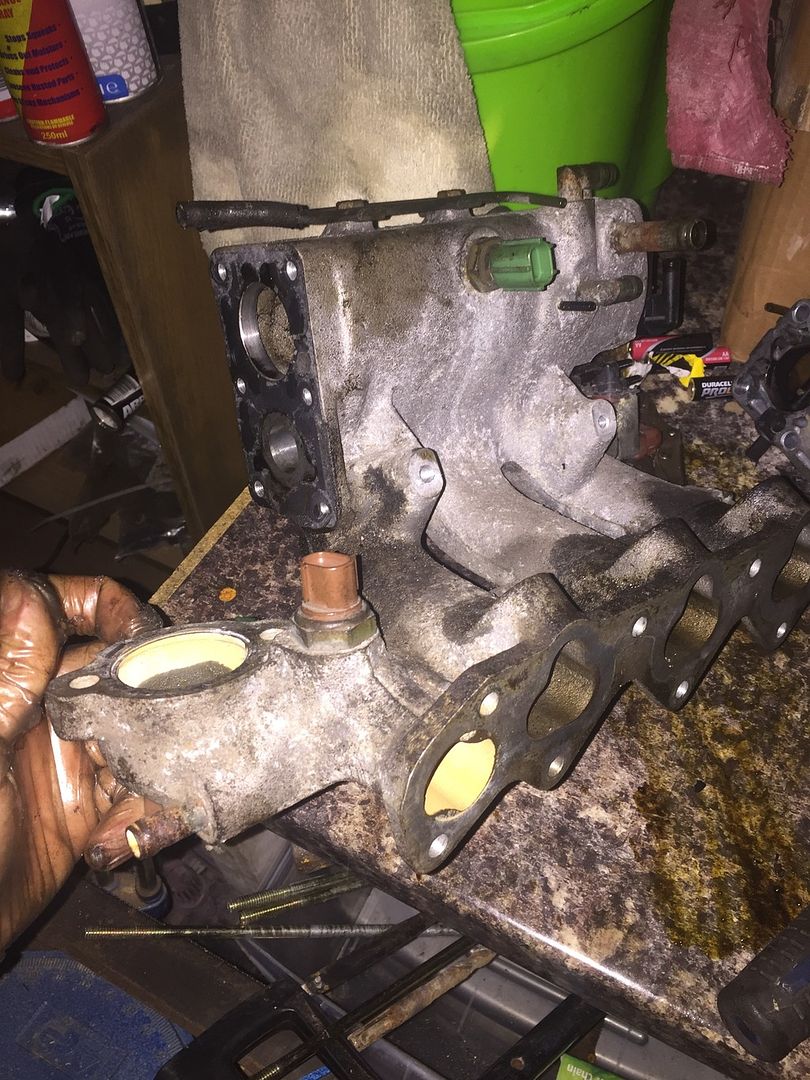
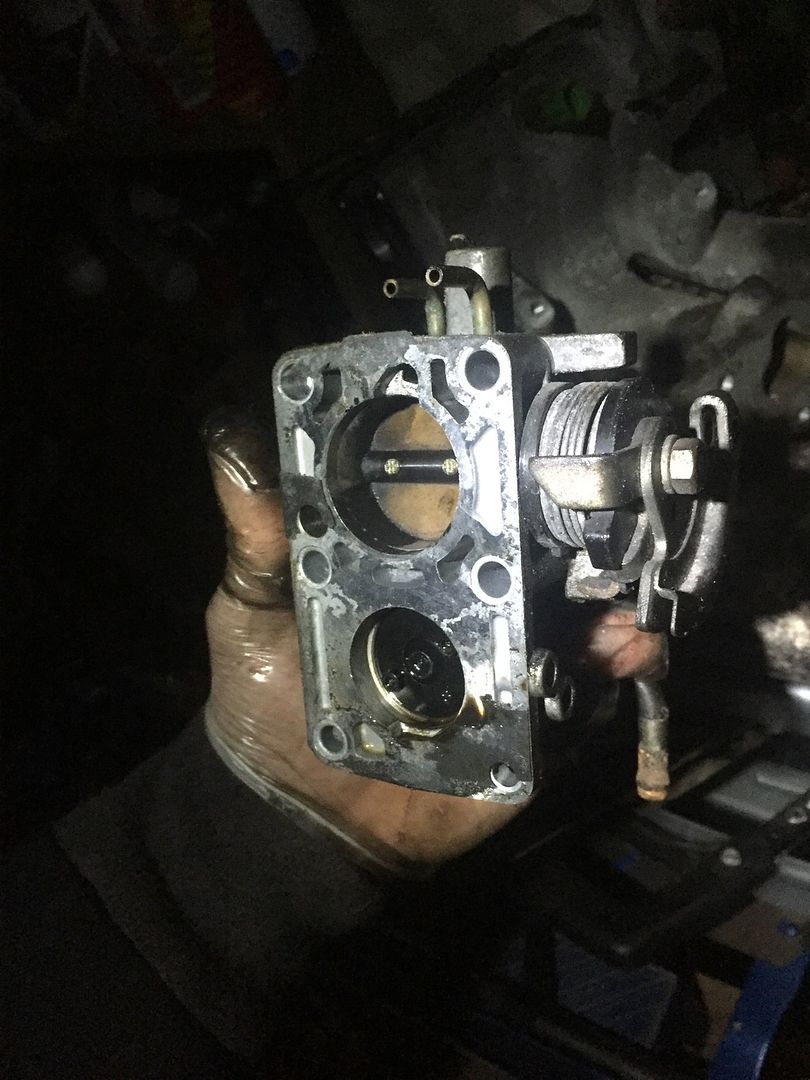
I've also started making some progress with my inlet manifold plan. Hoping to use my spare unit and fabricate a larger plenum and use a larger throttle body valve to optimise the intake side of things. Work in progress...
|
|
| Logged |
|
|
|
Reply: 76 - 86 |
|
|
| clemdobain |
| Posted on: Wednesday, April 13th, 2016, 6:04:02pm |
|
|
|
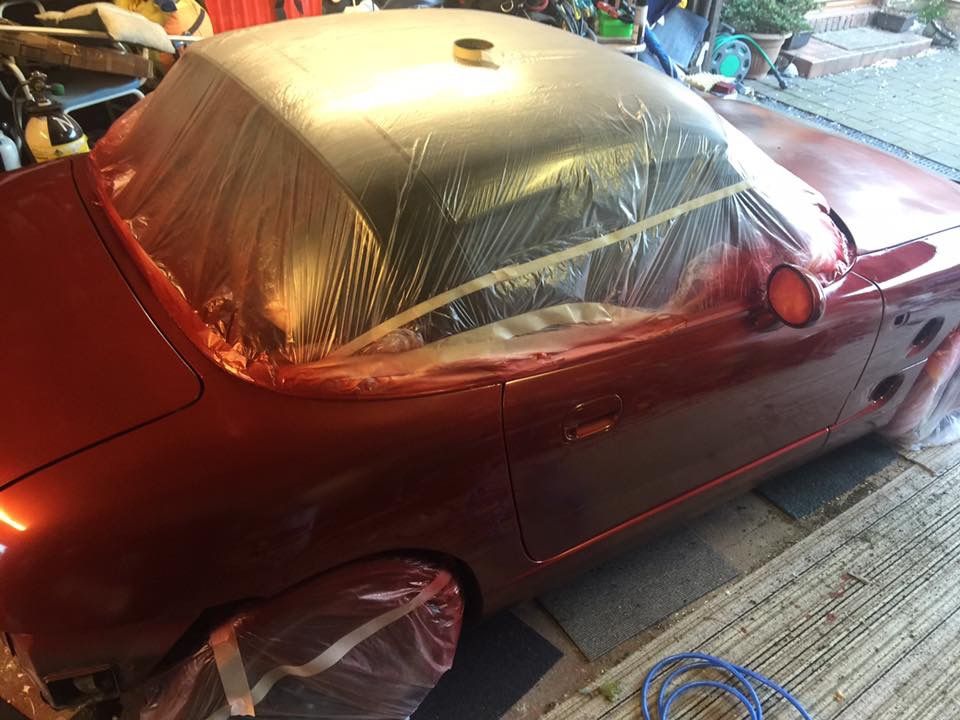
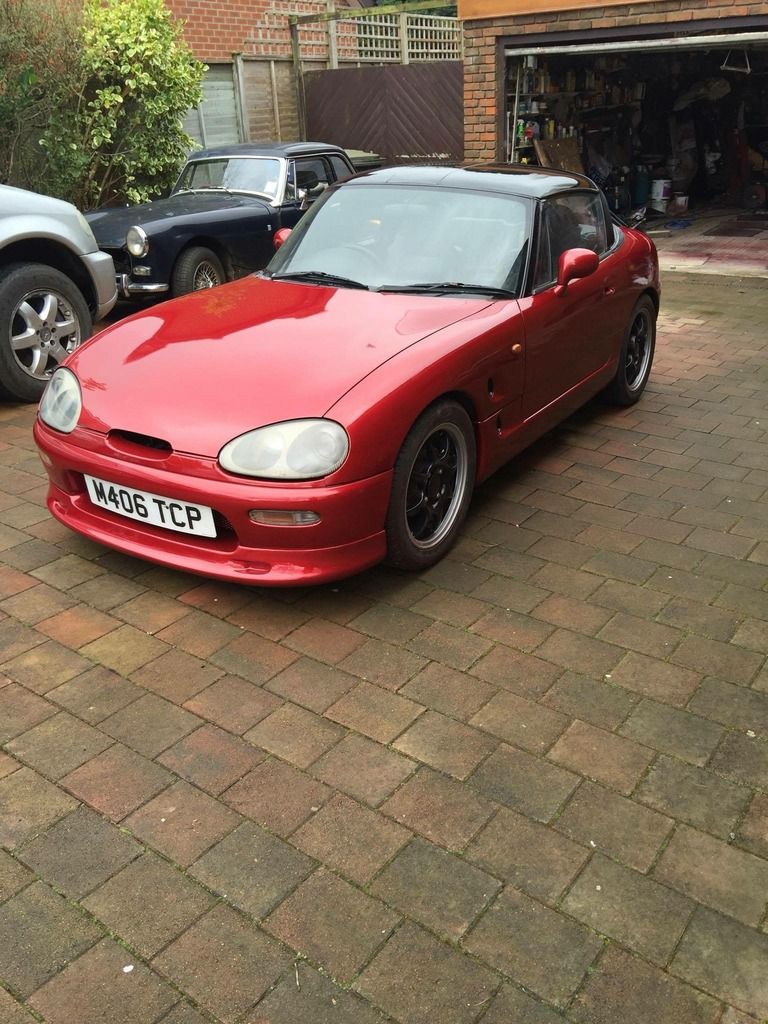
Well what do you think of the transformation?
I'm a big fan!!!
 |
Last modified Wednesday, April 13th, 2016, 6:05:21pm by clemdobain |
|
| Logged |
|
|
|
Reply: 77 - 86 |
|
|
| Andy |
| Posted on: Wednesday, April 13th, 2016, 9:31:39pm |
|
|
Official C.O.C Contributor
Gender: Male
Posts: 23604
Posts Per Day: 3.48 |
|
| Very nice indeed! |
Drop me a PM if you would like to be added to the ClubCappo Member Map. More details can be found here.
We now have an official Facebook group as well as a page! See here |
|
| Logged |
|
|
| |
Reply: 78 - 86 |
|
|
| dave660 |
| Posted on: Thursday, April 14th, 2016, 8:29:50am |
|
|
|
with that turbo you should be making closer to the 70-80kw mark, i'd say the n2 is holding you back as its not made to be used with that particular turbo. nice progress so far  |
|
| Logged |
|
|
|
Reply: 79 - 86 |
|
|
|
 Cappuccino Owners Club › Gallery › Cappo Related Album › Nick's cappo project (Espresso conversion!) (Moderators: )


 Locked Board