|
|
 Author Author |
 Kei's car (currently 2363 views) Kei's car (currently 2363 views) |
| Avar |
| Posted on: Sunday, August 5th, 2012, 4:40:33pm |
  |
|
|
Well finally got the rear bumper fitted, its not 100% but its the best i can do, the fixings though i'm very happy with.

Used an original fixing mount that normally you cant use with the take off kit.

Just need to do my modded fixing above the rear tow loop and there's no way its gonna come off 

And what the plastex ended up like, this stuff is the danglies and defo the way forward.

Next week, spraying!!! |
|
 Logged Logged |
|
|
 |
Reply: 160 - 276 |
|
|
| Avar |
| Posted on: Sunday, August 12th, 2012, 12:49:47pm |
|
|
|
Another weekend, more bits done.
Fuel cap done.

Rear garnish done.

Back end, first coat done, awaiting more hardener and then finished (hopefully tomorrow).


|
Last modified Sunday, August 12th, 2012, 1:05:22pm by Avar |
|
| Logged |
|
|
|
Reply: 161 - 276 |
|
|
| lord |
| Posted on: Sunday, August 12th, 2012, 1:37:10pm |
|
|
|
Thats looking very nice indeed!!! The arches have come out a treat too.
Well done bro. Finally getting there. |
|
| Logged |
|
|
|
Reply: 162 - 276 |
|
|
| Avar |
| Posted on: Tuesday, August 14th, 2012, 7:12:28pm |
|
|
|
Another bit done tonight, not 100% perfect but maybe 99% and not bad for first attempt 
 |
Last modified Tuesday, August 14th, 2012, 7:16:38pm by Avar |
|
| Logged |
|
|
|
Reply: 163 - 276 |
|
|
| half-9 |
| Posted on: Thursday, August 16th, 2012, 10:50:37pm |
|
|
Big Member

Posts: 453
Posts Per Day: 0.32 |
|
This is looking really professional! Good job!
|
|
| Logged |
|
|
 |
Reply: 164 - 276 |
|
|
| Avar |
| Posted on: Friday, August 17th, 2012, 7:10:55am |
|
|
|
Cheers, its slowing a bit, but with working during the day in the sun i'm knackered by the time i get home and not up for doing much car stuff. Hopefully the next few weekends will see the bodywork finished and i can concentrate on fitting the engine and getting the exhaust re welded to an acceptable standard. just a bit miffed that i balls'd up when spraying the bonnet, (narrowed the fan size, mid spraying) and from then on got three massive runs for my trouble.
Oh well, lesson learnt. |
|
| Logged |
|
|
|
Reply: 165 - 276 |
|
|
| Avar |
| Posted on: Sunday, August 19th, 2012, 2:14:47pm |
|
|
|
Well its pretty hard to do anything in this heat, but i managed to get these done this morning, its fairly hard given all the writing on the lenses but i think looks quite good.
Before and after.

All three together, (happy now that the crack in the light is harder to see).
 |
|
| Logged |
|
|
|
Reply: 166 - 276 |
|
|
| lord |
| Posted on: Sunday, August 19th, 2012, 4:10:29pm |
|
|
|
This is gonna be a dark n moody cappuccino.
Looking good. Its the finer details that make the car. |
|
| Logged |
|
|
|
Reply: 167 - 276 |
|
|
| Avar |
| Posted on: Sunday, August 19th, 2012, 4:59:48pm |
|
|
|
You have no idea how dark this car will be, if it goes to plan its gonna be a mean lil F***a.
Still need to find a spoiler for her and a new aerial. |
|
| Logged |
|
|
|
Reply: 168 - 276 |
|
|
| Avar |
| Posted on: Monday, August 27th, 2012, 6:20:56pm |
|
|
|
After waiting for the best conditions for spraying i got them today, perfect 16 degrees and almost zero humidity, and i think the painting has finallly finished. All in all very happy with the results, there's one or two tiny runs and its shown up some imperfections on the bonnet, but i'm happy to leave em till i get more time.


Rear bumper finished

Thought i'd give the rear garnish another coat and got it almost perfect


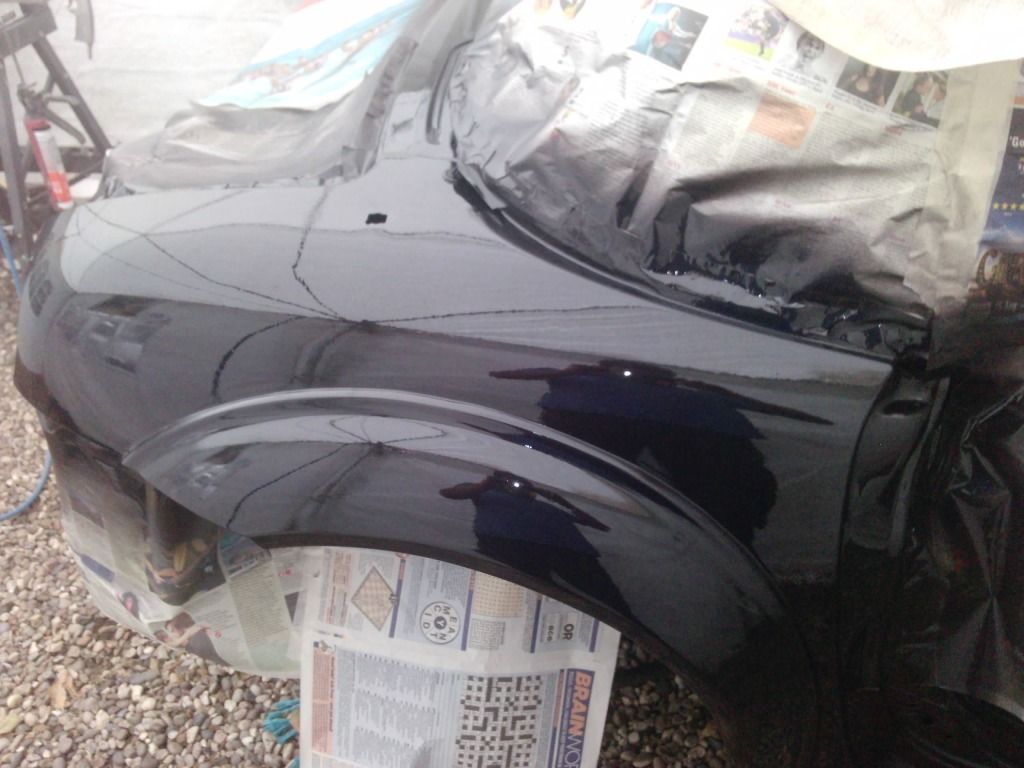
Next compounding and fitting the engine and drive train. |
Last modified Monday, August 27th, 2012, 6:22:39pm by Avar |
|
| Logged |
|
|
|
Reply: 169 - 276 |
|
|
| Andy |
| Posted on: Monday, August 27th, 2012, 6:24:50pm |
|
|
Official C.O.C Contributor


Gender:  Male Male
Posts: 23604
Posts Per Day: 3.49 |
|
Looking very nice indeed  |
Drop me a PM if you would like to be added to the ClubCappo Member Map. More details can be found here.
We now have an official Facebook group as well as a page! See here |
|
| Logged |
|
|
| |
Reply: 170 - 276 |
|
|
| Capposteve |
| Posted on: Monday, August 27th, 2012, 7:37:18pm |
|
|
|
| I agree with Andy. That's fantastic |
|
| Logged |
|
|
|
Reply: 171 - 276 |
|
|
| nikki |
| Posted on: Monday, August 27th, 2012, 8:35:17pm |
|
|
|
| Very smart |
|
| Logged |
|
|
|
Reply: 172 - 276 |
|
|
| Avar |
| Posted on: Monday, August 27th, 2012, 9:55:36pm |
|
|
|
|
| Logged |
|
|
|
Reply: 173 - 276 |
|
|
| Avar |
| Posted on: Friday, August 31st, 2012, 6:23:53pm |
|
|
|
Few hours checking out the paint job and testing out compounding etc, had a small problem with the bonnet, somehow it got rained on when there wasn't any rain after t was removed from the spray booth :O but i can deal with it. I then flattened and compounded the rear arch and did a test area of resin polish.

Close up

Starting to get excited now, its finally coming to an end. |
Last modified Friday, August 31st, 2012, 6:24:05pm by Avar |
|
| Logged |
|
|
|
Reply: 174 - 276 |
|
|
| ThePorko |
| Posted on: Saturday, September 1st, 2012, 2:47:04am |
|
|
|
| Looking good dude! Loving thew new colour. |
|
| Logged |
|
|
|
Reply: 175 - 276 |
|
|
| Avar |
| Posted on: Saturday, September 1st, 2012, 11:20:27pm |
|
|
|
Sides flatened, compounded and a protective polish.

 |
|
| Logged |
|
|
|
Reply: 176 - 276 |
|
|
| Avar |
| Posted on: Tuesday, September 11th, 2012, 7:13:32pm |
|
|
|
Just picked this up.
 |
|
| Logged |
|
|
|
Reply: 177 - 276 |
|
|
| Ricou |
| Posted on: Tuesday, September 11th, 2012, 8:19:29pm |
|
|
Maximum Member
Posts: 1110
Posts Per Day: 0.66 |
|
| Broken link on the picture for me. |
|
| Logged |
|
|
| |
Reply: 178 - 276 |
|
|
| Avar |
| Posted on: Tuesday, September 11th, 2012, 9:08:07pm |
|
|
|
| All looks fine here although photobucket was running very slow earlier. |
|
| Logged |
|
|
|
Reply: 179 - 276 |
|
|
| Andy |
| Posted on: Tuesday, September 11th, 2012, 9:10:45pm |
|
|
Official C.O.C Contributor
Gender: Male
Posts: 23604
Posts Per Day: 3.49 |
|
| It was a broken link for me first time I looked just after it was posted but was fine after that... |
Drop me a PM if you would like to be added to the ClubCappo Member Map. More details can be found here.
We now have an official Facebook group as well as a page! See here |
|
| Logged |
|
|
| |
Reply: 180 - 276 |
|
|
| Ricou |
| Posted on: Tuesday, September 11th, 2012, 10:13:58pm |
|
|
Maximum Member
Posts: 1110
Posts Per Day: 0.66 |
|
| Yeah it's good now. Nice engine Kei ! What pistons are these ? They look like the JE I got. |
|
| Logged |
|
|
| |
Reply: 181 - 276 |
|
|
| Avar |
| Posted on: Tuesday, September 11th, 2012, 11:22:27pm |
|
|
|
| They're the arias pistons i got a few months ago, ceramic coated tops and anodised skirts. |
|
| Logged |
|
|
|
Reply: 182 - 276 |
|
|
| Avar |
| Posted on: Friday, September 14th, 2012, 6:53:08am |
|
|
|
We spent a couple of hours last night getting things ready for the refit this weekend so lots of shiny bits.


Everything will go in nice and clean |
|
| Logged |
|
|
|
Reply: 183 - 276 |
|
|
| lord |
| Posted on: Friday, September 14th, 2012, 7:57:27am |
|
|
|
| What you use to get so clean |
|
| Logged |
|
|
|
Reply: 184 - 276 |
|
|
| mattjohns |
| Posted on: Friday, September 14th, 2012, 8:57:04am |
|
|
Maximum Member
Posts: 1652
Posts Per Day: 0.95 |
|
“ |
Quoted from lord, posted Friday, September 14th, 2012, 7:57:27am at here |
” |
What you use to get so clean
|
|
Good question. My gearbox is black  |
|
| Logged |
|
|
| |
Reply: 185 - 276 |
|
|
| lord |
| Posted on: Friday, September 14th, 2012, 9:40:53am |
|
|
|
| Gunk grease remover? Petrol? Muck off? |
|
| Logged |
|
|
|
Reply: 186 - 276 |
|
|
| Avar |
| Posted on: Friday, September 14th, 2012, 11:42:48am |
|
|
|
| Engine degreaser, the environmental freindly stuff they use in parts washers, cost about £25 for 5 gallon, a cheap scourer sponge and a very willing girlfriend. She did bloody well i think!!! |
|
| Logged |
|
|
|
Reply: 187 - 276 |
|
|
| lord |
| Posted on: Friday, September 14th, 2012, 11:59:40am |
|
|
|
Your misses!!! Thats a cheek! ha ha
|
|
| Logged |
|
|
|
Reply: 188 - 276 |
|
|
| Avar |
| Posted on: Saturday, September 15th, 2012, 5:30:16pm |
|
|
|
Got some more stuff cleaned last night and started fitting gearbox and getting ready to drop the bottom end in.

While awaiting my lovely assistant to arrive with the loctite i made this.

and from above.
 |
|
| Logged |
|
|
|
Reply: 189 - 276 |
|
|
| Ricou |
| Posted on: Saturday, September 15th, 2012, 6:10:55pm |
|
|
Maximum Member
Posts: 1110
Posts Per Day: 0.66 |
|
|
| Logged |
|
|
| |
Reply: 190 - 276 |
|
|
| Avar |
| Posted on: Saturday, September 15th, 2012, 11:47:05pm |
|
|
|
|
| Logged |
|
|
|
Reply: 191 - 276 |
|
|
| Ricou |
| Posted on: Saturday, September 15th, 2012, 11:49:22pm |
|
|
Maximum Member
Posts: 1110
Posts Per Day: 0.66 |
|
|
| Logged |
|
|
| |
Reply: 192 - 276 |
|
|
| Avar |
| Posted on: Sunday, September 16th, 2012, 6:28:47pm |
|
|
|
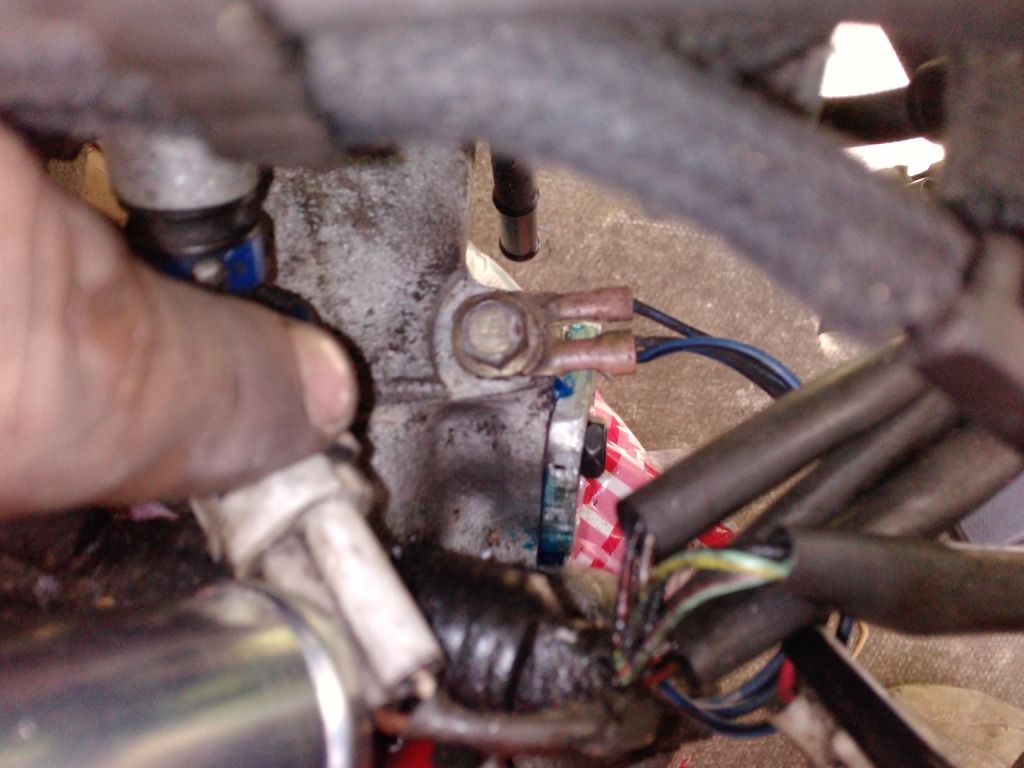
Spent the day getting the bottom end in along with prop and a few things underneath. also spent some time re covering all my engine bay loom, will finish it as soon as i get some black tape, but its deo starting to take shape now.
 |
|
| Logged |
|
|
|
Reply: 193 - 276 |
|
|
| Ricou |
| Posted on: Sunday, September 16th, 2012, 6:39:19pm |
|
|
Maximum Member
Posts: 1110
Posts Per Day: 0.66 |
|
Oh, so you're not putting back the engine as a whole right away ?
Anyway, good job ! |
|
| Logged |
|
|
| |
Reply: 194 - 276 |
|
|
| Avar |
| Posted on: Sunday, September 16th, 2012, 7:18:58pm |
|
|
|
| If i have a chance i always put the engine in in layers, it makes fitting everything so much easier and doesn't involve a hoist which i cant use on this ground. |
|
| Logged |
|
|
|
Reply: 195 - 276 |
|
|
| Ricou |
| Posted on: Sunday, September 16th, 2012, 8:46:26pm |
|
|
Maximum Member
Posts: 1110
Posts Per Day: 0.66 |
|
| Is there a specific reason to why you're not putting the engine on the taken off front subframe then refitting the whole ? |
|
| Logged |
|
|
| |
Reply: 196 - 276 |
|
|
| Avar |
| Posted on: Sunday, September 16th, 2012, 9:03:39pm |
|
|
|
| Thats ok i spose to do it that way if you've a nice garage to work in, but in my yard this is the best way to do it, plus given the dificulty plumbing in the exhuast and the fuel lines i'd rather assemble in layers. |
|
| Logged |
|
|
|
Reply: 197 - 276 |
|
|
| Avar |
| Posted on: Saturday, September 29th, 2012, 8:28:16pm |
|
|
|
Finally got to spend some time on the car.
Here's my work bench

Got the rad fitted on its temp brackets to check spacing.

Fits nice.

With just enough clearance underneath.

This was how it ended up.

Got some pics of the coolant mod.

Used a clip to stop the hose from sagging

And how it links into the pipework at the front (i have an extra sensor housing for temp sender)

I finally got to power up the radio and tested the JBL speakers and am VERY happy with them, miles better than the originals with only a slight farting at full volume when the plastic covers vibrate. Looks like i'll actually be able to hear the radio while driving  . . |
Last modified Saturday, September 29th, 2012, 8:33:34pm by Avar |
|
| Logged |
|
|
|
Reply: 198 - 276 |
|
|
| Badger |
| Posted on: Monday, October 1st, 2012, 3:54:27am |
|
|
|
| Good job mate, just read through this again, but as I cant find the answer to my question, 'What size Marquee did you use', I thought I'd ask now...lol....coz we're getting warmer weather now and getting closer to putting colour on mine, the marquee under my carport looks easier than 'Drop Sheets' to keep out unwanted dust...etc and the WIFE...LOL....Ouch, she came behind and slapped me..... |
|
| Logged |
|
|
|
Reply: 199 - 276 |
|
|
|
 Cappuccino Owners Club › Gallery › Cappo Related Album › Kei's car (Moderators: )


 Locked Board