|
|
 Author Author |
 Pepe's Hot Coffee (currently 1962 views) Pepe's Hot Coffee (currently 1962 views) |
| Pepito |
| Posted on: Sunday, February 1st, 2015, 5:56:43pm |
  |
|
Big Member

Posts: 193
Posts Per Day: 0.11 |
|
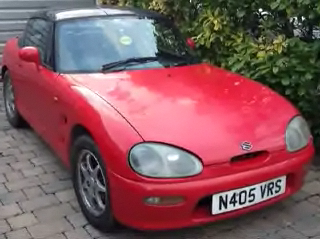
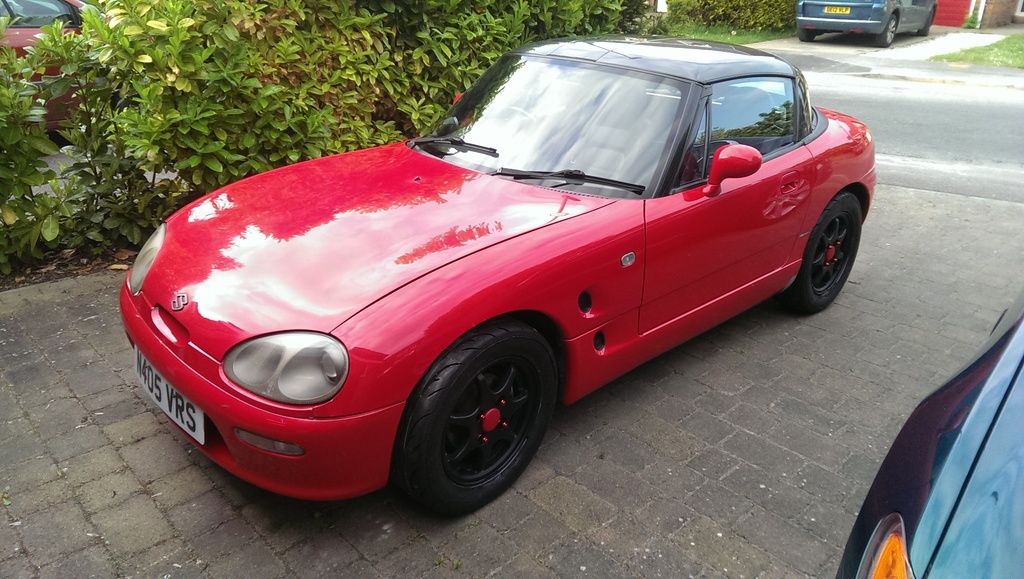
Hello All, well this is long overdue, after owning my Cappo for 2 and half years I am finally getting round to writing up its own thread, warning - it's a long one. I bought it back in May 2012 from a chap near Kings Lynn who had owned it for the previous 6 years and had looked after it well by keeping it off the road in winter, so rust wasn't a huge thing on it, only had 2 patches to be welded for its MOT. The car is a Cat C but I wasn't too fussed as I wanted a project, so here it goes!
Here is the car after I got it home
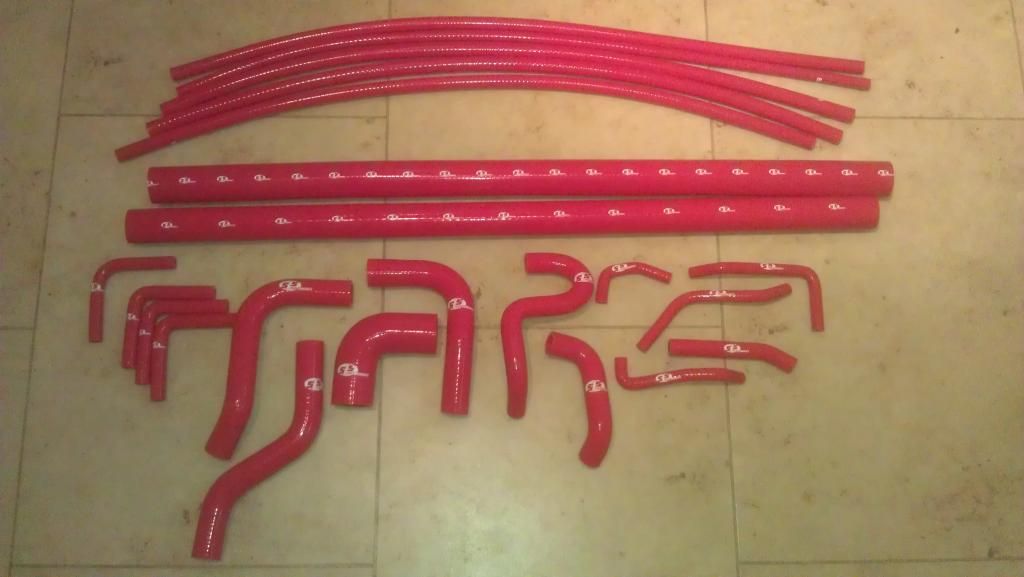
Once home I gave it a service when it went into my garage for the winter, new battery as the old one was dead, oil, plugs, changed HT leads to some Magnecor KV85, changed discs and pads all round to Black Diamond grooved discs and Predator pads, serviced the rear calipers as hand brake cable mechanism wasn't working correctly. I also checked to coolant pipes and good thing too as a lot of rust cracking happened when I squeezed them, so I got some nice SFS silicone hoses to replace them with along with some of the oil lines. I also replaced the cambelt as I had no idea how long the other one had been there with a Monster Sport cambelt, pricey! Also put some underseal on as the underneath had no protection whatsoever.
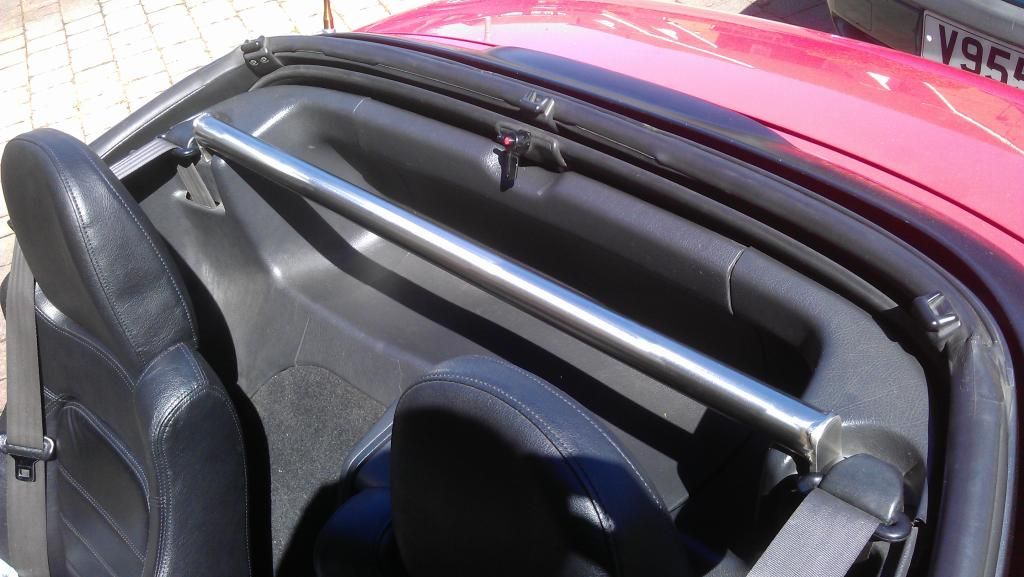
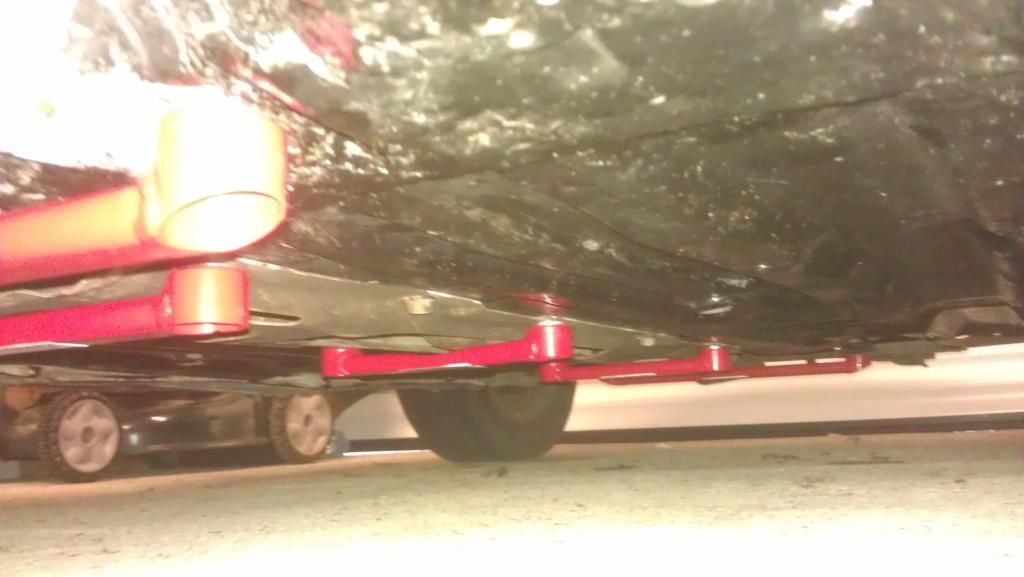
Once winter was over it was time to enjoy it again back on the roads, but the modification didn't stop. I got a Stainless Steel tower brace which IMO I really like, nice and practical and well made for that matter. I also got Steves 660 under body brace kit, in red of course.
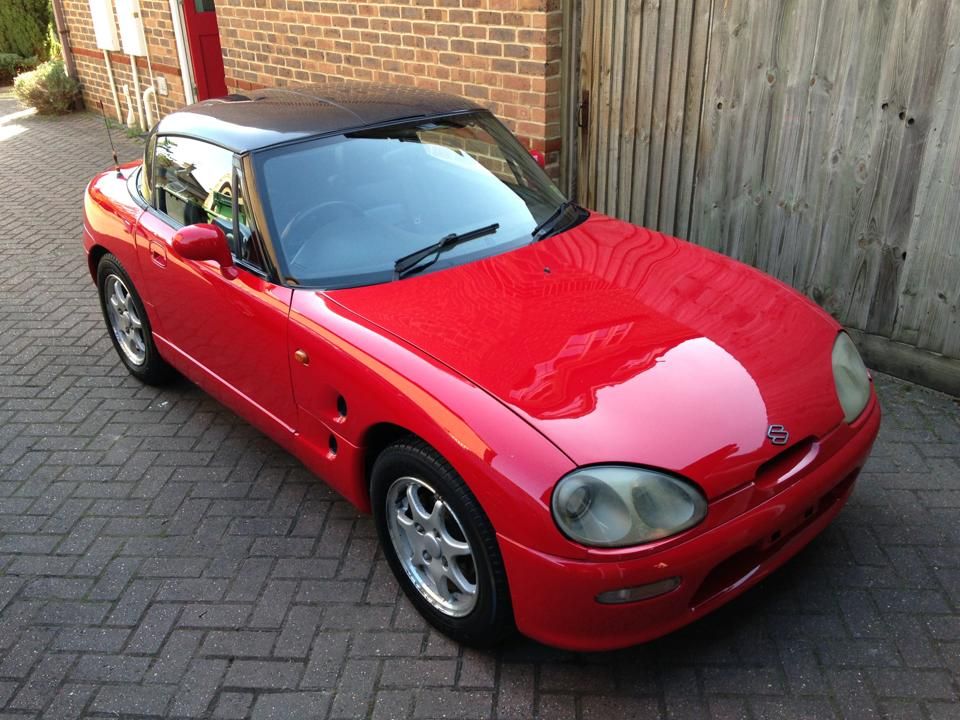
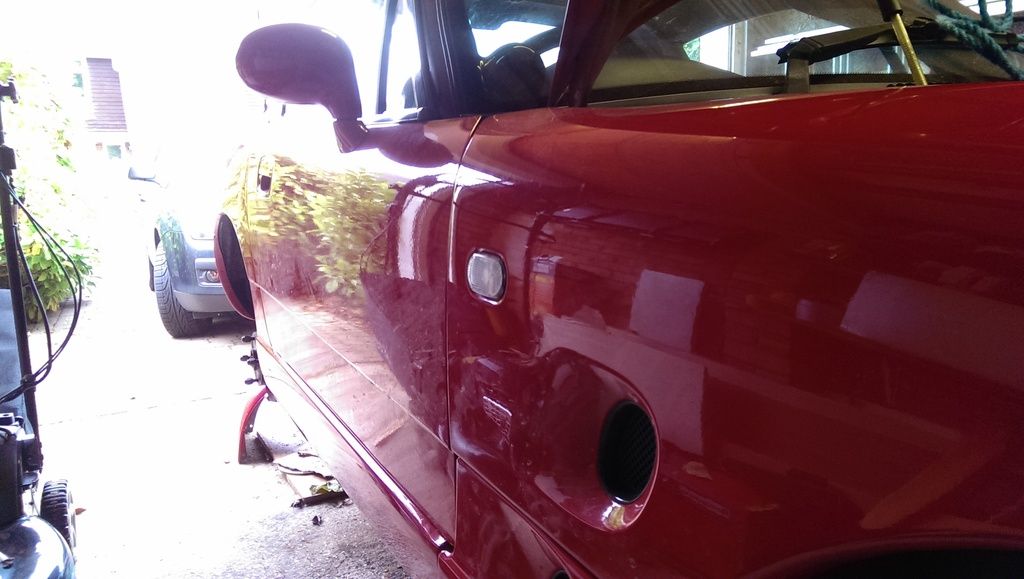
Just before the Modified Nationals, my mate offered to detail it to make it look as good as possible as the paint work on it was not great. You can have a look at his thread here: http://www.detailingworld.co.uk/forum/showthread.php?t=305464
Final result
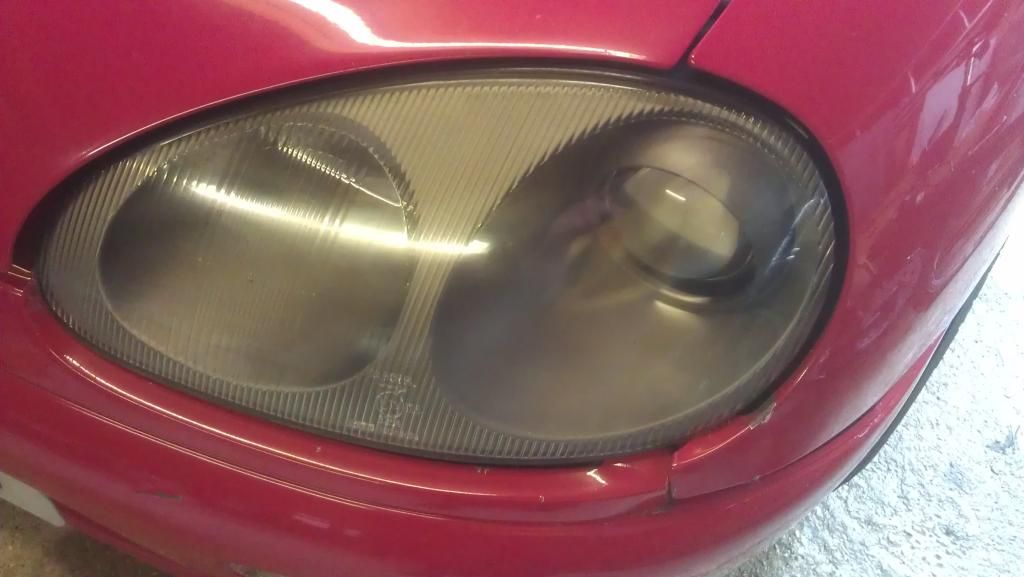
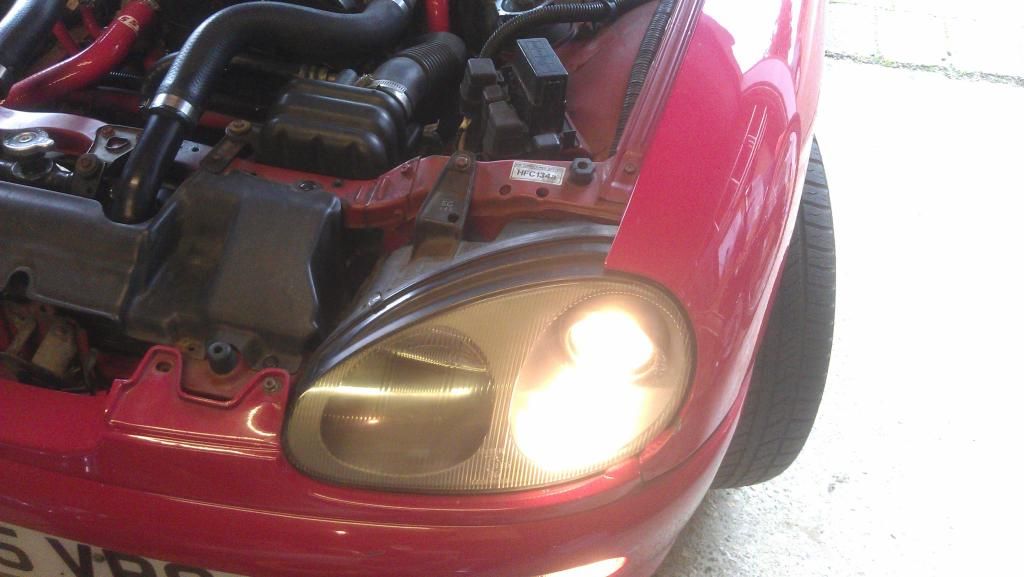
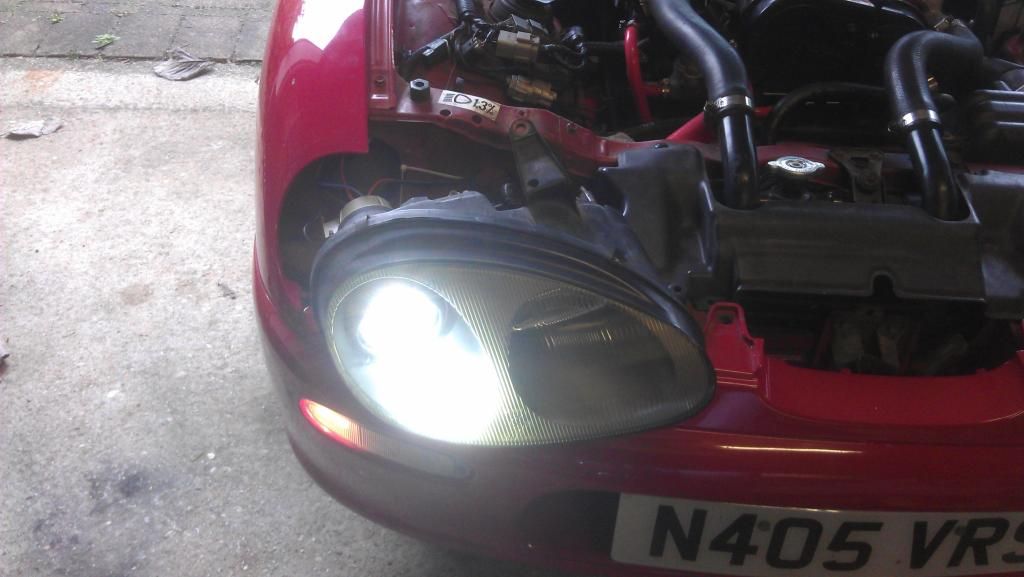
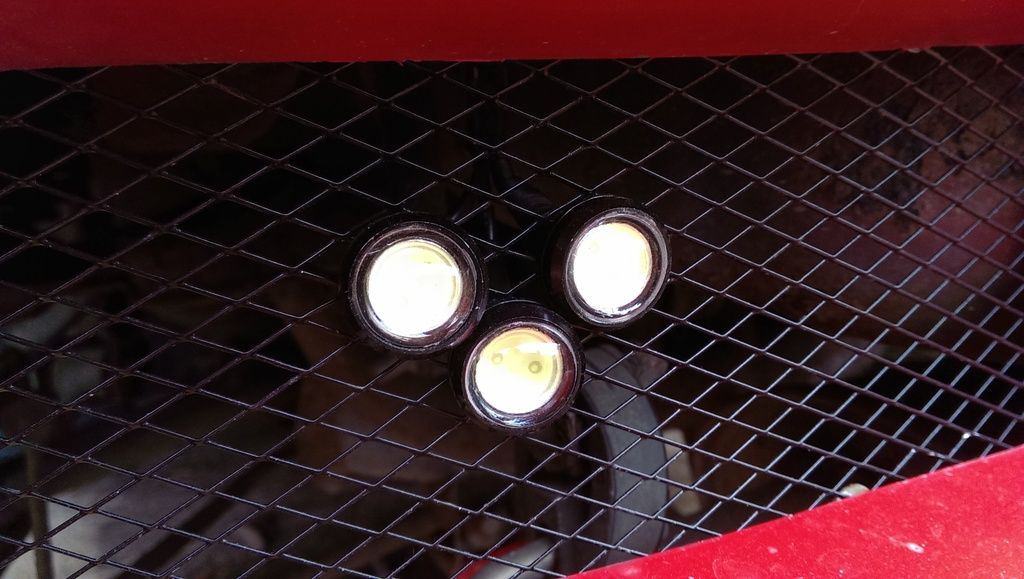
After the Nationals I decided some work needed doing to my headlights, they were looking a bit cloudy and so I polished them up and installed some 6000K HIDs which have a big effect and look awesome. I also replaced the chunky reverse and fog light boxes with some bright LEDs and replaced the mesh and looks good (don't have a pic atm).

After a busy first year on the Cappo it was time to head back to Uni for my final year after a year on being on placement. It was a busy year at Uni, as you can imagine doing an Engineering Degree, but it didn't stop me buying parts for the Cappo.
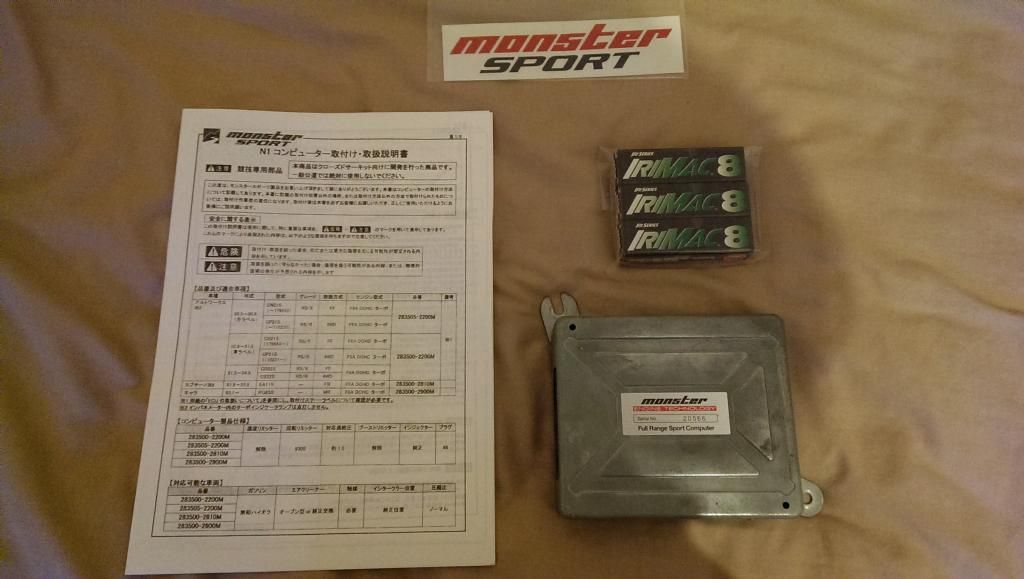
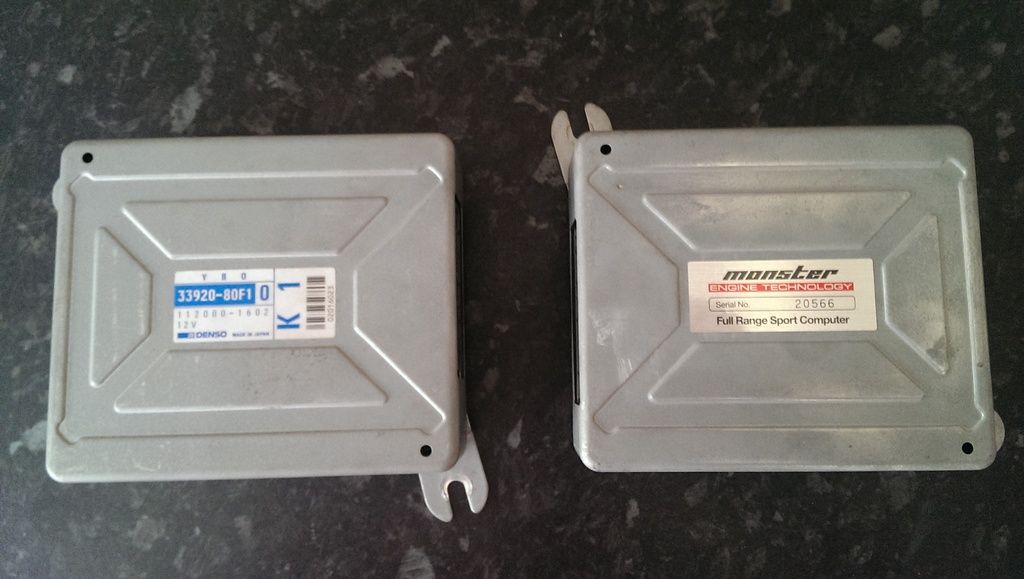
Yes that is an N1 ECU, which I can't wait to plug in and enjoy, I also bought a carbon A-pillar gauge holder, Take-off mudflaps which are in need of a bit of tlc, clear side indicators which are now installed and look great. I also got a Heartland front bumper which has been sanded back and ready for painting.
I graduated in the summer with a 2:1 in MEng Automotive Engineering from Loughborough University and in the summer went round Europe with this little beasty with my Formula Student Team http://www.lumotorsport.com
Was great to be back home and get back driving the Cappo until MOT day came and it failed with some rust problems.
I got it home and on closer inspection there is more to it than just that.
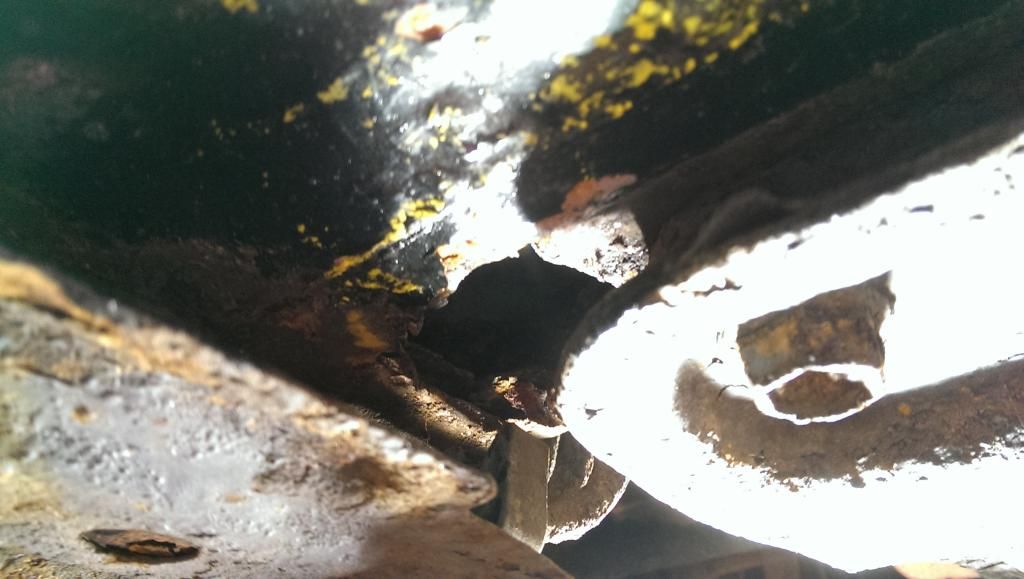
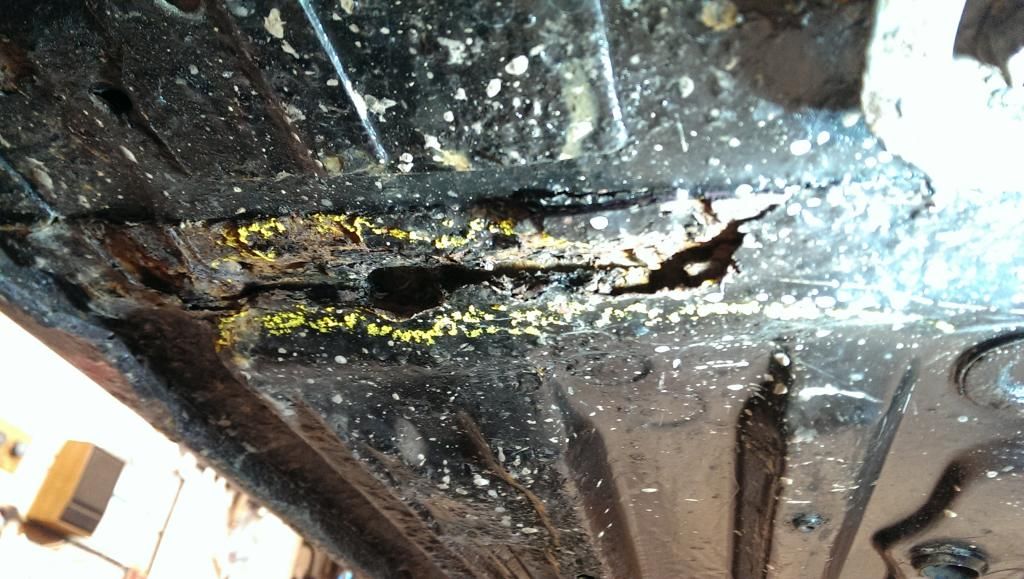
Yes thats the inner sill thats caved in on the drivers side, there is the Cat C then, thought it was surprising that the car looked good for a Cat C. Otherwise the rust from the MOT inspection wasn't too bad.

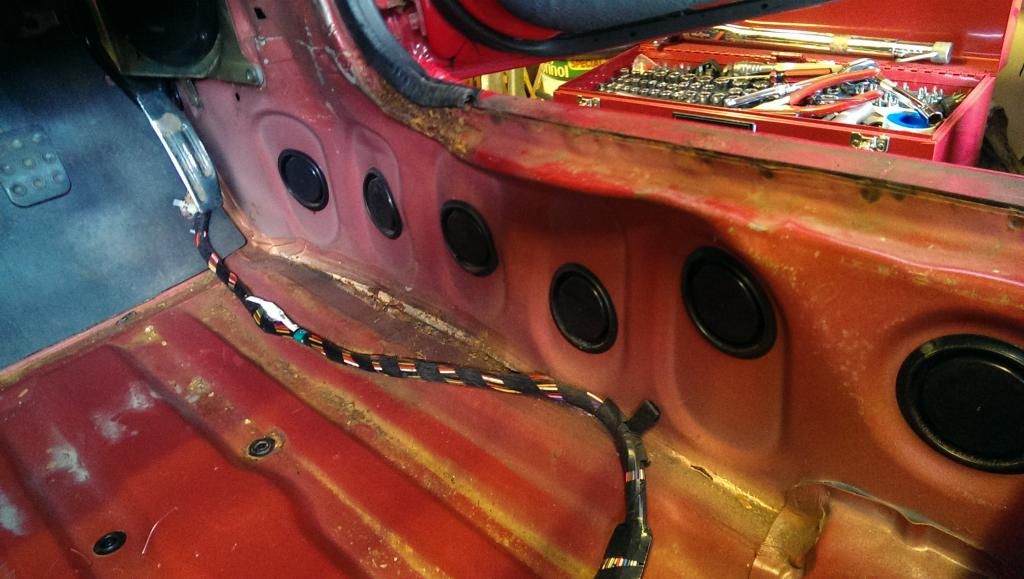
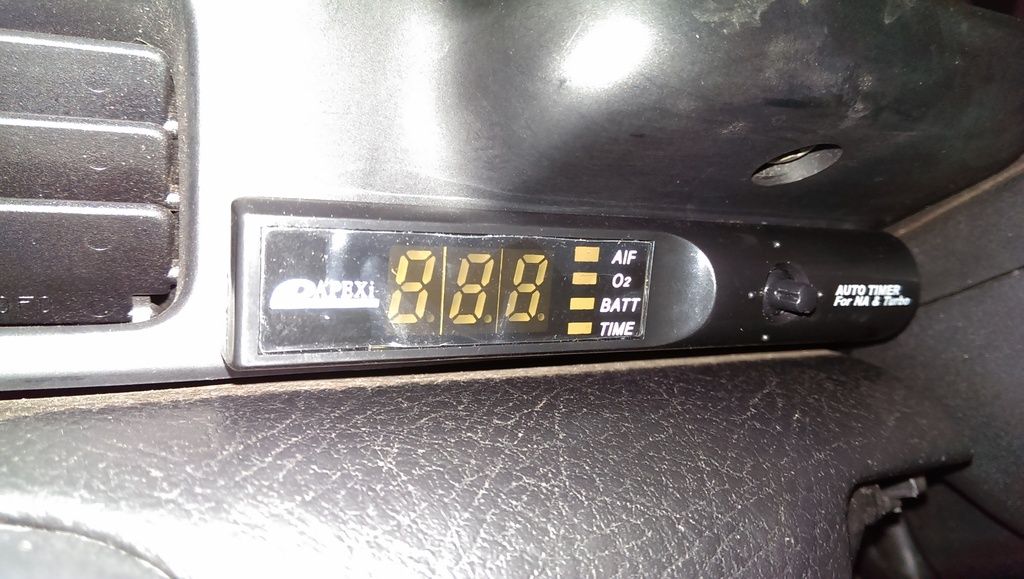
The rust is now more or less ready to be welded by my welder who starts in the next few weeks and we shall be looking at that sill and putting some new metal in. Apart from the rust I have been busy removing the air-con, who needs it in a convertible? Removing rusted bolts (they bug me), removed my immobiliser as it is broken, so broken it cut the engine while I was driving! May put a new one in at some point though. I have installed an Apexi turbo timer and I have just bought a Gizzmo IBC V3 boost controller (yes Andy I have one), a 660 airbox which will go in when the car goes back together and I will buy a Depo-Racing smoked boost gauge once they are back in stock.
I think that is everything so far, can be hard to remember everything over a 2 year period. I will try and keep this thread up to date, been great owning this car and will continue to do so for many years to come, I hope.
Thanks for reading,
Pepito
|
Last modified Sunday, February 1st, 2015, 5:59:16pm by Pepito |
|
 Logged Logged |
|
|
|
|
| Andy |
| Posted on: Sunday, February 1st, 2015, 6:34:26pm |
|
|
Official C.O.C Contributor


Gender:  Male Male
Posts: 23604
Posts Per Day: 3.48 |
|

Can't go wrong with the Gizzmo either  |
Drop me a PM if you would like to be added to the ClubCappo Member Map. More details can be found here.
We now have an official Facebook group as well as a page! See here |
|
| Logged |
|
|
  |
Reply: 1 - 66 |
|
|
| fuzz573 |
| Posted on: Monday, February 2nd, 2015, 1:21:39am |
|
|
|
| Great work so far, I love the shine after the detail |
|
| Logged |
|
|
|
Reply: 2 - 66 |
|
|
| Pepito |
| Posted on: Monday, February 2nd, 2015, 3:10:22pm |
|
|
Big Member
Posts: 193
Posts Per Day: 0.11 |
|
| Thanks, I know he did a great job on it! Shiney! |
|
| Logged |
|
|
| |
Reply: 3 - 66 |
|
|
| fuzz573 |
Posted on: Wednesday, February 4th, 2015, 12:35:29am
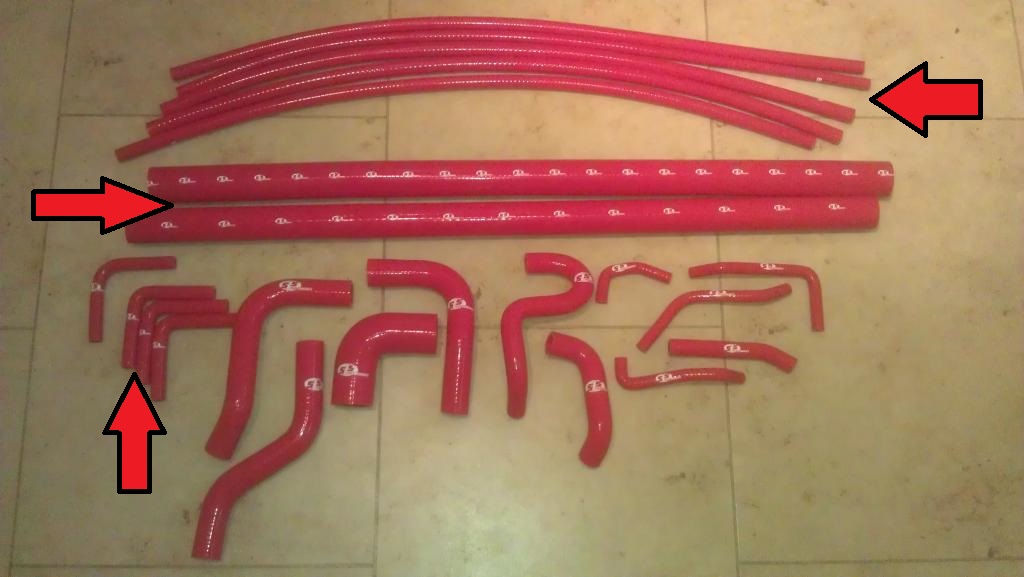
 Attachment: sfs_hoses_pic.jpg - 99.23 KB (1224 views) Attachment: sfs_hoses_pic.jpg - 99.23 KB (1224 views) |
|
|
|
Hi Pepito,
Have you fitted all of the SFS hoses now?
If not could you please give measurements of the hoses marked with the arrows?
Some of the hoses may have numbers on them which may help.
Thanks
Donna |
 |
|
| Logged |
|
|
|
Reply: 4 - 66 |
|
|
| Pepito |
| Posted on: Thursday, February 5th, 2015, 12:17:00pm |
|
|
Big Member
Posts: 193
Posts Per Day: 0.11 |
|
Hi Donna,
Yes I have fitted them all now apart from the 2 large ones and the large 90deg.
The small ones I think are 8mm both straight and 90deg but I'm trying to remember from 2 years ago! I can have a look at what I have left to give you sizes tonight, if I can find the box!
|
|
| Logged |
|
|
| |
Reply: 5 - 66 |
|
|
| Pepito |
| Posted on: Sunday, March 1st, 2015, 8:21:21pm |
|
|
Big Member
Posts: 193
Posts Per Day: 0.11 |
|
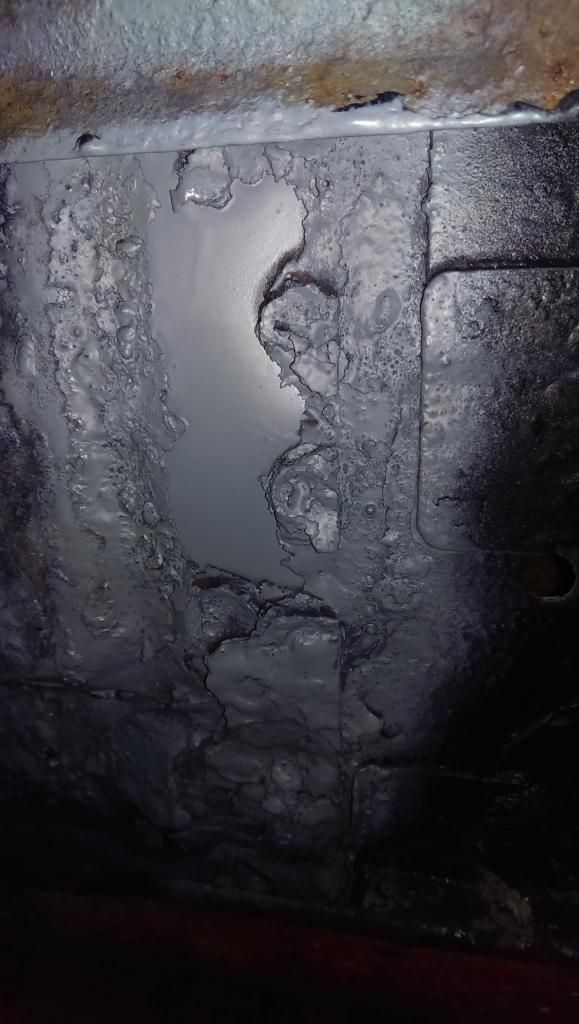
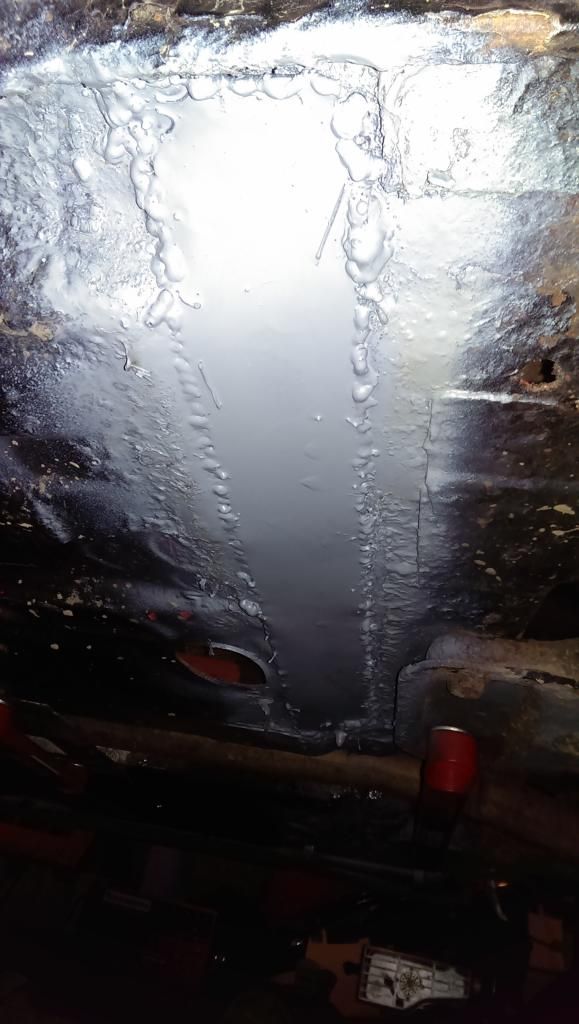
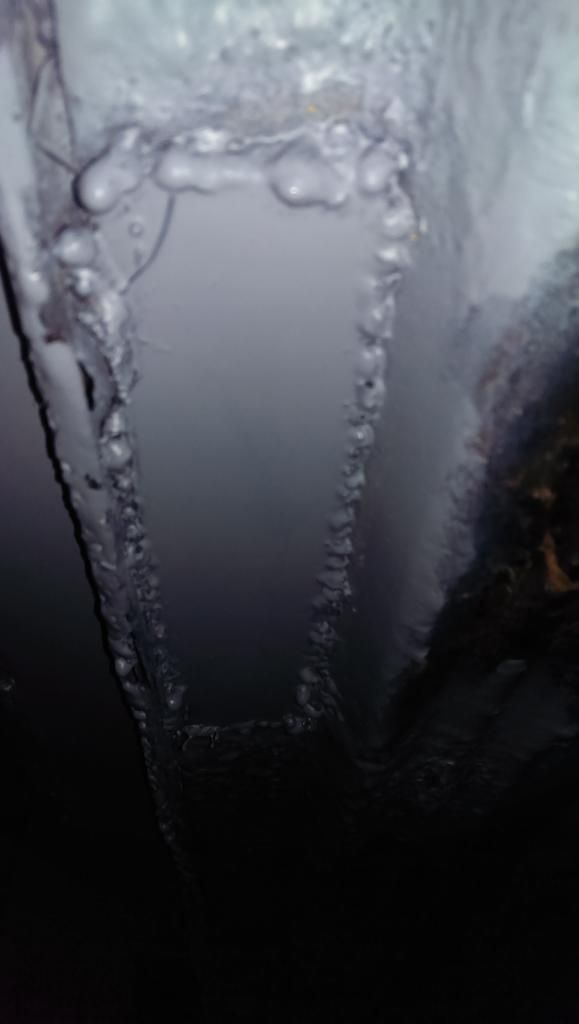
Well the cappo is welded up last weekend and zinc spray was put on the welds to stop any oxidation occurring.
Drivers Side
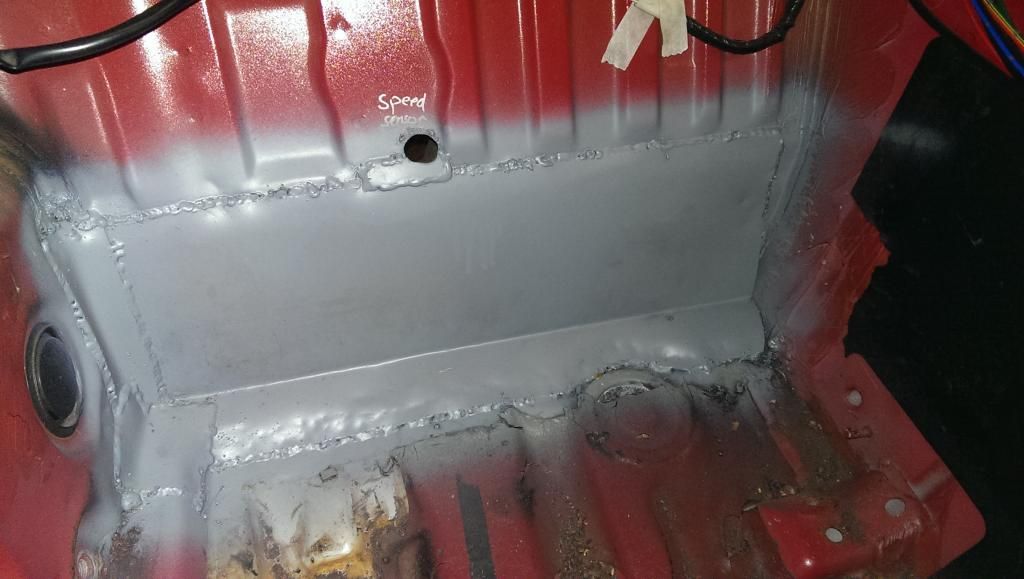
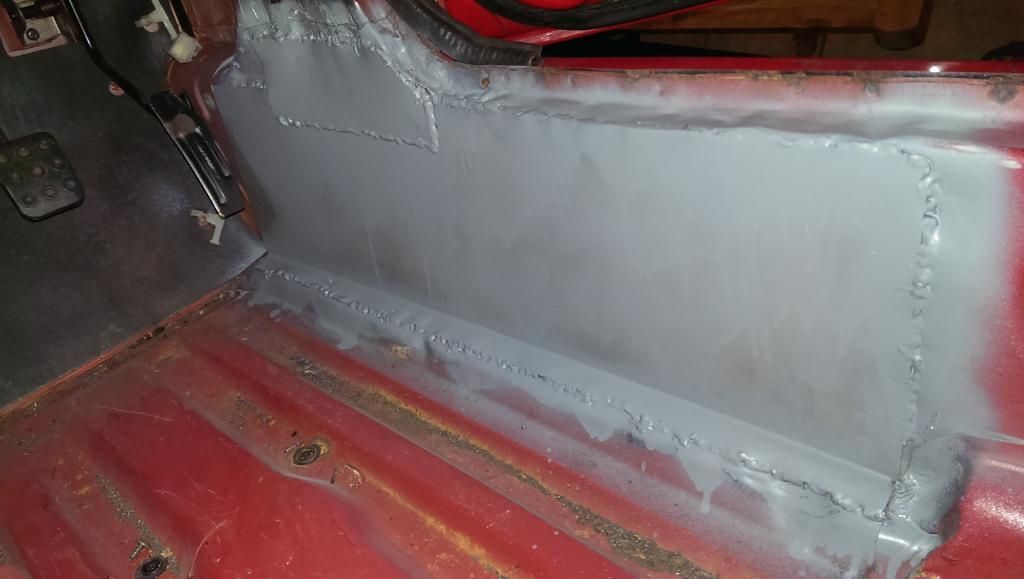
Passenger Side
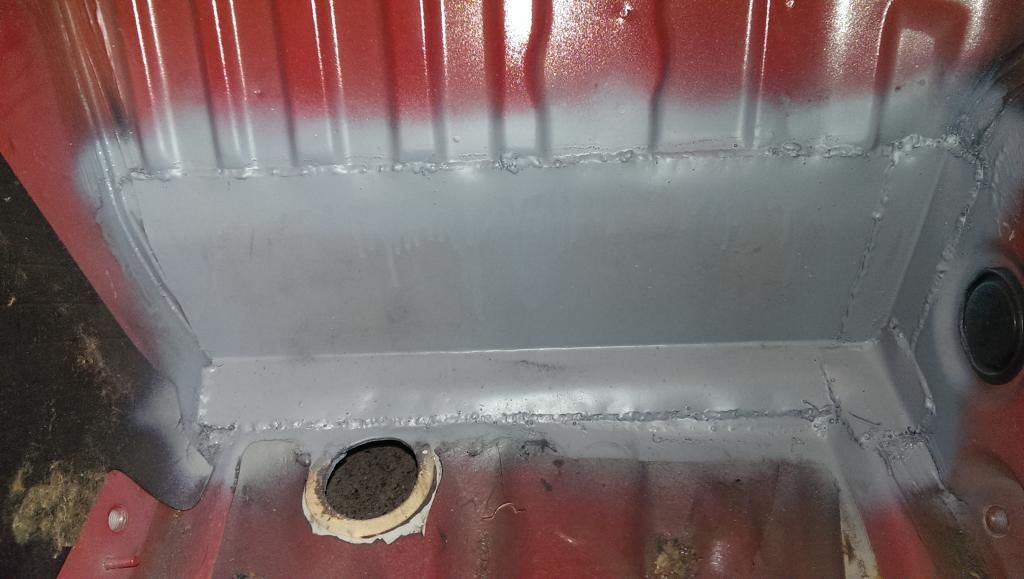
Passenger Outer Sill

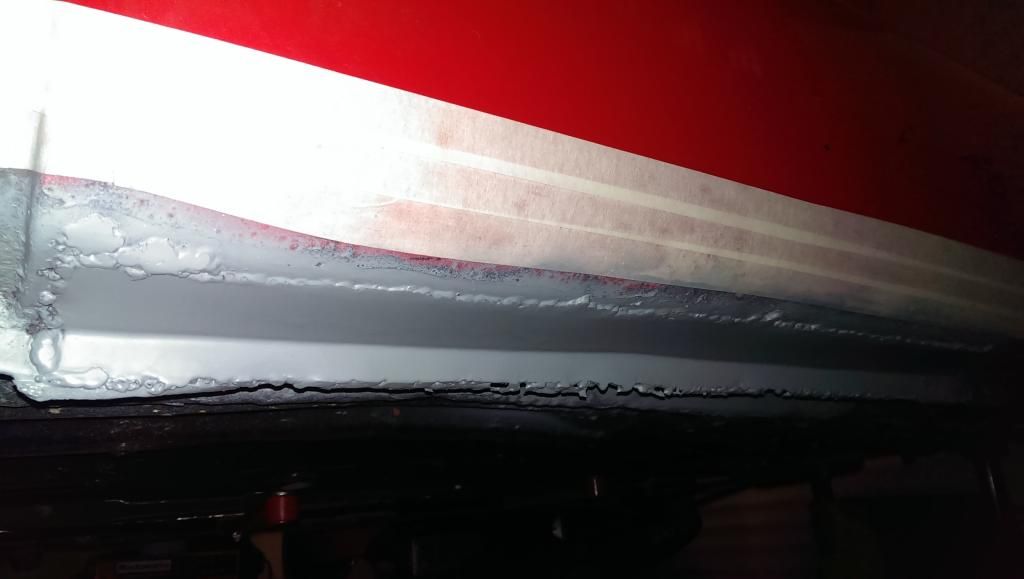
Front passenger arch (under fuse/relays)
This weekend been putting waxoyl on and sealing up some holes with some GT Pro Superfiber filler (has glass fibers in it) actually really nice stuff. So slowly getting there. Hopefully will finish the body work soon but the main thing is its welded and the drivers inner sill is done so im now safe. |
|
| Logged |
|
|
| |
Reply: 6 - 66 |
|
|
| Pepito |
| Posted on: Tuesday, March 24th, 2015, 12:50:24pm |
|
|
Big Member
Posts: 193
Posts Per Day: 0.11 |
|
Well the car in now has got Waxoyl on it and I have started the process of putting it all back together again. After connecting up the wiring again I decided to start it up, to make sure I hadn't done anything stupid after taking out the aircon and broken immobiliser unit. Had to charge the battery up for a bit as it dropped to 5V when cracking but it started 
Only down side was there was a lot of smoke coming from the exhaust manifold. There was a little smoke before I put it in for the winter but this time there was a lot more. Im hoping that it is nothing bad like a cracked manifold or a gasket that has gone (which I think it might be after initial inspection) and that I is just the penetrating spray (used a lot to get the aircon bolts undone) or some oil residue that has just built up over the winter. Going to take the heat shield off to have a better look. |
|
| Logged |
|
|
| |
Reply: 7 - 66 |
|
|
| Pepito |
| Posted on: Monday, March 30th, 2015, 1:56:11pm |
|
|
Big Member
Posts: 193
Posts Per Day: 0.11 |
|
Well this weekend has been a busy one, and certainly one with positives and negatives.
Positives: Interior has started to go back in, carpet plastic trim behind seats, sill covers and my seatbelt tower brace are in, rear bumper is back on and my new boost gauge is in place all ready to be wired up.
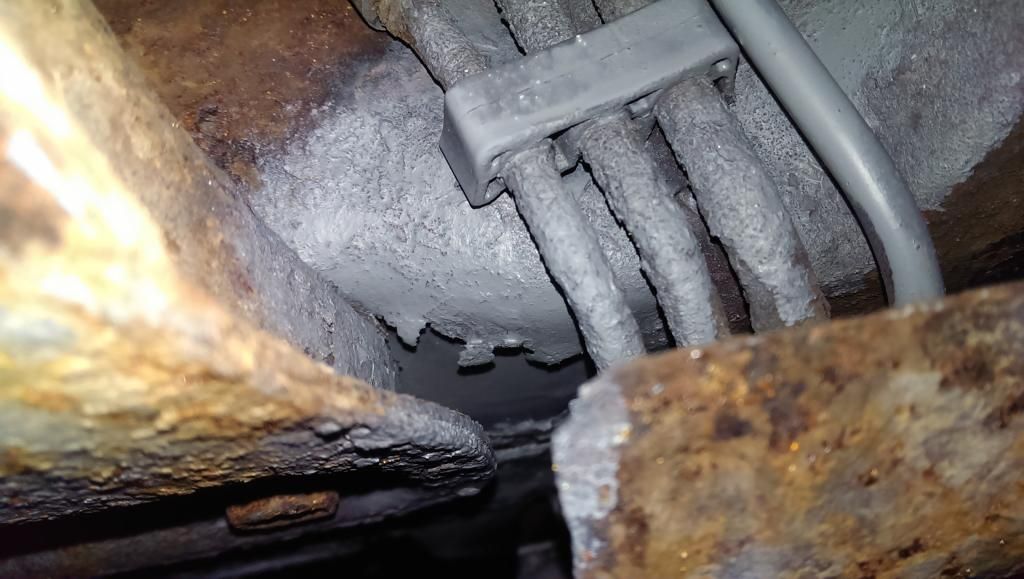
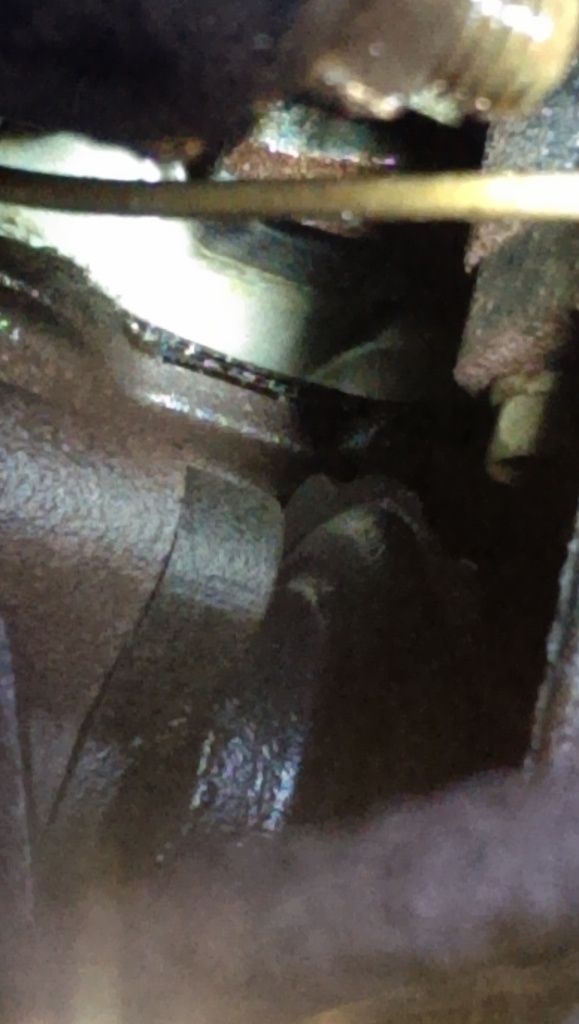
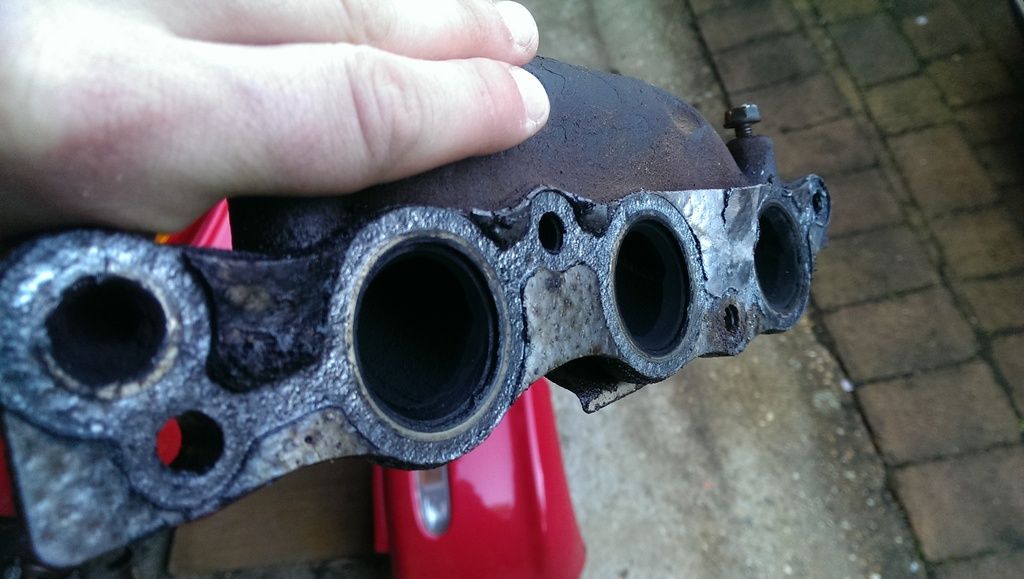
Negatives: Found the engine to exhaust manifold gasket has gone near cylinder 3 (see pic, taken from underneath) so started taking everything off. 2/3 off the turbo bolts came off fine but after using ALOT of penetrating spray the other snapped, oh joys! The 2 bolts holding the cat can are also tight and I have sprayed plenty on, don't want those to snap so will keep spraying till they eventually come loose.
 |
Last modified Monday, March 30th, 2015, 1:57:35pm by Pepito |
|
| Logged |
|
|
| |
Reply: 8 - 66 |
|
|
| Pepito |
| Posted on: Sunday, May 3rd, 2015, 7:33:18pm |
|
|
Big Member
Posts: 193
Posts Per Day: 0.11 |
|
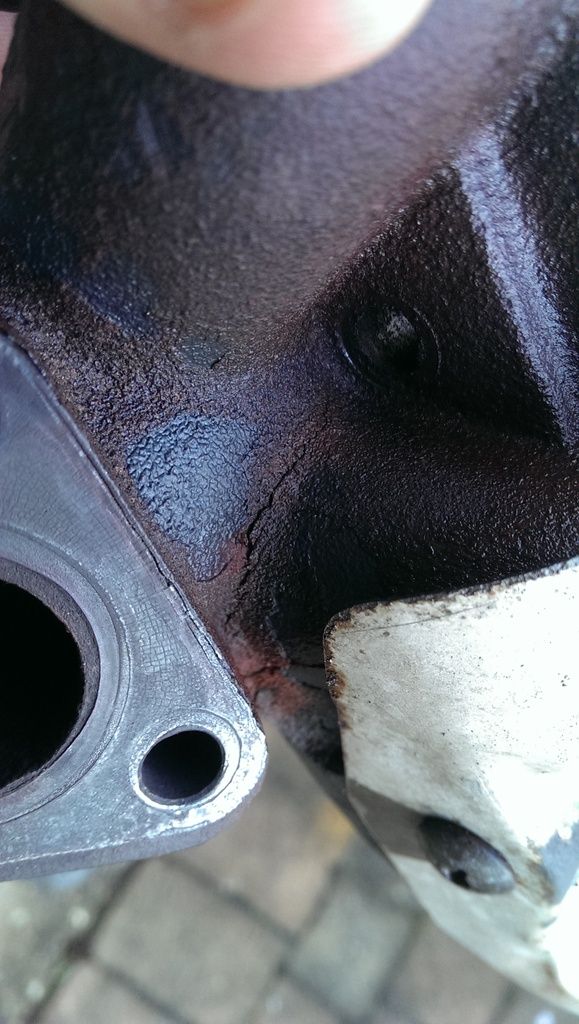
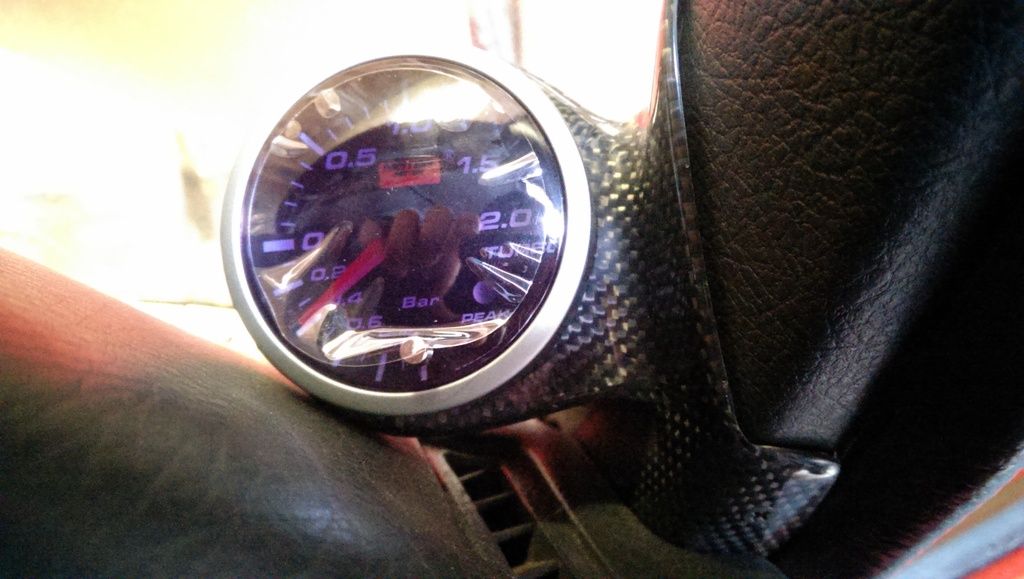
Well I have eventually got the manifold off, took quite a bit of plusgas to get the cat supporting bolts off and the allen head bolts for the manifold. But its out! Bad news is that it is cracked  so i think its either a new one or a Steve super manifold (if there are any) as I have an N1 ready to go in. so i think its either a new one or a Steve super manifold (if there are any) as I have an N1 ready to go in.
But in other news, boost gauge is in and installed and looking lovely, it illuminates white with the headlights lights off and red with the headlights lights on turbo timer is functioning, dont worry didnt turn the engine on just ignition. And finally also started wiring in my Gizzmo IBC boost controller. Been a productive weekend I think. |
|
| Logged |
|
|
| |
Reply: 9 - 66 |
|
|
| mattjohns |
| Posted on: Monday, May 4th, 2015, 6:53:55am |
|
|
Maximum Member
Posts: 1652
Posts Per Day: 0.94 |
|
| That first exhaust manifold pic just looks like years of baked on oil and crap is starting to lift, the second pic just looks like a WELL worn exhaust manifold gasket. I don't see a crack. |
|
| Logged |
|
|
| |
Reply: 10 - 66 |
|
|
| Andy |
| Posted on: Monday, May 4th, 2015, 9:51:43am |
|
|
Official C.O.C Contributor
Gender: Male
Posts: 23604
Posts Per Day: 3.48 |
|
| I thought it was the two lines coming down from under the heat shield... |
Drop me a PM if you would like to be added to the ClubCappo Member Map. More details can be found here.
We now have an official Facebook group as well as a page! See here |
|
| Logged |
|
|
| |
Reply: 11 - 66 |
|
|
| lord |
| Posted on: Monday, May 4th, 2015, 10:26:00am |
|
|
|
| Clean it and put it in the dish washer |
|
| Logged |
|
|
|
Reply: 12 - 66 |
|
|
| mattjohns |
| Posted on: Tuesday, May 5th, 2015, 7:07:05am |
|
|
Maximum Member
Posts: 1652
Posts Per Day: 0.94 |
|
“ |
Quoted from Andy, posted Monday, May 4th, 2015, 9:51:43am at here |
” |
I thought it was the two lines coming down from under the heat shield...
|
|
Now that you mention it... |
|
| Logged |
|
|
| |
Reply: 13 - 66 |
|
|
| Pepito |
| Posted on: Tuesday, May 5th, 2015, 9:32:24am |
|
|
Big Member
Posts: 193
Posts Per Day: 0.11 |
|
|
| Logged |
|
|
| |
Reply: 14 - 66 |
|
|
| Pepito |
| Posted on: Friday, May 29th, 2015, 4:27:02pm |
|
|
Big Member
Posts: 193
Posts Per Day: 0.11 |
|
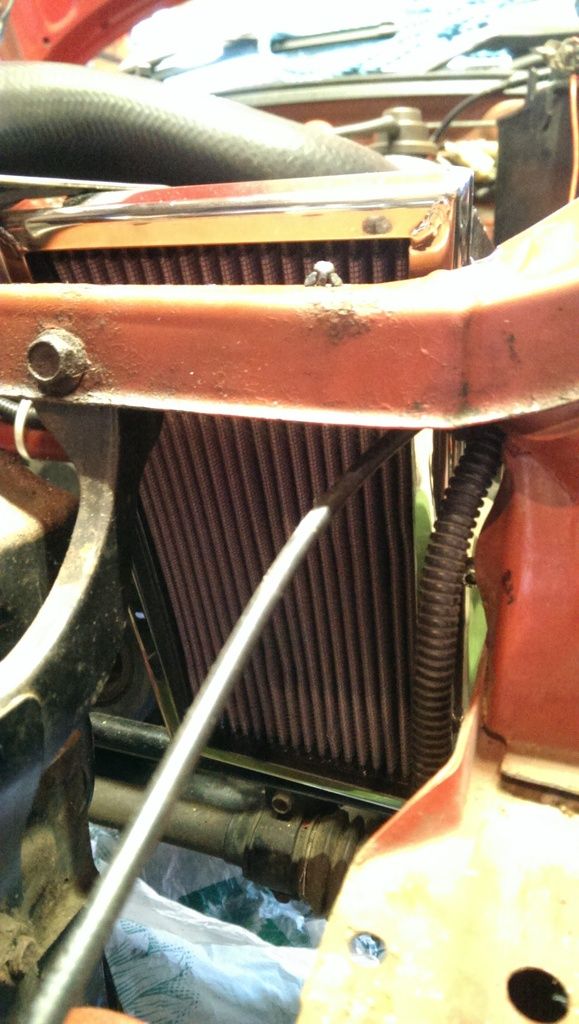
Well after having sourced parts from Suzuki and with the kind help from my misses a new manifold has been put on and the exhaust is all back on along with the shiny 660 airbox which just looks awesome!
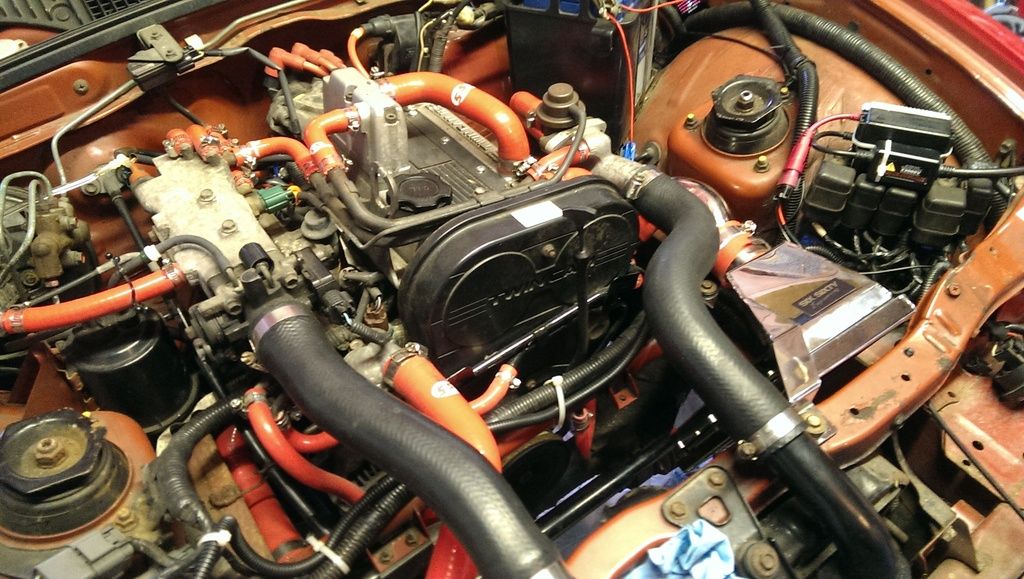

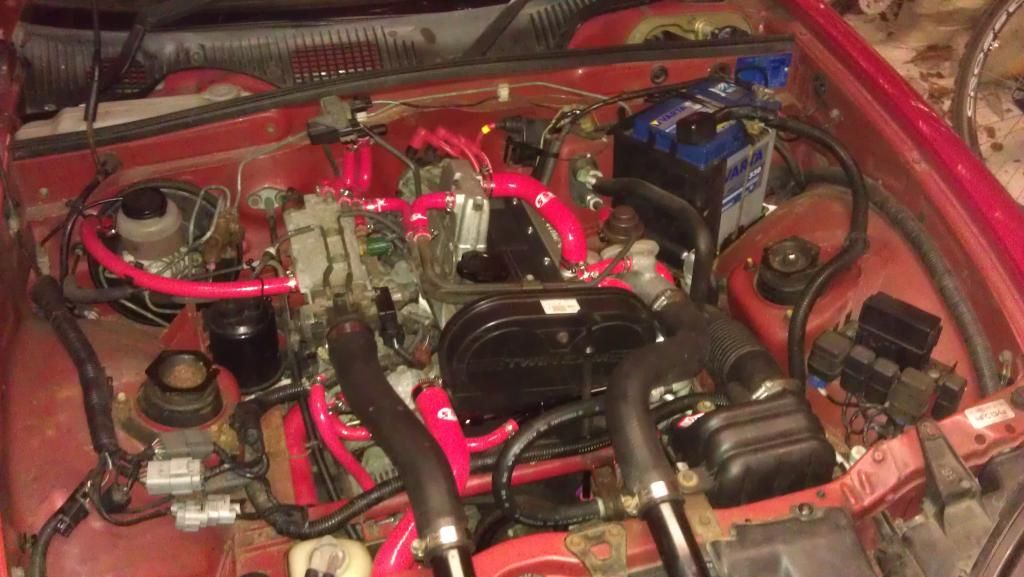
Also as you may have seen from previous posts I have also been busy doing other little bits and bobs. I have removed the EGR and various vacuum lines and now the intake side of the engine looks a lot cleaner and tidier.
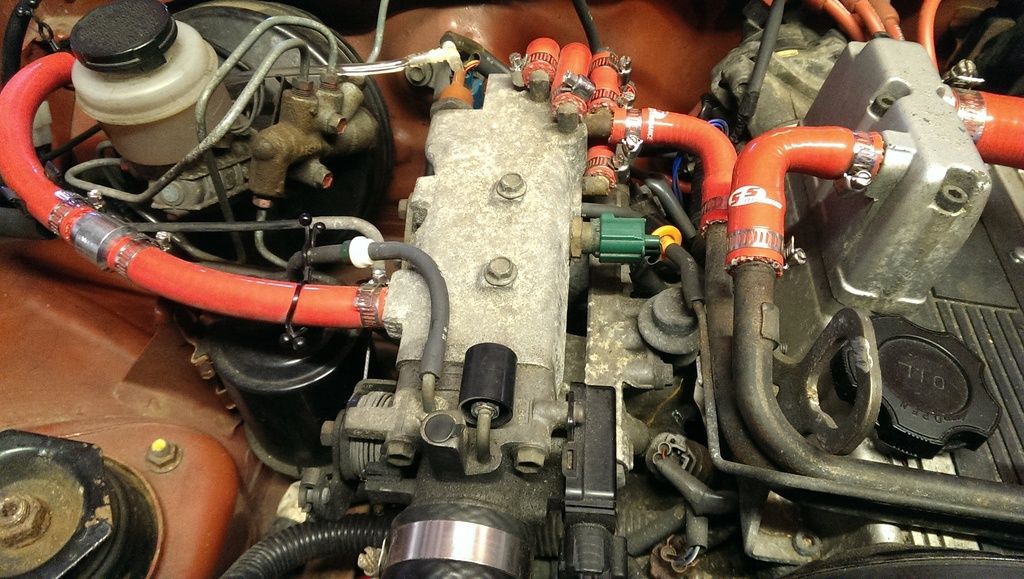
So here are the rest of the pictures that I have taken of the changes that I have done over the last few weeks.
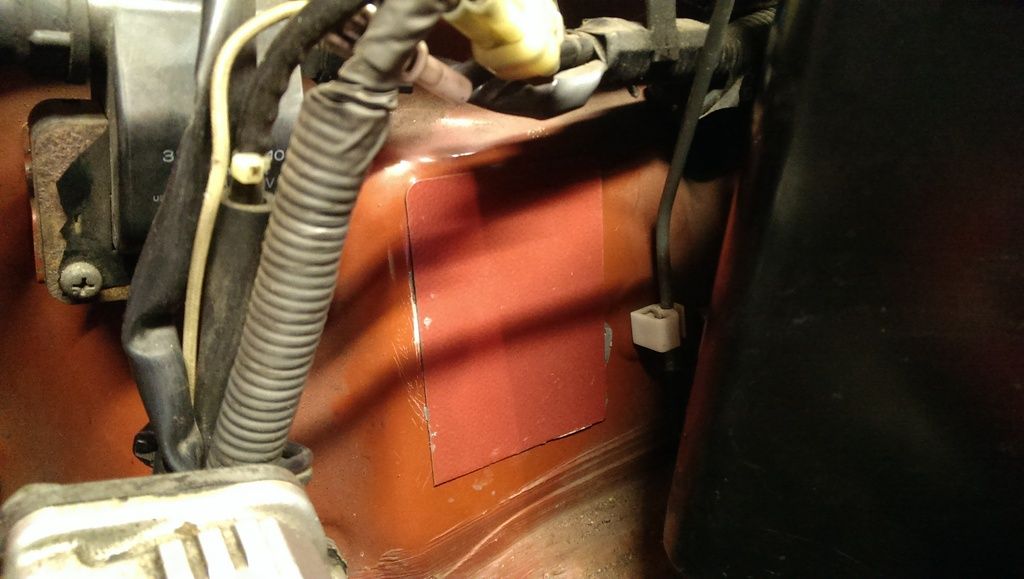
Air-con blanking plate for the bulkhead, metal courtesy of my dad as he gets sample through work, not a bad colour match considering it’s a coating the manufactures use.
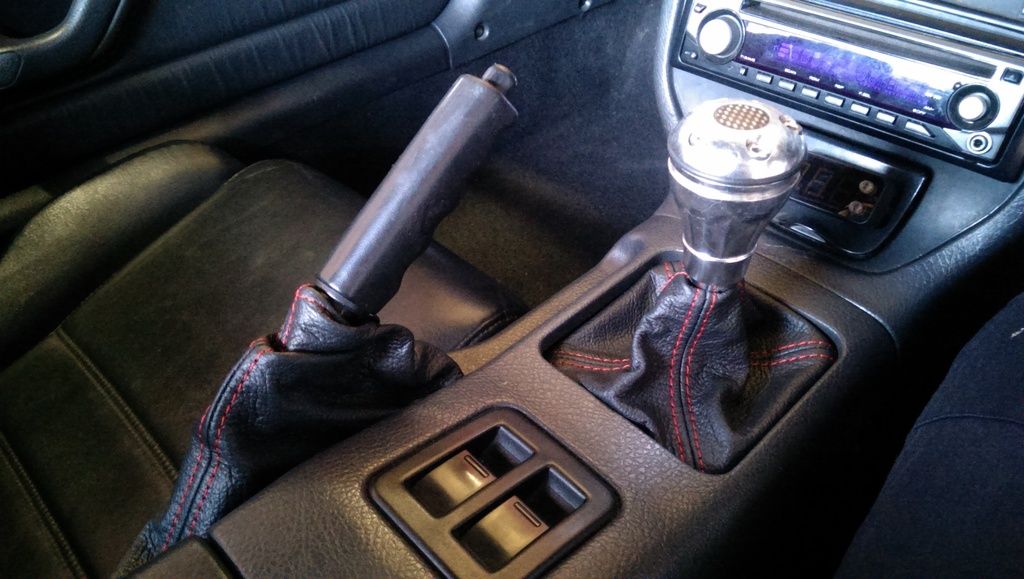
With the interior all in now, lovely new handbrake and gear lever gaiters with nice red stitching.
Boost controller placed on the bin lid, now doesn’t open but not too fussed as might change this area at some point.
Apexi Turbo timer
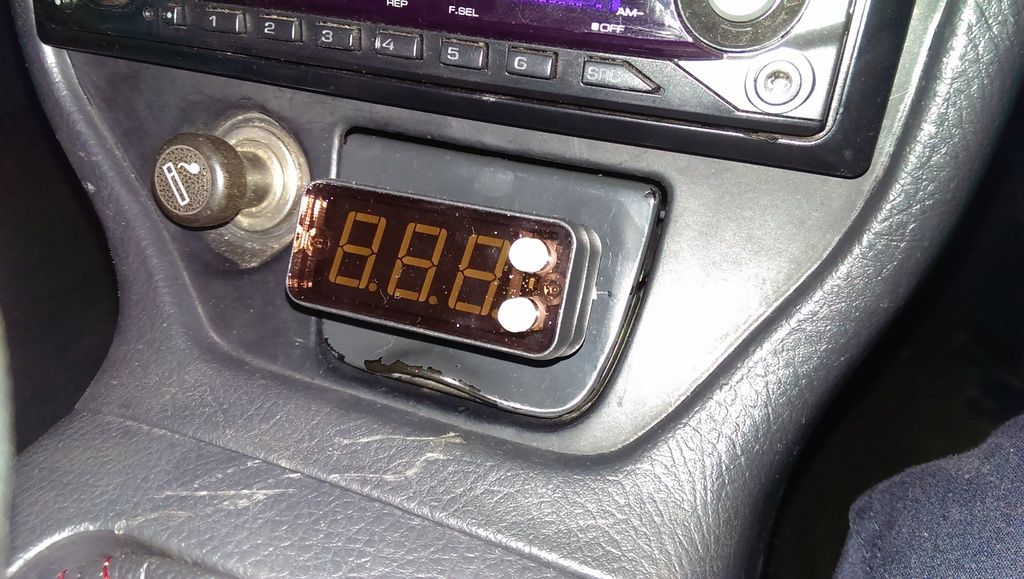
Boost gauge in Monster sport carbon gauge holder
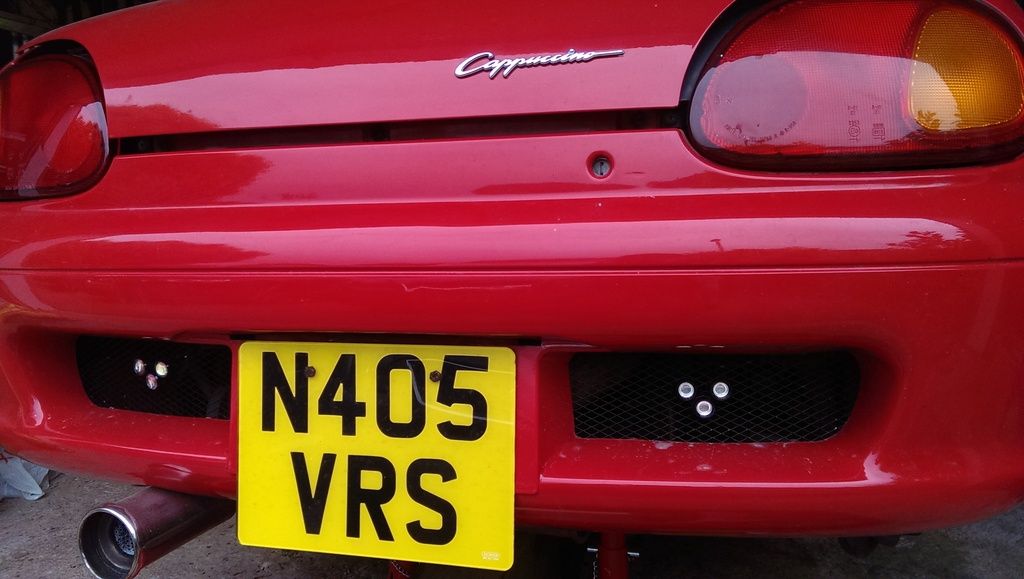
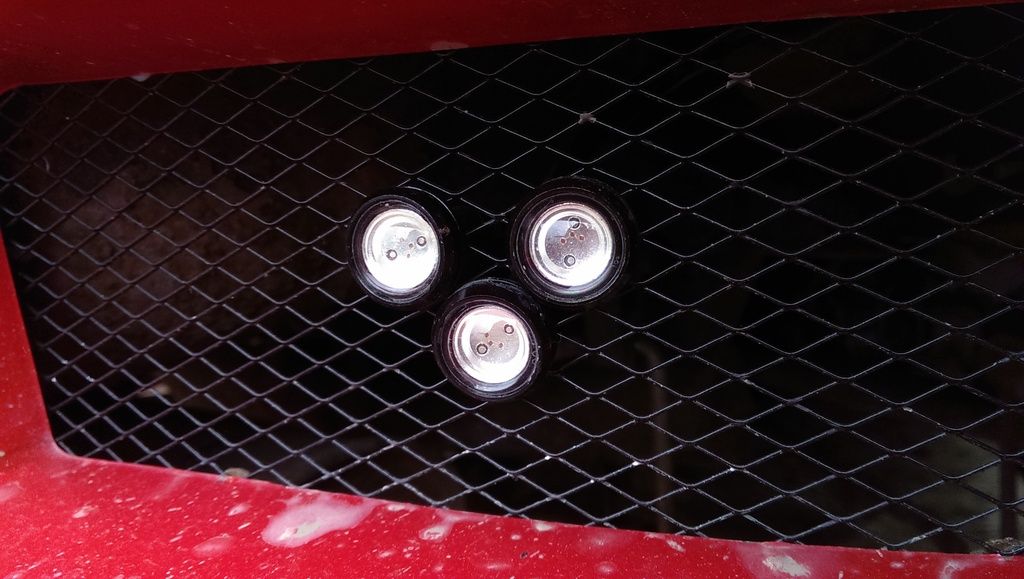
LED reverse and fog lights in new mesh, 3x 9W ultra bright LEDs, and they are seriously bright and look a lot better than the big clunky boxes IMO.
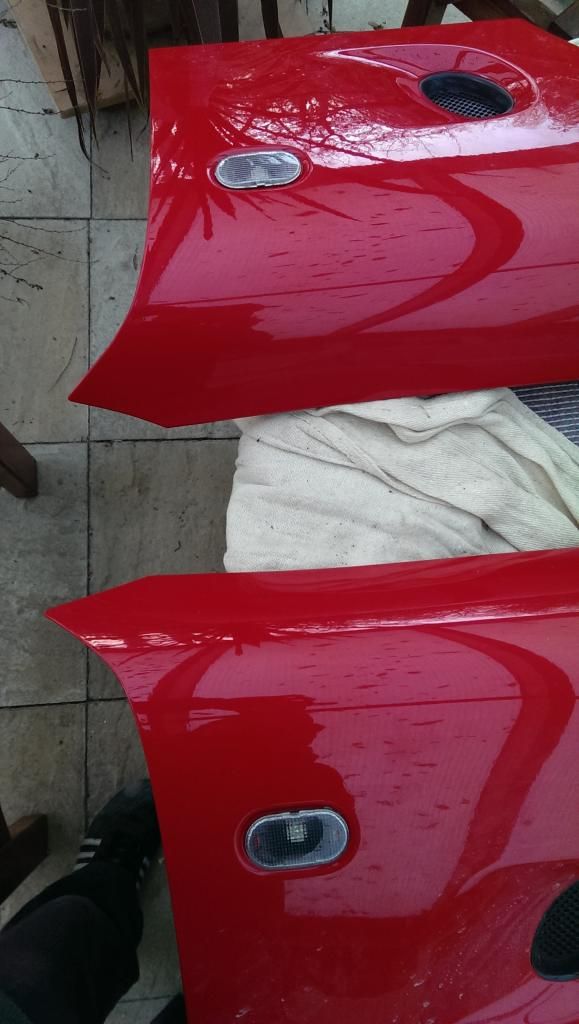
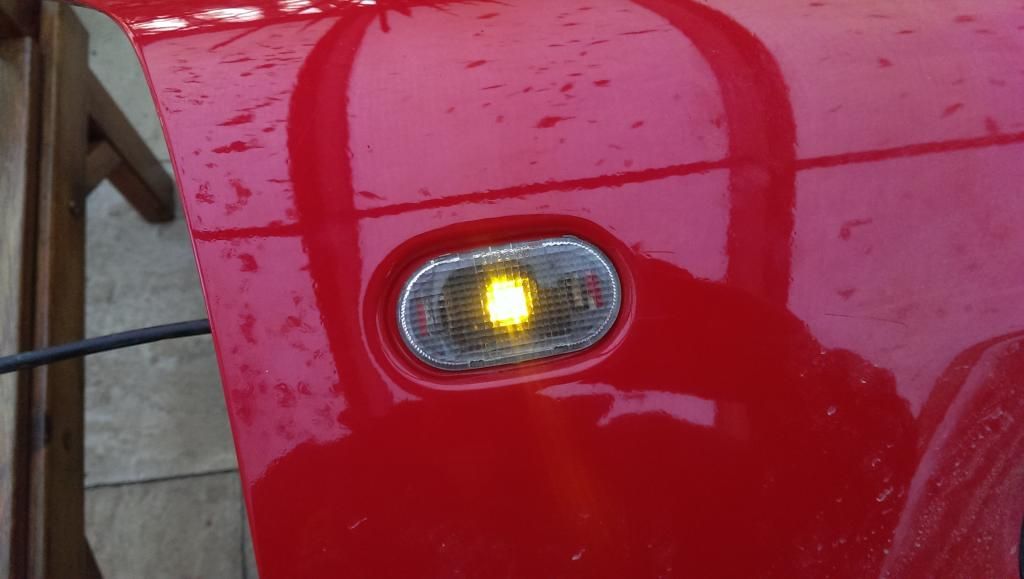
A pic of the new indicator lenses on the car, looks good.
After all that work, I needed to charge that battery as the voltage was too low to crank so after an overnight charge I went to start the car and it started! Only thing was I didn’t tighten the oil feed for the turbo so oil ended up on the floor. Luckily I saw it soon after starting so only lost about 3/4 litre but still wasn’t a happy bunny that I forgot about it and the fact the turbo timer was on so turned the key off and it carried on running! But at least the handbrake switch works!
After taking bit off again to tighten up the turbo oil feed bolt, and put a little bit of oil in it started up nicely and so let it run for a good long while. Gave it a little bit of throttle and the airbox makes it sound soo good! Definitely can’t wait to drive it again. All that’s left to do now is get the front end back together and a quick oil change. Excited is what I am.
|
Last modified Friday, May 29th, 2015, 4:29:22pm by Pepito |
|
| Logged |
|
|
| |
Reply: 15 - 66 |
|
|
| lord |
| Posted on: Friday, May 29th, 2015, 4:53:58pm |
|
|
|
|
| Logged |
|
|
|
Reply: 16 - 66 |
|
|
| Pepito |
| Posted on: Tuesday, June 9th, 2015, 1:57:22pm |
|
|
Big Member
Posts: 193
Posts Per Day: 0.11 |
|
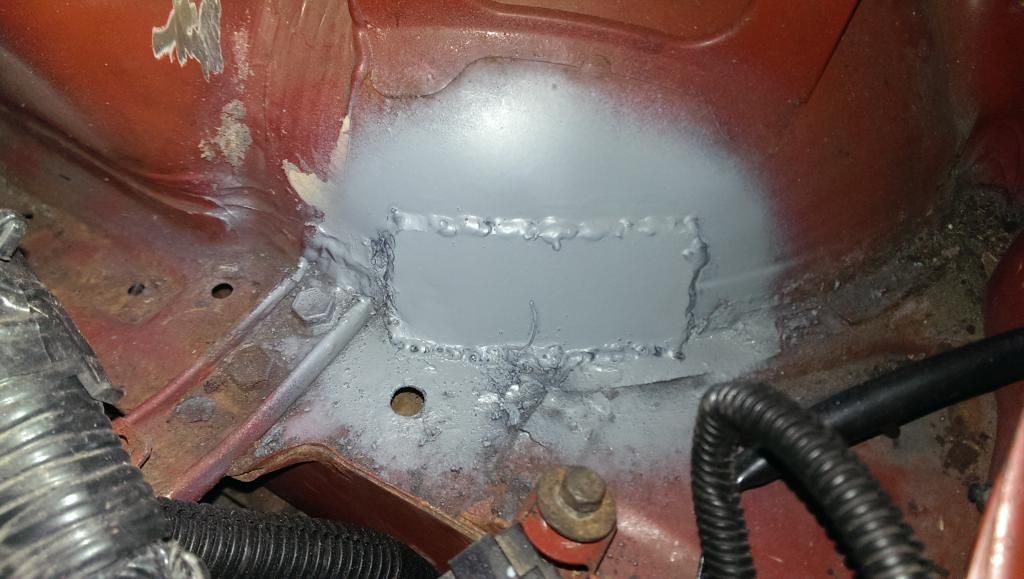
Well the Cappo is now back on the road after a few hectic days of trying to get it through the MOT. It went for its MOT on Friday and on the drive there I noticed that it wasn't boosting correctly, only to 0.3bar or so. But as I knew it wouldn't effect the MOT much I let it slide to fix at the weekend. It failed on Friday, a bit of rust had turned up in the drivers side rear arch and it also failed the emissions test (N Reg cappo) as lambda was too lean 1.08 , limit is 1.03. CO and HC were all in limit with CO being 0.00%.
So at the weekend I welded up a plate on the rear arch undersealed that and then moved to the emissions issue. I thought it would be a CO resistor issue so checked the duty cycles as best I could with my appalling analogue voltmeter, need to get one with duty cycle, and put a variable one in, starting at where the current one, L" resistor, was set and going richer from there. Also solved the boost issue, ABV was wide open as I had put the one way valve the wrong way that feeds it form the manifold, boosted nicely after that
Took it for its retest today and it was too rich and CO was all over the shot, was at 2.86% first attempt and 4.04% 2nd attempt! I asked them to tweak the CO resistor as I have obviously gone too far, another reason to get a new multimeter, and now it has passed! 
All I need now is some tax and I'm a happy chappy! So glad this day has come! |
|
| Logged |
|
|
| |
Reply: 17 - 66 |
|
|
| lord |
| Posted on: Tuesday, June 9th, 2015, 2:18:19pm |
|
|
|
|
| Logged |
|
|
|
Reply: 18 - 66 |
|
|
| Pepito |
| Posted on: Saturday, July 4th, 2015, 11:04:50am |
|
|
Big Member
Posts: 193
Posts Per Day: 0.11 |
|
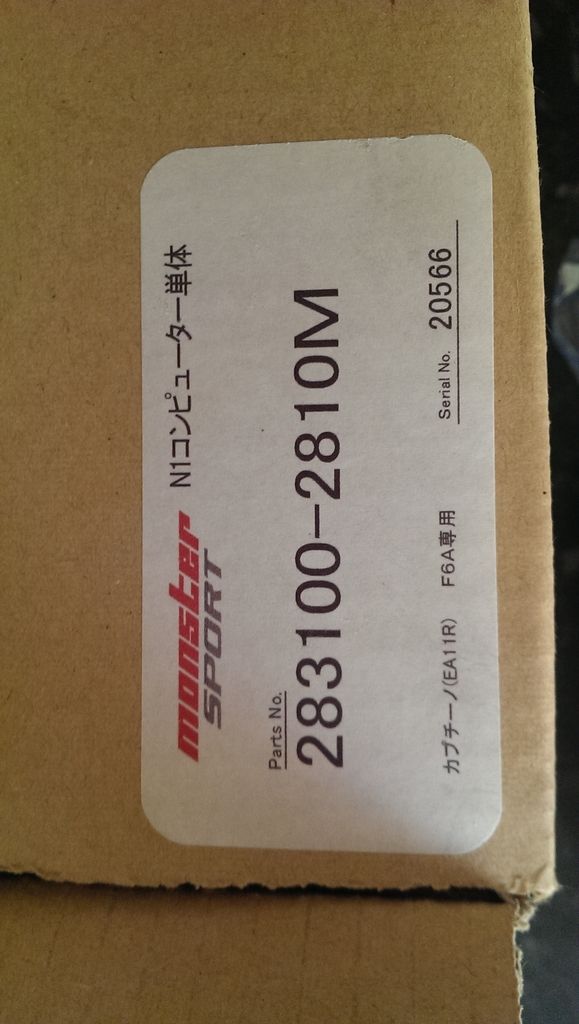
This morning I finally got round to installing my N1 ECU. Very simple to do, I think only took me about 10mins!
Original and N1
N1 installed

Started up first time too so I am happy. I let it warm up before giving it a bit of throttle just to make sure it was completely happy in a transient condition and noticed that the green boost light wasn't lighting up. Now I know on N2 ECU it doesn't light up till over 1bar and I am sure I have the N1 as it says so on the box and info inside.
But then couldn't find the exact part number on the Monster Sport site. Any ideas? |
|
| Logged |
|
|
| |
Reply: 19 - 66 |
|
|
| Andy |
| Posted on: Saturday, July 4th, 2015, 11:33:27am |
|
|
Official C.O.C Contributor
Gender: Male
Posts: 23604
Posts Per Day: 3.48 |
|
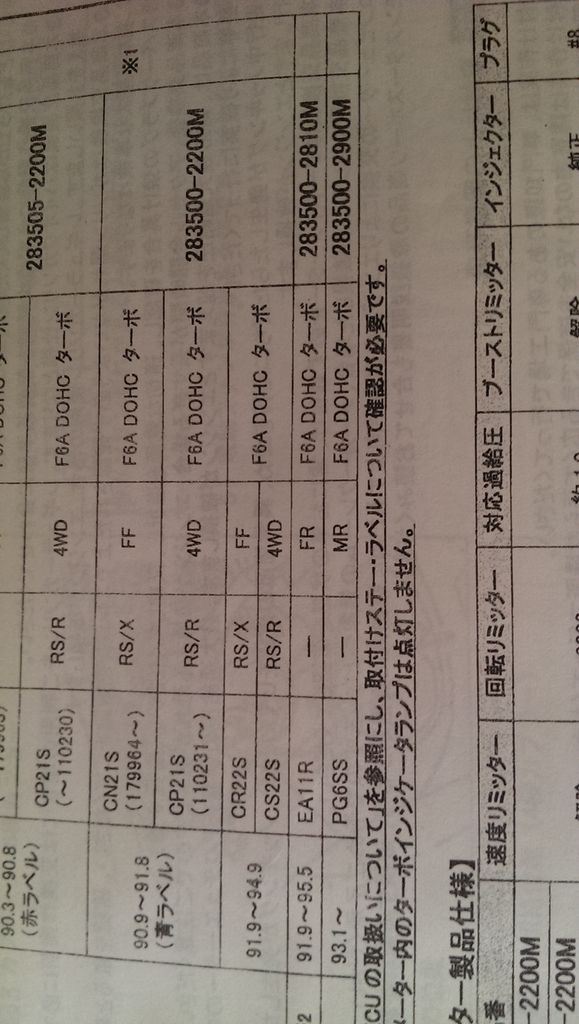
Interesting that the label on the outside says 283100-2810M whereas the instructions give the correct 283500-2810M part number...
Best way to check is to go for a spirited drive |
Drop me a PM if you would like to be added to the ClubCappo Member Map. More details can be found here.
We now have an official Facebook group as well as a page! See here |
|
| Logged |
|
|
| |
Reply: 20 - 66 |
|
|
| Pepito |
| Posted on: Saturday, July 4th, 2015, 12:41:46pm |
|
|
Big Member
Posts: 193
Posts Per Day: 0.11 |
|
| I did and I set up the Gizzmo IBC as well. Got 0.9bar, 1bar and 1.1bar for now and the boost light definitely comes on over 1bar. Also it does make a difference, standard feels sluggish. |
|
| Logged |
|
|
| |
Reply: 21 - 66 |
|
|
| Andy |
| Posted on: Saturday, July 4th, 2015, 1:26:43pm |
|
|
Official C.O.C Contributor
Gender: Male
Posts: 23604
Posts Per Day: 3.48 |
|
(y)
Boost light must be a change Monster Sport have brought in as the Suzuki Sport N1 has the boost light acting as standard. |
Drop me a PM if you would like to be added to the ClubCappo Member Map. More details can be found here.
We now have an official Facebook group as well as a page! See here |
|
| Logged |
|
|
| |
Reply: 22 - 66 |
|
|
| Pepito |
| Posted on: Saturday, July 4th, 2015, 1:46:15pm |
|
|
Big Member
Posts: 193
Posts Per Day: 0.11 |
|
| I cant think a) why the part number is different considering it also says N1 on the box sticker and b) why the boost light isn't coming on as normal. It must be a change they have done. Also cant see any other marking on the ECU casing to make sure it is an N1. |
|
| Logged |
|
|
| |
Reply: 23 - 66 |
|
|
| Andy |
| Posted on: Saturday, July 4th, 2015, 1:48:44pm |
|
|
Official C.O.C Contributor
Gender: Male
Posts: 23604
Posts Per Day: 3.48 |
|
| Serial number on the box and ECU match so I doubt it's the wrong ECU. |
Drop me a PM if you would like to be added to the ClubCappo Member Map. More details can be found here.
We now have an official Facebook group as well as a page! See here |
|
| Logged |
|
|
| |
Reply: 24 - 66 |
|
|
| Pepito |
| Posted on: Saturday, July 4th, 2015, 2:18:25pm |
|
|
Big Member
Posts: 193
Posts Per Day: 0.11 |
|
| True they are the same. It's just strange. Well I'm happy with it either way, and the engine is running nicely with it on. |
|
| Logged |
|
|
| |
Reply: 25 - 66 |
|
|
| lord |
| Posted on: Sunday, July 5th, 2015, 8:26:37am |
|
|
|
| How much quicker is it the. With this in? |
|
| Logged |
|
|
|
Reply: 26 - 66 |
|
|
| Pepito |
| Posted on: Sunday, July 5th, 2015, 12:42:45pm |
|
|
Big Member
Posts: 193
Posts Per Day: 0.11 |
|
| It is noticeably quicker. Got 1.2bar last night by accident as I wanted to make a tweek to the gain, as it was cooler than when I set up the gizzmo during the day got a bit more boost and that was just mad! It is so good, changes the feel of the car, makes it very eager. Love it. |
|
| Logged |
|
|
| |
Reply: 27 - 66 |
|
|
| Andy |
| Posted on: Sunday, July 5th, 2015, 12:55:45pm |
|
|
Official C.O.C Contributor
Gender: Male
Posts: 23604
Posts Per Day: 3.48 |
|
Certainly does You should accidentally hit 1.5 bar It all just turns into a blur (I don't recommend it really, well I do but I take no responsibility for things going pop )
|
Drop me a PM if you would like to be added to the ClubCappo Member Map. More details can be found here.
We now have an official Facebook group as well as a page! See here |
|
| Logged |
|
|
| |
Reply: 28 - 66 |
|
|
| Pepito |
| Posted on: Thursday, April 14th, 2016, 1:41:33pm |
|
|
Big Member
Posts: 193
Posts Per Day: 0.11 |
|
Well it has been a long time since I updated this, although there is very little to say Cappuccino wise as it has been a very busy couple months as the misses and I bought our first home and moved in back in January. So hence not a lot has been done on the cappo.
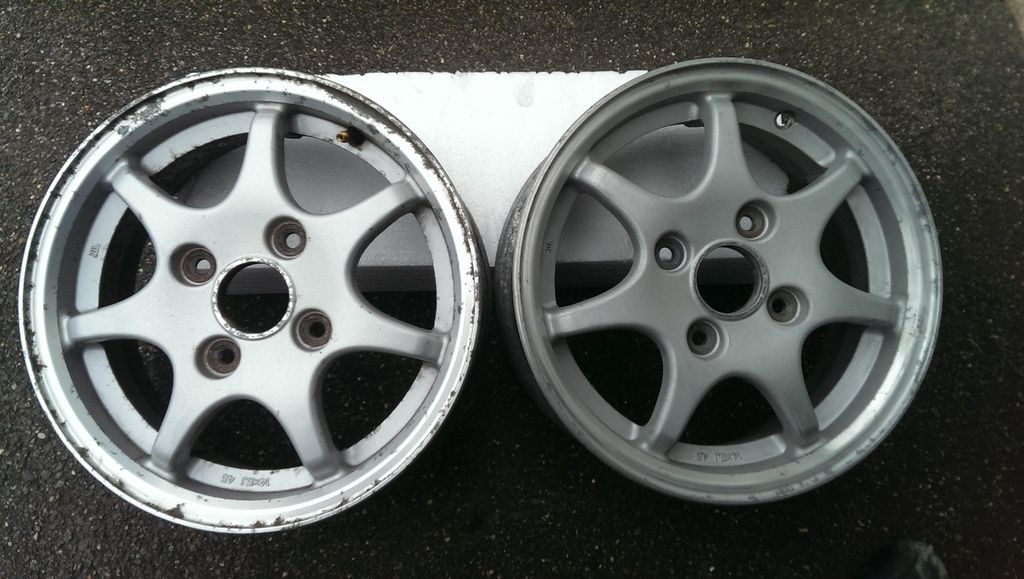
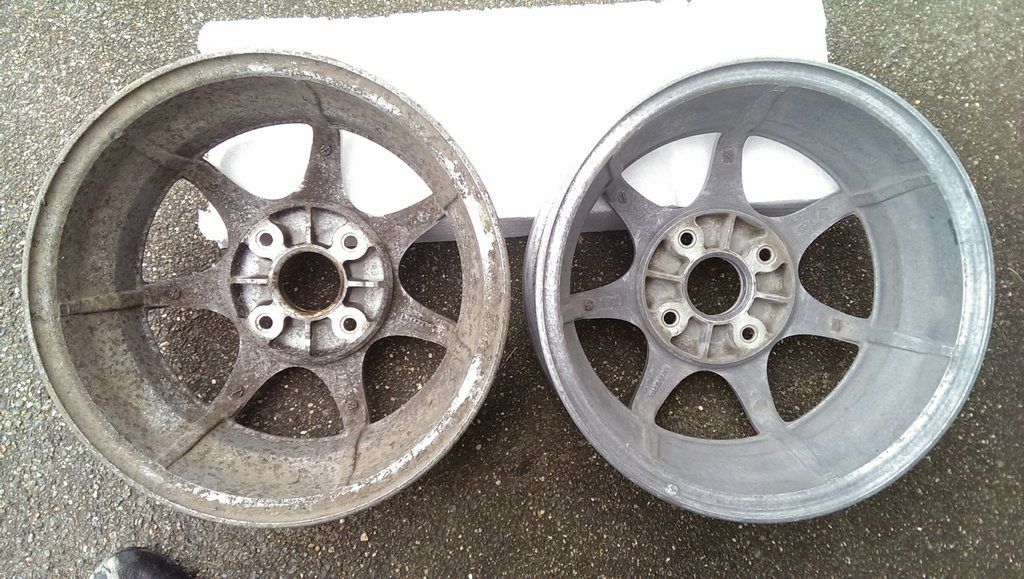
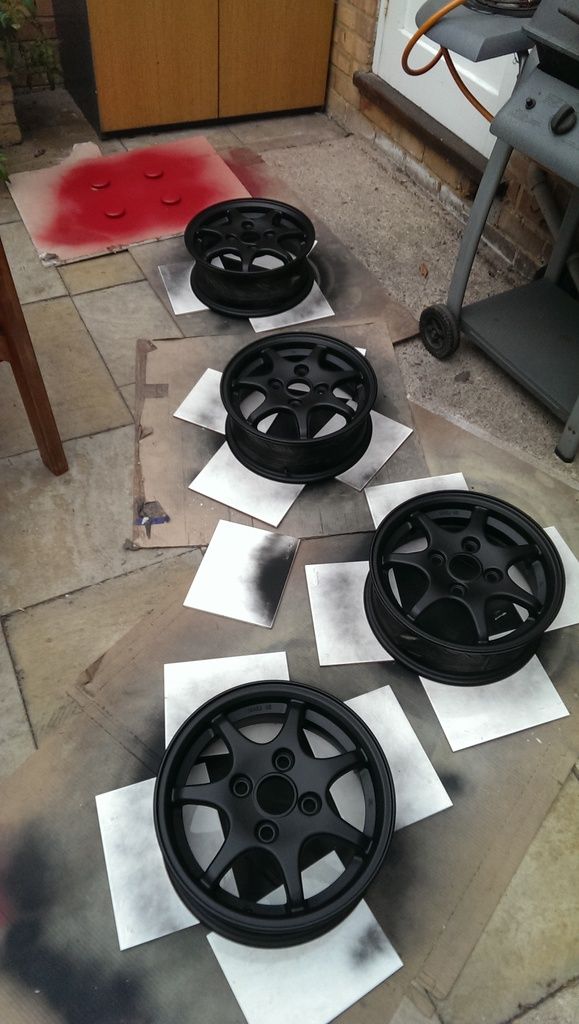
The plan was to refurbish the wheels, which I have started, been cleaning and sanding them back ready for painting (before left, after right). Colour I'm going to go for is matt black with the centre caps in red and some new red wheel nuts as some of them are starting to show their age and also had a bit of trouble getting one off.
I also have some intercooler hard pipes and an oil catch can I would like to install before it goes back on the road along with a regular service which needs doing. Hopefully I can have it out for the Nationals at the end of May but we will see as weekends are running out fast!
Oh and I also purchased Dons HT07, 320cc injectors and manifold at last years KKITP, so that will be in the pipe line - soon hopefully |
Last modified Thursday, April 14th, 2016, 1:42:44pm by Pepito |
|
| Logged |
|
|
| |
Reply: 29 - 66 |
|
|
| Pepito |
| Posted on: Friday, April 15th, 2016, 1:49:15pm |
|
|
Big Member
Posts: 193
Posts Per Day: 0.11 |
|
| Tyres I am thinking of going for are Nankang NS-2R in 185/60R14. The reviews on them have been good and the MX5 forums have raved about them as I couldn't find any info on these on here. Anyone used these? If not I will take the plunge. |
Last modified Friday, April 15th, 2016, 1:52:18pm by Pepito |
|
| Logged |
|
|
| |
Reply: 30 - 66 |
|
|
| Andy |
| Posted on: Saturday, April 16th, 2016, 1:22:31pm |
|
|
Official C.O.C Contributor
Gender: Male
Posts: 23604
Posts Per Day: 3.48 |
|
| Really? They must have improved over the years then because they didn't get the nickname ditchfinders for no reason... |
Drop me a PM if you would like to be added to the ClubCappo Member Map. More details can be found here.
We now have an official Facebook group as well as a page! See here |
|
| Logged |
|
|
| |
Reply: 31 - 66 |
|
|
| Pepito |
| Posted on: Saturday, April 16th, 2016, 2:41:30pm |
|
|
Big Member
Posts: 193
Posts Per Day: 0.11 |
|
| Yeah they are the best tyres they do and they are used in a racing series, can't remember which one. But people have said they are a good tyre for the price and perform well against the R888 for nearly half the price. I will have more grip than I do now anyway. |
|
| Logged |
|
|
| |
Reply: 32 - 66 |
|
|
| Andy |
| Posted on: Saturday, April 16th, 2016, 5:23:52pm |
|
|
Official C.O.C Contributor
Gender: Male
Posts: 23604
Posts Per Day: 3.48 |
|
| I've recently switched to Goodyear EffiecientGrip performance which offer great grip, feedback etc. They're also cheaper than the Nankangs. Falken Ziex ZE914 are another great tyre for less money. That said if you want to try them out and let us all know how they perform then we will all have more choice come tyre change time. |
Drop me a PM if you would like to be added to the ClubCappo Member Map. More details can be found here.
We now have an official Facebook group as well as a page! See here |
|
| Logged |
|
|
| |
Reply: 33 - 66 |
|
|
| Pepito |
| Posted on: Sunday, April 17th, 2016, 9:37:46am |
|
|
Big Member
Posts: 193
Posts Per Day: 0.11 |
|
| The thing is as I only ever use the car in the summer then I was thinking about more of a semi-slick tyre. The Nankang provides that and also has better rain channels than a R888 should I get caught out in the rain. I will give it a go and let you know how it goes! |
|
| Logged |
|
|
| |
Reply: 34 - 66 |
|
|
| Pepito |
| Posted on: Monday, May 23rd, 2016, 12:30:22pm |
|
|
Big Member
Posts: 193
Posts Per Day: 0.11 |
|
Well a busy couple of weeks, been decorating the house and tiding up the garden and I have also managed to find time to work on the car and a good thing too as will be joining Marc at the Royston car show next Sunday (5th June).
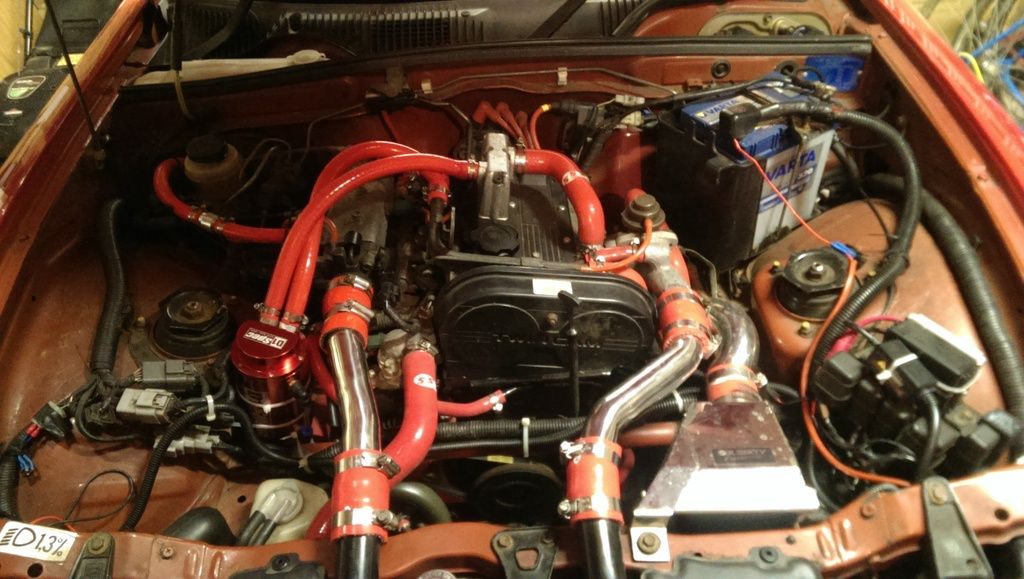
Anyway, have finally got round to installing my oil catch can, which is currently very securely attached with cable ties, very JDM. but it doesn't move so all good. And also changed the remaining vacuum lines to red silicone so now the engine bay is looking pretty good especially with the new intercooler pipes.
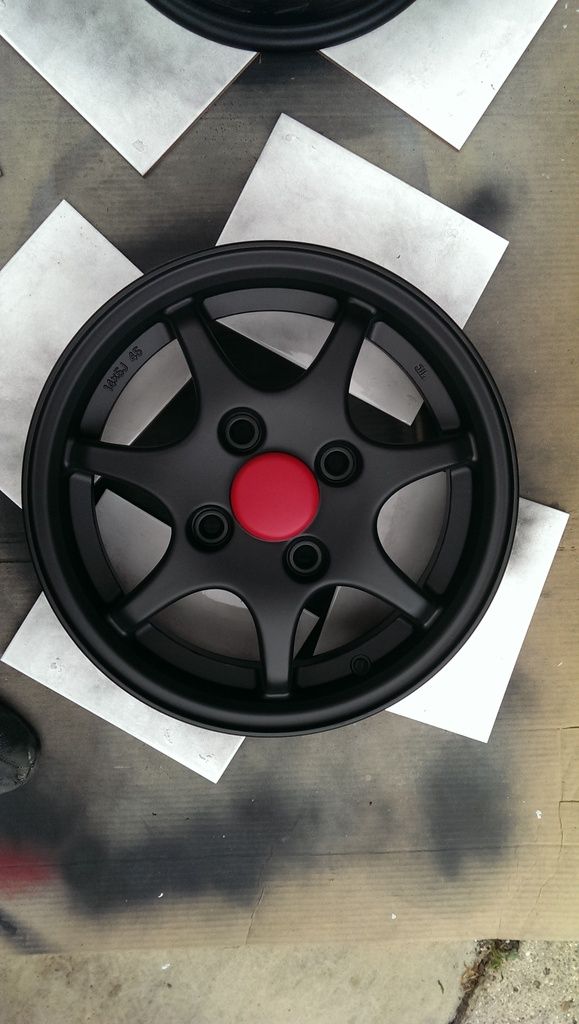
Also I have finished painting the wheels, all nice and matt black now and very happy with how they have turned out considering how they used to be! And the centre caps are red too which I think look good, may get some Suzuki S's to go in the middle. Then its get my new tyres on, wheels balanced, get the tracking done and hopefully no problems with the MOT.
Looking forward to driving it again |
|
| Logged |
|
|
| |
Reply: 35 - 66 |
|
|
| Pepito |
| Posted on: Friday, May 27th, 2016, 9:56:22am |
|
|
Big Member
Posts: 193
Posts Per Day: 0.11 |
|
I got my Nankang NS-2R 185/60R14 tyres put on yesterday and here they are fitted to the car along with my nice new red wheel nuts.
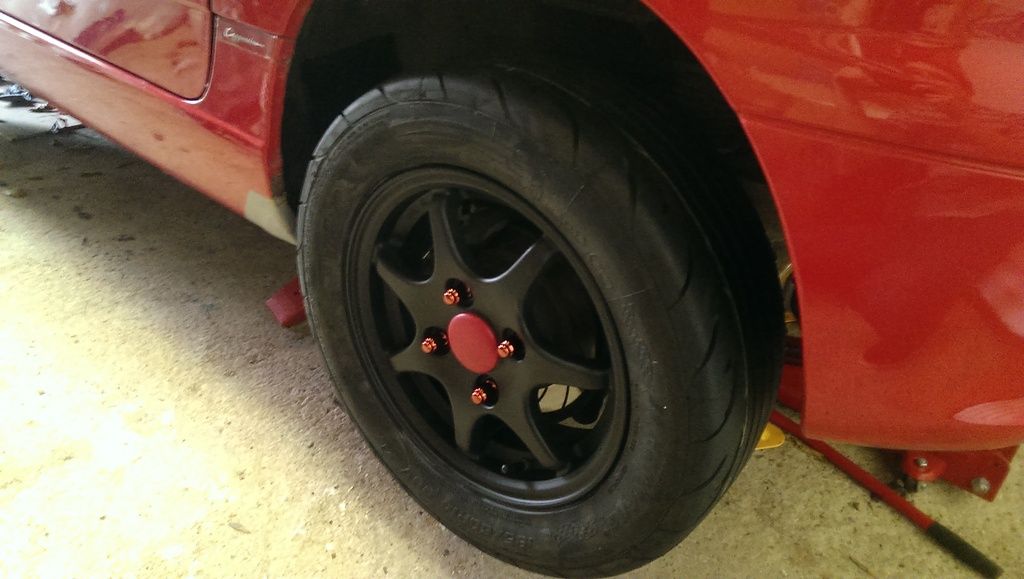
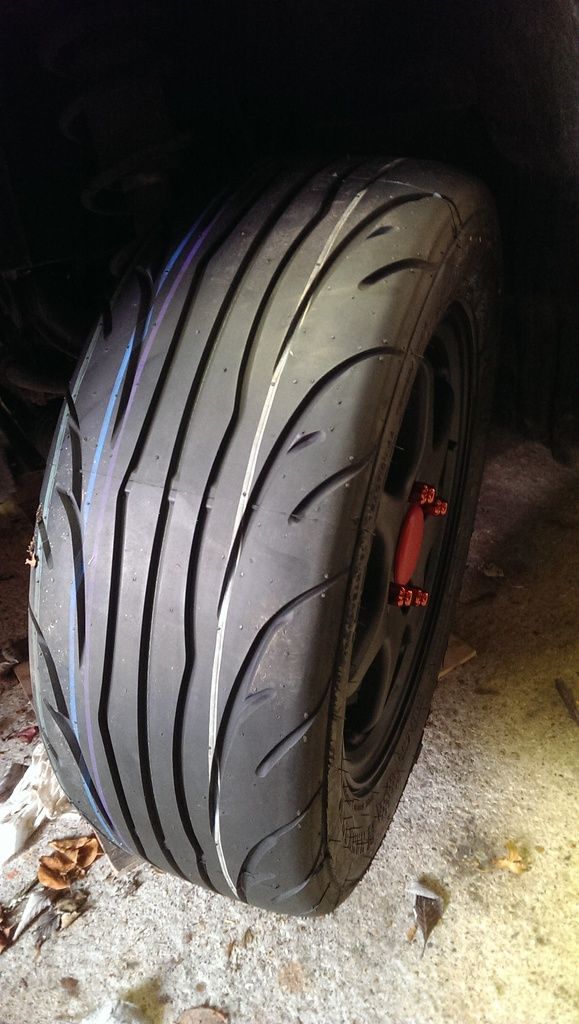
The fronts are rubbing slightly on turning so will need to move the arch liners. but otherwise very happy with how they have turned out. Hopefully much more grip than my previous tyres! |
|
| Logged |
|
|
| |
Reply: 36 - 66 |
|
|
| Ricou |
| Posted on: Friday, May 27th, 2016, 1:14:20pm |
|
|
Maximum Member
Posts: 1110
Posts Per Day: 0.65 |
|
Those are semi-slicks so yeah I expect you're gonna have shitloads of grip !
Probably more than you should ever need in a Cappuccino 
Nice paint job by the way, but I'm not a huge fan of the protruding wheel nuts. |
Last modified Friday, May 27th, 2016, 1:15:22pm by Ricou |
|
| Logged |
|
|
| |
Reply: 37 - 66 |
|
|
| Pepito |
| Posted on: Tuesday, May 31st, 2016, 2:44:42pm |
|
|
Big Member
Posts: 193
Posts Per Day: 0.11 |
|
IT PASSED ITS MOT! First time it has passed first time since buying it back in 2012!!!! Very happy chappy, cant wait to drive it again (parents drove it to MOT as its at their house atm), especially with the lovely weather we are having 
Thanks Ricou, I'm very happy with how the wheels turned out and I kind of like the wheel nuts, something about them. All ready now for Sundays car show at Royston with Marc (Kei)! |
|
| Logged |
|
|
| |
Reply: 38 - 66 |
|
|
| john&ann |
| Posted on: Wednesday, June 1st, 2016, 7:20:51am |
|
|
|
| Looks good mate. MOT Time is always a worry with the Cappo and, such a relief when it passes. Drive carefully and enjoy for another year ! |
|
| Logged |
|
|
|
Reply: 39 - 66 |
|
|
|
 Cappuccino Owners Club › Gallery › Cappo Related Album › Pepe's Hot Coffee (Moderators: )


 Locked Board