Topic Started by:
Hi I thought i'd start a repairs and works thread for my cappo.
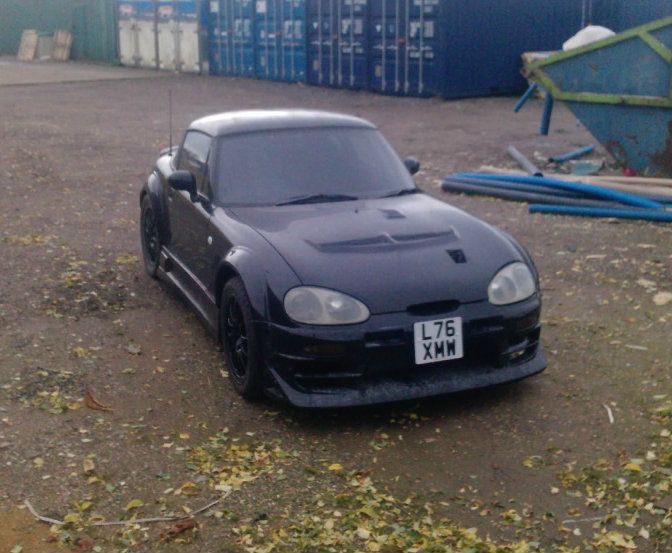
Here's a few pics to get started
The driverside arch with rust cut out and awaiting arches to arrive beforefinal cutting and welding.
A replacement driverside front sill piece almost ready to go on after rust cut out.
and another few of the same part
more pics to come.


Reply: 1
Glad I live out here, the rust over there is unbeliievable.
Reply: 2
All cars over there should have fiberglass shells!
Nice fabrication :)
Reply: 3
Cheers, not bad for my first.
It's taken about 2 yrs but the rear bumper is finally finished (dance)

Reply: 4
Oooo i like the look of that! Very close to my idea of the ideal rear bumper!
Reply: 5
Another sand down, a coat of paint and the front bumper will be completed. I'm really happy with the grill.

Reply: 6
I love the rear bumper too.. like the take off one..how comes it took you two years?
Reply: 7
Quoted from lord, posted Friday, June 12th, 2009, 12:10:53am at here I love the rear bumper too.. like the take off one..how comes it took you two years?
A, cause i'm a lazy git
B, cause it kept getting damaged
and
C, cause i never could decide what colour i wanted
;D
Reply: 8
get some more pics up.. the idea of the grill is a wicked idea!!!!
trust me.
lord
Reply: 9


Reply: 10
Seems nice.
I wonder how it looks on a the car !
:)
Reply: 11
i like it when you get a dark grey gun metal lip..that follows the lines of the front grilll down to the bottom of the bumper...looks nice! Try this? then get it on the car..
Reply: 12
Gonna keep the lip red as (funds allowing) i want to put some writing in that section. Ż13 for 2x "kei inside" intel type graphics for the sides and Ż13 for another cappuccinosport.com logo.
The bumper should look good on the car, another 2 days work on the rusty cills before the now painted skirts go on, and about 3 days to attend to the arches. A days G3'ing and polishing and she should be looking good for the Ace Cafe day ;D
Reply: 13
Surely Dany will give you the cappuccinosport one :D
Reply: 14
Where's the clubcappo one going? ;D
Reply: 15
Nah the cappo sport stickers are all the graphic type ones, i want a plain web addy type one and the club cappo sticker sits pride of place in the rear window :)
Reply: 16
Pretty sure he did have the web address type ones :-/ wonder what happened to them? (If I haven't dreamt them up that is :D)
Reply: 17
There's a few places on eBay that do stickers from jpgs I think - maybe you can supply the file to them and they will laser cut it?
Reply: 18
Theres a company in town that does it, it may be a lil more expensive but it's good to be at the machine for any last minute changes etc.Ā Plus its a good chance to have an hour chat about cars and stuff :)
Another pic of the rear bumper, i think the colour match is fairly good, after G3'ing i think it's gonna be spot on.

Reply: 19
Looking good :D
Looking forward to seeing it at the Ace Cafe at the end of next month
Reply: 20
Looking forward to going, last time the car generated some interest but most of the comments were about the oily engine bay and the body kit was a bit tatty imo.
This time its got a spanking s2 engine with fancy cappo sport pipework, un ripped seats, fantastic looking body kit and hopefully a colour restored shiny bodywork. I might even get around to re painting the calipers, it should get quite a lot of attention. :)
Reply: 21
ha ha.. I'm sure we have met????
were you at the ace cafe about two years ago? You had the black body kitt? and you sat right by the entrance!? I'm sure we had a lengthy chat? There was a mint white swift turbo on the day and most of us were in Ignis sports??
Reply: 22
Forgot to mention although it wont be seen, should have a temporary N1 fitted to the car too ;D
Reply: 23
Here's the driverside cill almost finished
Sorry no before pics, the camera didn't work well in low light.
Bit of advise when working with a grinder WEAR EYE PROTECTION, just had some really painfull chunks of metal removed from my right cornea. Not nice.

Reply: 24
Aw, sorry to read that Kei.
Weren't you wearing glasses by the way ?
Reply: 25
Yes, thats the trouble. Normal glasses offer no protection. My eye should be ok for more works later today. The cills are nearly done, i just have to start on the arches.
Reply: 26
Heres a tip for when you start welding ;D
Reply: 27
While that is a funny pic, during a safety induction at a mine site, we were shown much worse. I'll see if I can find pics and put them in the fun section.
Bumpers look good Kei ;)
Reply: 28
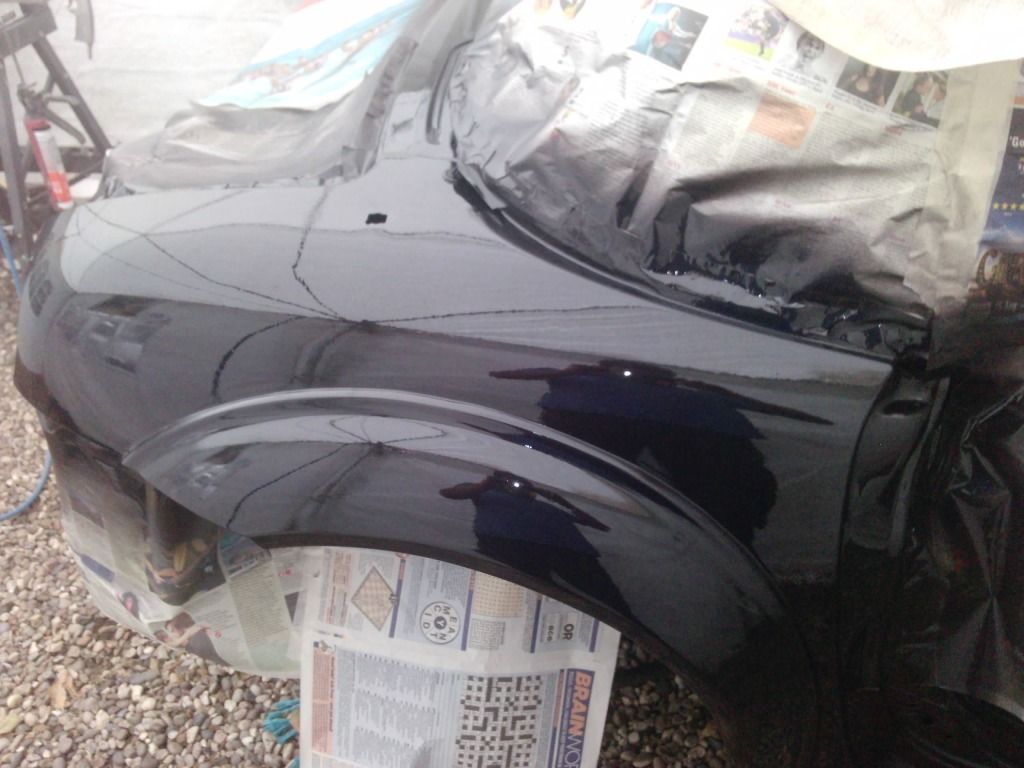
Spent a couple of hours on the bonnet, rubbed down with G3 compound, then that red colour restore turtle wax and a final super resin polish.
here's a 50/50
and the finished job
the colour match with the bumper is quite good i think.
and heres the passenger cill after rust has been cut off and removed from my eye ;D and 1.1mm plate welded back on. Sorry about the quality of the pic and the welding, fortunately it's all being covered by side skirts.


Reply: 29
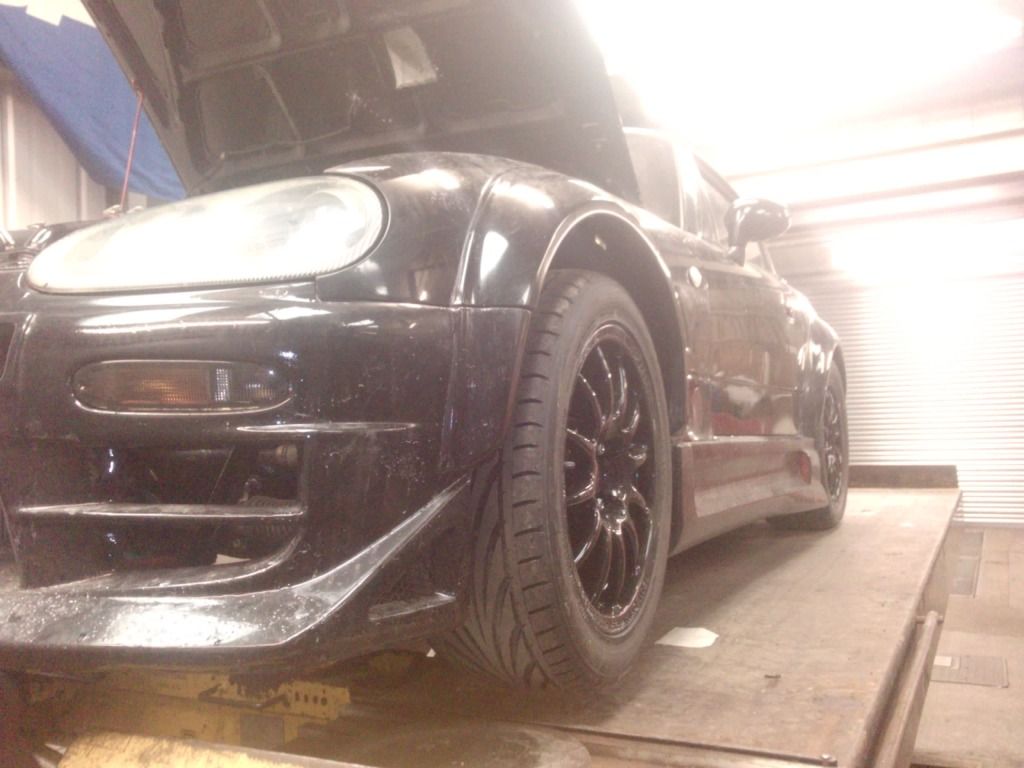
Finally starting to get there, just a few more things to do, but here's the kit finally fitted, although the bumper needs a bit more work after driving down the newly resurfaced Walworth Road.


Reply: 30
Wow.... it's quite, hu, low, isn't it ?
I wouldn't like to drive that on the crappy road I got out here ! :D
Reply: 31
Its too low at the moment, i need to increase the tyre profile back to 65, the extra 5mm could make all the difference.
Reply: 32
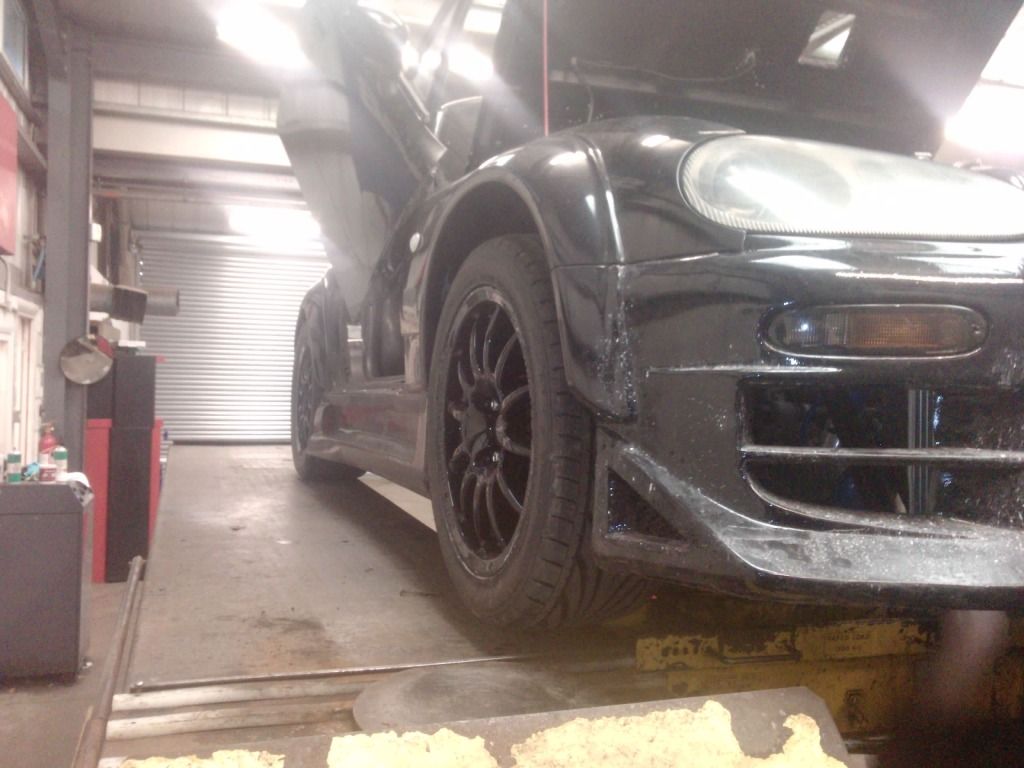
a few more pics from last summer
Just got these back from having new sport bushes fitted
and fitted


Reply: 33
Nice... but it would look better with larger wheels I think.
By the way, is that an exhaust or a food can ? ;D
Reply: 34
Cheeky b*gger :) its a blooming expensive 4" exhaust in white carbon, only can i've come across that size are the ones i get my confit in.
Yep it needs bigger wheels, but with limited funds its either the wheels or get Wayne to work his magic at the moment.
Reply: 35
Food can! That's one funny comment although a lil cheeky lol
This is obviously a little fun project on the side. I think it looks ok.
The moral of the story as cappos on here are most peoples second car so what ever funds you have left go on the cappo lol
Reply: 36
Unfortunately this is my everyday car, so modifications are done on a two steps forward one step back basis. For example the take off body kit is great and the suzuki coil overs are equally great, put the two together though and you get less great. I've only just now got it so i can go over speed bumps without slowing to 5mph.
However i'm very chuffed with the new front bumper supports i made up last weekend (diagonal red things in the last picture) i can hit things now with some confidence that the bumpers not gonna rip off :D
Just got to repair all the kit again, specially the rear bumper after being ripped apart by a cats eye, refurb the rear coilovers and suss out why a few of my guage sensors aren't working, then book her in at chipwizards.
Reply: 37
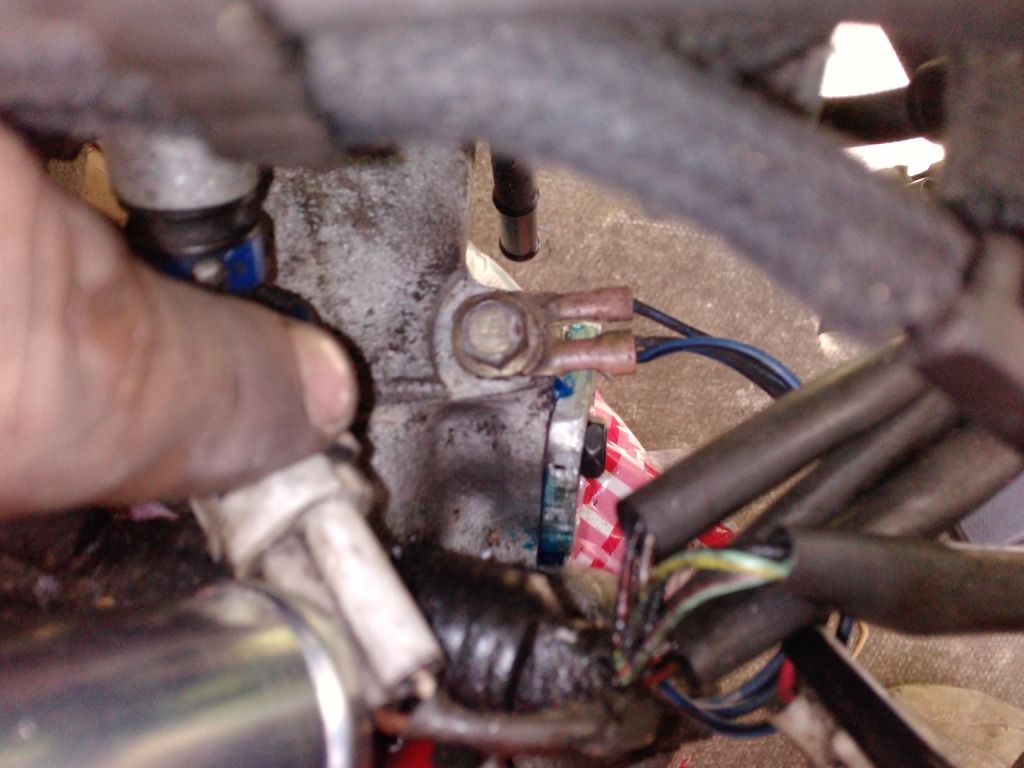
About a month ago, i shot blasted, re-greeced, painted and fitted a troublesome caliper.
and last week i decided to do some much needed engine bay mods, made an aluminium heat shield for my filter, made a bracket to fit my oil catch can in the only place available along with fitting some nice braided hoses for it. Fitted a loom, the 3 bar map sensor on a crudely made bracket and fuel pressure regulator ready for the adaptronic and also mounted the oil pressure sensor on another crude bracket fixed to my strut. Space is getting a bit tight now.


Reply: 38
nice mods, very colourful
Reply: 39
Looks nice - especially all the new mods :)
I think a really cheap things to do to make it look neater again in the engine bay is to buy some loom tube (the convoluted tubing that is probably sold at Halfords with a split all the way down one side for hiding wiring).
:)
Reply: 40
Cheers, my presentation has always been a bit questionable.
I've got to still tidy the wires, once i allocated whats needed for what sensor for the adaptronic, there's enough available for plenty of mods to come.
Trouble is the engine bay could really do with a clean and respray but its too late now. I think this car is now just the work in progress and colection point for the grander scheme. If i can get my hands on a workable chassis which shouldn't be hard with the amount of cappo's i've got to break, i'll then have that renewed and transfer everything i know works, over.
Reply: 41
wise idea :)
Reply: 42
looking good kei,
i like the lowness of it, looks awesome, although the thought of driving it over here in Ireland is laughable,
Ive got ssr springs with a heartland body kit and it scrapes all the time!
the bumper brackets are a good idea, must look into making a pair for my bumper,
one side has already got a nasty crack starting!
did you buy that spoiler or did it come with the car?
Reply: 43
Cheers, the spoiler came with the car along with the optional extra mud flap thingies, i think it was that which made me get the car, it was the first cappo i saw in real life and looked realy cool, since seeing others i'm glad i did as i'm not too kean on the plain rear end of the cappo.
The bumper struts were an after thought at the end of a weekend of working on the car, as i had the welding gear out and off cut strips of steel hanging around i quickly coupled something together, cleaned the chassis support under the car and welded a big a** nut to it on either side, bolted and riveted the struts to my aluminium plate i previously fitted to the bumper and bolted the whole thing to the newly welded nuts. Its unbeleivable strong now.
Now the front springs have been refurbed i've got 11.5 cm front clearance and approaching speed bumps is not the worry that it used to be.
Next on the list is the bypass pipe, the last few parts will be turning up in a couple of days, so i can start on that soon and then i should finally have it ready for tuning.
Reply: 44
Well after putting in 4hrs of work a night for the past 4 days, i've finally got the bypass pipe done. The welds aint pretty and i've got a slight blow on the weld i did to the existing exhaust when adding a flange, but that can be fixed next week.
But i'm still pretty chuffed with the outcome, the exhaust note has changed a little to, less resonance and about a tone higher, i will post before and after videos when i get a chance.


Reply: 45
That looks pretty damn good. Shouldn't it have a bracket mid way down?
Reply: 46
Cheers
I Figured the bracket was really just there to take the weight of the heavy Cat canister. I can't see a bracket on the cappo sport design. Unless its generally agreed it needs one for vibrations i think i'll not put it on.
Reply: 47
I think I'd prefer a bracket on it than possibly snapping the turbo/manifold studs.
Reply: 48
Good work Kei - were you happy with the turbo flange?
I'd go without a bracket if your system has the gearbox bolt-on mounting still attached. (Unlike the Suzuki Sport front pipes).
If not, go with a bracket but use a bracket that allows some movement due to heat expansion and one that is stiff enough to allow the vibration to be restrained. (like a clamp on sleeve that then has a piece welded on that goes back to the engine mounting bracket).Ā
You want to try to stop vibration fram causing the pipe to crack at the welds but not to fix it too rigidly to cause cracking due to thermal expansion / contaction.
Reply: 49
Cheers and yes very happy with the flange thanks although it may have overcooked it fraction as i have a tiny blow, but that could just mean i need to retighten one of the bolts. Bolts were a bit of a pain and in the end i used the same type allen bolts used on the manifold for 3 of the 4 bolts.
The nearest exhaust mount is about a foot past the gearbox so i will figure out some sort of vibration reducing mount that bolts onto the existing cat mount.
I need to make some minor mods i.e. need to loose about 3mm from the length of downpipe and shave about 8mm off the bottom lip of the flanges at the other end as i noticed it's now the lowest part on the car and with two peeps in the car it now just catches the highest speed bump i have to negotiate. Also i want to bend the pipe just before it connects to the exhaust by about 5 deg as I'm not happy with the way the flexible section has to be bent to meet this pipe.
Anyway still very happy with it so far and for 100 pound which includes buying the wire and gas for the Mig was a bargain compared with off the shelf pipes.
Reply: 50
Right then after posting last week that my poor thing had failed its MOT from some quite alarming rust, i've had a chance to start.
It's been a really good day, i had the whole day booked to replace a turbo on our Iveco van, it actually took me 1 and 1/2 hrs plus the same driving to and from it's location so the rest of the day could be spent working on my car (dance).
I had already gathered together everything i needed except the sheets of metal which finally turned up midday anyway :D and i had allready stripped the seat and belt out, so it was all go for grinding and welding.
But first this;-
This is where my seatbelt mount should be, it passed the mot but as soon as i put a spanner on it, it broke right off. Now i advise anybody that can, to check there mounts (including passenger) as this wouldn't have survived an impact or more importantly i wouldn't have despite it passing the MOT tug test.
Now back to the main pics :)
I removed the door and fitted/welded a big a** bar to retain chassis shape, then cut the top of the outer sill and bent it back to reveal the rot.
After grinding the rest of the panel out and welded areas down.
I then cut and did the same to the centre panel.
I then cut out the inner section in parts and then using my spot weld bit drilled out key weld areas and ground down other areas ready for fitting of new section.
Light was starting to go so i cut out the crappy edges of the floor and ground down to clean metal ready for fitting new edge strips. Lastly before the light had gone i quickly sprayed the clean areas with zinc to keep our wonderfull climate at bay till tomorow.
Not bad for a days work, a bit of fettling about in the morning and i should be ready to start fitting new panels and fixing the floor. There's still lots to do but with the good start i've had i hope to get her back up and running before xmas.


Reply: 51
Doesn't it have to go on a jig?
Reply: 52
Bypass and down pipe? Any difference?
Reply: 53
Not an amazing difference, about a tone higher and and lil less resonance, less boomy. I'll post a vid one of these days.
I'm not using a jig mainly cause i'll need to have a lot more of the car stripped but also it shouldn't be needed with the precautions i've made as long as its not left too long like it is. The bar keeps it spaced right and the underside of the car is suported with a plank, at the end of the day i checked and the chassis hasn't moved at all.
Reply: 54
Another day of work and she's coming together :D
I made up some lengths of angle, about 30mm and 25mm L shape and guide riveted them to the floor pointing up for easy welding.Ā Made up some patches for the fron and rear bulk heads, and welded them in place.
Cleaned up the edges and part welded the inner sill in place.Ā The welds aint pretty but its better than what was there originally.
I didn't do any pics as the day progressed just did a few at the end of the day.
Rear bulkhead repair
Front bulkhead
And outside view
Hopefully the rain will hold off tomorrow so i can finish welding this panel and think about plugging the next panels in place.


Reply: 55
Looks like a decent job to me so far!
Reply: 56
Cheers, about 12 months of thought have gone into this, i was holding out though till i could get into a workshop, but the MOT tried to call my bluff so i had my hand forced and have to do it outside in the winter on a gravel hardstanding. Thnkfully the passenger side aint half as bad as i dont have the sills for that, i'll just have to patch it. If the moeny situ works out i'll get the ally's i need and may even get around to fitting the arches.
I got a new toy last week too so i can progress with my half started bonnet project, once thats fitted she'll look like a real ricer. :D
Reply: 57
Only got 1/2 day in today, due to rain and running out of wire, but i got the middle sill section plugged inplace (just needs grinding) and the door back on to keep the rain out.


Reply: 58
Got another couple of hours in this arvo, couldn't believe my eyes though, all the plugs and welding i did yesterday had allready started to rust, the UK climate is an absolute pain.
Here's a couple of pics after i ground all the plugs and welding down, then zinc primed everything to give me as much protection as possible ready for the final panel. I decided to form the section thats fixed to the inner sill as it was far to rusty to try to repair, it aint pretty, but it's strong and hidden away.
And now with the last panel offered up, its a spot on fit and nice and snug, i'm very happy :D
I gotta full day tomorrow to hopefully finish this side off, then light repairs to the other side and ready for its retest.


Reply: 59
Fair play for doing the work yourself. been watching this thread closely over the last week or so. where did you get the sills from? Was this a difficult job? What about the rear inner arch? And repainting??
Reply: 60
The sills were bought off ebay as were most other items i've used with the exeption of welding gas, panel sealant and red paint.
The rear inner arch will be done once i can get the rear tyre off, i will be just cutting the bad bit out and welding in a fabbed panel, painting is fairly easy for me, almost all of it will be covered up with body kit or cabin plastic, so as long as its rust proof and water tight i'll be happy.
Difficulty wise i'll say its very difficult, finding spot welds with your finger tips to drill out and ensuring your not cutting to much to cock up refixing can be time consuming and hard work.Ā Welding to old panels is a pain and fraught with the danger of burning the old metal out, grinding and welding while laying down is a pain, specially outside and no-one selling small goggles suitable for mig welding is just stupid (how else can you weld in tight spaces?).Ā But the satisfaction of seeing panels going on outways all the bad points.Ā As i've said previously the time taken thinking about this project has been massive and practising drilling spot welds on other cappo's has helped no end.
This isn't the sort of job where you want to learn everything as you go on, its too big for that, you will defo need some background welding and grinding practise.
Reply: 61
I've got the odd 1/2 day in here and there and after todays 1/2 i managed to remember to get some pics :)
I've finally got all the plugs welded and any repairs needed to the front door post, which was causing the door to sag about 1/8" and making shutting a pain (bellow the lower hinge mount was rotten).Ā Almost all has been ground down where visable.Ā Everything was zinced again for total protection, then primed and a mist coat of final done (purely for cosmetic satisfaction at the end of the day).
She needs final sanding off before the main coats go down and i can then get her off the ramps, but i'm very happy with the job so far.
Just need to pick up some paper and more mig gas before hols and i'll be all go for finsihing her off.
I also remembered to get a few pics of the rear bumper mod i did back in the summer.
and from behind
The alu panel was cut about to fit roud the rear can but its long enough to reach the subframe and is bolted to a nut i've welded in place.


Reply: 62
I got some more time in today, more grinding and sanding and got a few coats of paint down, this is just the base coat but i'm really chuffed with the way its come out.

Reply: 63
Great job dude, impressive. Glad to see your Cappuccino is gonna be healthy again ! :)
Reply: 64
Cheers, this side atleast will be healthy, the other (although not as bad) will need to be plated and patched as i dont have the panels to do the same. But i'll make sure she's well sealed up so hopefully before she gets as bad as this side was i'll be able to aquire new sills.
Yesterday, allthough i didn't manage to get any pics, i managed to get the final coat of paint on and tarted up the lower lip of the door which was showing signs of bubbling. I also sealed the underside join where the floor meets the new panels and got a good coat of underseal on including undersealing the front arch again and worked my round the front of the car. Then started putting plastic back on and fitting the new led bulbs i got for the dash (which although is bright white, still is a bit dim).
The hardest job was aligning the door back up, in my wisdom i changed the door hinges for some that were less worn so spent ages getting the height, gaps and the twist of the door right. Not a fun job when you have to adjust the door without the front wing yet need the front wing fitted to check alignment all the time being carefull not to scrape the fresh paint, but she's done now and today i can spin her round and back on the ramps ready for the after xmas repairs.
Most disapointing part of the day was fitting the new speaker to the driverside footwell, i ordered a 5 & 1/4" cone with pretty decent range and 80w rms handling but when tried to fit it saw that the measurement they give you is for the absolute outer dimension which was not the measurement i took, i actually need something like a 6 & 1/4" speaker, and when i tested it and compared it to the original in the foootwell it was pathetic, i could not believe that the 20 year old 8w clarion cone was clearer more responsive and gave out a much louder fuller sound :(
Reply: 65
Well now the over indulging is over i can get back to work, i've set the car up ready to work on the passenger side and took a few before pics.
Well i can say she's not as bad as i've seen before, which is good as i dont have the panels for this side. I can patch this side up, thankfully the middle sill panel is in pretty good condition and evrything will be covered by the skirts.
I did get the take off arches out yesterday also and checked lines and where i would be cutting and was not so pleasantly suprised to see a slight difference in the sizes of the rear arches. Its not a lot, but it will make lining up and balancing of the rear flares a lil harder. All i need now is bloody rimstock to answer my calls with a price and manufacture date of the alloy's i want.


Reply: 66
Well not much to show today as its all repairs to the centre sill, but i managed to get the first half of the outer patch done, i'm really loving plug welds, they make life so much easier and are so easy to clean up.

Reply: 67
Got some more works done the other day inside the rear arch. That had to be the hardest bit of welding i've done, not very complex but zero space to work in but very happy with the outcome.
Inside the arch.
And outside showing good penetration with the outer sill.
I've just got to do similar in the passenger rear arch and a bit of structural welding to do in this arch that i exposed to be very rusty, then sealing and undersealing then i'll be done.


Reply: 68
Well after almost a month of laying on my back in the cold getting grinder dust in the face molten weld on the hands and sparks in the hair, i was able to finish all the welding and sealing yesterday and get her off the ramps ready for assembling the body kit.
here's a couple of pics of the finished rear wheels housings.
Another hour today and i'll have the kit on and ready to take to the garage for brake lines and MOT ;D
I've got the wheels on order and being machined to spec now, so this wont be the last time she see's the ramps this year but atleast the bulk of the work has been done.


Reply: 69
Wow, what a massive undertaking! And all this outside. My hat off to you for the job you've done so far. Maybe I wouldn't do it the same way, but one has to admire your determination and your resilience to carry such a big job out all by yourself. Congratulations!
Reply: 70
Thank you i've been fortunate in that all of the works i've done gets covered up, i could've spent another day or so in total cleaning welds further and maybe a bit more care sppraying her up, but this car is my daily not a show car (you only have to see the engine bay to know that :D ).Ā But i am very happy with the works i've done.Ā Apart from the previously mentioned weld cleaning i dont think i could've done a better job on the drivers side, the use of new sills made it easier and discovering things like plug welding and seam sealer has made the result looking heaps better than some of the "pro" repairs i've seen done on cappo's i've broken up.
In an ideal world i would've removed the subframes and given the whole car a going over but that requires atleast a garage and more time, maybe in a couple of years when i've got my next house i'll do it.
She got a lot more work to come, the rear arches are still a mess but with the new wheels on there way that will be done soon and my bonnet project is on hold again untill i can source some pads for my main sander, but i hope that by the summer of this year i'll have her looking the way i want.Ā I just need to find a rear spoiler i like that isn't over priced.
Reply: 71
What are the silverish things on the bonnet for?
Reply: 72
I presume you mean the bonnet catches, they are a bit tatty now as they are only the cheap halfrauds ones and rust pretty easily but i think they break up the bonnet area nicely.
I fitted them mainly though as most cappo's i've driven have the bonnet lifting after about 60MPH, as they only have a hook in the centre unlike larger cars which have extra catches on the front corners for peace of mind.
Reply: 73
Well the past couple of weeks have been a bit of a downer with my car, but i think i've located the bits for the engine so all is good ish.
But these finally arrived today well 2 out've the 4 but it's still enough to make me very happy
Pro race 1.2 15 7j with 20 offset
there's lots of clearance and perfect to mount the R888's on i think i can get away 235's on the rear.
Looking good during test fitting
and only project this much, so should look good with the take off fenders :D


Reply: 74
Forgot to say, weighing in at 6.8kilo minus tyre compared to the stock with toyo CF-1 weight of 12 kilo's.
Not sure about the weight of the R888's but i dont think i'm gonna be adding that much extra weight compared to the extra grip i'll get.
Just hope my clutch can cope :)
Reply: 75
Nice wheels. Are you planning on cutting the steel arches in order to fit the take-off fenders ?
Reply: 76
Yes, lots more grinding, welding and fibre glassing to do now. Plus i'll need to make up some arch liners.
Reply: 77
I ordered myself a rear tyre over the weekend and had it fitted this afternoon so that i could test fit and get an idea of what needed to be cut to make everything work.
Rear wheel and tyre (looks tiny doesn't it? :D )
test fitted to rear, looks like once the arch has been cut it will drop a further 10mm (now it looks a lot bigger)
And the all important eat my dust view
Now the front end, bare in mind the fronts will be 10 - 20mm narrower but 5mm higher aspect
A lot more work than i thought will need to be done to the front, this is at full lock and its just catching on the front bumper and full lock the other way couldn't be acheived as it was catching the front of the skirt as well as the lower wing section.
Inner clearance is perfect but i've pushed the wheels out about 20mm so thats to be expected, weight wise the tyres are heavier than expected i'd say ive added about 4kilo's of extra weight per wheel.
The materials for fitting have started to turn up, i need to start making the fibreglass parts that are to be fitted to the arches at the points i'll be cutting them and come up with a clever way of fixing these.
I'm thinking of cutting them like this
The rear bit will be fitted to the bumper and bolted from the inside to the rest of the arch, by cutting it at a 30ish deg angle i hope to achieve a production look.Ā I'll be doing similar to the front and then everything will be fibreglassed inside, then filled and then further fibreglassed.Ā I've managed to get my hands on some flexible zinc and plastic coated metal sheets that i should be able to turn into replacement arch liners.Ā I've got 450gsm fibre matting for this work (real thick and heavy duty) should be perfect for getting a nice strong arch.Ā ;D


Reply: 78
Looks like there's a lot to do, as you said... Good luck mate.
Reply: 79
Having just Finished mine, it's good to see someone else doing similar.
I followed the the Original lines of the Bumper to make it look like it was always there.....
Traced the shape onto A4 paper, cut along the line, then transferred it onto the Flare for cutting.
Followed the Skirts and Door line for the other cuts. Well pleased with the Result. Have a look in Sneaza 2 Album.....
Good luck with this, just remember, when you cut the Rear Arch, the Outer and Inner panels will not be strong as they will seperate. Tack weld them together before you attach the Flares to retain rigidity in the Panel....I can't weld, so Pop Rivetted mine, fibreglassed over the Arch, attached the flares, then fibreglassed the entire lot again.....Strong as. Sanded smooth, then applied the Body Deadener.....you'd never know it was attached.
Reply: 80
Right then as i mentioned a full year ago, I'm now starting my ultimate cappo project. Everything is in place, i'm just awaiting the shell to be delivered so it can be rushed off to the body shop to be renewed and have a couple more things added. Think Georges and Victors cappo but with the full take off kit and you wont be far from the end result. I'm going for smooth, awesomeness in menacing black (same black as the special ed cappos) with the angular features of the Take Off Crosstyle car.
While i'm not gonna give too much away, mainly as the shell aint been started yet i thought i'd post a couple of teaser photo's to get the job started.
Front donor subframe, just needing a clean and a couple of items swapped.
And a lil something i've acquired to go in the car ;)
(can you guess what it is yet)
More pics will be coming thick and fast as i've got the shell booked in for a lightning turn arround (as soon as i get the shell that is :D)
This project should be fun and give me an end result which isn't the full racing car i've really wanted but a happy medium between original cappo comforts and the Take Off beast that convinced me to buy my first cappo some 7 years ago.
Stayed tuned.


Reply: 81
Wow. This might get really interesting ;D
No idea about the Mitsubishi thing, it looks like a laptop but I don't think it is one.
Reply: 82
Its an ecu
Reply: 83
Do you need power steering?
Reply: 84
The steering is pretty heavy already making parking a bit of a pig, i'm assuming with even bigger wheels and stickier rubber it'll be worse and with the expensive wheels and wider body i want parking to be as easy as possible, which would explain the wing mirrors i'm thinking of using ;)
I'm trying to make this car as special as possible but without all the fancy interior, as i'm not too fussed about that, i like it as basic as long as the seats are tear free.
Reply: 85
Another job done. New fuel tank with pump and fuel level sender fitted with new pipework :D
Everythings slowly falling into place :D

Reply: 86
Well had a blinding day playing with dumpers and diggers at work and when i get back to the office, some new toys have arrived and might i say RESULT.
I ordered some allen head bolt packs a while back, only to get the wrong ones due to error and discontinued blah blah blah, but as a sorry i received another 500 assorted black nuts, bolts and washers free of charge
I also ordered my air compressor, paid Ż100 for a 25ltr 9.5 CFM unit only to receive
Miles better and about twice the price :D
and then the icing on the cake
Dimensions are a lil larger than the stock rad, pipe ins and outs are about the same an close to same position and in shiney shiney alu and about half the weight :D:D


Reply: 87
u got link to buy that radiator ??? what model of car?
Reply: 88
Its for a civic. Give me a week to compare with stock rad, the pipes and fitting and i'll post the linky if its gonna work, but it was considerably cheaper than a recore.
Reply: 89
Yup i love that radiator would love one in my cappo if it works would out too much choping!
And it should last much longer than a standard one!
Thanks
Ming
Reply: 90
Another goody box arrived today, good price, match the existing perfectly and although not the best of the range i know you cant go wrong with JBL's
Now with the carpets i'll be able to hear the stereo above 30mph.

Reply: 91
Those speaker direct replacement yeah ?
Reply: 92
They look like it, the fixing holes line up perfectly, the depth is almost exactly the same and the magnet on the rear is only slightly larger. The only possible issues are there's no rubber on the rear of the speaker so mounting would be metal to metal i think this wont be a problem though and if it is i can always make up some 4mm gaskets using sound deadening mat to prevent any vibrations but this could then make the other possible concern a bit tighter. These come with a tweeter mounted in the centre thats slightly cranked to get direction, i didn't check how much this sticks out and if it could come into contact with the cappo speaker fascia. I dont think it will but i will know more in a week or so when it comes to fitting it.
Reply: 93
Did a test fit of the speakers and although i didn't get to power them they fit like a glove. As mentioned before though the lil tweeter does sit a bit further out and does push the plastic cover trim out by about 3mm. I fitted them withot the JBL guards.
On another note i received another package today, i've waited over two months for these, but now the engine can go off to be rebuilt :D
Hopefully the extra coatings will make it that little bit more reliable.

Reply: 94
Your a tease lol
Reply: 95
Nice ! What brand are these pistons ? JE ?
Reply: 96
They're Arias a UK / US brand.
Reply: 97
Ok, now things are building a little steam. After deciding to take the rest of the week off working on the car and predicting the weather was gonna be crap i decided to buy one of those 3 x 6 mini marquee's, turned up within 24hrs of ordering so i could get something done :)
Here's a quick teaser, i'm holding back on showing whole car as i've given far too much away allready.
I then thought i'd get some fibreglass moulds done so i could start a fixing my take off arches
One waxed and pva'd
One waxed, pva'd and fibre glassed
After taking sneaza's advise about placing the arch on stands, the edges look good i think.
While all this was going on though an old friend turned up to show off one of his cars, turns out this is being traded in next week for the new model (as if it really needed to be improved.
STUNNING
Hope to get lots done this week, if possible get atleast one arch fitted and rear frame blasted, painted and fitted, then i can see how this bad boy is gonna look with its new wheels :D


Reply: 98
Is that PVA Poly Vinyl Adhesive that you've used or Poly Vinyl Alcohol? The latter is the normal stuff for moulds and it is usually purple. If it works, though, why not?
Reply: 99
Um, that teaser shot - has someone been very busy over the last two weeks?!
Reply: 100
Its adhesive, after waxing and prior to gel coat, paint a layer of that down and it acts as an extra barrier i presume and just peels away. I may have got it wrong, but it certainly hasn't done anything wrong to the first mould i did.
And
Yes someone has been VERY busy, the shells back and although not exactly as i thought it would be, its now ready for me to start fixing bits to it, i have already been able to black out the fuel tank area and surrounds, i now have to fit arch's and prep for main base coat. (its already had one and a light blowing over of top to prevent it from rusting up).
Reply: 101
Man. I'm soooo jeleous. This is looking good. And we haven't seen anything. Another cappo getting some serious love!!!
Reply: 102
I just hope the end product is worth it.
Reply: 103
Another bit ready to be fitted :)

Reply: 104
Forgot to take a pic of this yesterday, but here's another arch mold done.

Reply: 105
More works done :D
My creative fog light is wired, used a changeover relay with a bit of fancy wiring and liberal use of the old heat shrink sleaves.
Floor pans zinc'd, primed, blacked and undersealed.
and rear brake calipers, blasted and painted along with one front carrier.


Reply: 106
Got the rear frame on the car early this morning and was able to do a test fit.
I think its stock rear springs at the mo, although there's defo rsr on the front, i need to drop it another 30mm to start looking good, but it will suffice for the time being.Ā Clearance wise, its a little tight on the return lip of the fender.Ā The tyre is a 225/45 and the clearance on the shock seat is 25mm i think i could've gone slightly lower than 20 offset on these wheels and fitted a larger tyre but i personally think 225 is overkill anyway :D


Reply: 107
In this last pic I can see a front member on the floor lol. How many bits you got lol this is gonna be special
Reply: 108
I needed a couple of things off it and seeing as replacing the whole section is a right pain i thought i'd choose the easier option :)
Reply: 109
Had a bitty week at work so manged to get some jobs done.
Front end all primed up, just needing a quick scratch and then i can top coat the engine bay and all the unseen bits :D
Want to have the front subframe and engine in next week so i can spend the long weekend fettling the bodykit.


Reply: 110
Looking good K
Reply: 111
Cheers, hope to get the topcoat on this arvo, then it'll start to look like it can be finished in the timescale i've got.
Reply: 112
Fair Play Kei. You dont mess about. This will be cool when it's done. I'd still love to know what the finished product will look like!
Reply: 113
So would i and judging by my first attempt at top coating, not very good :(

Reply: 114
cant see too tough.... what you done wrong?
Reply: 115
surface contamination, from sweaty fingers, :(
Reply: 116
Some spoilers now.
Any ideas?
And the money shots, because your worth itĀ :)
She's getting there.


Reply: 117
gull wing doors?
Reply: 118
Not gull wing thats what the AZ has init? dunno what the correct name for these is.
Reply: 119
Scissor doors ;)
Reply: 120
that's it lol
Reply: 121
Coming along well :)
Quoted from Avar, posted Saturday, May 19th, 2012, 11:18:32am at here
Is that a rubber gasket between you arches?Ā I think I'm going to want some of those too.Ā Where do you get them from?
Reply: 122
Nope, no gasket, i'm glassing the arches from the underside and running a very thin bead of PU sealant along the outside to blend it into the bodywork. i want it to look aftermarket but not if you catch my drift.
Reply: 123
Well its been a slow starting day today, becuase i've encountered a slight problem, not to worry it shall be overcome, hopefully by making this and then adapting its young to suit.

Reply: 124
and the end result

Reply: 125
You're getting the hang of the fibre glassing now aren't you (thumb) Wonder what other things you could start making :D
Can't wait to see the finished car. It's going to be good!!
Reply: 126
Try some wings Kei....
Reply: 127
Glassing is becoming easier specially when the right PVA is used, i ordered some the other day and got the release stuff and it makes life so much easier, for example i started to cast the mold at 10 this morning, by 12.30 i had it off, waxed and PVA's and by 2.30 i had a new peice out of the mold and ready to fit, it was still a bit wubbery but it was the only wy i could see of popping the tricky part from its mold.
And no wings, sorry i'm going through kilo's of resin as it is, i might just have enough for the three molds still to make and two parts to produce and i dont want to be buying any more.
I just hope every can be sorted out, two of the main original cappo details i am desperate to retain are potentially being compromised and i need to come up with an alternative that will make the changes acceptable. Otherwise its back to the drawing board.
Reply: 128
Its been a busy day so far and still got a few more hours left in it but here's this mornings work.
Blasted, primed and top coated in the same colour as the car.


Reply: 129
After 3 days of fettling and getting depressed cause things weren't looking like they were getting anywhere, the pieces all start to come together.
Got the front subframe in so i could test fit the wheel and see where things needed to be modified, spotted that even the chassis needed modifying ::)
So after some cutting welding and sealing.
Then the wings got fitted, marked, cut and the arches tacked into place ready for glassing tomorrow.
Then test fitted the new rad, it can still drop another 20mm so should just fit.
And at the end of the day, things finally look like they're coming together :D


Reply: 130
Well i've stripped the rest of the body parts from red today, she's starting to look a bit sad for herself, even more so now as the boot spoiler had been removed shortly after this pic:(
But i started very erly today and managed to get a few jobs done on blacky today also.
The arches had set firm after PU'ing them yesterday.
You can see the full extent of the cutting to the front fender here
And everything was fibreglassed nice nd solid and allowed to set, then i got a good primer coat so i could see if any further bodywork would be needed, i'm fairly happy with the result.
There's a small amount of filling to do, i also managed to sand down the front bumper an get a coat on that also, no pics as of yet but some to follow soon, i just hope the tatty smashed about bumper comes up ok.


Reply: 131
I have to say the cappo looks good so far,
You are skilled mate. I have to say.
Just looking at the panel alignment there
Reply: 132
Just loose fit at the mo. biggest prob will be setting doors, the brackets need
serious work to get everything to look good
Reply: 133
love the aftermarket grease/beer bottle headlight pics! ;D
Reply: 134
I get more light from the otherside with the pop up baccy pouch :D
Reply: 135
Nothing done today but got a good morale booster shot.

Reply: 136
Wow.
Reply: 137
Very nice (thumb)
Reply: 138
Fair play Kei....
this is looking good. This project is shifting.
Reply: 139
I got a few hours in today and concentrated on some of the more fiddly bits that i really had no idea of doing, but as soon as i started i found the ideas coming thick and fast.
Fortunately i had a small sheet of pre made flat fibreglass so i just cut the infills, PU'd in place to hold (with the odd dab of superglue) and then gel coat filled over the top with the intention of cutting and fibreglassing the innards tomorrow. Not sure if i'll do the same for the back of the arch of if i'll just blend it into the lower quarter panel, i guess i'll see tomorrow.


Reply: 140
Will look great with them all blended in like that (thumb)
Reply: 141
:D Cheeres
Its amazing how much time you can spend working on it, after posting i went outside to tidy up and do a few lil things, ended up spending 2 hr's hand sanding, getting ready for the final layer of primer.
Reply: 142
OK trying out a semi intresting idea for today, it all depends on the wireless working at the house but for those who maybe intrested i'm putting up a webcam in the workshop.
http://ustre.am/LmUO
Not sure how intresting it will be or how interactive but it may give an insight into what goes on while i'm mucking about on the car.
Reply: 143
Quoted from Avar, posted Thursday, June 7th, 2012, 6:35:32pm at here :D Cheeres
Its amazing how much time you can spend working on it, after posting i went outside to tidy up and do a few lil things, ended up spending 2 hr's hand sanding, getting ready for the final layer of primer.
LOL........... :D :D ;D Welcome to my world. Apart from my Dremel for cutting and shaping in tight corners, I've Hand sanded everything. Very time consuming, but more control..........My preference ;)
Nice to know somebody else experiencing the same. Wait till you've been doing it a few years. Just when you think you;ve finished, you think of something else... Make sure when you start Glassing 'em up, they dont expand....coz you have them off the car, there is nothing to stop the Flexing/expanding then when you go to refit, you wonder why they don't.Good job by the way. Love the Hinges... :)
Reply: 144
Webcam ! Ahaha nice ;D
Reply: 145
Puzzle solving today :)
Got the new rad brackets tacked up, looks like it'll fit.
And this pig, you've no idea how much thinking its taken to get the lower panel to fit.Ā But its fitted and i haven't lost one of the cappo's most important features :)
Primed up and a tiny bit of filler and i think gthis should look good.


Reply: 146
Another pic of the wings off the car now they've gone off.

Reply: 147
Sanding and prep day today, getting things ready for top coating tomorrow.
Front bumper final base coated
and the same for the rear bumper


Reply: 148


Reply: 149
Its getting there......
slowly.


Reply: 150
It's starting to look very good... well done Kei :)
Reply: 151
Cheers
Just got this coated, pics always look better when its wet :D

Reply: 152
good job!
This is quick work!
Reply: 153
Ive been watching this and it's like work....break... update... back to work on it. it's non stop. Fair Play mate. When you have the space and the ttols and the work ethic you can do anything really...!
But well done mate it's looking very good so far. I like....
Reply: 154
Thanks for the kind words, this project is having to race along as i've really only got days left to get it completed, before i have to start working on my house before my girlfriend and her daughter move in, in a couple of weeks.
I'm rapidly running out of time and the engine block still hasn't turned up.
My next task is the rear arch cuts, which is a very hard decision.
I'm thinking along this line, it has to be straight given that i need to create fillets and curved fillets would be a nightmare to create. To top it off the arch should actually be 40mm lower down and is cut such but as far as i'm concerned the best location is the one above.
What do you guys think?

Reply: 155
As i said time was tight and i have to sort the house out now so unfortunately....

Reply: 156
As long as it's only on hold for two weeks.....
Don't want to see it on ebay as an unfinished project.
Reply: 157
Not much chance of that, tax and insurance runs out on red end of July which would be perfect time to swap over.
Reply: 158
Back to it allbeit a bit slowly.
Spent sometime this weekend trying to sort out the final bit of the body kit, made harder by a slightly differently sized rear arch :(
The side thats been causing me greif
Looks like i'll have to spend a bit getting the shape right.
Then spraying the rear, lets hope the weather stays with us for a couple more weeks.


Reply: 159
Got a few more hours in today, almost got the damn rear arches done :D
And fully fixed inside
Also managed to play with a new product to me "plastex" OMFG this stuff is good, after a fibreglass repair failed i thought i'd get this stuff and give it a go, basicly its a two part plastic kit comprising of a bottle of plastic dust and a bottle of resin.
I glassed a backing in place so i had a platform to work off then kept adding layers of this product, then half way added another piece of folded 450gsm matting and continued building it up, the result so far is a plastic repair thats very stron, bonded perfectly and capable of being sanded back. Really impressed with this stuff..
Tomorrow more sanding ready for the final spray next week.


Reply: 160
Well finally got the rear bumper fitted, its not 100% but its the best i can do, the fixings though i'm very happy with.
Used an original fixing mount that normally you cant use with the take off kit.
Just need to do my modded fixing above the rear tow loop and there's no way its gonna come off :D
And what the plastex ended up like, this stuff is the danglies and defo the way forward.
Next week, spraying!!!


Reply: 161
Another weekend, more bits done.
Fuel cap done.
Rear garnish done.
Back end, first coat done, awaiting more hardener and then finished (hopefully tomorrow).


Reply: 162
Thats looking very nice indeed!!! The arches have come out a treat too.
Well done bro. Finally getting there.
Reply: 163
Another bit done tonight, not 100% perfect but maybe 99% and not bad for first attempt :)

Reply: 164
This is looking really professional! Good job!
Reply: 165
Cheers, its slowing a bit, but with working during the day in the sun i'm knackered by the time i get home and not up for doing much car stuff. Hopefully the next few weekends will see the bodywork finished and i can concentrate on fitting the engine and getting the exhaust re welded to an acceptable standard. just a bit miffed that i balls'd up when spraying the bonnet, (narrowed the fan size, mid spraying) and from then on got three massive runs for my trouble.
Oh well, lesson learnt.
Reply: 166
Well its pretty hard to do anything in this heat, but i managed to get these done this morning, its fairly hard given all the writing on the lenses but i think looks quite good.
Before and after.
All three together, (happy now that the crack in the light is harder to see).


Reply: 167
This is gonna be a dark n moody cappuccino.
Looking good. Its the finer details that make the car.
Reply: 168
You have no idea how dark this car will be, if it goes to plan its gonna be a mean lil F***a.
Still need to find a spoiler for her and a new aerial.
Reply: 169
After waiting for the best conditions for spraying i got them today, perfect 16 degrees and almost zero humidity, and i think the painting has finallly finished.Ā All in all very happy with the results, there's one or two tiny runs and its shown up some imperfections on the bonnet, but i'm happy to leave em till i get more time.
Rear bumper finished
Thought i'd give the rear garnish another coat and got it almost perfect :)
Next compounding and fitting the engine and drive train.


Reply: 170
Looking very nice indeed (thumb)
Reply: 171
I agree with Andy. That's fantastic
Reply: 172
Very smart :)
Reply: 173
:)
Reply: 174
Few hours checking out the paint job and testing out compounding etc, had a small problem with the bonnet, somehow it got rained on when there wasn't any rain after t was removed from the spray booth :O but i can deal with it.Ā I then flattened and compounded the rear arch and did a test area of resin polish.
Close up
Starting to get excited now, its finally coming to an end.


Reply: 175
Looking good dude! Loving thew new colour.
Reply: 176
Sides flatened, compounded and a protective polish.


Reply: 177
Just picked this up.

Reply: 178
Broken link on the picture for me.
Reply: 179
All looks fine here although photobucket was running very slow earlier.
Reply: 180
It was a broken link for me first time I looked just after it was posted but was fine after that...
Reply: 181
Yeah it's good now. Nice engine Kei ! What pistons are these ? They look like the JE I got.
Reply: 182
They're the arias pistons i got a few months ago, ceramic coated tops and anodised skirts.
Reply: 183
We spent a couple of hours last night getting things ready for the refit this weekend so lots of shiny bits.
Everything will go in nice and clean :D


Reply: 184
What you use to get so clean
Reply: 185
Quoted from lord, posted Friday, September 14th, 2012, 7:57:27am at here What you use to get so clean
Good question. My gearbox is black :P
Reply: 186
Gunk grease remover? Petrol? Muck off?
Reply: 187
Engine degreaser, the environmental freindly stuff they use in parts washers, cost about Ż25 for 5 gallon, a cheap scourer sponge and a very willing girlfriend. She did bloody well i think!!!
Reply: 188
Your misses!!! Thats a cheek! ha ha
Reply: 189
Got some more stuff cleaned last night and started fitting gearbox and getting ready to drop the bottom end in.
While awaiting my lovely assistant to arrive with the loctite i made this.
and from above.


Reply: 190
What is it ?
Reply: 191
EGR valve blank.
Reply: 192
Oh, I see now. Nice.
Reply: 193
Spent the day getting the bottom end in along with prop and a few things underneath. also spent some time re covering all my engine bay loom, will finish it as soon as i get some black tape, but its deo starting to take shape now.

Reply: 194
Oh, so you're not putting back the engine as a whole right away ?
Anyway, good job !
Reply: 195
If i have a chance i always put the engine in in layers, it makes fitting everything so much easier and doesn't involve a hoist which i cant use on this ground.
Reply: 196
Is there a specific reason to why you're not putting the engine on the taken off front subframe then refitting the whole ?
Reply: 197
Thats ok i spose to do it that way if you've a nice garage to work in, but in my yard this is the best way to do it, plus given the dificulty plumbing in the exhuast and the fuel lines i'd rather assemble in layers.
Reply: 198
Finally got to spend some time on the car.
Here's my work bench
Got the rad fitted on its temp brackets to check spacing.
Fits nice.
With just enough clearance underneath.
This was how it ended up.
Got some pics of the coolant mod.
Used a clip to stop the hose from sagging
And how it links into the pipework at the front (i have an extra sensor housing for temp sender)
I finally got to power up the radio and tested the JBL speakers and am VERY happy with them, miles better than the originals with only a slight farting at full volume when the plastic covers vibrate.Ā Looks like i'll actually be able to hear the radio while driving (dance).


Reply: 199
Good job mate, just read through this again, but as I cant find the answer to my question, 'What size Marquee did you use', I thought I'd ask now...lol....coz we're getting warmer weather now and getting closer to putting colour on mine, the marquee under my carport looks easier than 'Drop Sheets' to keep out unwanted dust...etc and the WIFE...LOL....Ouch, she came behind and slapped me.....
Reply: 200
:)
I used a 6m x 3m marquee cost me Ż60 on ebay, its been worth every penny. I'd advise using drop sheets as well if you can, a double layer would work better against pests.
Reply: 201
Thanx for the reply bud....good to see you are up early...lol. How 'High' was it at the peak...??? incase I need to cut the legs of the one I've seen....also, did you have enough room around the sides when you did the doors etc.....???
Reply: 202
I would guess it was near 3m tall at the ridge, i had no problem with access to the sides but i have different doors, with normal doors it would be difficult to work your way around with them open. I would advise taking them off and masking the door void up so you can get access to the door reveals when spraying and then do the door as a seperate panel.
Reply: 203
Thanx for the info.....Already Done the Reveals and under Guards, Bonnet, Boot, Bumpers etc....
Reply: 204
Oh yeah i forgot about your thread :)
Reply: 205
Got lots done this weekend.
Radiator made up.
engine bay almost finished.
A lot tidier after most of the uneccesary pipes have been removed, just need to sort a couple more.
Coilovers fitted to rear (still a bit high though :( )
and a final side shot.


Reply: 206
Looking fantastic mate. Your doing a great job. Like the blue and red contrast in the engine bay.
Reply: 207
:) i just need to replace those awefull red hose bits on the intercooler pipes.
Reply: 208
and give it a good clean!
Reply: 209
Thats just the splatter from the compounding, i've got another day of that to get rid of any pin scratches and bring out the full shine of the black.Ā Gonna do that last though as i'm sure to get grubby prints and the like on it while i finish it off.Ā I'm glad i gave it a layer of polish though, it gives it a nice barrier against any oily and greasy hands.
Reply: 210
Baby got some new shoes :)

Reply: 211
Got some more work in today all the brakes fitted and bled, coilovers fitted and final tyres and wheels fitted.
Fronts could do with dropping a small amount.
Also got a lot of the aftermarket wiring done. After tomorrow it should just be panel allignment and final compounding.


Reply: 212
Well the worst thing possible happened yesterday.
They let something i built with my own hands on the road :D:D:D:D
Here's a few pics while it was getting health checked
There's more to be done still, haven't made the arch liners, the brakes still aren't feeling right and there's a smell of fuel in the cockpit but atleast she can be driven.


Reply: 213
Nice one (thumb) Just one question - what does the mileage say on that certificate?
Reply: 214
About 33k :)
A lil more than that engine has done but its the nearest i had.
Reply: 215
Ermm have you looked again? It says 336k lol
Reply: 216
I take it it should read 33,678.7 miles rather than the 336,787 miles it has been recorded as :-/
Reply: 217
It looks it doesn't it :D
Oh well as long as i dont get done for clocking it next time arround.
Reply: 218
Its looking good though. Were there any advisors?
You done anything with the interior
Reply: 219
Sailed through but for the slightly high DS main beam. The interior is practically stock.
Reply: 220
I've never shown a pic of the whole car but i thought i will now seeing as its practically finished. As mentioned before theres a few things still to do and i'm not 100% happy with the bonnet but seeing as it was formed by hand i'd say pretty good for what it cost.
Reply: 221
Very nice! (drool)
Reply: 222
Looks great Kei :D Well done :)
Reply: 223
All i can say is for a self made project. Fair play. You have done really well. Congrats.
Tue 30th. Back to look at it again and it still looks good! I like!!
Reply: 224
This looks brilliant, seriously mean black cappo, have you got a pic of the rear end and are you able to lower it further. l reckon you can get seriously low on those wheels.
Good job!
Cheers
H
Reply: 225
More pics to come. front can be lowered another 80mm or so and the rears similar once i work on the seized spring seats. It can only be done for the track as any lower and it wont get over speed bumps.
Reply: 226
Rear pic
And guess whats happened, on the road for a week and someone reverses into the car allready.


Reply: 227
What an a**hole :o
Is it just paint or is the bumper cracked ? :-/
Anyway, and apart from the exhaust (potato-canon style ;D) I really love the look, congrats Kei.
Reply: 228
Full on crack i'm afraid, i can pull it back into shape, glass the back and then groove and fill the front, will only take a couple of hours and the bumper needed to come off again anyway. Just sods law really atleast the guy left a note to admit he'd backed into the car, most peeps would just b*gger off.
Reply: 229
Mate. What the!!
That's what I hate about our cars! Too small!!
Reply: 230
They're small but they are not bloody invisible - there's no excuse for unobservant drivers.
Reply: 231
sh*t happens and its pretty dark at 6am and he was nice enough to leave a note on my screen owning up for it.
I'm getting far to old to get upset at silly little things like this.
Reply: 232
Well nothings been done on the car since the last post as my work van decided to pack up and i'veĀ been relying on the car to get me to work etc but so far everythings running pretty well.Ā The brake master has failed making braking a little intresting at times but once my special spanner turns up i'll swap that over for one that i know is good and re bleed.Ā I need to re plumb part of the new coolant bleeding kit as mentioned in my trader section becuase she's taking about 10 mins to fully warm up.Ā The new pistons have been nicely bedded in now and even at stock boost is pretty rapid and i need to replace the 888's for a suitable wet weather tyre as the car is far to twitchy for my liking.
Then she needs the last bits of bodywork to be finished.
The guys at prestige insurance have done me a pretty good deal on the insurance too with the premium being just under Ż300 fully comp.Ā This includes all mods and covers me for Ż3000 for the chassis / shell plus the value of aftermarket parts added which comes to a tidy amount :D
Other than that though i'm really quite impressed with my work.
Reply: 233
Kei - you've been living with scissor doors for a while now, would you recommend them or not? I think they look really cool but I've seen some that don't open all that well.
Reply: 234
Honest truth, there are times they can be a pain in the a*se but it is rare. They are brilliant in carparks, they can be a god send when reverse parking into an awkward bay, open and lift and i can easily see if i'm about to kerb my allys or worse still hook my GRP bumper on the kerb. Mine are a bit stiff but thats because i cant find my lithium grease to ease them. My girlfriend stuggles to open her door but shes only small and it allways gets brownie points if you open the door for a lady anyway.
You have to develop a unique way of falling into the car and (sort of) falling out. Plus the giggles i have when watching my mechanic or dad cram themselves in and out is allways worth it.
Now the bad bit. Fitting them requires serious skill, there's a reason capp sport charged so much for these conversions. The front pillar these are fixed to needs to be cut out and a new custom section needs to be welded in. The hinges themselves are about 12mm thick and they also need serious modding to the part that bolts to the chassis and the part which bolts onto door needs to be cut off and a custom door mount needs to be welded back in place that curves with the whole door edge. The door edge itself needs to be modded to fit the new bolt mounts.
The door wiring needs to be altered as these hinges will cut through the existing wire location like a pair of scissors.
The wings also need serious thought as hinge mount and swing is right where the lower quarter wing mounts sit, you'l notice that all the capp sport cars had the wide body kit this was to get over this issue, i spent atleast two days sitting next to my car trying to puzzle out how i could fit the existing wings to retain that unique cappo detail and in the end had to join the two panels together and panel beating the wing returns and shaving a few mills off the door piston mount to make everything sit like the original.
Now the good bit, it looks FANTASTIC. I still have a spare set of unmodded Decah hinges and a set of the custom plates that fit to the door edge, i also have the drawings and specs for the section that needs to be cut and fitted to the door post available. I'll let these go for Ż200, all you need is the pistons and access to some serious welding gear. The pistons themselves are available for about Ż30each i think, and after lots of testing i think the 1400 newton were eventually used.
It just comes down to whether or not you want to undertake what is a big job to fit them.
Reply: 235
They are brilliant in carparks - That's a plus I hadn't considered
a unique way of falling into the car and (sort of) falling out. - This is my main concern.
it looks FANTASTIC - I agree, regardless of what other people think.
Fitting them requires serious skill - I imagined so. I don't have a problem modding the front guards.
Thanks for your insights. I might have to hunt down someone who has these fitted to a car and actually try them out.
Reply: 236
That's an awesome bit of kit! Headlights could do with a lens polish though imo, as they're not as crystal as the paintwork.
Cracking build mate :)
Reply: 237
This is coming alone very nicely :)
Reply: 238
Well a little more fettling, gotta sort one of the arch to rear bumper joins as i think i cracked it reversing into my parking area the other day and lots of polishing and it should be done. Got some more side repeaters as the current ones are too white, going for smoked and the passenger one has lost its lense already :O
Will give the headlights a fine polish with toothpaste and prolly give em a lacquer to keep em clean.
Good thing is i've got till the nationals to get it ready and thats plenty of time.
Funny thing is i look at it and the side sills still look too big for the car even with the wider tyres and arches, odd when i've had them fitted for years without the arches.
Still very pleased with the outcome considering what i've paid for it.
Just have to decide what the next project will be, not short of chassis' at the mo :)
Reply: 239
Sods law eh!
About 6 hours after fitting one of steve's manifolds, crap happens.
The culprit
What i had to do to remove the b*gger :(
So given that i had the front end off i decided i'd fit this.
Regretably this will effect the results of the tests for the manifold, but i absolutely hate doing things more than once in one week.
Finished
Results for manifold to follow, but firstly on the drive home i noticed that my boost guage is now reading 0.1- 0.2 bar less pressure, would this be because of the increased cooling or something i've done????


Reply: 240
That could very easily be the pressure drop across the intercooler.
Reply: 241
My thoughts also, i haven't lost any perceived power.
Reply: 242
Spent the arvo, changing oil and testing the new setup, but i think i've hit a wall.Ā I need to give my test vids another going over but the latest batch of mods haven't appeared to have done much.Ā While the launch does appear to be miles better, there is a slightly longer hesitation before a bigger kick comes in but the 0-60 times are only fractions better.Ā Prior to the last package i was getting 7.5 secs with 0.75/0.8bar boost i'm now getting maybe 7.2secs at the new 0.6/0.65bar.Ā The kicker is that even after turning it up to 1bar i still only appear to be getting 7secs.Ā Conditions were maybe 4 degree's warmer on the same section of road as the before tests with practically zero wind.Ā So feeling is i either have a very small leak somewhere in my new piping (very unlikely) or the fueling isn't right.Ā It does look like theres a slow spot in the rev range but again i need to analyse the vids further to confirm this.
Odd though when the only restrictions i thought were the stock cooler and the exhaust manifold.
I'm thinking though if my car has an L1 resistor fitted to the emmsions wiring, would it make sense to pull this and make the car run one step richer, a: for peace of mind but also to see if a lil more power can be gained.
Reply: 243
I still got bugs to sort out, but I kinda have the same impression on mine about the boost not changing things that much. Going from 0.7-0.8 to 1.0bar didn't seem to make a lot of change, but I'm planning on running more later (1.4b).
It might come from the ignition map on my Adaptronic that is not well tuned, but it could be normal, I don't know.
By the way, why don't you turn up the boost a bit ?
Reply: 244
Without cans and other tuning equipment i dont want to take the engine past 1 bar. This engine has seen a few failiures and has had the head skimmed close to its maximum now, it has a 2.2 gasket but i think with the amount thats been removed from the head the compression ratio is still high. Hence me fitting the larger intercooler, i wanted the denser air but without the high pressures.
Odd thing is i've tried all maner of boosts on different cappo engines and normally the change from 0.7 to 1 bar has been a lot more noticable and once had the wastegate pipe fail and had it overboosting upto 1.5 on a totally stock engine and that was rapid.
Reply: 245
I can confirm 1.5 bar on a standard Cappo is insane!
Is the increase in intercooler size, and therefore spool time, but a quicker 0-60 at a lower boost setting not proof that the package is working? Admittedly, as you say, you would expect better results when boosting to 1 bar like you get on a standard car.
Reply: 246
I'll admit that there's an improvement, just not what i had expected. I'm sure i'm just at the max that the fueling will give. Perhaps the 1 bar has taken it too lean and i would see the same perormance and less possible piston melting at say 0.8 bar.
I think its time to start getting the cash and final bits needed to get the adaptronic fitted and tuned, that ecu would truly benefit from these mods.
Reply: 247
The adaptronic and some wide band and your cooking :) Strange that the blue coating on the manifolds not worked and the black does :-/
Reply: 248
Are you running the standard ecu Kei? Mods like that really do warrant a proper setup on rollers...
Reply: 249
I know, my setup is pushing the stock ecu to its absolute max. I'm going to turn the turbo back down to standard and just prepare for a tuning day. Trouble is not many peeps mention specializing in the adaptronic ecu round here i think there's one other side of dunmow but thats it for east of england.
Reply: 250
a decent tuner should be able to handle the mapping of an adaptronic. I will be going with a MS though, on the basis that there's a much bigger backing for them here. I can't say I understand all the electronic crap mind, just going by what some clever folk have told me :D
Reply: 251
I got the impression a mega squirt was a little cruder, the adaptronic has some pretty cool features and there's a few bods here that can easily help with the install, I think Don is even running the same setup as you.
Reply: 252
There are certainly a lot more Adaptronic Cappos than MegaSquirt.
Reply: 253
Spent yesterday, fibreglassing and repairing and improving the rear bumper, but while i had the bumper off realised how totally over the top the car width to tyre width ratio was :D
I'd say thats pretty aggressive.
At a later date i may get a pair of 8J's made up with a slightly improved offset, there's still an inch of clearance with the strut.

Reply: 254
+1 looks very mean! Tyres and exhaust looks good too!
Reply: 255
I'm still not a fan of the exhaust, but the rest is just lovely ;D
Those tyres look so wide, oh my. What size is that already ?
Reply: 256
Quoted from Ricou, posted Monday, May 6th, 2013, 3:52:50pm at here Those tyres look so wide, oh my. What size is that already ?
225's on the rear :)
Reply: 257
Reminds me of my brothers old supra, 275's inside the arches XD
And yeah, there's a fair few tuned Cappo's in Aus, hence the backing for adaptronic. But as for backing of the actual ECU goes, I know a lot more people comfortable with MS tuning around my area.
Cappo is looking sweet though buddy :)
Reply: 258
Haven't sorted the door yet :( but i think 've got someone on the case getting a piston made up, but in the meantime i bought the car a lil something to finish off the menacing thingy its got going on.
Does my bum look big with this?
and the view from the rear view mirror :S


Reply: 259
It looks like a batmobile.....I like it
Reply: 260
I think the shape is spot on, but possibly a little too wide versus the car?
Does it stick out on either side? Can't tell from the photos.
I particularly like the way you've mounted it, the brackets look angled slightly, I think it adds to the look.
Can it get any higher? (Vertically)
Cheers
H
Reply: 261
No its about 1.43m wide without the end plates, my rear tyres are approx 1.44m outside to outside and the rear flares are about 1.46m outside to outside, it just fits :)
I can raise it about another 10mm but that then pushes it back another 10mm or so and that sits too far back. I could've got the 15" legs like lozzy has but thats far to high for the car. I recon i've got it spot on and although i wasn't looking for extra downforce (just looks) i think its positioned perfectly with the blade catching the air flow off the roof and the centre bump flowing air back over the lower boot lip. At speed the car is a lil less bumpy now, its possible the assistor springs on the rear shocks are now loaded up a fraction more which is nice.
It has a couple of extra benefits too as the car is a lot easier to see when parked up so hopefully no more reversing into it, plus its a handy shelf to place my Maccy D's when i'm unlocking and opening my car up.
Reply: 262
Looking good Marc :)
Reply: 263
Awesome...can you stick up a few more photos from different angles?
Reply: 264
is that on 7 inch brackets mines on the 10 inch ones almost over the cab
Reply: 265
Kei - have you got any more pics you can share?
Cheers
H
Reply: 266
Well the cars had its repairs, the doors are now back up, down and working fully after removing the old hinge and replacing it with one of my spares, with the new piston and gob fulls of grease its sooooo smooth. The turbo was fixed using the chamber from a damaged suzi sport turbo and pressure is back upto 0.7 / 0.75 at standard, the goes way faster now but cant do any tests yet as my engine is still labouring (think a cylinder lining is on its way out).
No pics yet but as soon as i get a chance i'll get some more taken.
Reply: 267
kei ive just read you could of got the 15 inch legs where did you source your spoiler from ?
cheers!
Reply: 268
Don't know, someone online, just came with option of 7" and one bigger size 15" (I thought) but maybe it was just 10".
Reply: 269
Ok well new bits fitted and a couple of things tweaked and a few more will be tweaked tomorrow.
I've been getting really bad fuel consumption and I thought the engine was getting a touch hotter than it should, so I checked the timing and found it at 6.5 - 7 degree's instead of 5, so that's been sorted and the A/F duty will be sorted tomorrow.
Now the good bits, crap pics I'm afraid;-
And I trimmed the wing a bit so its not so mental :D I think it may need the end plates now.


Reply: 270
Very nice (thumb)
Reply: 271
Alright indeed , i like the line from bonnet to roof. now get everything straight on the sides and you'll have a car that will awe everyone and get the cappo prices up :)
Reply: 272
The bonnet looks good, did you buy the roof too?
Get some better pics up :)
Reply: 273
It's been a while since any pics (plenty on facebook :) )
So I thought i'd post them here too.
Not much has been done on the car this year, except the new front end, the addition of the carbon bonnet catch guards and some carbon wing end plates.Ā The bumper though was a pretty big project, involving removing and temp fixing and filling of the take off bumper then cutting some sections out that I didn't like.Ā I then took a five part mold of the bumper and after getting that as perfect as I could I cast a new bumper using carbon and a few other special materials.Ā The end result was a bumper that had a strong finish but as shock proof and resilient as a plastic bumper.Ā Good job too as I spun the car a week after fitting and bent one corner into the wheel arch, had it been made of GRP it would've been completely destroyed.Ā The next stage was make a splitter to match but that could be easily removed and replaced should any speed bumps catch me out.Ā All in the two parts weigh as much as the original take off bumper :D


Reply: 274
Very nice how did you get them doors to work!!!!!!
Reply: 275
By paying the guy who did cappo sports other scissor door cars :D
Only 3 in this country and only a few worldwide so I know that with other mods this car is 100% unique.
Reply: 276
Prob the best had made project ever I reckon
Powered by e-blah Platinum Series © 2007