Topic Started by:
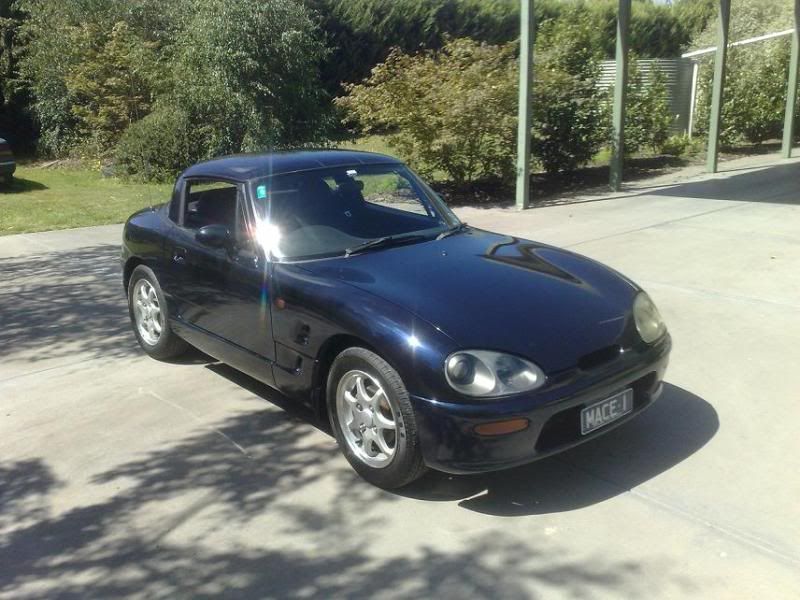
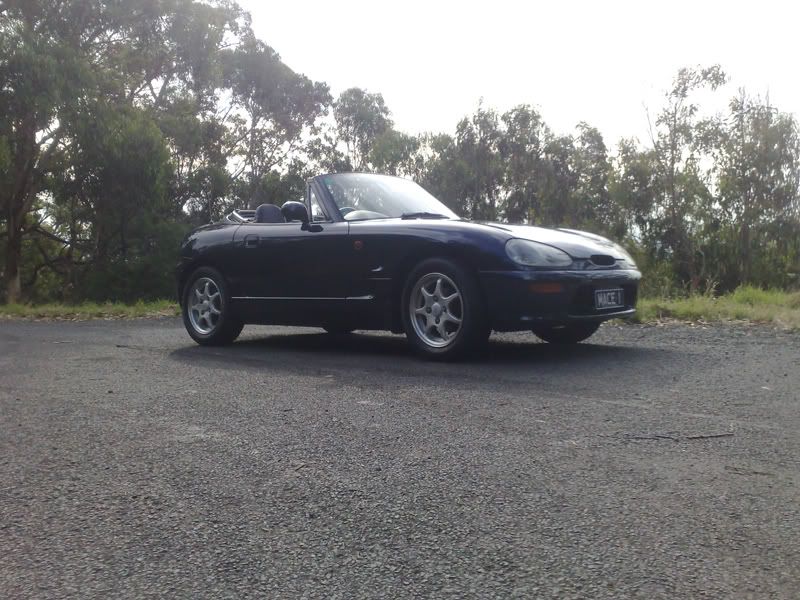
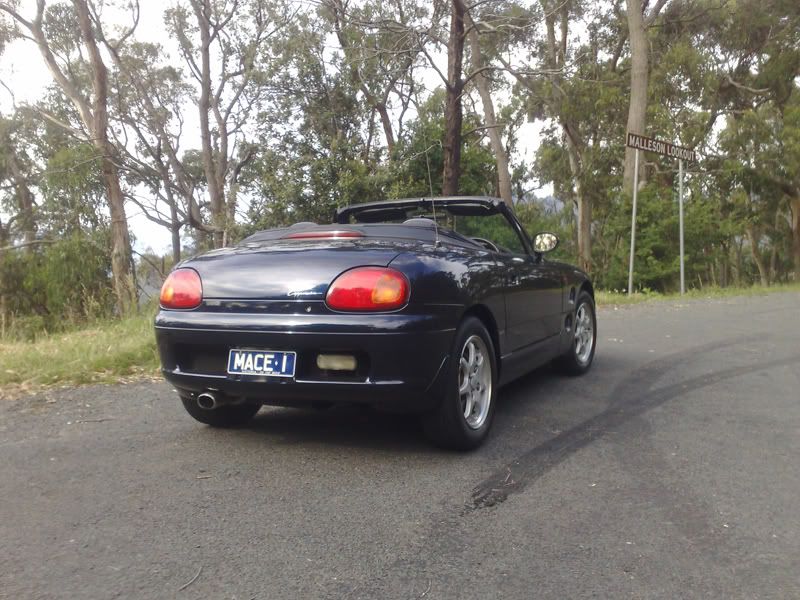
Thought it was about time I put some pics up:
Completely stock except for alarm and turbo timer.

Reply: 1
Absolutely gorgeous car (thumb)
Reply: 2
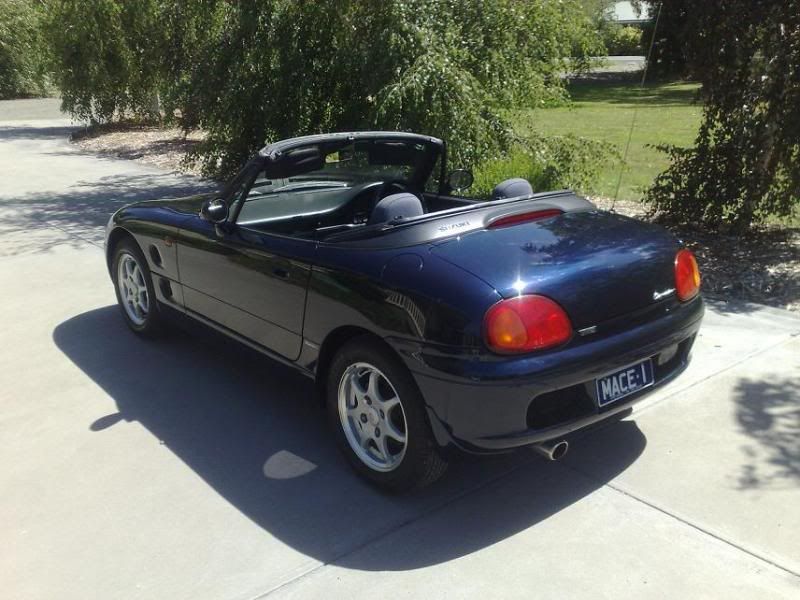
Thats the one I want, Ltd edition - very nice!
Reply: 3
Thanks guys. Unfortunatley photos make it look better than it is, the front end panel alignment (mainly bumper and bonnet) is a bit rough due to a repaired accident from the previous owner, but maybe im just too picky :)
Reply: 4
How about a Close up rear end shot, showing off that limited editon badge?
Reply: 5
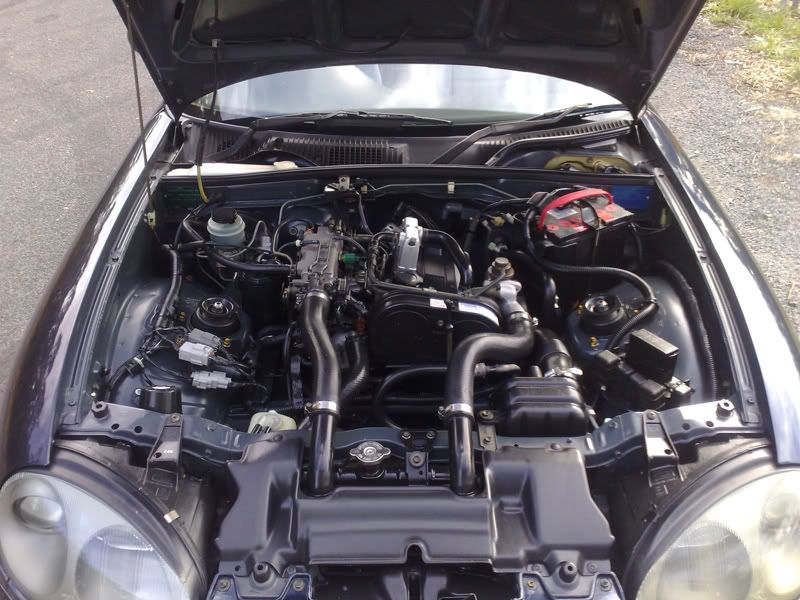
Wow thats one clean cappo....wish my engine bay looked so tidy!! Truly a cappo to be proud of.
Reply: 6
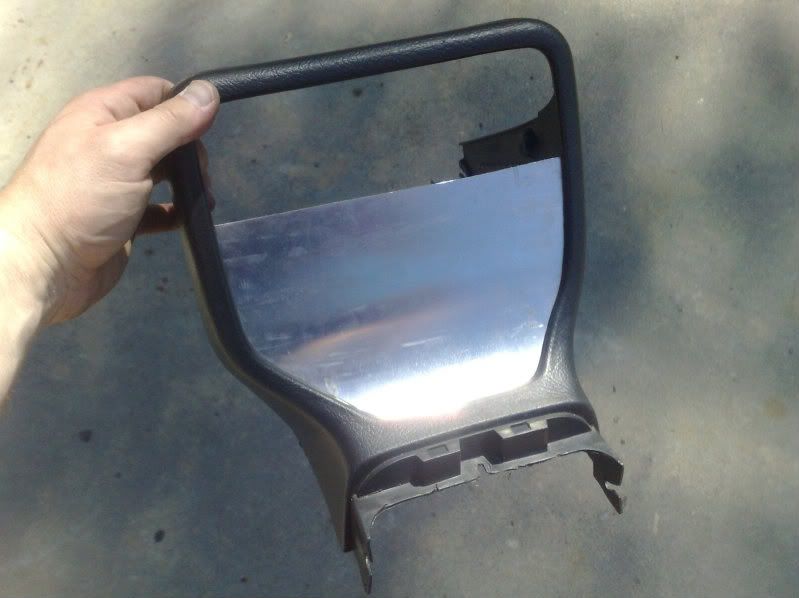
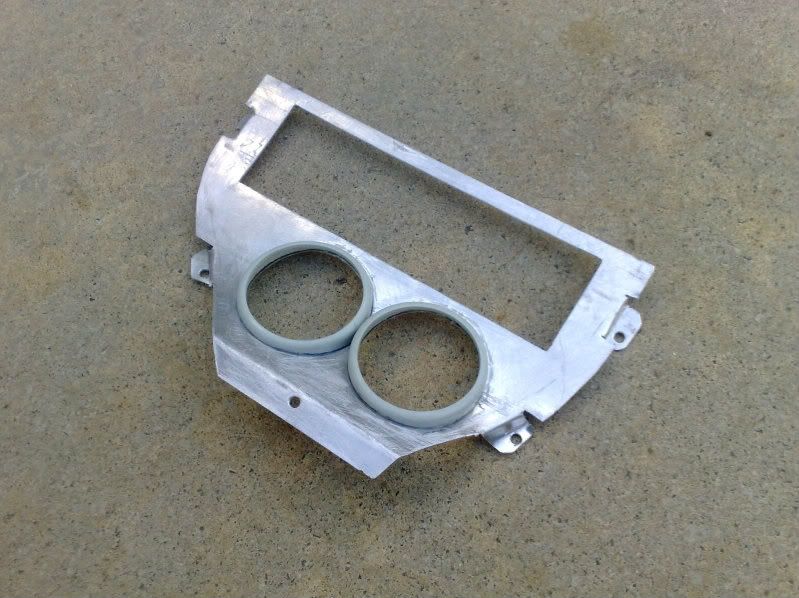
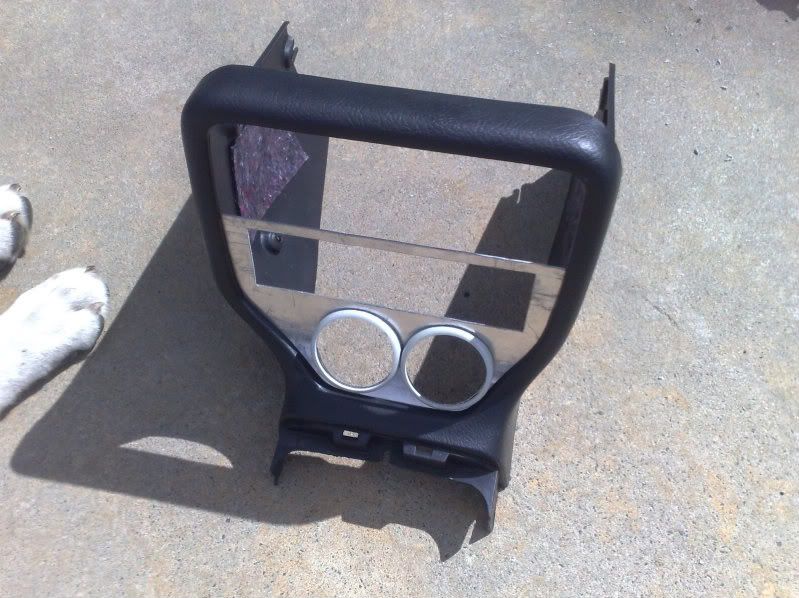
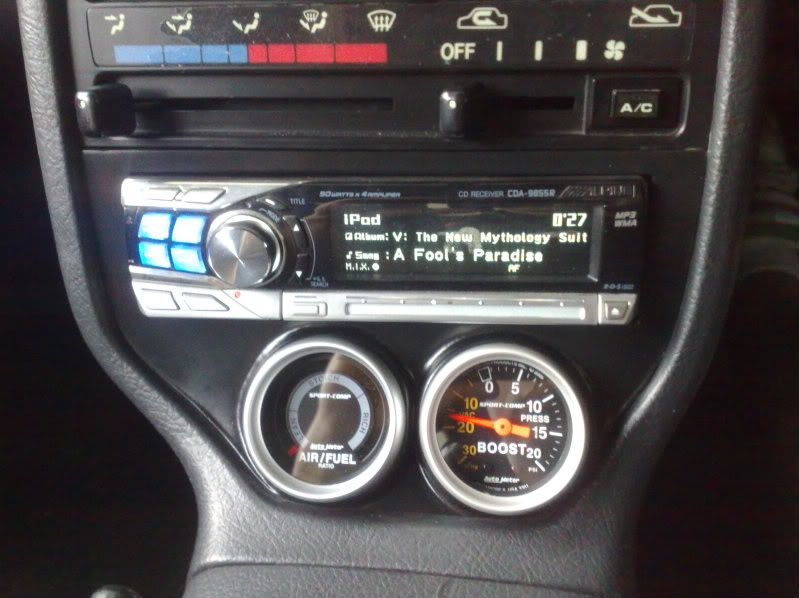
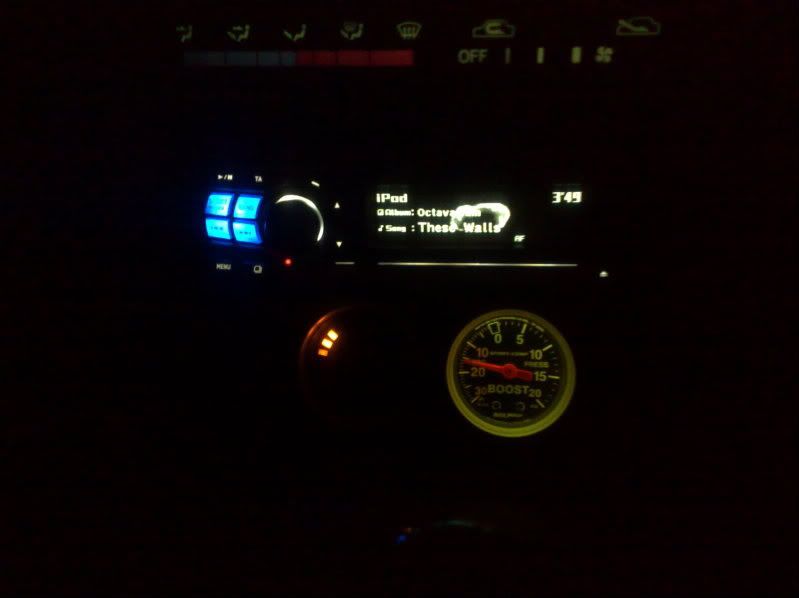
Gauge holder I knocked up few weekends back:
Its a bit rough, but will do until I find a reasonably priced Crux one.
Very happy with the gauges, illumination looks a lot better then in the photo (phone cam).
Car is completely stock, but manages to pull 1 Bar of boost.
Reply: 7
What do you call reasonably priced...??? I might be able to help you out.
Reply: 8
Quoted from Badger, posted Tuesday, April 6th, 2010, 2:04:22pm at here What do you call reasonably priced...??? I might be able to help you out.
Not $100+ for a little bit of plastic. How might you be able to help?
Was going to get onto my mate in Japan to hunt me down one, even second-hand.
Reply: 9
Wanna make me one Nick....Looks the goods mate, knock up a couple and sell em to buy the one you want LOL
Reply: 10
Quoted from Justin, posted Thursday, April 8th, 2010, 11:49:47am at here Wanna make me one Nick....Looks the goods mate, knock up a couple and sell em to buy the one you want LOL
Ha ha. Was frustrating enough making that one... :P
Reply: 11
I thought so....but It's always easier the second time...just ask Sneaza LOL
Reply: 12
Nice to see the car today for real :) It's a very tidy little capp!
Reply: 13
Thanks Sean. Nice to finally see your cars too :)
Reply: 14
Had an altercation with a Hayman Reese towbar yesterday. Front bar is in bad shape and bonnet latch got moved, but the bonnet and everything else survived. Looks like I have some work to do on the weekend... :(
Reply: 15
:( how bad is the bumper? (email me pics if you want to in my profile)
Reply: 16
Haven't got around to taking a photo of it. Already pulled the bumper off, few cracks and heavily pressed in at the middle. Hoping my heat gun will sort most of the deformation out. Bonnet latch might be a bit of a hassle, seems that area was softened up when the previous owner crashed it.
Reply: 17
sounds like what happened to my cappuccino...
bad luck nick =(
Reply: 18
Not so bad now that I've had a look under the shed lights and a bit of a play with it. Just need to finish reshaping it with the heat gun, then throw some epoxy on it. Getting the paint matched will probably be the hardest bit.
Reply: 19
Finding Paint match should be the easy bit.
Find the Paint Codes on the Plate under the Bonnet, then take that to an Auto Paint Supply Shop....should be able to match, Take your Petrol Cap as well, that way you can be sure....BEFORE you put it on.Shame about the accident, car looks very Cool.....
Reply: 20
Yeah, but that still relys on the paint shop getting it mixed right. Last time I tried it was a Toyota colour available in Australia and it was still off... :(
Reply: 21
Quoted Text Its a bit rough, but will do until I find a reasonably priced Crux one.
Look no further, click here
Reply: 22
Quoted from Nick_Sawyer, posted Tuesday, April 13th, 2010, 1:02:39pm at here Yeah, but that still relys on the paint shop getting it mixed right. Last time I tried it was a Toyota colour available in Australia and it was still off...Ā :(
Which is why I said to 'Take your Petrol Cap' as well......then you can see for youself. ;D ;)
Reply: 23
:( Hope the heatgun does it for ya, seemed to wrk quite well for me!
Reply: 24
Update:
Finally got all the bits I needed to replace together and found some time to start on it. Big thanks to soldave for sourcing parts I couldn't get locally.
Some of the goodies:
Machined flywheel:
New clutch and pressure plate:
New gearbox mount:
As you can see in that last pic the old gearbox mount was completely split, which along with slightly worn engine mounts was the cause of my engine movement (as discussed in another thread). All were replaced with Suzuki Sport mounts. Also have diff mounts to go in this weekend.
As for my power loss, it turned out to be the clutch which was buggered from the day I bought it, so never noticed anything was wrong until it really started to let go under boost. Have a few bits to put on after work then its out for a test drive and hopefully all is goodĀ :)


Reply: 25
Sounds like you gonna have some fun times ahead!
Reply: 26
I had to get my green cappi's paint matched recently, just did like Sneaza said and it came out well...
Probably just depends on the shop you go to :)
looks like your Capp will be going well again soon :)
Reply: 27
Just noticed how clean your engine bay is ! Very nice ;D
Reply: 28
Engine out:

Reply: 29
More pics (everyone loves pics :P):


Reply: 30
The pic with the bear bottle cracked me up!
Reply: 31
I needed something for a scale reference, just happened to have that in my hand... :P
Reply: 32
Quoted from ThePorko, posted Wednesday, December 22nd, 2010, 2:46:17am at here The pic with the bear bottle cracked me up!
Me too ;D
Reply: 33
A mini update:
More parts arrived courtesy of soldave. Bearings and rings went straight to the engine builder who will finish up the short block, then its back to me to finish putting back together.
Also have these bits from a previous order from soldave awaiting the blocks return (and spoiled the Cap with some HID lamps from my mate):
Also have something special on order with Jesse, and a few other parts to eventually get...Ā wallet feels lighter these days...


Reply: 34
:D F100M kit:
Got the block and head back from engine builder!
Getting ready for some paint:


Reply: 35
So Jealous right now...lol. What colour are you painting it...???
Reply: 36
Quoted from Badger, posted Thursday, March 31st, 2011, 12:51:03pm at here So Jealous right now...lol. What colour are you painting it...???
Going for VHT Aluminium, rather than the factory black. Also, all the metal engine piping is translucent blue over metallic silver, hopefully will look good once assembled :)
Reply: 37
Its going to fly! :)
Reply: 38
Quoted from capgun, posted Thursday, March 31st, 2011, 1:43:13pm at here Its going to fly! :)
I hope so :D
Reply: 39
I like where this is going VERY much! if you dont mind me asking how much do f100M kits go for these days?
Reply: 40
Jealous of:
a. your car spec - limited with LSD and PAS
b. F100-M kit, I bought the F111 before the "M" came out
c. your car colour - it's lush
that is all.
Reply: 41
Don't be jealous over the F100-M Paolo, the hp gain is very low ;D
Reply: 42
Yeah but it's something that I don't have but want! ;)
Reply: 43
Got some painting done:
Rebuilt my alternator (only needed bearings, brushes were good):
Blue paint is translucent blue over metallic silver, unfortunately doesn't show up with the iphone camera in that light.


Reply: 44
Nice! (thumb)
Reply: 45
Looking good Nick......
Reply: 46
I should keep that block on your coffee table as a conversation piece ;D
Reply: 47
Not much done last night, rear main seal and housing:
Oil pump and front seal:


Reply: 48
Looks nice and clean... good job !
Reply: 49
Sorry steal your pic, but in need of help.
The part circled holds the Oil adapter Plate, which holds the Cooler and Filter.
On removal of the Cooler from my AltoF6A, which attaches directly to the Block,
I discover that the 3 Holes to attach the Adapter Plate ARE NOT THERE.......... :o:'(
How hard will it be to Drill and Tap these...??? any ideas welcome
Reply: 50
You have PM.
Reply: 51
Replied......
Reply: 52
Water pump, oil pick-up and sump on tonight:
Also picked these up from the polisher:


Reply: 53
Absolutely f***in' Gorgeous...so jealous right now...lol How Much...???
Reply: 54
About $500...
Reply: 55
nice porn!
Reply: 56
Bet that took a lot of Duraglit ;D
Reply: 57
damn man, that looks absolutely sex!
Reply: 58
very pretty
Reply: 59
Seriously though..... How the hell do they do that?
Reply: 60
Time, patience and a whole range of special polishing die-grinder type tools.
Reply: 61
Back to business. Oil filter adaptor on:
Monster Sport MLS head gasket (1.4mm) and head on:
Got bored Friday at work and made a new emissions label:


Reply: 62
I am liking this, VERY MUCH
can someone explain to me what the spring thingos on the top of the head do?
is it for the timing of the valves?
Reply: 63
Quoted from kayfour, posted Saturday, April 9th, 2011, 10:16:27am at here I am liking this, VERY MUCH
can someone explain to me what the spring thingos on the top of the head do?
is it for the timing of the valves?
Thanks :)
The lobes on the camshaft push the valves down (open) and the springs, which sit over the valve stem, push the valve back up (closed) once the lobe has passed.
Reply: 64
Very nice Nick, had to do a CLOSE-UP of the Adapter plate to rub it in didnt ya...lol. What Exhaust Manifold is going back on...??? something Shiny to match the other side perhaps...???
Reply: 65
Quoted from Badger, posted Sunday, April 10th, 2011, 12:31:31am at here Very nice Nick, had to do a CLOSE-UP of the Adapter plate to rub it in didnt ya...lol.
:P Did you get the PM?
Quoted from Badger, posted Sunday, April 10th, 2011, 12:31:31am at here What Exhaust Manifold is going back on...??? something Shiny to match the other side perhaps...???
Indeed. Something shiny should be on its way from Japan soon.Ā ;D
Reply: 66
Yeh got it and thanx again mate....now just have to get on with the holes...
Reply: 67
Rest of the valve-train on:


Reply: 68
Looks fantastic ! /drool
Reply: 69
it looks like something out of The Terminator ahahah
great job, i wish such skills and knowledge!
Reply: 70
poliahed peices look great , its going to look beautiful!
Reply: 71
Nick, thats beautiful! Great work!!! What was the paint you used on the block?
Reply: 72
Great job Nick,
I am just about to start rebuilding the engine for my red cappo it's about at the same stage as Sneaza's.
I am dam sure when I finish it wont look manything like yours though. LOL.
Reply: 73
yeah Im more excited to see this thing finished than my own car! LOL
Reply: 74
Props to all the hard work!
That motor is looking sexy!
Reply: 75
Thanks guys! It's been a long and slow process squeezing in time between work and keeping the daily running. Fingers crossed when I get to turn the key it doesn't go bang... :P
Reply: 76
Small update, nothing exciting. Put new foam backing on the rear cam cover and fitted it. (Cleaned the shed too :P):
Had to use domed Allen bolts as regular look like they might foul the timing belt:


Reply: 77
New oil cap fitted earlier this week:
Some goodies that arrived today:
Fitted:


Reply: 78
Awesome looking engine dude :o
How much did you pay for the adjustable cam gears ?
Reply: 79
Had a few hours today to get into it. Discovered I'll need a 5mm plate between manifold and turbo for it to fit properly, so started on the intake side:
Throttle body:
Rail and injectors (wish they were blue :P):
Water pipe:
Temp sensors etc:
Then called it a day....ĀĀ ;D


Reply: 80
Looks briliant ;)
Reply: 81
Wow
Amazing work,
must see this in real life sometime!
Reply: 82
Truly awesome!!
Reply: 83
It's almost a shame it has to go into an engine bay
Reply: 84
Thanks guys :)
Reply: 85
Looking Absolutely Gorgeous..........But, why do you need the Plate for the Manifold...??? and how did you discover this...???
Reply: 86
Quoted from Badger, posted Sunday, May 8th, 2011, 7:56:25am at here But, why do you need the Plate for the Manifold...??? and how did you discover this...???
Manifold fouls the banjo bolt and intake housing on the turbo, not sure why... tolerances may have been out on the manifold... but the easiest way to solve is to fit a 4mm plate to lower the turbo down slightly.
Reply: 87
Sorry to ask again but could you tell me how much you paid and where for the adjustable cam gears please ? I might need to get a set too and I'm not sure where to look.
Reply: 88
I would look on Yahoo Japan, as That is where I saw a set for approx. 23,000yen....
Reply: 89


Reply: 90
Gobsmacked.....
Reply: 91
It's a work of art! (thumb)
Reply: 92
Thanks guys. Its getting there slowly, need to get the sub-frame out soon and put the engine on that, then put it back where it belongsĀ ;D
Reply: 93
never seen a thermostat cover so polished =O
amazing work
Reply: 94
This engine is so nice you shouldn't put it back in your car, it should be in a display case ;D
Reply: 95
what a beast!!!!
How will you time the engine? Line up both cam and cam sprocket then belt on adjust tensions?
Thanks
Ming
Reply: 96
Quoted from ycming, posted Sunday, June 12th, 2011, 8:06:52pm at here How will you time the engine? Line up both cam and cam sprocket then belt on adjust tensions?
I assume you mean the initial timing? Same as most engines - crank at TDC, then line up mark on cam pulleys with those on the backing plate. Fit belt and tension.
Reply: 97
Had some spare time and motivation today. Very rarely do I get both...Ā :P
Another spacer (alloy, so could make it myself this time):
Rest of the polished pipe work on:
And finally got around to pulling the subframe out:


Reply: 98
This is fantastic - but I think I'm only seeing a few of the pics, eg post above - I can only see 1 pic showing the engine - is it just my PC?
Good stuff, will look good in the bay
Cheers
H
Reply: 99
Should be 13 pics in that last post. Im using Firefox 3.6 and photos are hosted on Imageshack... could your browser be blocking?
Reply: 100
hmm, will try from home, my employer has blocked all forums, social networking sites and anything else that might distract.
Somehow club cappo escaped the block.... ;D
Reply: 101
That is just awesome.
Reply: 102
Nick, thats fantastic. I love you! ;D Will you build mine for me? :B
Reply: 103
Bush mechanics 101: 2 ton ratchet strap and a pipe sling make an excellent engine hoist.
Lightened flywheel:
Gearbox:
Ready and waiting for tomorrow:


Reply: 104
Looking great :)
Reply: 105
Good job.
Reply: 106
Wow looks amazing that !
After that is it just a case of bolting that to the chassis!?
Thanks
Ming
Reply: 107
Is it weird that I am spending more time looking at pics of your engine then looking at porn on the net? ::)
Nick, put up a list of specs and parts used for your engine build
Reply: 108
Quoted from redgaijin, posted Sunday, June 26th, 2011, 1:53:54am at here Is it weird that I am spending more time looking at pics of your engine then looking at porn on the net?Ā ::)
Nick, put up a list of specs and parts used for your engine build
Lol!
Might do a spec list when completed. There will be some omissions though, gotta have some secrets...
Reply: 109
Some more progress seeing as it was a nice sunny day, well for winter anyway...
Their long awaited reunion:
A hint of my colour scheme (is a lot more metallic than the photos show):
Decided to use good clamps on all big hoses:
Alternator and radiator hoses on (top hose is the same colour as the bottom ones, silly camera):


Reply: 110
Quoted from Nick_Sawyer, posted Sunday, June 26th, 2011, 5:03:51am at here
Lol!
Might do a spec list when completed. There will be some omissions though, gotta have some secrets...
Omissions?! Sharing is caring Nick :P
Reply: 111
Look's stunning Nick.
Reply: 112
This thing is sweet!
Reply: 113
The engine looks perfect and your attention to detail far exceeds mine.
However looking at the pics, the 2nd from last one shows a rusty spot in your engine bay, are you going to sort that? its about 2 inches into the car from the blue VIN plate and to be honest it was the first thing i noticed when i saw that pic.
Reply: 114
I think it's a leaf! ^
Reply: 115
Quoted from Avar, posted Monday, June 27th, 2011, 7:34:03am at here The engine looks perfect and your attention to detail far exceeds mine.
However looking at the pics, the 2nd from last one shows a rusty spot in your engine bay, are you going to sort that?Ā its about 2 inches into the car from the blue VIN plate and to be honest it was the first thing i noticed when i saw that pic.
Its surface rust, has been there since I bought the car. I'll get to it eventually... :P
Reply: 116
Quoted from Avar, posted Monday, June 27th, 2011, 7:34:03am at here The engine looks perfect and your attention to detail far exceeds mine.
However looking at the pics, the 2nd from last one shows a rusty spot in your engine bay, are you going to sort that?Ā its about 2 inches into the car from the blue VIN plate and to be honest it was the first thing i noticed when i saw that pic.
So with an engine like this between the wheels, and the first thing you saw in the pic was a tiny spot .... :o
Reply: 117
Wow! Certainly need a youtube video of this beauty.....
Reply: 118
Quoted from redgaijin, posted Tuesday, June 28th, 2011, 12:33:10am at here
So with an engine like this between the wheels, and the first thing you saw in the pic was a tiny spot ....Ā :o
Believe it or not i did, i aint complaining i think the work done to date goes into the realm of art / carnography but my eyes were just drawn to that point. Its a curse, it happens with buildings also i can be looking at the finest architectural work of art and i'll be drawn to a bad mortar joint or something stupid.
Yet you look at the state of my car and you wouldn't think this :D probably why i have to drive fast, that way i dont get time to admire the interior.
Reply: 119
I managed to take alook from my PC at home - engine looks gorgeous.....
What about the wiring though - are you going to hide it away? or make it shout??
Reply: 120
Quoted from half-9, posted Friday, July 1st, 2011, 8:08:01pm at here I managed to take alook from my PC at home - engine looks gorgeous.....
What about the wiring though - are you going to hide it away? or make it shout??
Wiring will stay as it is. To much work to hide, and all other options (sleeving etc) were expensive as budget has been maxed for now.
Reply: 121
Quoted from Nick_Sawyer, posted Saturday, July 2nd, 2011, 1:26:23pm at here
Wiring will stay as it is. To much work to hide, and all other options (sleeving etc) were expensive as budget has been maxed for now.
Hey Nick. Can you tell me how, where you would hide the wiring? I really like the idea of making a really clean engine bay, but dont know how I would do this.
Reply: 122
Should ask dave660.....he did his.
Reply: 123
Quoted from Badger, posted Monday, July 4th, 2011, 7:29:51am at here Should ask dave660.....he did his.
Will do Sneaza. Haha. I hassle him so much :P Did you hide all your wiring too?
Reply: 124
Nope, too much hassle.
Reply: 125
Nick, give us an update. I need my fix 8)
Reply: 126
Quoted from redgaijin, posted Wednesday, July 20th, 2011, 11:56:19am at here Nick, give us an update. I need my fix 8)
Soon... :)
Reply: 127
Dizzy all freshened up:
New fuel lines - Stainless steel braided, then nylon braided. (Short 1 connector at time of photo):
Fitted all vac, fuel and water lines, and clear timing cover:
Re-using any old hoses that are still in good condition, then will replace them over time.


Reply: 128
Is that a new dizzy? Where did you get the braided fuel lines Nick? Are they custom made?
Reply: 129
Quoted from redgaijin, posted Sunday, July 24th, 2011, 9:49:19am at here Is that a new dizzy? Where did you get the braided fuel lines Nick? Are they custom made?
Dizzy is my original, just replaced everything and painted so its like new. Fuel line I bought ages ago when I first decided to rebuild the engine, just had to cut to length and put the ends on.
Reply: 130
if youre keeping the stock abv, please paint it blue :)
Reply: 131
Quoted from Chernoby1, posted Sunday, July 24th, 2011, 12:43:57pm at here if youre keeping the stock abv, please paint it blue :)
It is a hideous colour isn't it? :P Undecided what I'll do with it yet....
Reply: 132
Got a tiny bit done today, not the best weather....
New earth straps...Ā a bit longer than I thought (bought while engine was out) but I'll make them fit :P


Reply: 133
Looking at this engine bay makes me feel warm and fuzzy inside
Reply: 134
Is the timing belt cover something you've made or did you buy it?
Reply: 135
Is it wrong to have "feelings" about an engine? ;D
Reply: 136
Quoted from Andy, posted Sunday, July 24th, 2011, 6:03:32pm at here Is the timing belt cover something you've made or did you buy it?
I bought it, but it is just made from an OEM cover. Didn't have the patience to work with plastic.. although now looking at it I probably could have made it quite easy.
Reply: 137
UPDATE!!!!!
Did you replace the Air-Cond. or leave it out...??? and how does the car handle now...???
Reply: 138
Air-con is staying out for now, but will keep it just in case.
Just got the car back from my trusted mechanic/dyno tuner who was sorting out some issues. Currently running it in so have to keep it under ~5psi, but will let you know what its like once its run in. Will go back to the dyno for a tune and power run.
Should be getting a new exhaust on Wednesday, also got some lowered springs to put in. On the downside I think a CV or bearing is on its way out in the a*se end.
Reply: 139
On the Upside...I just happen to have a pair of said Bearings (09267-35003) should you require them. Let me know.
Reply: 140
That is looking great mate!
Reply: 141
Update: CV joints are fine, however some d***head (me) left a few bolts only hand tight up the front endĀ ::)
Back to running it in now, had to fit a ghetto heat-shield over the exhaust mani as it made my battery holder a bit soft and deformed :P .
Exhaust booked for Tuesday and new slotted rotors ordered.
Pretty happy that its back in time for summer.
Reply: 142
What are the rotors you have ordered Mr Sawyer?
Both front and back? Keeping the stock calipers?
Reply: 143
Ordered slotted DBA rotors, as they are cheap and Australian, so easy to get my hands on. Only the fronts for now, honestly don't think the rear does enough work to need them. Yes, keeping stock calipers. Might get some braided lines later down the track, but basically just upping the stopping power/reliability a little to match the increase in power.
Reply: 144
Just fitted the same DBA slotted rotors to KOF33 with EBC greenstuff ceramic pads on the front and EBC redstuff pads on the back and st/st braided brake lines.
Dont know how it feels yet as I have the motor out at the moment.
Reply: 145
Ah, good to know someone else is giving DBA rotors a go.
Just when I thought I had run out of things to fix on this car the clutch has started making funny noises. Most likely the thrust bearing. Not sure why, the whole assembly is newĀ :-/
Reply: 146
Could it be something simple like the clutch cable settling and just needing a lil adjustment?
Reply: 147
I think now that its just gear chatter. The hardness on my gears was fairly worn when I had the box apart.. everything works so can't be arsed pulling it out just yet.
Reply: 148
Lovely bay :K)
Keep up the good work :)
Reply: 149
Sometimes you meet really gifted people, most of the time in a certain profession or art. Sneaza is like that, he's the 'Plastic Magician', but you are certainly a match when it comes to engine detailing, incredible what you accomplished, a real work of art. It gives us humble wrenchers something to aim for! :)
Reply: 150
Any updates on this nick ??
Powered by e-blah Platinum Series © 2007