Drop me a PM if you would like to be added to the ClubCappo Member Map. More details can be found here. We now have an official Facebook group as well as a page! See here
Logged
Reply: 41 - 97
2002gimp
Posted on: Monday, July 1st, 2013, 12:25:51pm
Guest User
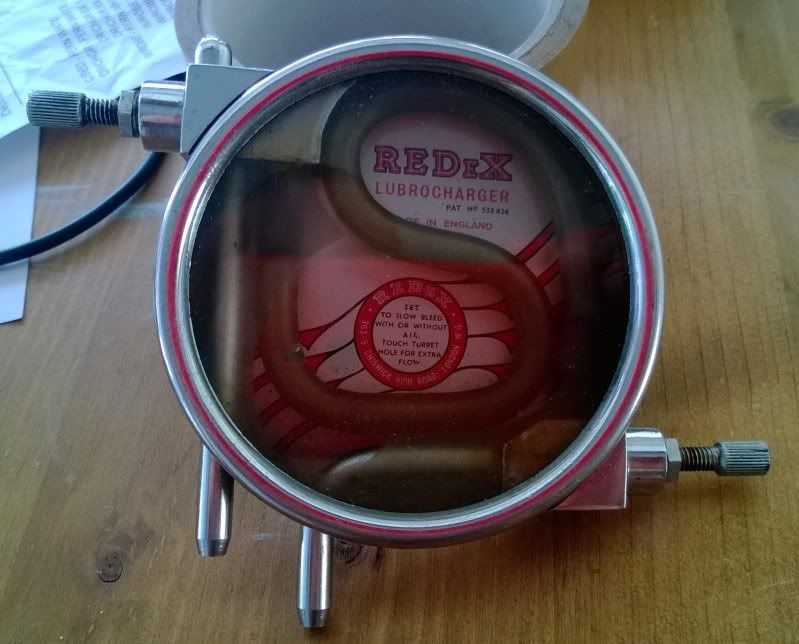
Yeah summat like that, I'm guessing it will work with no power attached then, or failing that I can remove it and link the 2 pipes?
Could really do with someone just unplugging theirs and see what happens, then its one less thing to worry about if she fails to start/run properly
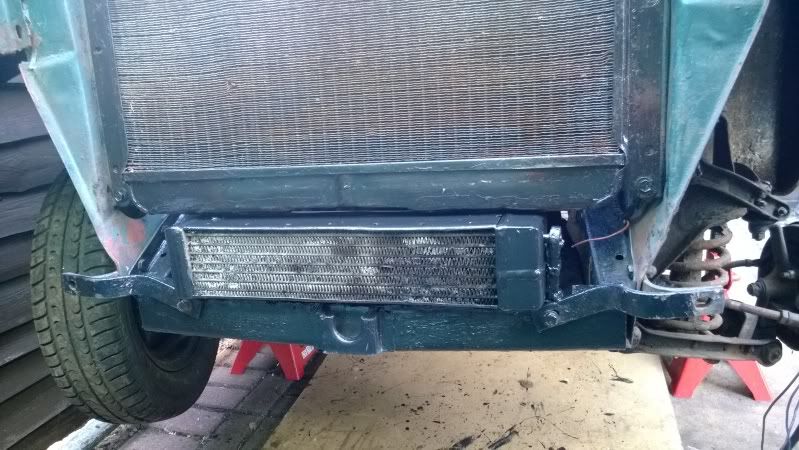
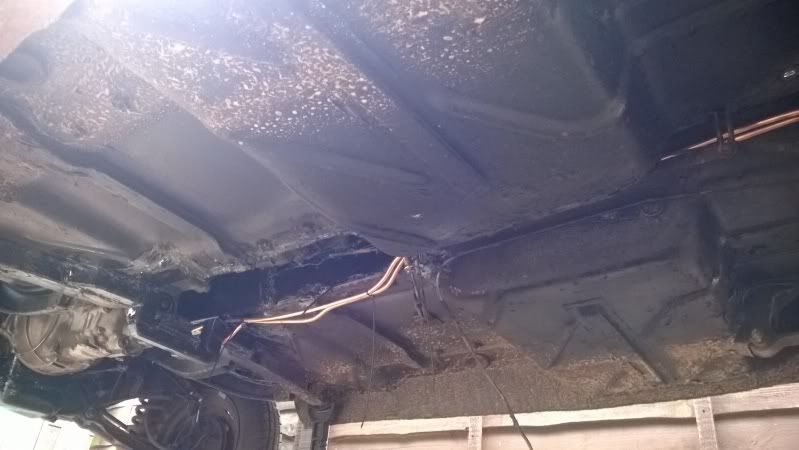
Oil cooler from a range rover in its new home, maybe a little excessive, its 4 inches square by summat like 17 inches long. It is fitted behind the front valance and will only have a few holes drilled so i figure its all good
I fitted the fuel lines, 8mm there and back. They are currently held up by a couple of plastic p clips and some cable ties as i'm waiting for some rubber lined stainless clips to arrive, so they will be neater when finally done
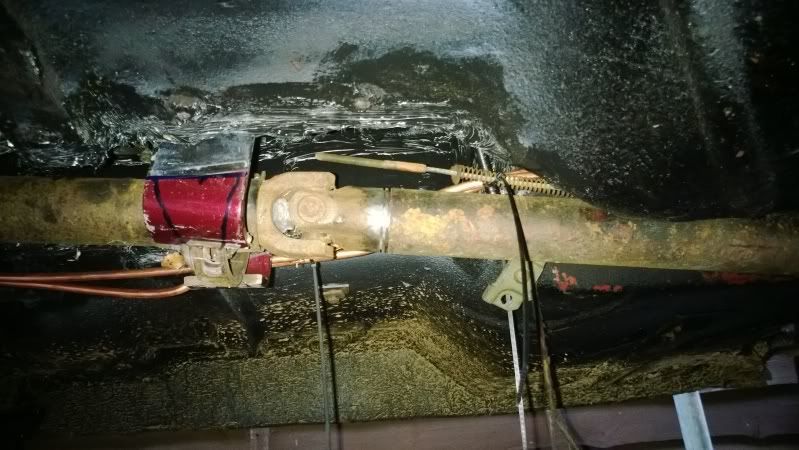
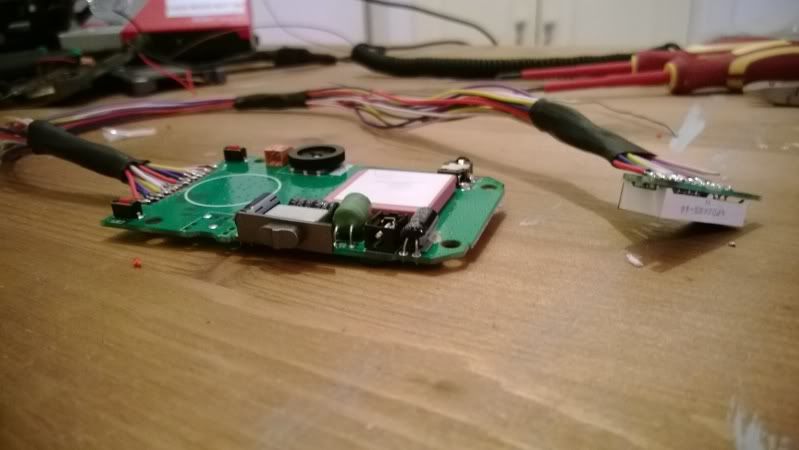
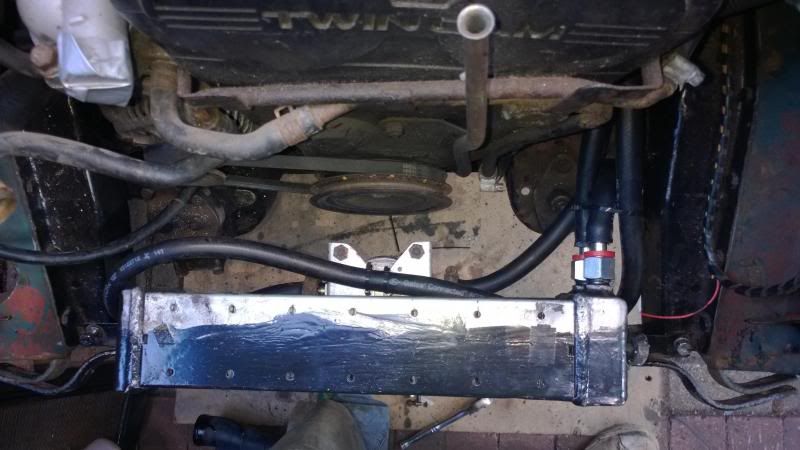
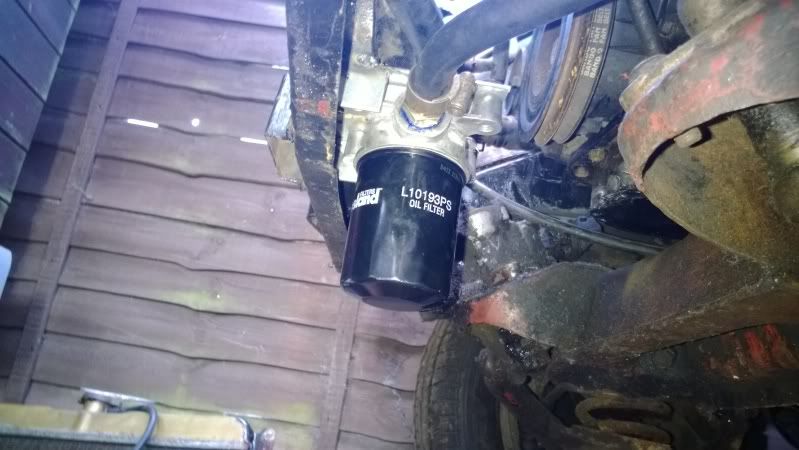
I got the remote oil filter in whilst i was at it. I really cant tell you how much grief this has caused me, even though this engine is bordering on the pathetic size wise, there's just no room. After some time trying to find a spot i fitted it in the inner wing. I slept on it and decided to move it, not only would it get covered in crap from the tyres it was about 2 inches above the camcovers which in my head didn't seem ideal.
I stuck it here in the end, fits lovely, the filters above the subframe line so it should be alright, if i feel its a little low i'll source a shallower filter as this ones a good 4 inches.
Lastly this arrived, eBay Audi 1.8t intercooler, all £5 of it!
As you can see its about 3 times the size, its also 2.5 times the thickness, and the cores are denser, basically, its an ideal cooler for this engine!
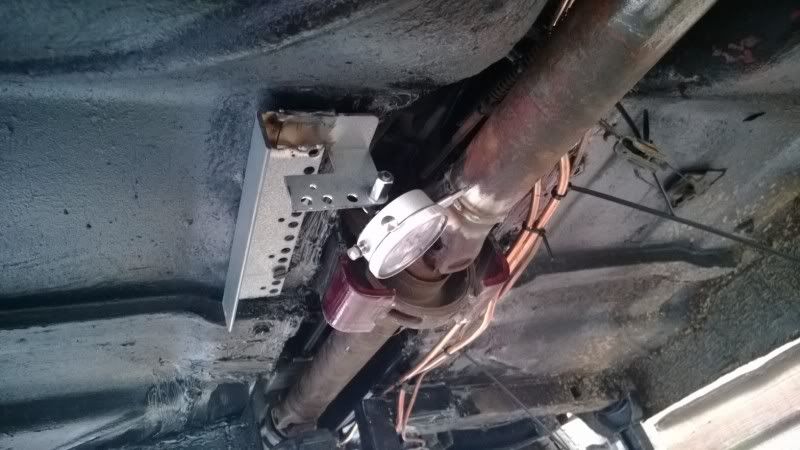
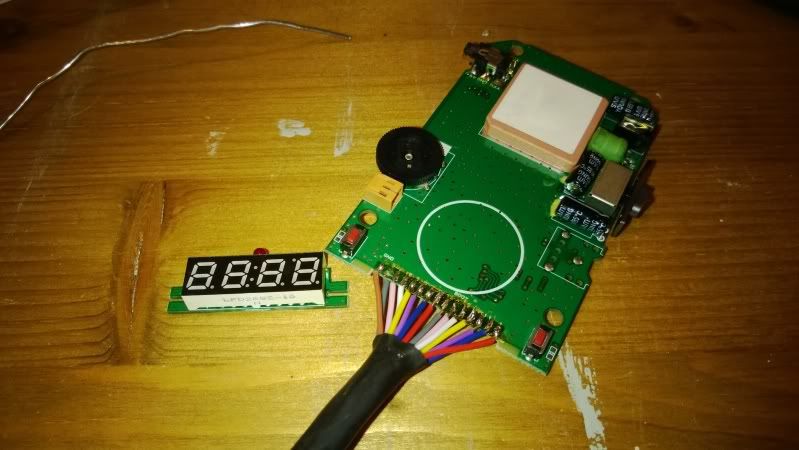
Posted on: Thursday, July 4th, 2013, 11:33:59pm Attachment:az1_oil_filter_mount2.jpg - 30.20 KB (809 views)
Maximum Member
Posts: 1446 Posts Per Day: 0.83
You may well hate me for not mentioning this earlier but...
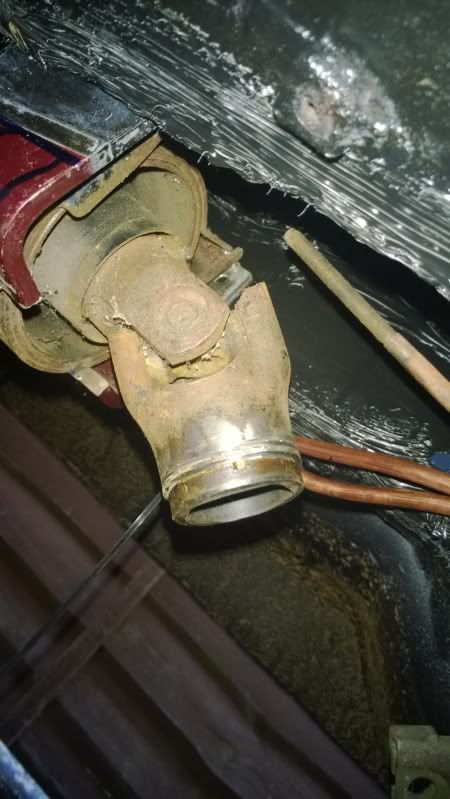
As far as I know the cappo is the only F6A application that uses the remote filter mount, on all the other cars it go's straight on the side of the block just under the turbo. pic is from the AZ-1 but it's the same on the Alto's, Carol's and Wagon R's - the end of the sandard filter is about 1 3/4 inches inside of the outside of the turbo. As I said earlier, if it would have worked like that you are going to hate me
This is a great build and I hope she fires up for you this weekend!
Logged
Reply: 45 - 97
2002gimp
Posted on: Friday, July 5th, 2013, 7:32:07am
Guest User
The engine mount must be different mate, the cooler and filter wont fit in that configuration, i tried :/
To be honest its that tight even if I just had the filter on the block i'd have to lift the engine to change it, so this is ideal, cheers for thinking of me though...
You can see she ran away with me at the end, due to not blocking off the old servo vacuum.
I was told a turbo makes an effective silencer, this is clearly wrong
The next time I started it (un filmed) I thought I'd test boost, yes the turbos working, how do I know? The intercooler isnt jubilee clipped on and its crotch height; work it out...
Last modified Sunday, July 7th, 2013, 10:34:15am by 2002gimp
Logged
Reply: 47 - 97
2002gimp
Posted on: Wednesday, July 10th, 2013, 9:31:02pm
Guest User
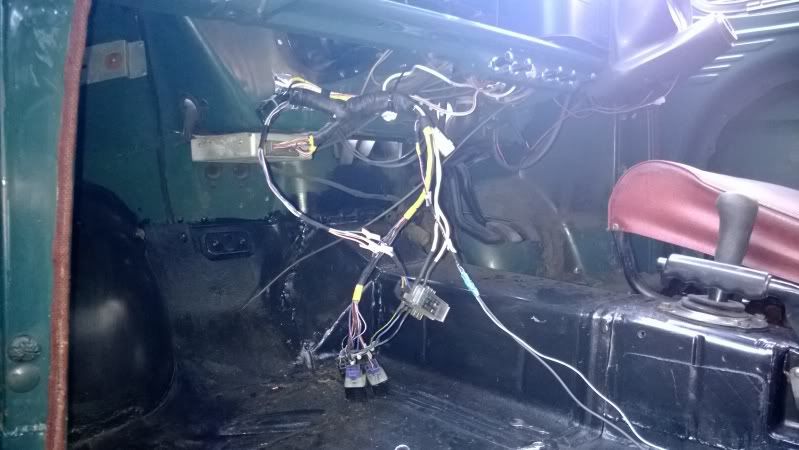
Now the engine works i thought i'd tidy the wiring. I removed it and wrapped it then put it back
Inside is also a bit neater, but i've yet to mount the relays and fuse box
So the engine runs, whats next? I guess with 37 days to go i really need to get her back on the floor and drive her round the village to make sure its all good before the vast amount of 'finishing jobs' get done.
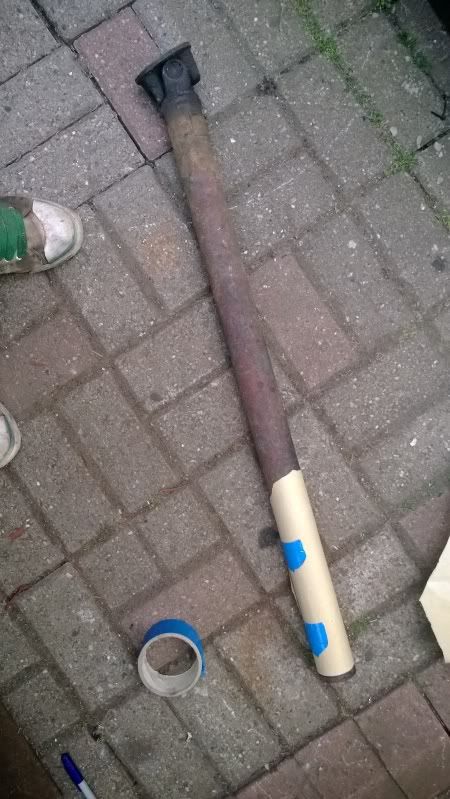
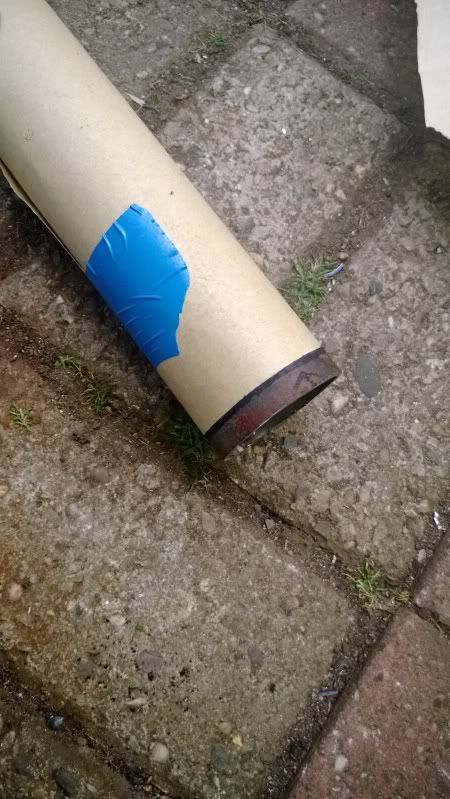
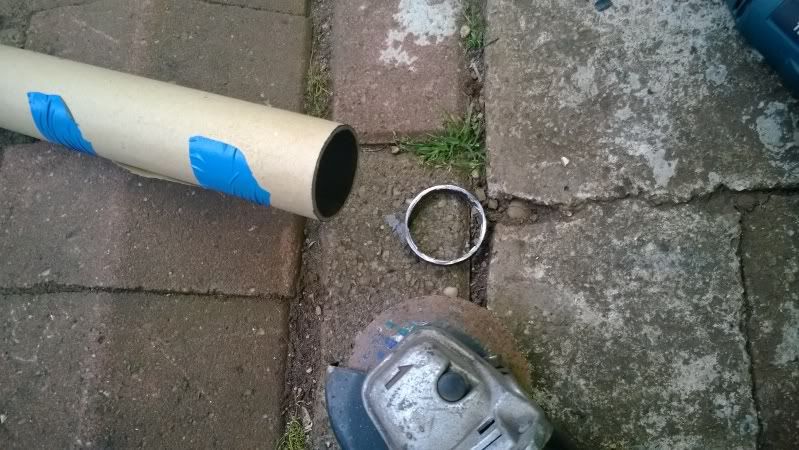
First up, the prop, now props scare me, they're made of metal and spin right fast near your a** with a few mm of steel to protect you.
With that in mind i really didn't want to cut and sleeve it, even though the OD's are the same. Handily the ID's were also the same, so i gently sliced through the weld holding the yoke on the rear part of the suzuki prop until it was off, this leaves this half inch flange
This allows you to use an interference fit between the prop tube and yoke which holds it in line.
I measured the Standard prop and used paper to make sure it will be a straight cut
Made the cut very slowly and carefully using a 1mm disc
I lined up the new yoke to be opposite the old one - there's a reason for this but it escapes me right now, but i read it on the internets so it must be true - and hammered it home, but not quite up to the lip; just in case the cut wasn't perfectly straight and to leave a good line to fill with weld
Bolted back in place at both ends then span a few times whilst hitting it in the middle lightly with a hammer as i felt this would help centre it as i dont have a dial gauge. To my eye it looks spot on, I wont know till she's actually driven
Last modified Wednesday, July 10th, 2013, 9:31:45pm by 2002gimp
Logged
Reply: 48 - 97
Avar
Posted on: Thursday, July 11th, 2013, 6:43:23am
Guest User
Looking good, major points to you for undertaking the prop mod, the balance needs to be spot on and the care you've taken means it should be pretty close.
Logged
Reply: 49 - 97
2002gimp
Posted on: Thursday, July 11th, 2013, 12:40:17pm
Guest User
Dial gauge has been ordered so i'll be checking it before I weld it, only has to be within .127mm and inch from the weld, so it can't be to hard hey ;p
Logged
Reply: 50 - 97
2002gimp
Posted on: Sunday, July 14th, 2013, 9:21:26am
Guest User
Before I went ahead and welded the prop I thought i'd like to check it so I bought a dial gauge
Mounted it here
Now i'm glad I did as my 'eye' clearly sucks, there was a good 4mm of movement
With some hammering and turning I got it down to 0.2mm, which I think is pretty good?
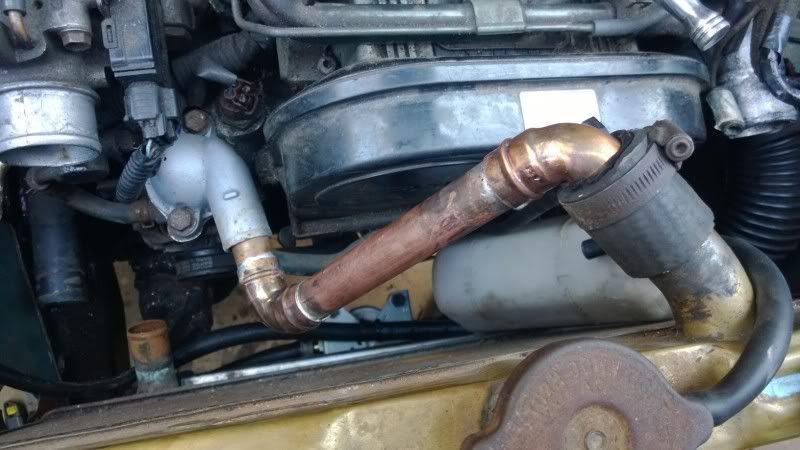
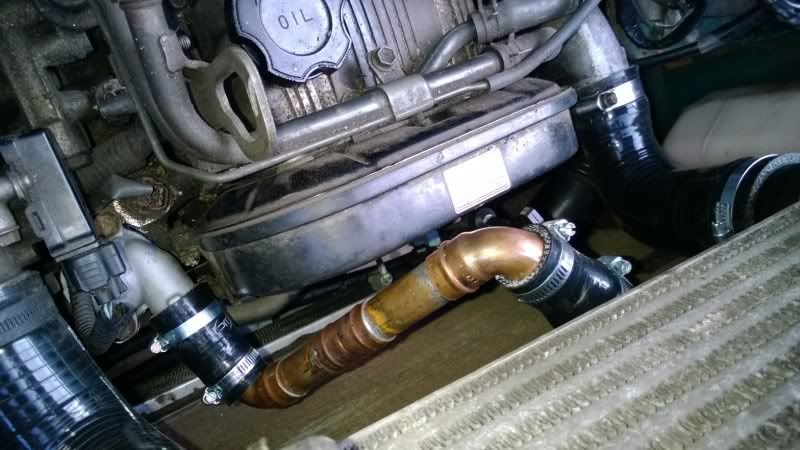
Started on the cooling system
This original pipe hit everything, so I remade it to fit
Top pipe done, i've ordered some small reducers, its waiting for things that drag this project on
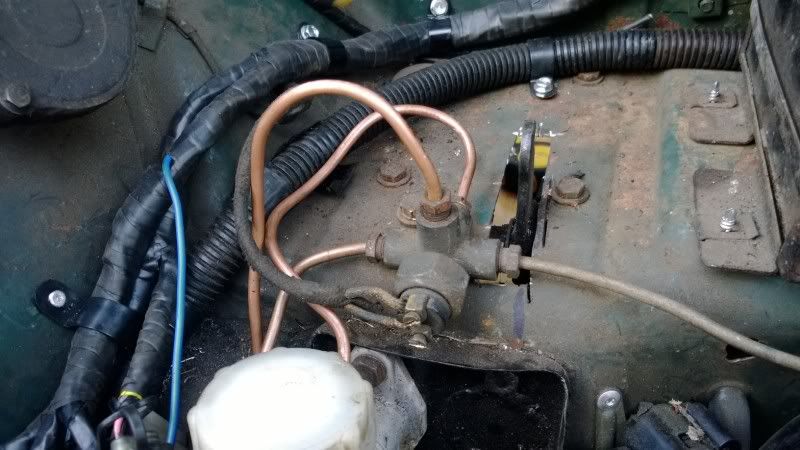
All the brake pipes are now done
As you can see I still need to sort the clutch pedal, originally it was hydrolic and the Capp is cable, hence the hole
So, i'm slowly plugging away, 33 days to go...
Logged
Reply: 51 - 97
2002gimp
Posted on: Wednesday, July 17th, 2013, 7:27:55pm
Guest User
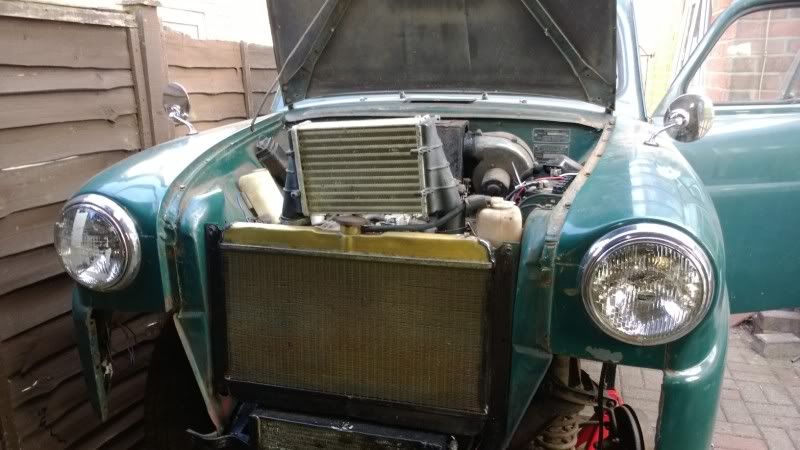
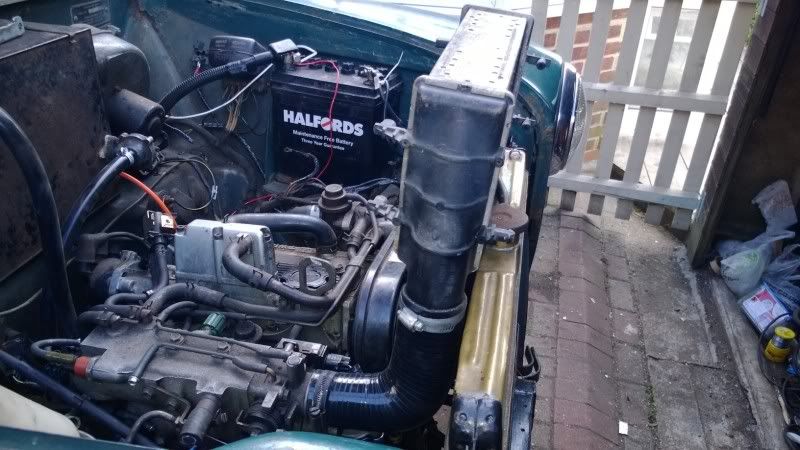
Today I had her running for a while and on boost as i've finished the cooling system
I temporary fitted the intercooler, dont think I can use it in this position, shame as it was dead easy!
The warning lights are fitted, they'll be coming out later on as they look like sh*te, but they work. Red is oil pressure, orange is the check engine light, green is the battery light and blue comes on when the MAP senses boost
Lastly I made the clutch work, the Standard was hydro, the Cappo was cable, I welded the top off the Capp pedal to the Standard one, then made this to fit over the top and hold the cable, it works a charm amnd looks like a shocked, long nosed gent!
Posted on: Monday, September 23rd, 2013, 5:36:54pm
Maximum Member
Posts: 1110 Posts Per Day: 0.65
Nice pics
Congrats for making it work !
Logged
Reply: 55 - 97
2002gimp
Posted on: Monday, September 23rd, 2013, 6:59:44pm
Guest User
Cheers mate
Few things still to do
I need a speed sensor to stop the cel coming on
I need to address the amount of air underneath her, flip the rear axle and chop the front springs
I need to swap the wheels and under-tyre her for more acceleration
Logged
Reply: 56 - 97
2002gimp
Posted on: Saturday, October 5th, 2013, 6:24:27pm
Guest User
Logged
Reply: 57 - 97
doodlepugg
Posted on: Saturday, October 26th, 2013, 10:16:27am
Guest User
Finally took the time to read through this; inspirational and brilliant. Well done
Logged
Reply: 58 - 97
2002gimp
Posted on: Tuesday, November 5th, 2013, 1:03:16pm
Guest User
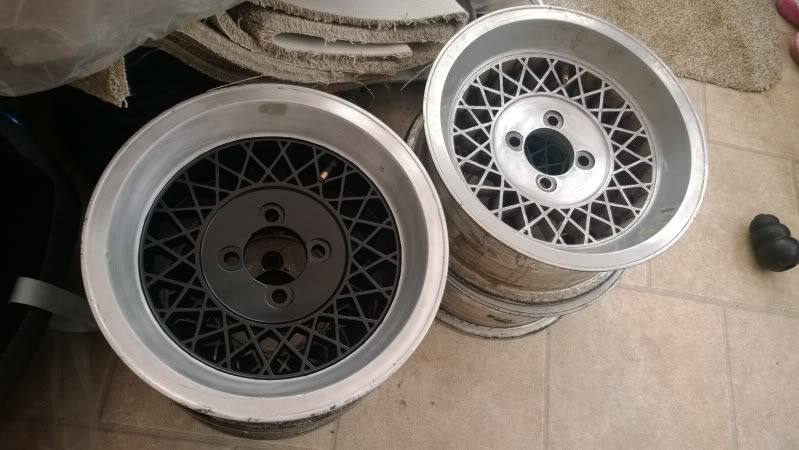
I'll just leave these 13x6 et5 Appliance Wire Mags here
Last modified Tuesday, November 5th, 2013, 1:04:08pm by 2002gimp
Logged
Reply: 59 - 97
lord
Posted on: Tuesday, November 5th, 2013, 3:59:09pm
Guest User
They are going to look cool !!
Logged
Reply: 60 - 97
2002gimp
Posted on: Tuesday, November 5th, 2013, 4:23:23pm
Guest User
They look cooler for the fact they were £50!!!!!!!!!!!!!!!!!!!!!!!
Logged
Reply: 61 - 97
2002gimp
Posted on: Wednesday, November 6th, 2013, 4:07:37pm
Guest User
Logged
Reply: 62 - 97
2002gimp
Posted on: Friday, November 8th, 2013, 6:40:24pm
Guest User
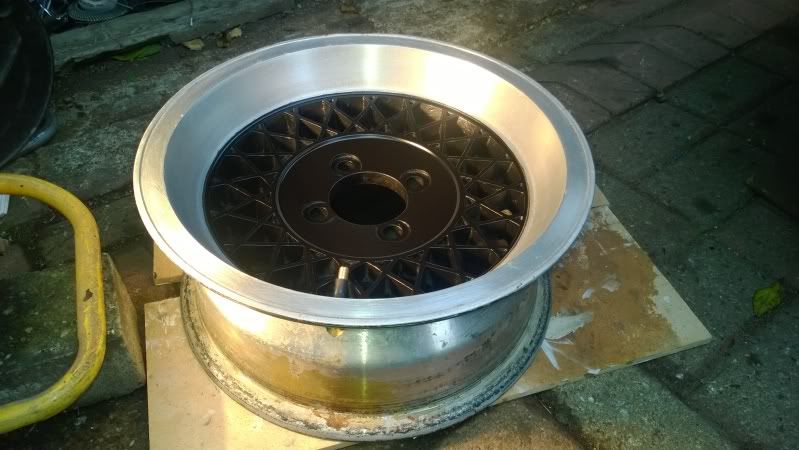
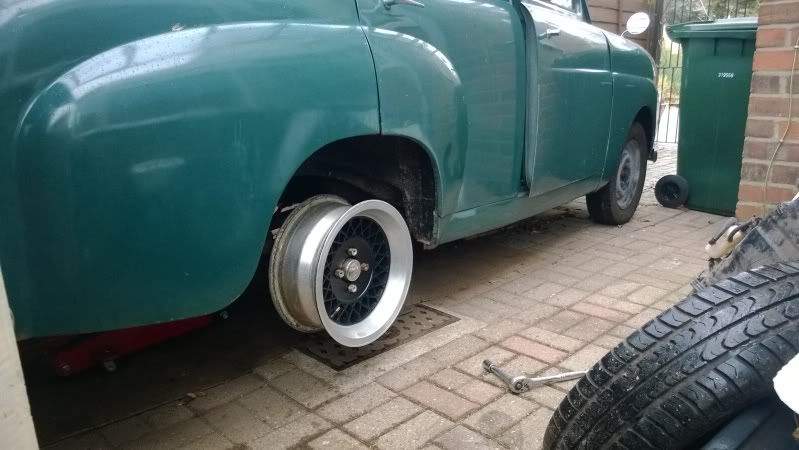
So, thought i'd have a trial fit of the rim I've painted. I need some 3/4 sleeve nuts before I can bolt them on, but at least it gives me an idea.
I'm very happy with them. I've spent a long time looking for some alloys that would suit a 50's car and trust me when I say they are few and far between. I was on the verge of banding the steels, but its getting common so was buzzing when I came across these fitted to a Lotus.
I'm going to 'The Range' tomorrow to pick up some tins of Plasticote, they have a load of satin colours for a fiver each, i'm going for a nice flat brown to paint a centre to see if it looks better than the black.
Tyres are being swapped from the steels to the alloys this week as I cant afford new ones after spending huge for the alloys.
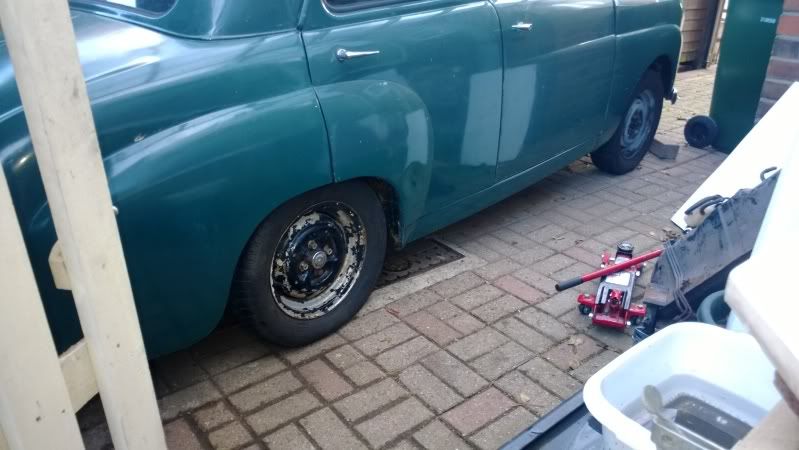
Seeing the wheel bolted up and seeing the huge arch gap made me both happy and sad. I'd of been disappointed to bolt the wheels on with her that high as it would take away from how cool they are.
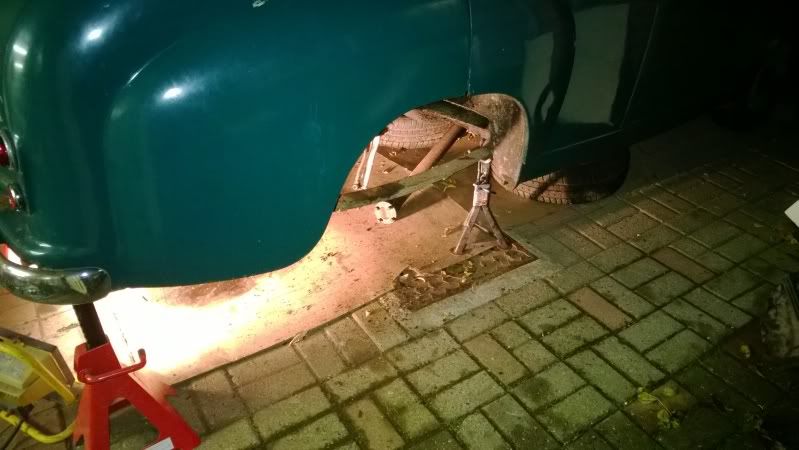
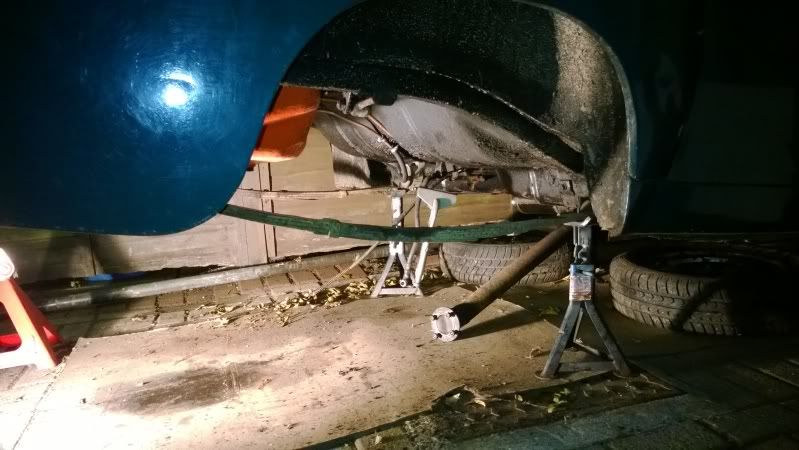
Only one thing for it, flip the axle.
End of play today has the axle removed and me freezing. I'm still wearing summer type clothing; i'll soon learn!
Logged
Reply: 63 - 97
2002gimp
Posted on: Sunday, November 10th, 2013, 7:05:18pm
Guest User
All done, well bar needing to replace the steel brake hardlines as they wont seal again, think they've gone very hard...
Oh, and the front end needs some coils loosing
Logged
Reply: 64 - 97
2002gimp
Posted on: Wednesday, November 20th, 2013, 9:36:43pm
Guest User
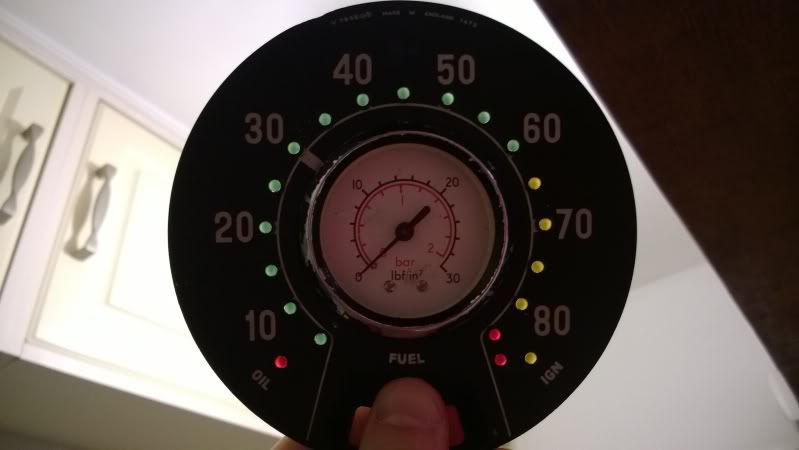
More on the led tacho
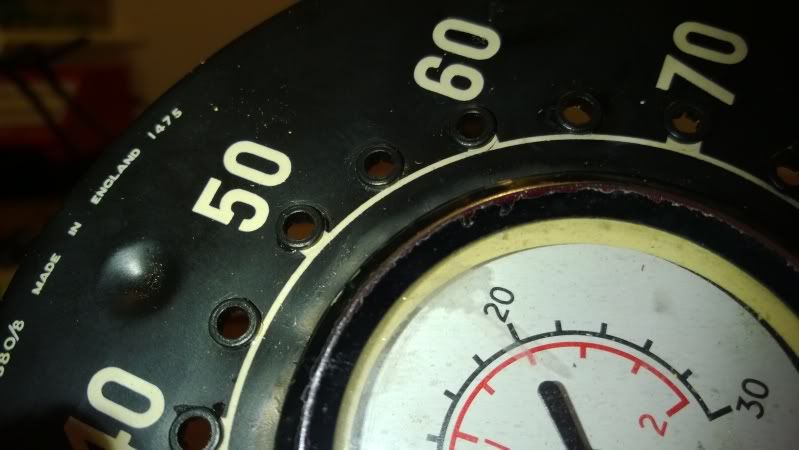
Take your 57 year old brass speedo face and notice it goes upto 85mph. Handily the new engine redlines at 8500rpm.
Can you see where this is going?
Drill some 4.5mm holes
Take these really fiddly led holders and cut off the little clip thingies as the brass is to thick for them
Glue them into the holes
Fit the 3mm leds and marvel at the amount of soldering you have to do
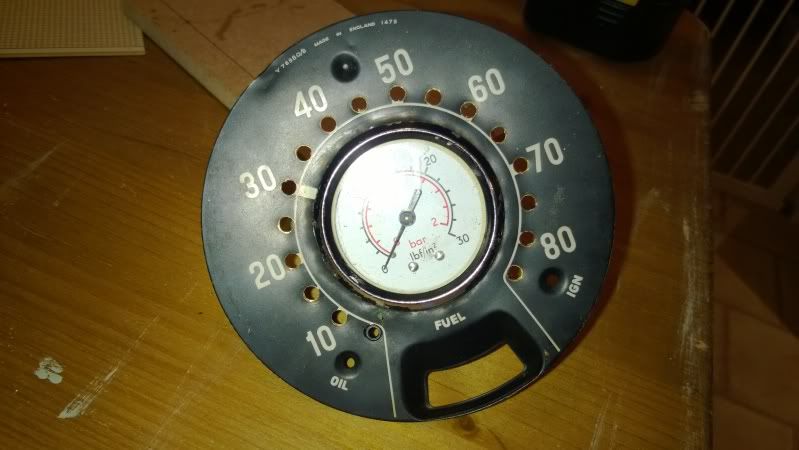
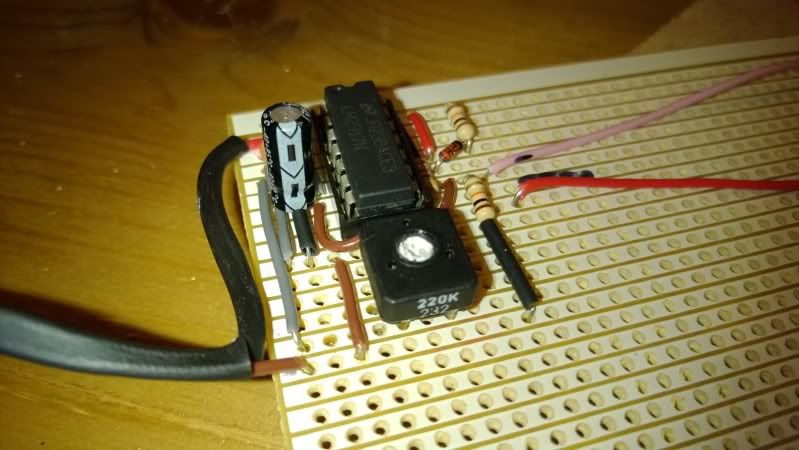
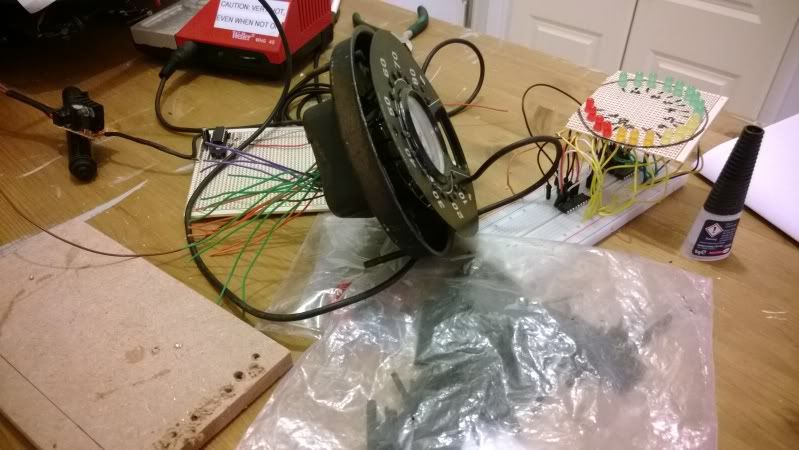
Start building the circuitry, this is just the chip and relevant components to convert the coil frequency to a voltage. There is a voltage regulator and 2 sets of led bar drivers to fit as tightly as possible together to have any hope of fitting behind the dial face.
Inbetween the mental meh of soldering tiny parts together hold the face upto the light, just to see how cool it will look.
Trial fit face back into holder, there is no room at all as I fitted the boost gauge in the middle so all the electrtics will have to go in a box behind. Not to worry, I love the boost gauge being there. Walk away for the night leaving this mess
Posted on: Thursday, November 21st, 2013, 12:50:10am
Maximum Member
Posts: 1446 Posts Per Day: 0.83
That is such a cool idea but what do you do for a speedo?
Logged
Reply: 66 - 97
doodlepugg
Posted on: Thursday, November 21st, 2013, 7:24:52am
Guest User
If I'm not mistaken, that will still be the Speedo? Just with led's as a rev counter too?
Logged
Reply: 67 - 97
2002gimp
Posted on: Thursday, November 21st, 2013, 8:27:25am
Guest User
The speedos now defunct, it was run from the old gearbox, the Cap uses the diff, neither of which i have anymore.
i have a gps speedo that I'm going to pull apart and fit into an old gauge at some point so it doesn't look like a lump of plastic on my dash
Logged
Reply: 68 - 97
2002gimp
Posted on: Monday, November 25th, 2013, 8:36:28pm
Guest User
Uninteresting update is uninteresting.
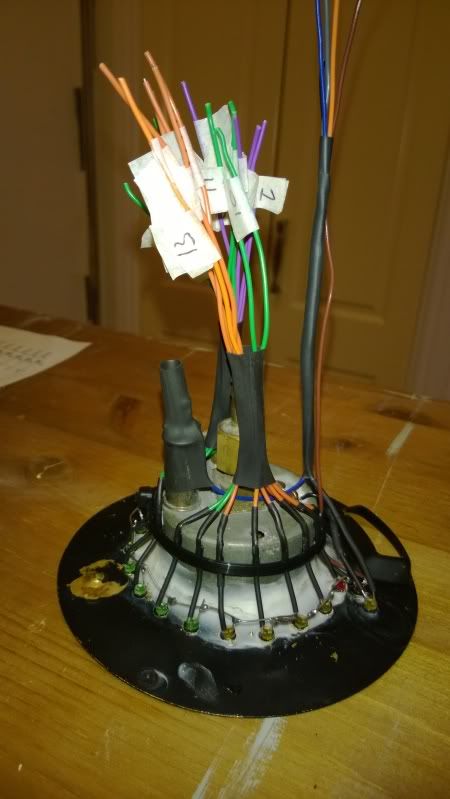
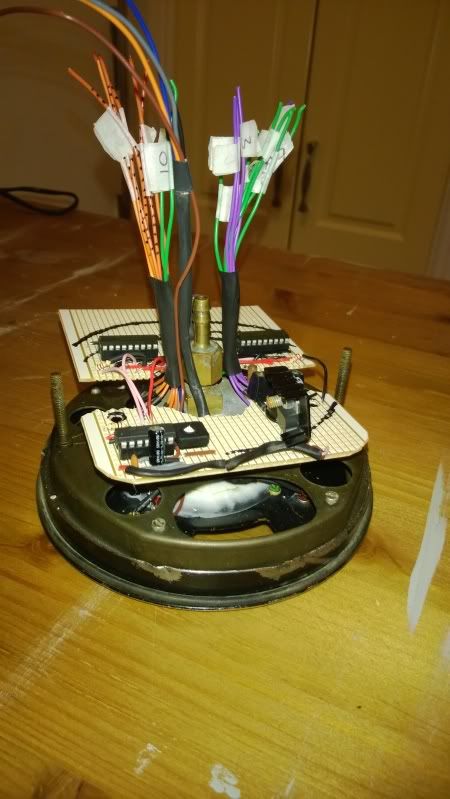
But hey, its documenting the build so tough, have 2 pics of the back of the Tacheedo
All wires soldered and neatened up
Boards done bar the led wiring which needs to be done after the face is glued back in. This will be held onto the dial with some upstands i'm yet to make, i've also got to trim the rear board into a circular shape
Lots and lots of work going into 18 little LEDs, but it'll be worth it i'm sure
Next step, its getting fancy now this here Tacheedo.
I pulled the fuel gauge out, it flicked around randomly anyways. In its place I glued some dark smoked plastic
Bit random you may think, what could possibly fit in this tiny orifice obscured by dark plastic you ask?
Well, pull apart a gps speedo and do some of this
Yup, fits a charm!
I'm awaiting on a hot glue gun and a few more led holders before I can wrap this part of the project up.
For the inquisitive who ask 'what can you fit inside a 6 inch speedo cowl?' we have:
Tachometer - utilising leds and the old speedo digits Boost gauge - eBay buy, old and tatty Speedo - Talex gps cut about and display hidden Oil light Ign light CEL light Indicator tell tales
All in there and when powered down appears pretty standard (if you ignore the boost gauge, which I imagine most would)
Drop me a PM if you would like to be added to the ClubCappo Member Map. More details can be found here. We now have an official Facebook group as well as a page! See here
Posted on: Wednesday, November 27th, 2013, 8:32:29am
Maximum Member
Posts: 1110 Posts Per Day: 0.65
Nice work, very clever use of this gauge ! I know how tedious electrical wiring can be, well done.
Logged
Reply: 71 - 97
lord
Posted on: Wednesday, November 27th, 2013, 9:31:17pm
Guest User
This whole concept is sick
Logged
Reply: 72 - 97
2002gimp
Posted on: Wednesday, November 27th, 2013, 9:45:22pm
Guest User
Read the datasheet for the lm3914 and when i hit the redline the whole display can flash as well which is pretty cool
Logged
Reply: 73 - 97
2002gimp
Posted on: Tuesday, December 3rd, 2013, 7:40:10pm
Guest User
GPS speedo display is in place
as far as I can tell it displays the time until you start moving, that or it currently thinks I'm doing 151mph sat on my drive
Next this happened, got her down low, front still needs to settle a bit, but I'm well happy with that
Wheels all need painting and that's pretty much the look, bar some lower profile tyres when funds allow
Logged
Reply: 74 - 97
lord
Posted on: Wednesday, December 4th, 2013, 12:55:00am
Guest User
That is the sh*t! I wanna see a video lol inside too
Logged
Reply: 75 - 97
shonen-angell
Posted on: Wednesday, December 4th, 2013, 2:02:13am
Guest User
love the AA badge on the bumper
Logged
Reply: 76 - 97
2002gimp
Posted on: Sunday, January 19th, 2014, 9:41:14am
Guest User
Updates? Very little at the minute, its winter and I'm mostly enjoying being a Dad to my 12 week old daughter. Saying that, I am getting little bits done in drips and drabs.
The speedo is all together and working, I have some resistor values to change to get it accurate, but I'm waiting on a hall effect (magnet glued to crank pully and a pickup, very accurate) tacho from eBay China before I can do that. It has a digital readout which is very fancy, but very modern looking hence It only being used for calibration
I've started on the carpet, its amazing the difference it makes, transforms the whole, err, sitting in there experience. I bought this heat moldable stuff from a show for £15 and got 1.8x5m of the stuff so was expecting very little of it, but it actually works, heat the rear with a heat gun, bend into shape, let cool and it stays there!
Soured on by the fact its cold out and the carpet looks good I spent a few hours with the sewing machine making the head lining. I tried my hardest to get the original material as I don't want to upset the purists, I think I've nailed it, though the fleck might be slightly off ;p (JOKE)
Finally I mostly have this to deal with, now she's lowered 5 odd inches there appears to be around 1.5inches between the sump and the floor. Going back up is never going the happen so I have to pull the engine out again and remake the sump. I'm going to get some plates laser cut and use that, might make it about 5mm thick so it can take a knock
Logged
Reply: 77 - 97
Capposteve
Posted on: Wednesday, February 5th, 2014, 10:58:23pm
I've just joined and have spent the last couple of evenings reading through the various threads that took my interest but this one above all. The casual ease with which seemingly insurmountable problems are solved is incredible. I'm putting a K@N filter in my second best Cappuccino tomorrow (see what I did there...) and have no doubt that it'll take three hours and a blood transfusion. Love the bit about not wanting to upset the purists. Thanks a lot.
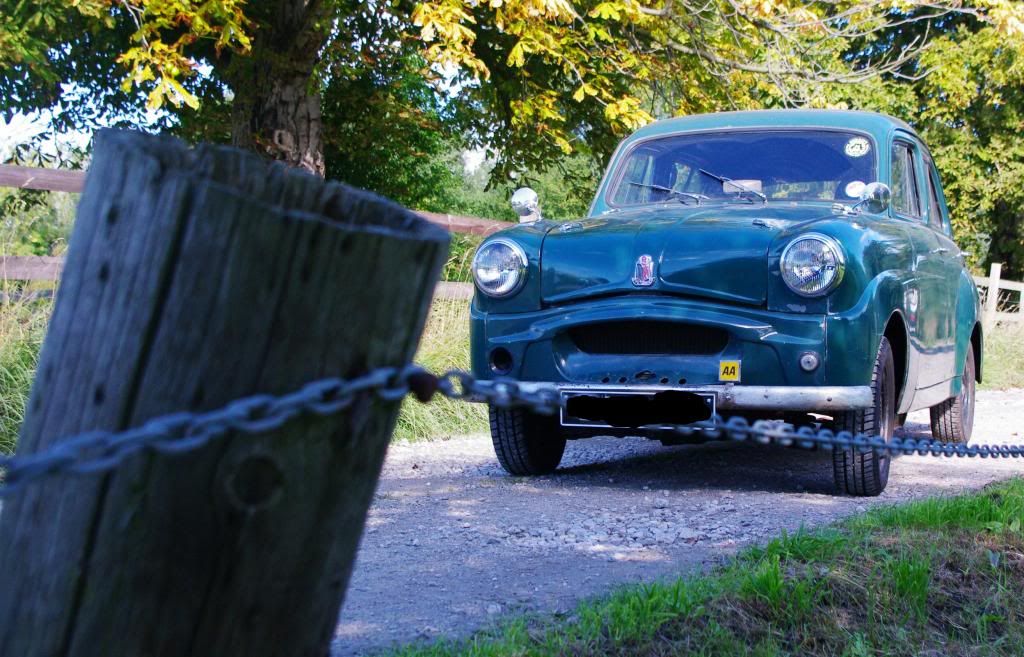
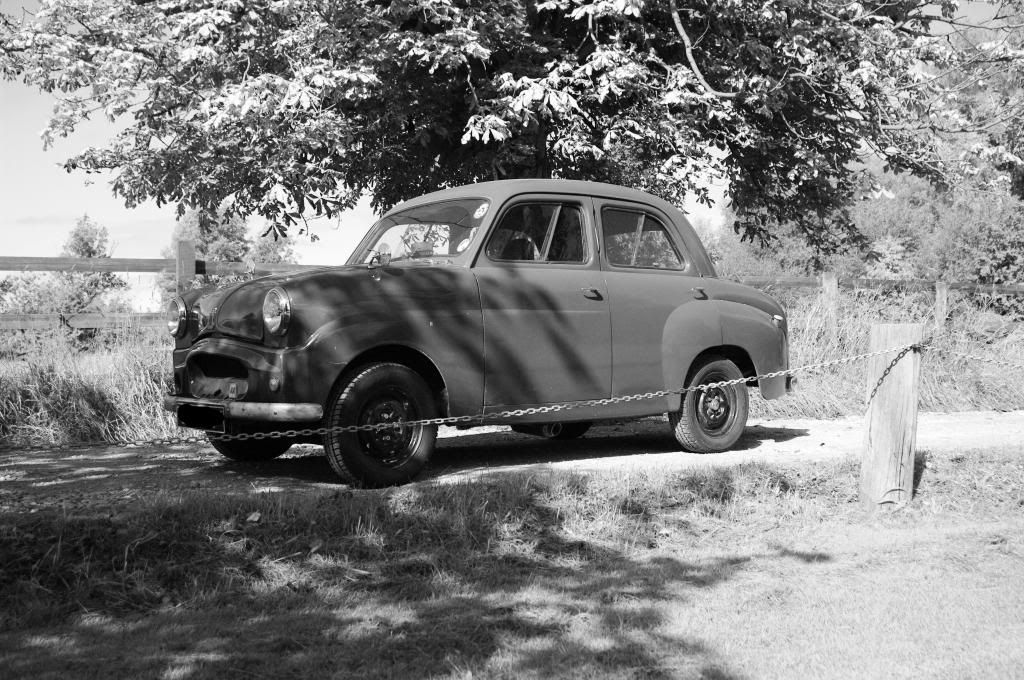
 Cappuccino Owners Club › Gallery › What Else Have You Got? › 1955 Standard Eight - 660cc Turbo (Moderators: )
 Author
 1955 Standard Eight - 660cc Turbo (currently 2909 views)


 Logged

 Male
Male


 Attachment: