|
|
 Author Author |
 ZCars Hayabusa Turbo Capp (currently 10027 views) ZCars Hayabusa Turbo Capp (currently 10027 views) |
| soongster |
| Posted on: Thursday, September 8th, 2011, 8:25:39am |
  |
|
|
|
 Logged Logged |
|
|
 |
Reply: 80 - 272 |
|
|
| half-9 |
Posted on: Monday, September 26th, 2011, 1:09:40pm
 Attachment: dsc04757.jpg - 148.32 KB (1072 views) Attachment: dsc04757.jpg - 148.32 KB (1072 views) |
|
|
Big Member

Posts: 453
Posts Per Day: 0.32 |
|
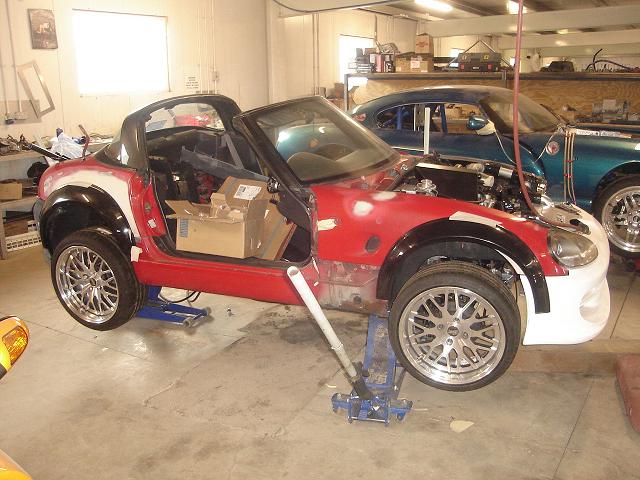
funny stuff!
here's an update... |
 |
|
| Logged |
|
|
 |
Reply: 81 - 272 |
|
|
| half-9 |
Posted on: Monday, September 26th, 2011, 1:10:39pm
Attachment: dsc04752_s.jpg - 68.22 KB (1067 views) |
|
|
Big Member
Posts: 453
Posts Per Day: 0.32 |
|
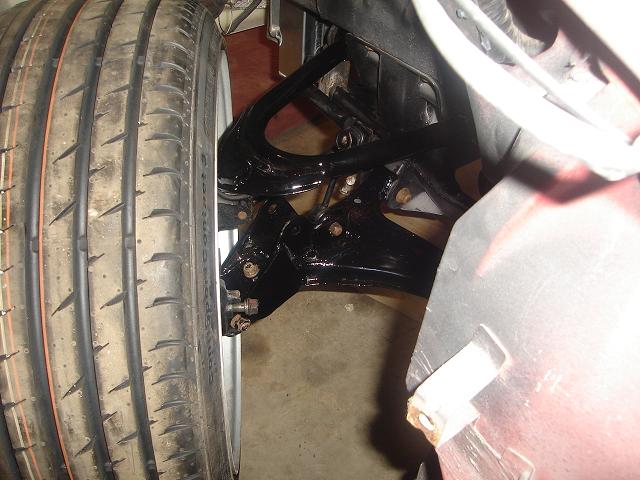
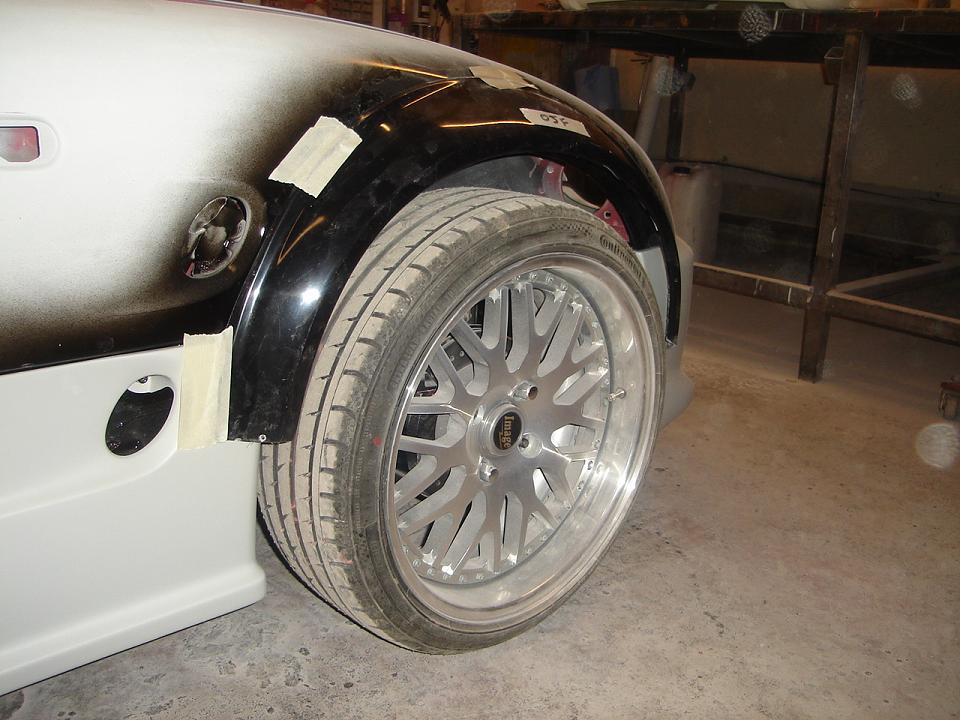
| front suspension extended 1.5 inches each side |
 |
|
| Logged |
|
|
| |
Reply: 82 - 272 |
|
|
| half-9 |
Posted on: Monday, September 26th, 2011, 1:12:24pm
Attachment: dsc04755_s.jpg - 78.85 KB (1067 views) |
|
|
Big Member
Posts: 453
Posts Per Day: 0.32 |
|
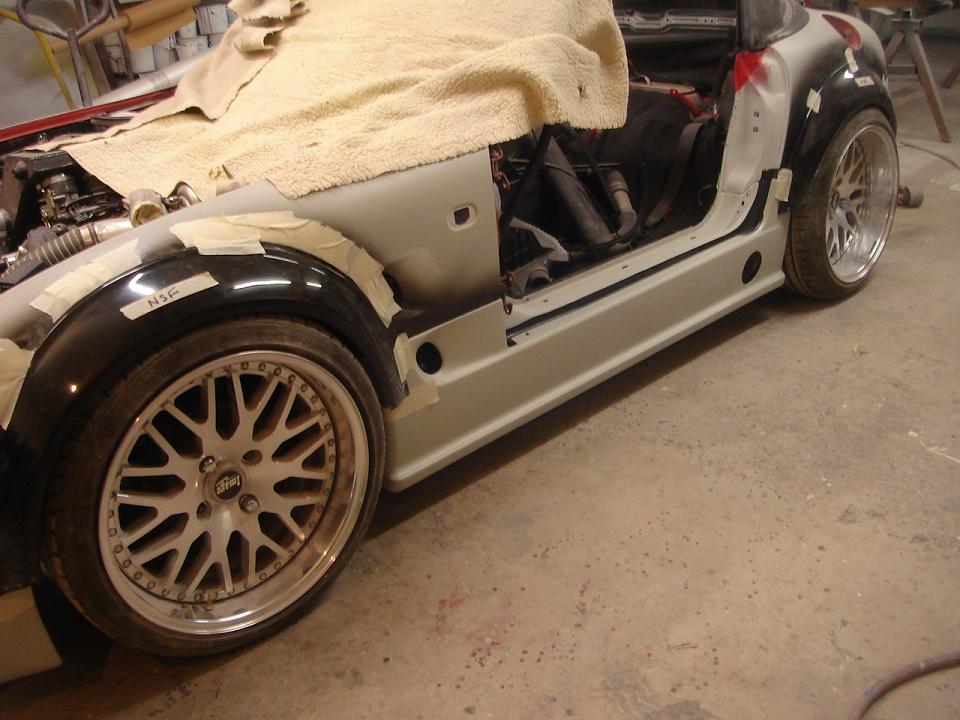
still has the take-off arches on for now.
Also side skirts are "SPL" |
 |
|
| Logged |
|
|
| |
Reply: 83 - 272 |
|
|
| kingpow |
| Posted on: Monday, September 26th, 2011, 3:54:38pm |
|
|
|
| Excellent, looking very good. I'd love to do an engine conversion to my Cappo, but just too costly at the moment. |
|
| Logged |
|
|
|
Reply: 84 - 272 |
|
|
| Tiny |
| Posted on: Monday, September 26th, 2011, 8:46:10pm |
|
|
|
| If you do decide to loose the Take-Off arches let me know as I'd like them I have seens some amazing rays that I need super size arches. Plus I already have the takeoff bumper! |
|
| Logged |
|
|
|
Reply: 85 - 272 |
|
|
| half-9 |
Posted on: Tuesday, November 15th, 2011, 6:30:32pm
Attachment: dsc04799_e.jpg - 155.67 KB (975 views) |
|
|
Big Member
Posts: 453
Posts Per Day: 0.32 |
|
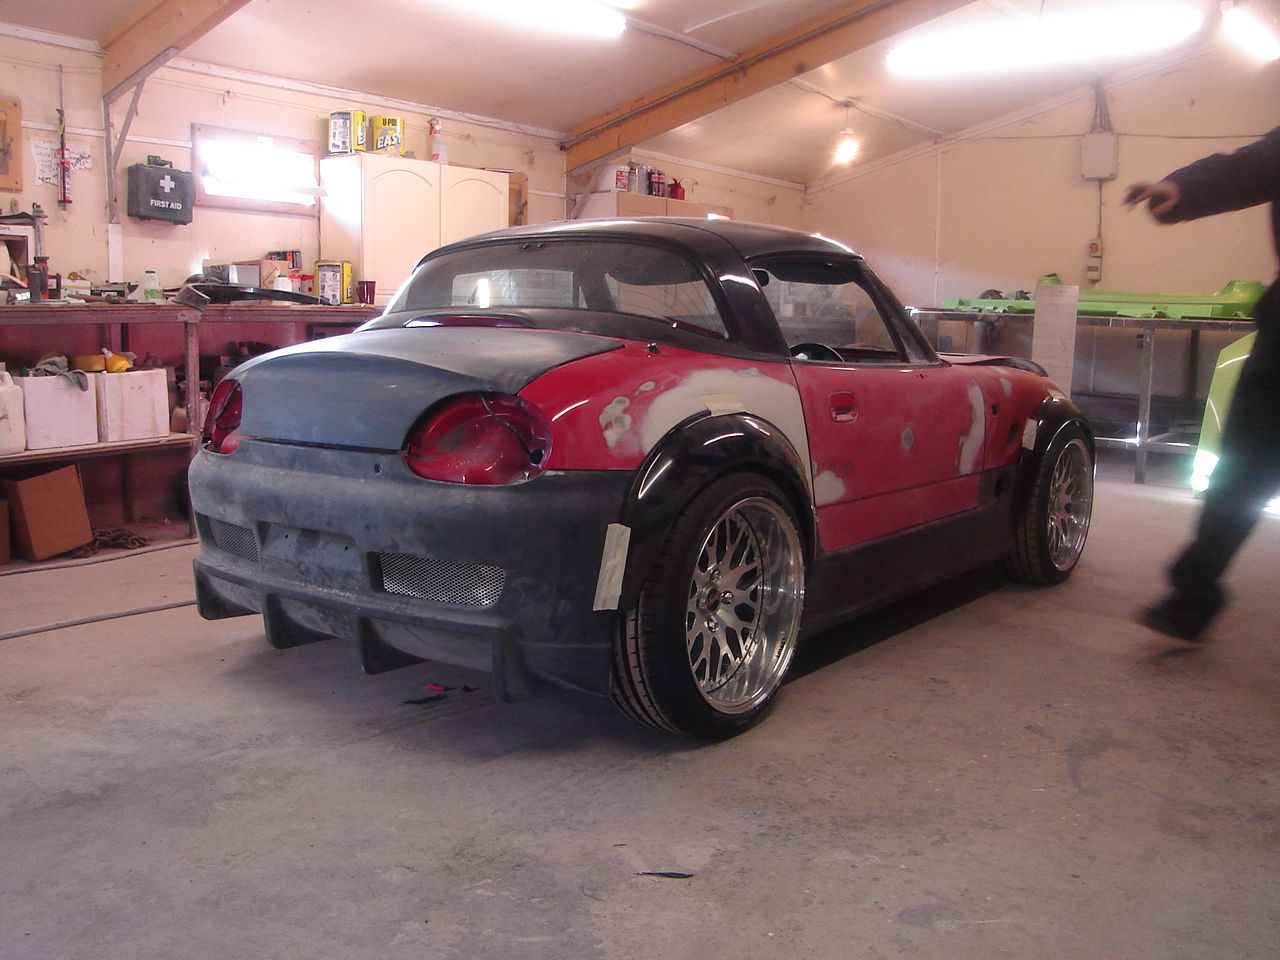
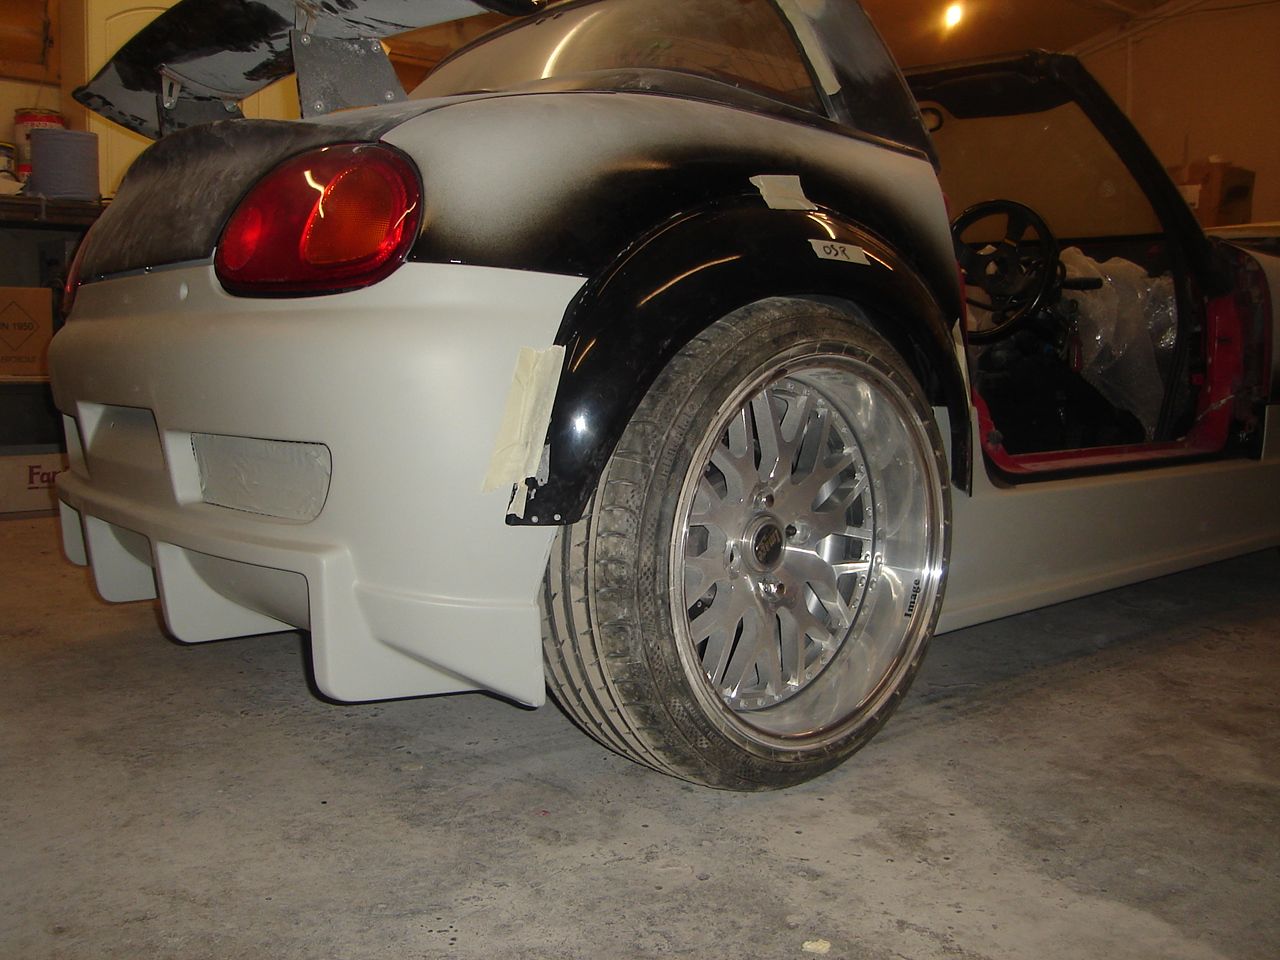
latest pics - car is being sprayed - not sure what the bonnet will ultimately look like, and not sure whether my take off arches are being used or new arches being fabricated..
note the rear wheels now corrected in terms of off set - so no spacer being used, and also perimeter bolts in place |
 |
|
| Logged |
|
|
| |
Reply: 86 - 272 |
|
|
| half-9 |
Posted on: Tuesday, November 15th, 2011, 6:37:14pm
Attachment: dsc04792_e.jpg - 159.42 KB (972 views) |
|
|
Big Member
Posts: 453
Posts Per Day: 0.32 |
|
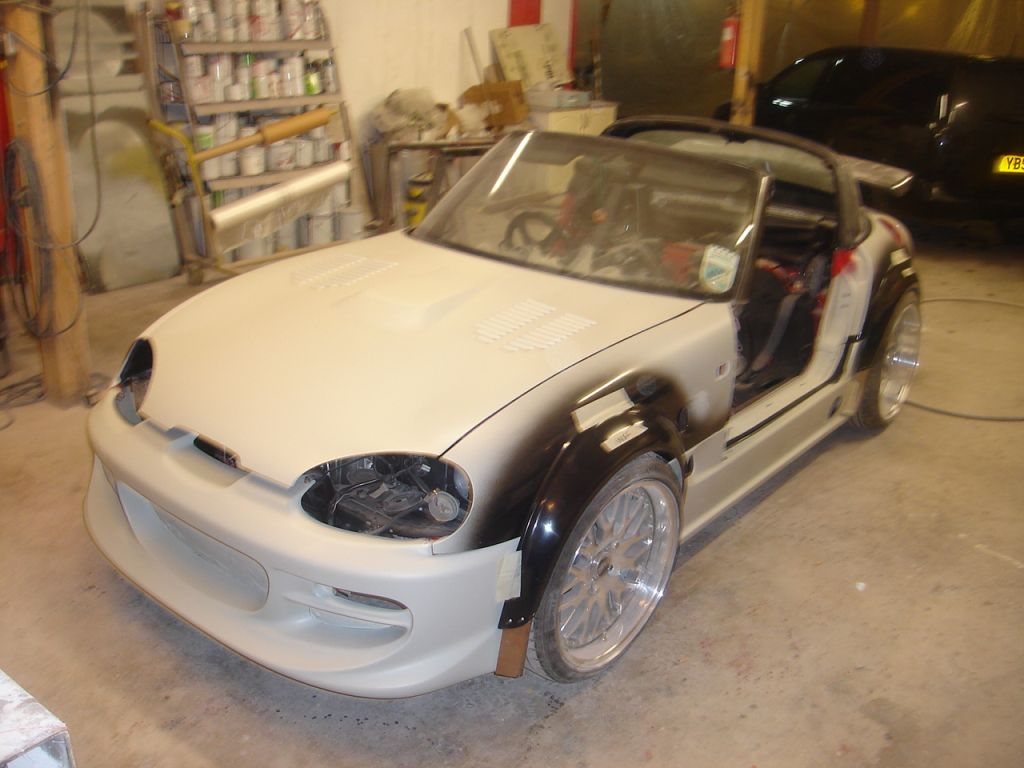
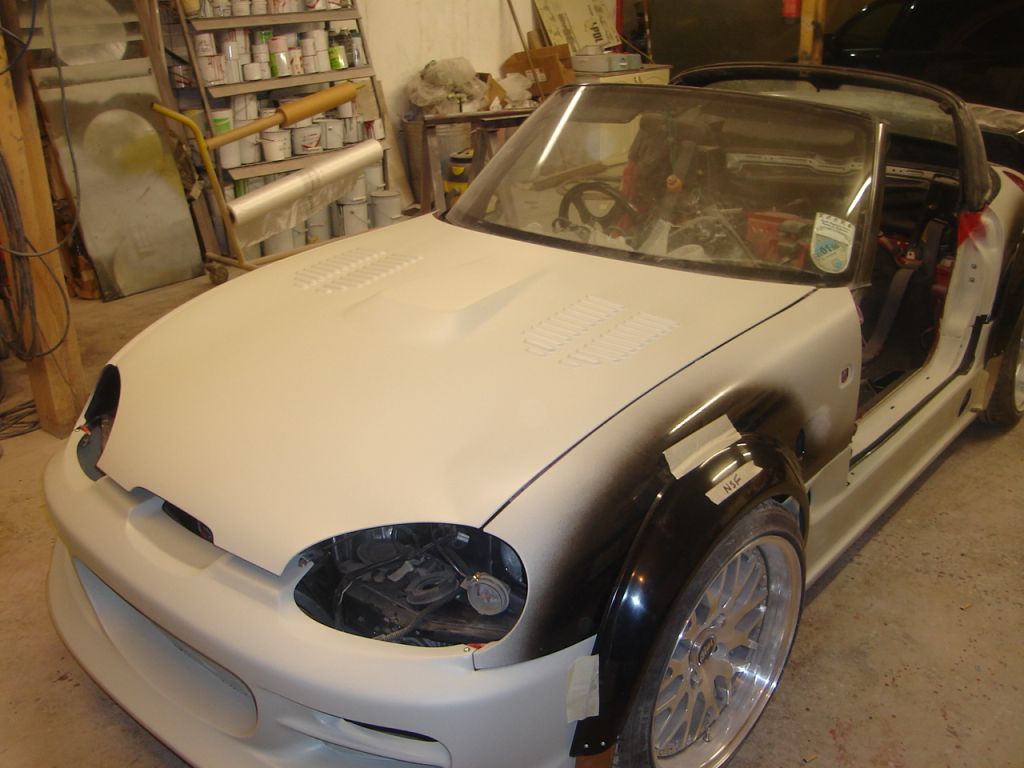
| sorry - got the re-sizing picture bit wrong! |
 |
|
| Logged |
|
|
| |
Reply: 87 - 272 |
|
|
| paolo |
| Posted on: Tuesday, November 15th, 2011, 7:07:05pm |
|
|
|
| Omg. That looks awesome! I hate you. |
|
| Logged |
|
|
|
Reply: 88 - 272 |
|
|
| Ricou |
| Posted on: Tuesday, November 15th, 2011, 7:10:24pm |
|
|
Maximum Member

Posts: 1110
Posts Per Day: 0.65 |
|
Damn this car is going to look fine.
It's already really nice, I find the shapes agressive yet well balanced.
What read bumper is that by the way ? It seems to get along really well with this bootlid. |
|
| Logged |
|
|
| |
Reply: 89 - 272 |
|
|
| ggutnik |
| Posted on: Tuesday, November 15th, 2011, 11:41:18pm |
|
|
|
I'm too jealous to ever open this thread again
Until the next update! |
|
| Logged |
|
|
|
Reply: 90 - 272 |
|
|
| soongster |
| Posted on: Wednesday, November 16th, 2011, 1:55:05am |
|
|
|
i love the boot  |
|
| Logged |
|
|
|
Reply: 91 - 272 |
|
|
| ggutnik |
| Posted on: Wednesday, November 16th, 2011, 2:25:59am |
|
|
|
“ |
Quoted from Ricou, posted Tuesday, November 15th, 2011, 7:10:24pm at here |
” |
What rear bumper is that by the way ? It seems to get along really well with this bootlid.
|
|
completely agree!! i wanttttttttttt |
|
| Logged |
|
|
|
Reply: 92 - 272 |
|
|
| redgaijin |
| Posted on: Wednesday, November 16th, 2011, 2:28:39am |
|
|
|
half-9, love your work son!  Keep it up!!! Keep it up!!!
Same question as Ricou, what is the rear bar and boot lid? |
|
| Logged |
|
|
|
Reply: 93 - 272 |
|
|
| Andy |
| Posted on: Wednesday, November 16th, 2011, 1:59:15pm |
|
|
Official C.O.C Contributor

Gender:  Male Male
Posts: 23604
Posts Per Day: 3.48 |
|
| It's a Take Off rear bumper... |
Drop me a PM if you would like to be added to the ClubCappo Member Map. More details can be found here.
We now have an official Facebook group as well as a page! See here |
|
| Logged |
|
|
| |
Reply: 94 - 272 |
|
|
| Cappo |
| Posted on: Wednesday, November 16th, 2011, 3:12:15pm |
|
|
|
| and a Toyoshima craft bootlid. |
|
| Logged |
|
|
|
Reply: 95 - 272 |
|
|
| redgaijin |
| Posted on: Thursday, November 17th, 2011, 5:22:29am |
|
|
|
| Good kids! Thanks Andy, Midori |
|
| Logged |
|
|
|
Reply: 96 - 272 |
|
|
| Wayne2105 |
| Posted on: Thursday, November 17th, 2011, 11:22:58am |
|
|
Maximum Member
Posts: 850
Posts Per Day: 0.65 |
|
I like the alternator kit, is it one you can buy or one they've made up?
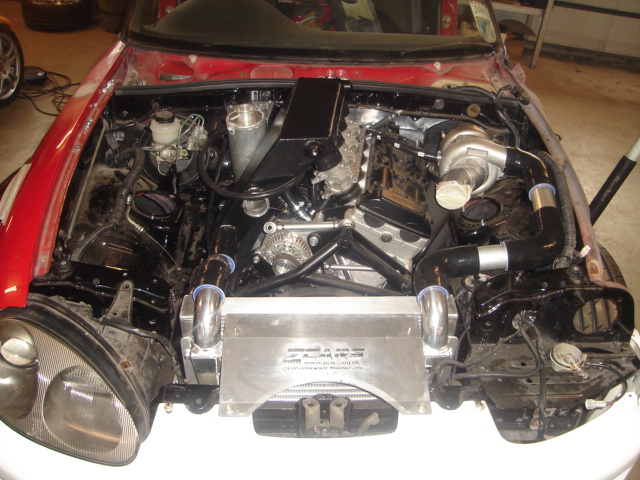
Not sure that the flat-sided plenum won't crack on the welds though... it's a pressure-vessel at the end of the day and they should always have curved faces. You don't put forces into a flat panel, ever. You're putting bending loads into the faces where you should have tensile loads (which are much better dealt with). The will put great stress on the welds, especially at the corners. |
|
| Logged |
|
|
| |
Reply: 97 - 272 |
|
|
| half-9 |
Posted on: Saturday, December 10th, 2011, 9:17:41am
Attachment: dsc04891.jpg - 87.69 KB (802 views) |
|
|
Big Member
Posts: 453
Posts Per Day: 0.32 |
|
Hi,
Thx! here are the latest pics. Will ask about the plenum. There is a gap between bonnet & bumper that shouldn't be there - investigating that. And I think the front arch is being mounted lower then it should be & am not a fan of the mounts for the take-off wing.
If you see anything else that looks odd, please do comment as this is the only chance I have to catch anything that has gone off.
the camera is not in focus unfortunately |
 |
|
| Logged |
|
|
| |
Reply: 98 - 272 |
|
|
| half-9 |
Posted on: Saturday, December 10th, 2011, 9:18:42am
Attachment: dsc04893.jpg - 91.65 KB (800 views) |
|
|
Big Member
Posts: 453
Posts Per Day: 0.32 |
|
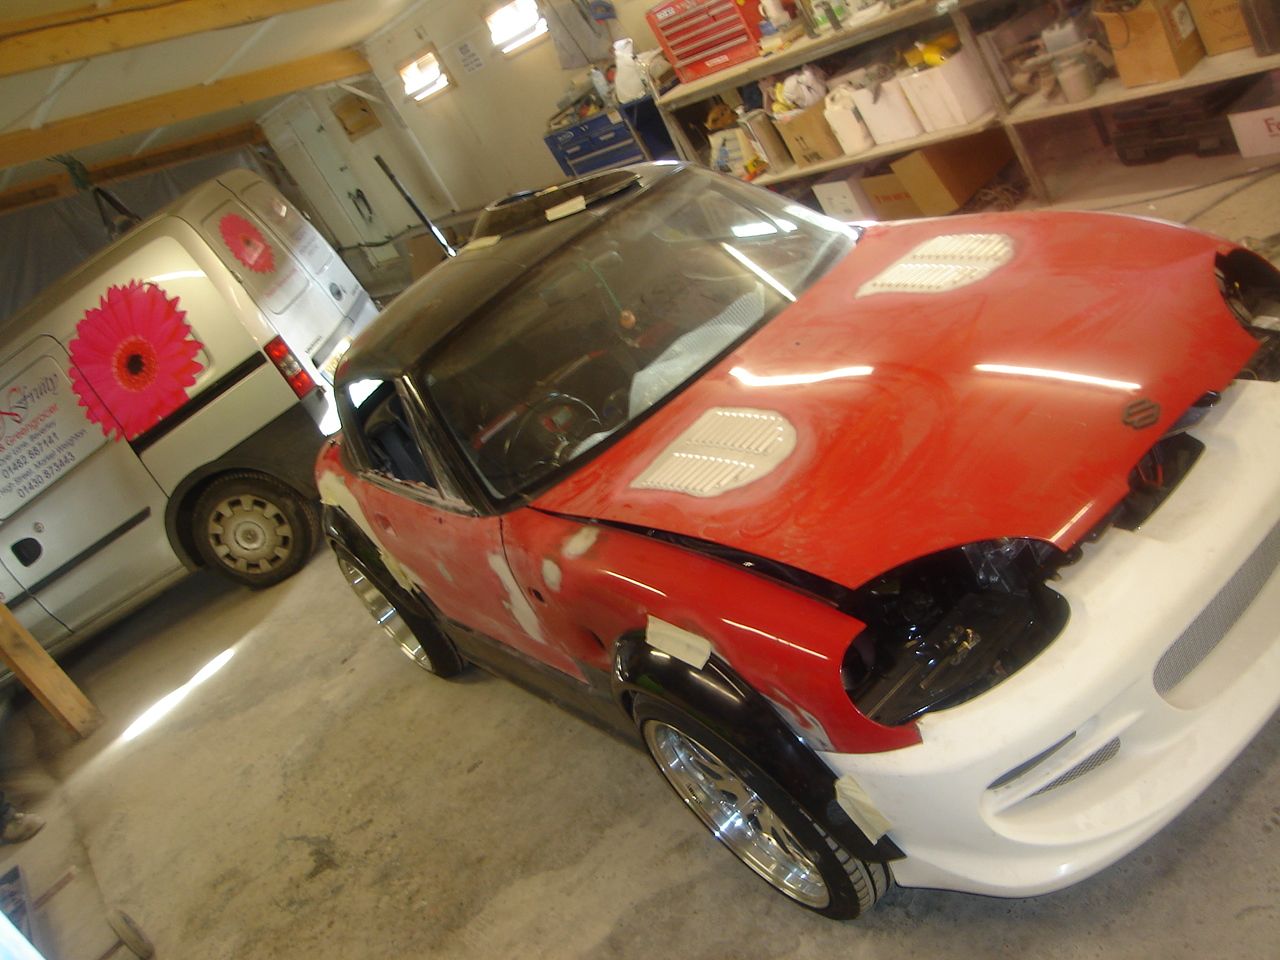
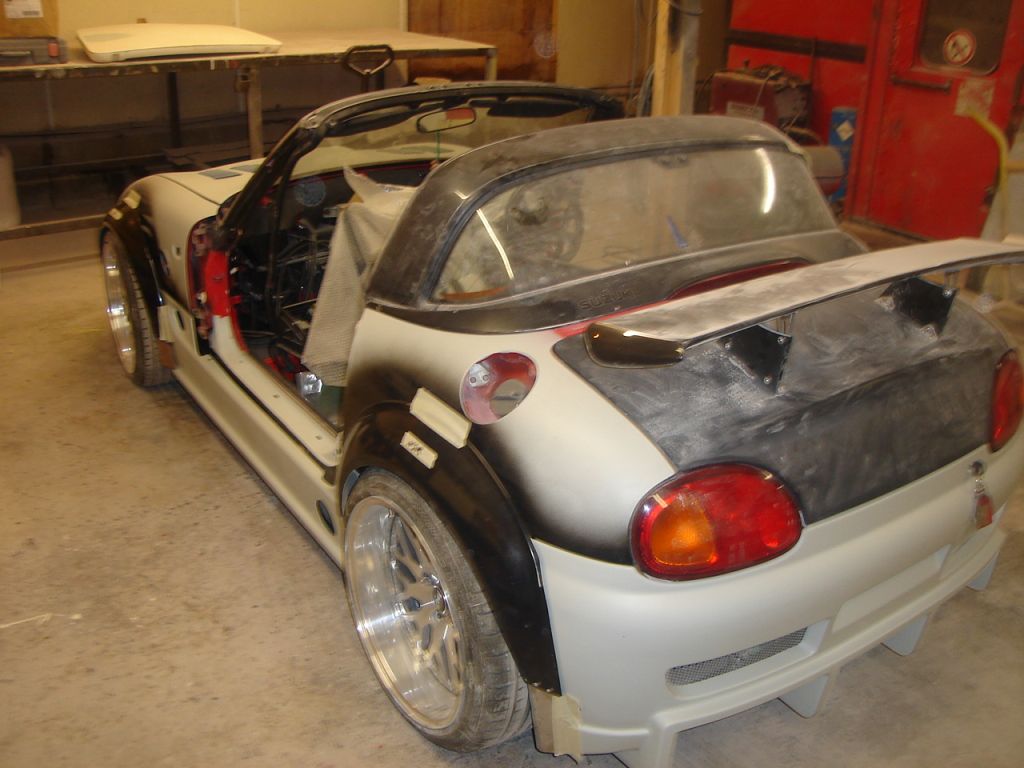
| the other end - quite liking the matt white on the capp.... |
 |
Last modified Saturday, December 10th, 2011, 9:29:23am by half-9 |
|
| Logged |
|
|
| |
Reply: 99 - 272 |
|
|
| half-9 |
Posted on: Saturday, December 10th, 2011, 9:19:38am
Attachment: dsc04894.jpg - 96.68 KB (803 views) |
|
|
Big Member
Posts: 453
Posts Per Day: 0.32 |
|
| actually here is the other end |
 |
|
| Logged |
|
|
| |
Reply: 100 - 272 |
|
|
| redgaijin |
| Posted on: Sunday, December 11th, 2011, 9:57:43am |
|
|
|
| I gotta stiffy man! |
|
| Logged |
|
|
|
Reply: 101 - 272 |
|
|
| lord |
| Posted on: Sunday, December 11th, 2011, 2:23:13pm |
|
|
|
|
| Logged |
|
|
|
Reply: 102 - 272 |
|
|
| half-9 |
Posted on: Tuesday, December 13th, 2011, 2:33:27pm
Attachment: dsc04909_s.jpg - 108.33 KB (754 views) |
|
|
Big Member
Posts: 453
Posts Per Day: 0.32 |
|
| So I wasn't happy with the location - in terms of distance from top of fender - of the front wheel arch. I got them to move it upwards to where it should be per my expectation & this revealed: |
 |
Last modified Tuesday, December 13th, 2011, 2:34:16pm by half-9 |
|
| Logged |
|
|
| |
Reply: 103 - 272 |
|
|
| half-9 |
Posted on: Tuesday, December 13th, 2011, 2:36:32pm
Attachment: dsc04921_s.jpg - 105.90 KB (750 views) |
|
|
Big Member
Posts: 453
Posts Per Day: 0.32 |
|
lowering is going to require a host of inner arch mods - but it should get to this:
|
 |
|
| Logged |
|
|
| |
Reply: 104 - 272 |
|
|
| ycming |
| Posted on: Tuesday, December 13th, 2011, 4:42:06pm |
|
|
|
This is just sick !!! loving the work!!!
And i hear you are selling your suspension  ? ?
Ming |
|
| Logged |
|
|
|
Reply: 105 - 272 |
|
|
| half-9 |
Posted on: Tuesday, December 13th, 2011, 8:19:41pm
Attachment: dsc04919_s.jpg - 142.03 KB (731 views) |
|
|
Big Member
Posts: 453
Posts Per Day: 0.32 |
|
| thx, if they pull this off, I will be very happy |
 |
|
| Logged |
|
|
| |
Reply: 106 - 272 |
|
|
| half-9 |
Posted on: Tuesday, December 13th, 2011, 8:20:36pm
Attachment: dsc04920_s.jpg - 143.57 KB (727 views) |
|
|
Big Member
Posts: 453
Posts Per Day: 0.32 |
|
| front |
 |
|
| Logged |
|
|
| |
Reply: 107 - 272 |
|
|
| half-9 |
Posted on: Tuesday, December 13th, 2011, 8:22:48pm
Attachment: dsc04911_s.jpg - 160.79 KB (730 views) |
|
|
Big Member
Posts: 453
Posts Per Day: 0.32 |
|
| i like this, a little OTT i know |
 |
|
| Logged |
|
|
| |
Reply: 108 - 272 |
|
|
| Avar |
| Posted on: Tuesday, December 13th, 2011, 8:49:32pm |
|
|
|
| Whats the tyre clearance on the rear bumper like? I've been thinking that i'd have to cut mine to allow more space. On the above pic it looks tight but with just enough clearance. |
|
| Logged |
|
|
|
Reply: 109 - 272 |
|
|
| half-9 |
Posted on: Tuesday, December 13th, 2011, 9:26:09pm
Attachment: dsc04910_s.jpg - 58.64 KB (722 views) |
|
|
Big Member
Posts: 453
Posts Per Day: 0.32 |
|
| suspect it needs a trim - I have another photo of the rear... |
 |
|
| Logged |
|
|
| |
Reply: 110 - 272 |
|
|
| Badger |
| Posted on: Wednesday, December 14th, 2011, 6:08:08am |
|
|
|
The problem you will have is at the Top of the Arch......Unless you remove some of the metal Panel as I said before.
Are you going to Fibreglass between the Arch and the Sideskirts/Bumpers...???I hope so.
Not a fan of your Rear spoiler, especially with the Duck Tail...sort of living up to the name and 'Spoiling' the Look.....but this is only my opinion as I personally 'HATE REAR SPOILERS'.
God it looks good though, cant wait to get mine finished over Xmas ready for Paint.
|
|
| Logged |
|
|
|
Reply: 111 - 272 |
|
|
| half-9 |
| Posted on: Wednesday, December 14th, 2011, 6:15:13am |
|
|
Big Member
Posts: 453
Posts Per Day: 0.32 |
|
Yes, the arches should be extended to meet the bottom edge of the sill etc, they should taper in towards the car.
I'm not a fan of spoilers either, but the rear end of the cappo has always been too round and goofy for me. I can always remove it if it's too shouty I guess.
Thanks
|
|
| Logged |
|
|
| |
Reply: 112 - 272 |
|
|
| Badger |
| Posted on: Wednesday, December 14th, 2011, 6:20:31am |
|
|
|
| So should look a bit like mine on my Red One then.....Good to hear. |
|
| Logged |
|
|
|
Reply: 113 - 272 |
|
|
| Avar |
| Posted on: Wednesday, December 14th, 2011, 8:32:50am |
|
|
|
I personally like spoilers on cappo's, the rear end is far to rounded and as you say goofy, thats why i bought the first cappo i saw in real life becuase it came with the optional rear lip.
I think with this car though your gonna need as much rear wing as you can, if you look at Waynes HyaCappo and the amount of work he's put in on the back end to make it stick. You'll have a very flighty rear end without it, i presume there's also going to be a rear diffuser? If anything atleast to stop the mass of air that traps up inside the rear bumper (it can act like a sail at high speeds). I've had mine pull off at over 90 before.
Also, what has been done to reinforce the take off kit, its very fragile! |
|
| Logged |
|
|
|
Reply: 114 - 272 |
|
|
| half-9 |
| Posted on: Thursday, December 15th, 2011, 11:10:00am |
|
|
Big Member
Posts: 453
Posts Per Day: 0.32 |
|
| I didn't know the take off kit needs reinforcing - thanks for the heads up, which bits are the weakest? Also how have you solved the rear bumper/sail issue? I assumed the vents above the trim at the bottom would let the air out, I also saw one of these on a 7tune featured Capp, he had cut the bottom trim off and replaced with an angled lower spoiler |
|
| Logged |
|
|
| |
Reply: 115 - 272 |
|
|
| Avar |
| Posted on: Thursday, December 15th, 2011, 6:56:55pm |
|
|
|
The whole take off kit is made of very flimsy fibreglass, the bolt and screw fixings can break quite easily as can the mesh catches. Sometimes one tug is enough to pull them off.
The weakest points though IMO is the nose / lip of the front spoiler, i've fixed an alu panel accross the bottom of the bumper riveted in place, i've put mine so the panel is the first thing the speeds bumps hit and since then the fibreglass hasn't been damaged. If you look in my repair thread in this section you can see what i've done and how i've then mounted diagonal bars down to reinforce the whole front end.
The side skirts can be fragile but your wheels are sticking out more so they will kerb before the skirts, plus yours are straight whereas mine flare at the rear.
The rear bumper, is pretty tough given that it is rounded more, but as i said if the arch fixings are weak as were mine then the bumper can start to flap and stress the upper fixings. To resolve this i cut out the fake diffuser rounded fibreglass in the middle section of the 3 bays and fibreglass'd a real'ish alu diffuser in place, this starts off from the rear subframe and fixed firmly to bumper, with a nut welded to the subframe and a bolt going though the alu panel fixing it firmly in place. I'll try to post a pic during the next week cause its so much harder to explain than see.
Also all parts were filled with builders expanding foam in all the nooks and crannies to give some lightweight riggidity and the skirts were filled and then cut to the profile of the sills to ensure a nice and snug fit. |
Last modified Thursday, December 15th, 2011, 7:02:05pm by Avar |
|
| Logged |
|
|
|
Reply: 116 - 272 |
|
|
| half-9 |
| Posted on: Friday, December 16th, 2011, 6:56:13pm |
|
|
Big Member
Posts: 453
Posts Per Day: 0.32 |
|
Thanks - very useful info.
Please post pics of yours when you can. My front bumper is NRF, side skirts SPL. The take off arches are being bonded to the take off rear bumper which means if it rips off I'll lose the arches too! I am not having the arches cut to meet the factory lines - although I might re-visit that later.
Phase 2 should see a real diffuser go on, but it will take 15 years to recover from phase 1!!
I am very anxious about the ride height, tyre clearance and so on, hopefully I will get what I want, but it is very difficult to describe. I think its called hellaflush, but I find the terminology confusing. |
|
| Logged |
|
|
| |
Reply: 117 - 272 |
|
|
| Avar |
| Posted on: Friday, December 16th, 2011, 8:27:13pm |
|
|
|
| I've been thinking about bonding my take off arches to the car and bumper and having a cut in them at a similar angle to a shape on my front bumper to enable easy removal of the bumpers. Every job requires bumpers to be removed and its the only way i think i can get it to look as pro as possible. I think sneaza has similar ideas on his project. |
|
| Logged |
|
|
|
Reply: 118 - 272 |
|
|
| redgaijin |
| Posted on: Saturday, December 17th, 2011, 2:11:46pm |
|
|
|
| Hey Kei, can you please post the link on where you strengthened the rear bar. |
|
| Logged |
|
|
|
Reply: 119 - 272 |
|
|
|
 Cappuccino Owners Club › Gallery › Cappo Related Album › ZCars Hayabusa Turbo Capp (Moderators: )


 Locked Board