Topic Started by:
Hey Guys..
Can i just say that this is one of the most active forums ive been on and well organised and run by good people. You guys all help each other and it's nice to see. If i can help anybody i will.
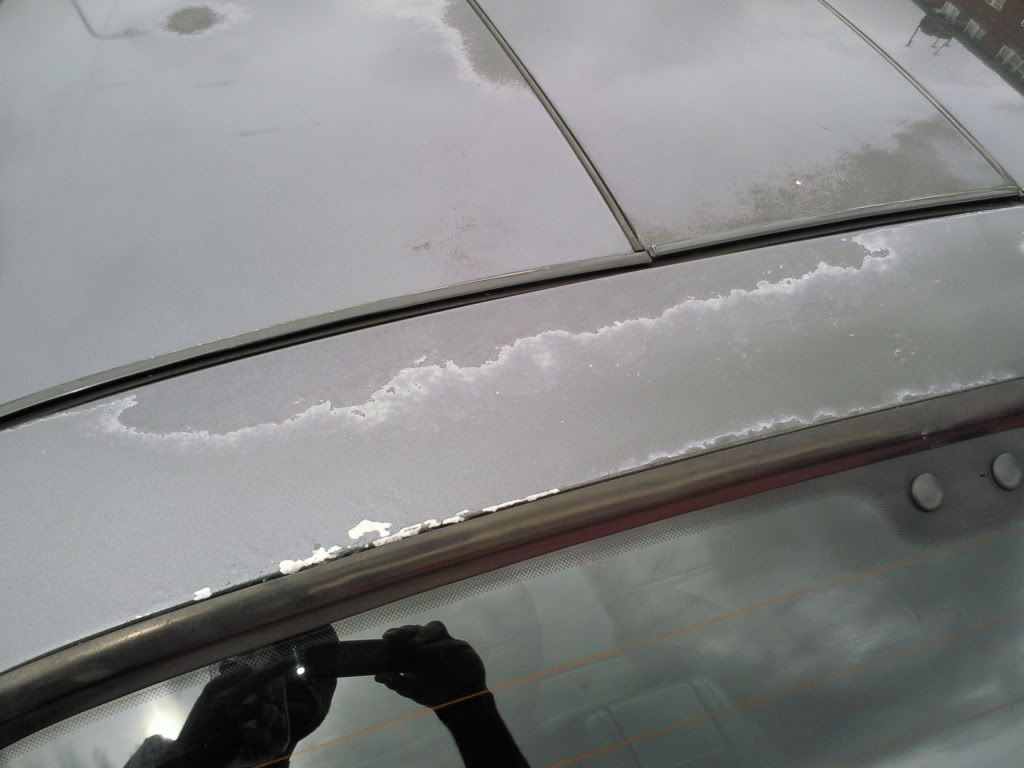
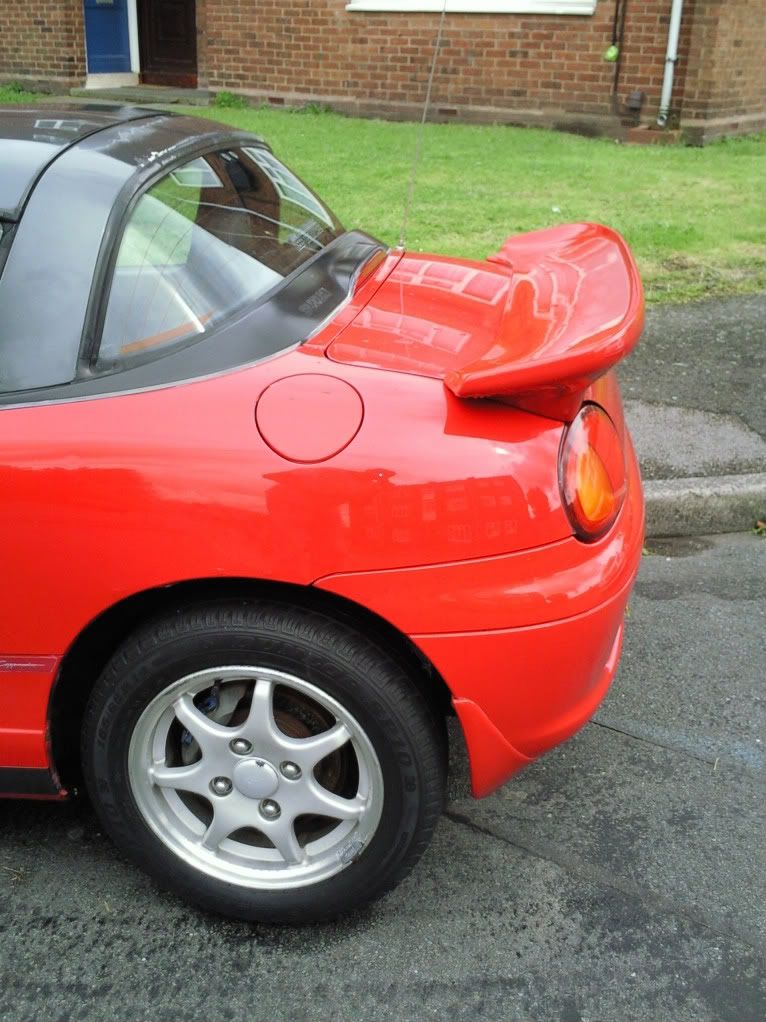
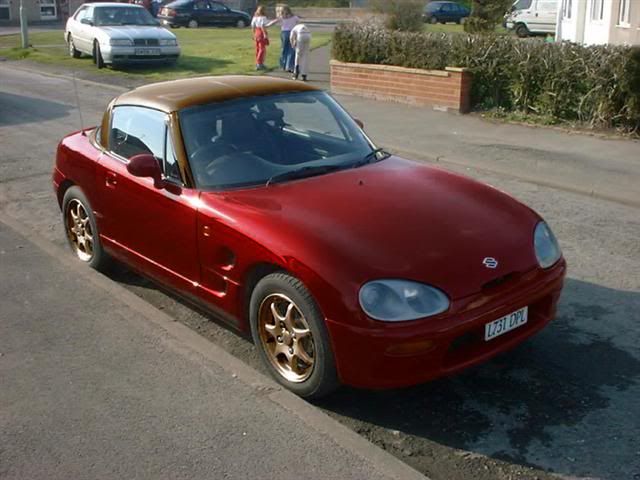
Here's my little cappo i bought last week. It has an MOT until end of April next year and Tax runs out end of September 09. I got it at a bargain but it needs work. I'm looking forward to messing around with it. This will be a good project. The first thing i'm going to do is a full service of the engine, change the belts and brakes etc. Then i'm going to look at the rust by taking the bumpers off and looking under the carpet...Hope there isn't too much rust lol
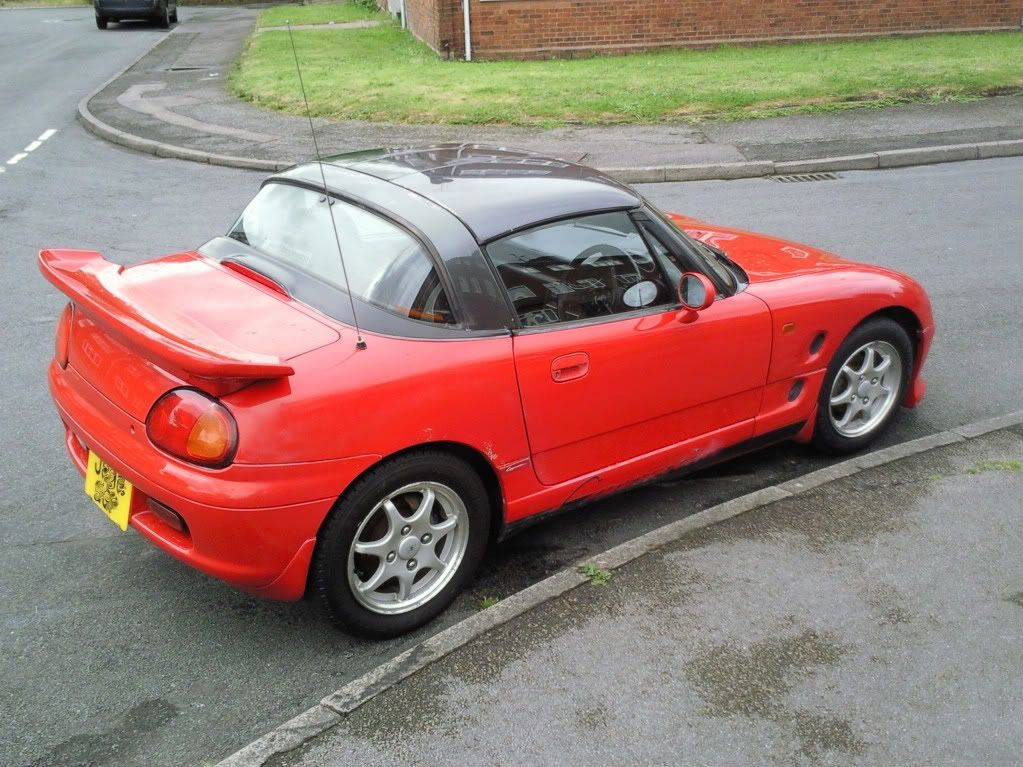
Here's the pics guys. Let me know what u think.
when i saw it for the first time.
Roof needs re painting
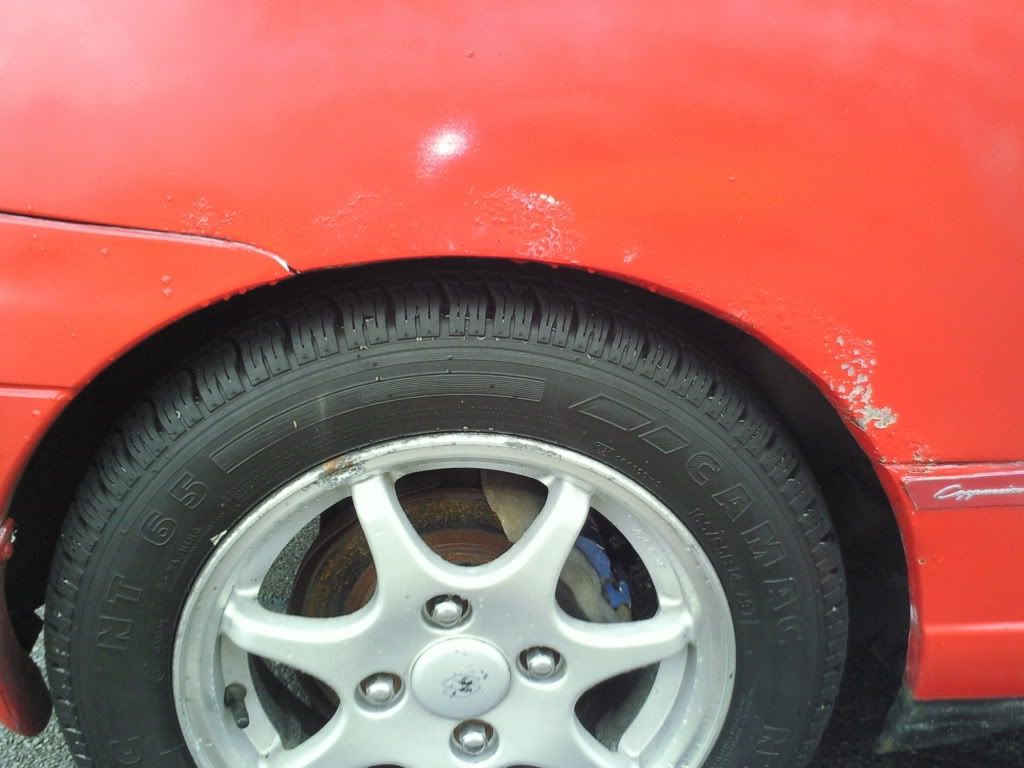
Arch
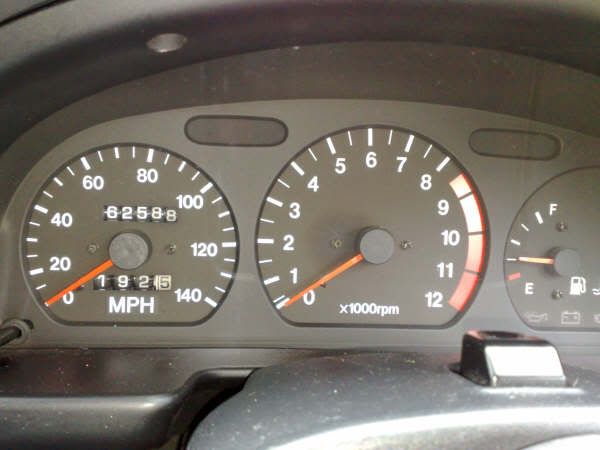
Clock
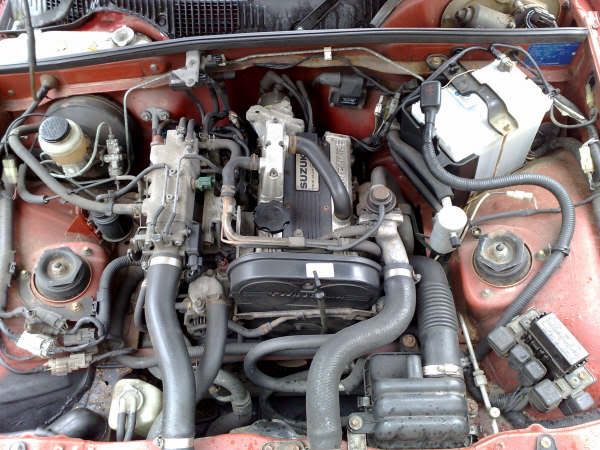
Engine Bay
front Spoiler
Passenger Arch
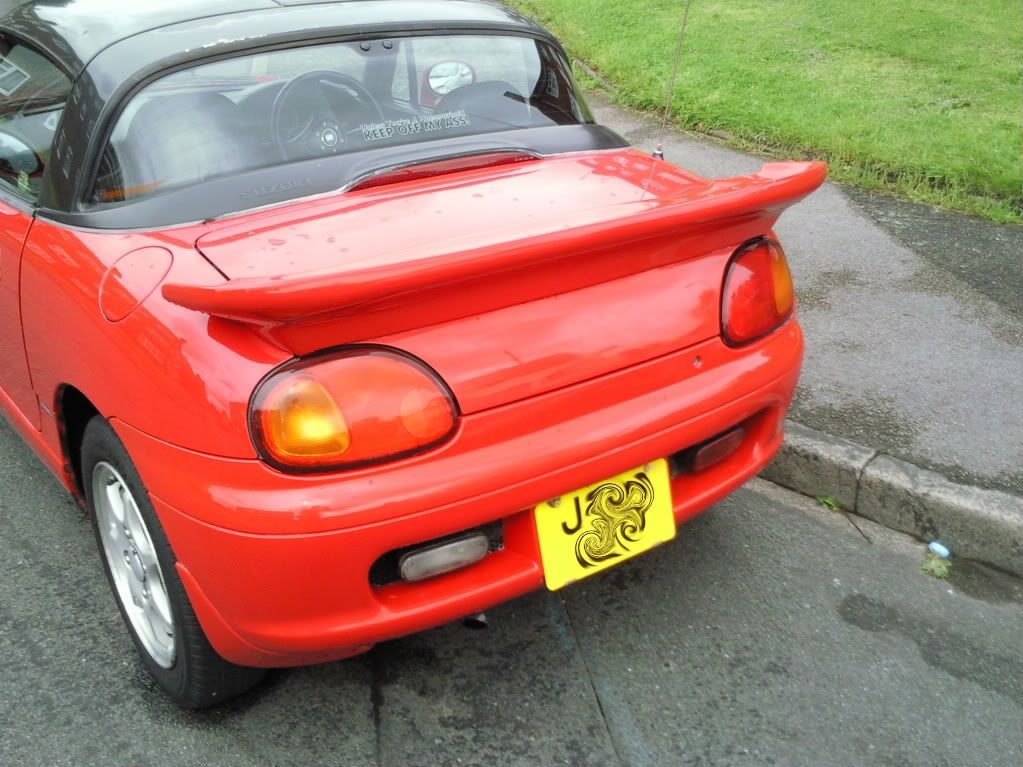
full car from rear
Spoiler
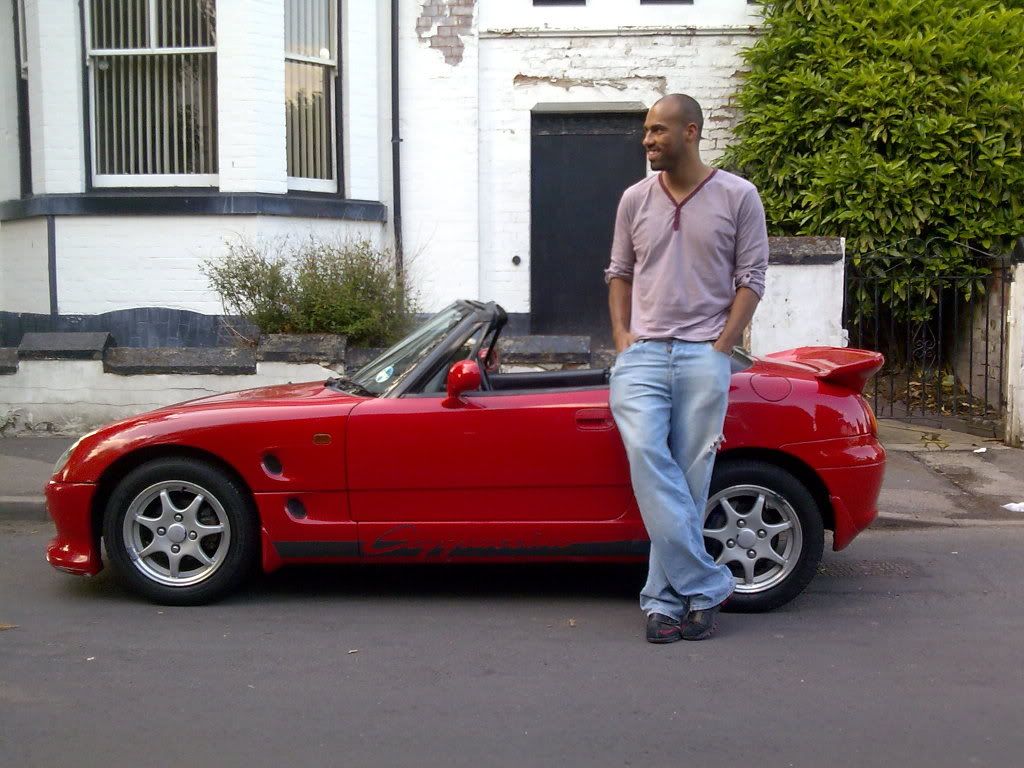
Finally me and the car ha ha. This is when i realised i'm too big for the car!
Does anybody know where the spoiler is from? Or seen it on another car?


Reply: 1
Hmmmm - RX7? (bob_g might know if it is or not)
Your roof looks nearly as 'good' as mine :D Nice car though and should look great once the cosmetic work has been done. As you say though let's hope there aren't any nasty surprises lurking under the carpet.
Reply: 2
This carpet thing is scary!! It's like a horror film! I'm scared to look. I can hear the movie type voice over lol (guy with deep voice saying)...........He thought he bought his dream car....he had hopes and dreams.....until he lifted the carpet!... Nooooooo....(Horror music kicks inn.)
Reply: 3
Hahaha.
You may be pleasantly surprised. I was the first time I lifted the carpet on mine. (thumb)
Reply: 4
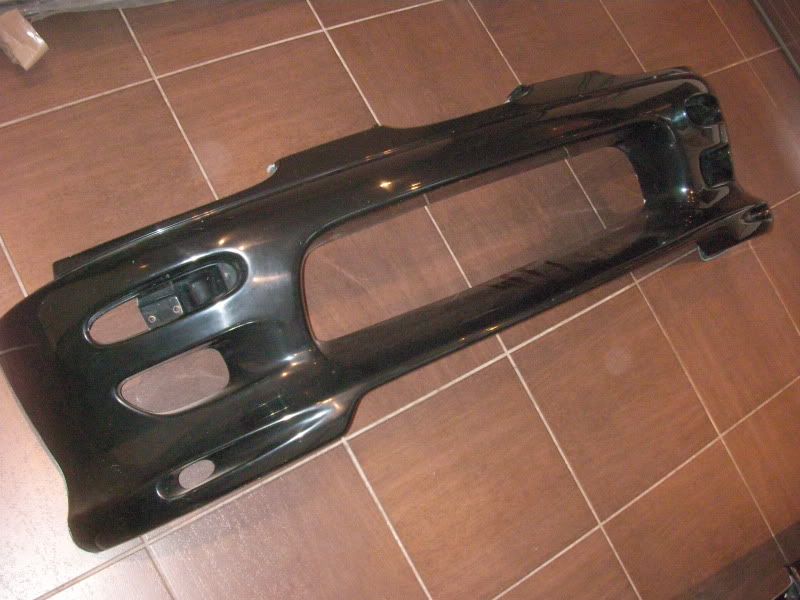
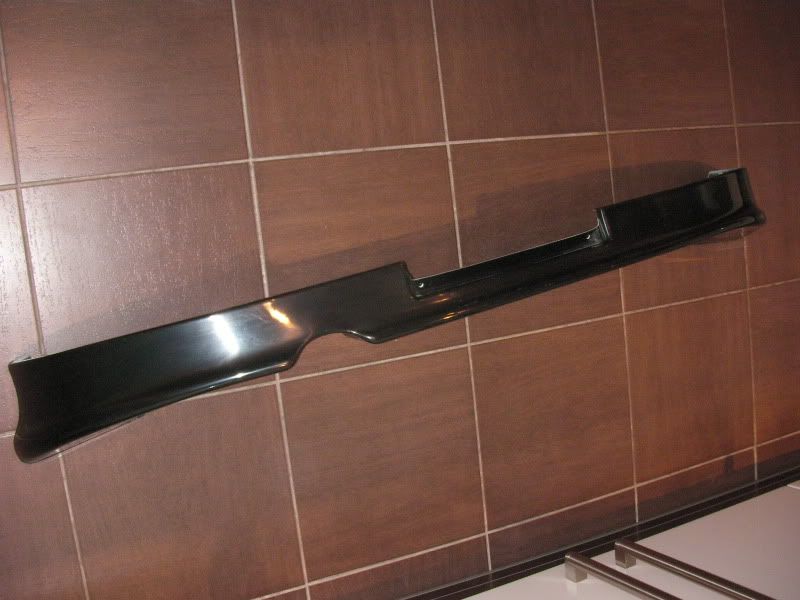
I think it's a Heartland rear wing (front bumper is defo Heartland).
Reply: 5
Looking at the way it overlaps the bonnet edges and rear lights I presumed it wasn't meant for the Cappo. If that is meant to be specifically for the Cappo that's pretty poor especially if it is a heartland one.
Reply: 6
Looks nice :)
Reply: 7
Rear spoiler is actually by 'Hippo Sleek' and is intended for the Cappo. (I checked the spotters guide to Cappo bits!) I think it has been fitted slightly too low...
Reply: 8
I can see where they get the hippo bit from, but sleek? :D
Reply: 9
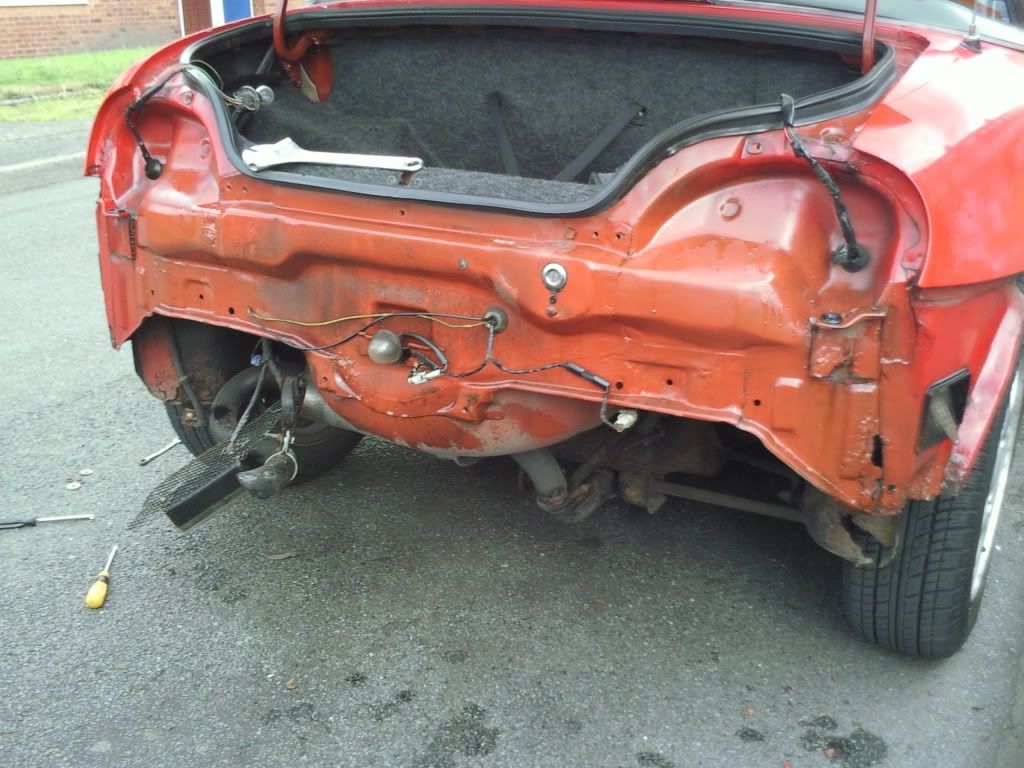
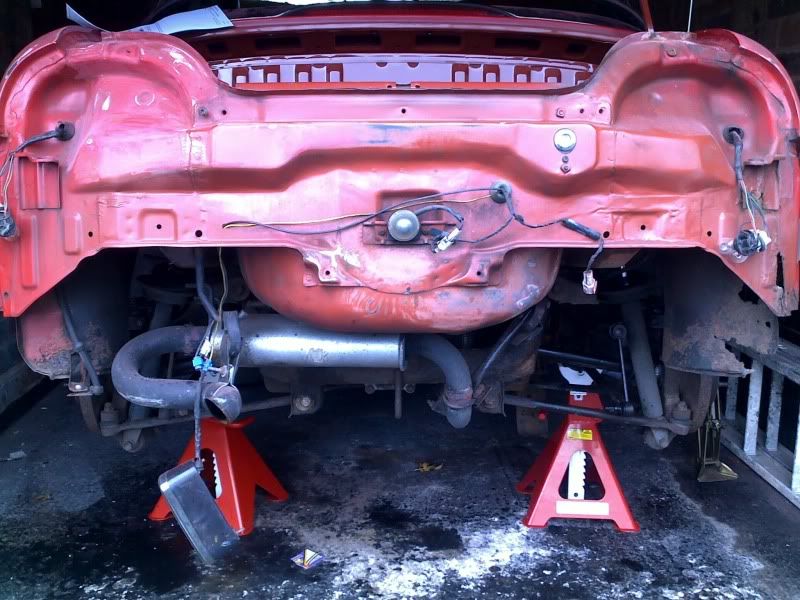
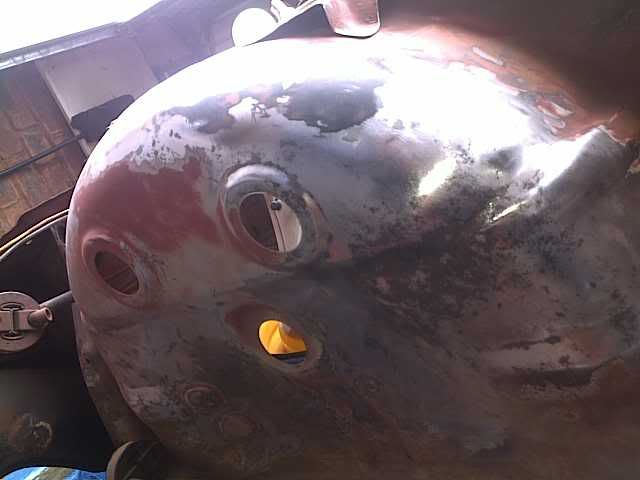
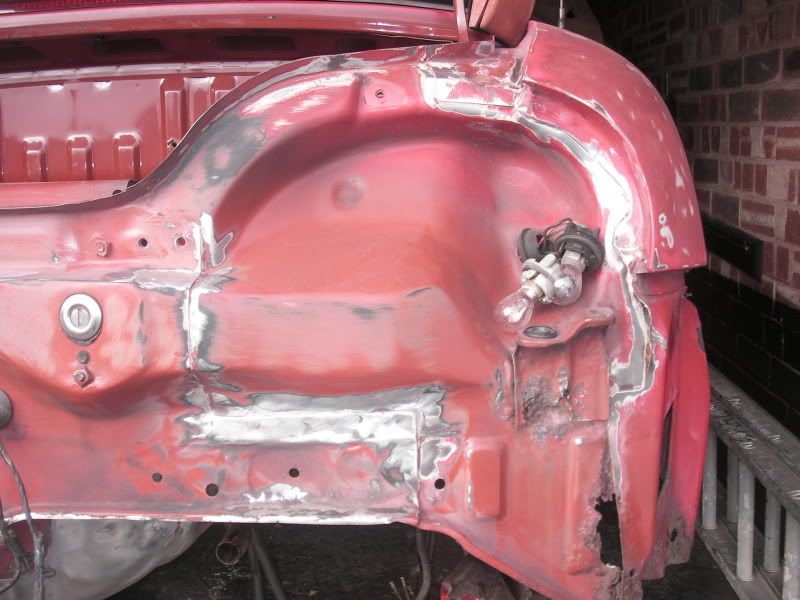
I had a look at the rear today without the bumper. The rust isn't too bad on the back. I dont know if you can see but the rear drivers side is rusty as hell. Think it needs a new inner arch. Do you know if you can still get them?
Gonna contact Suzuki tomorrow and see if there's any left. any help would be greatly appreciated.
Reply: 10
Interesting looking exhaust...
Any parts you may need will be far cheaper through Dany at CappuccinoSport. He stocks (or can get hold of) all the genuine parts that are still in production. He's probably got a fair few that are out of production too. ClubCappo members also get a further 10% of Dany's reduced prices too!
http://www.cappuccinosport.com
Reply: 11
Love that front bumper!
Reply: 12
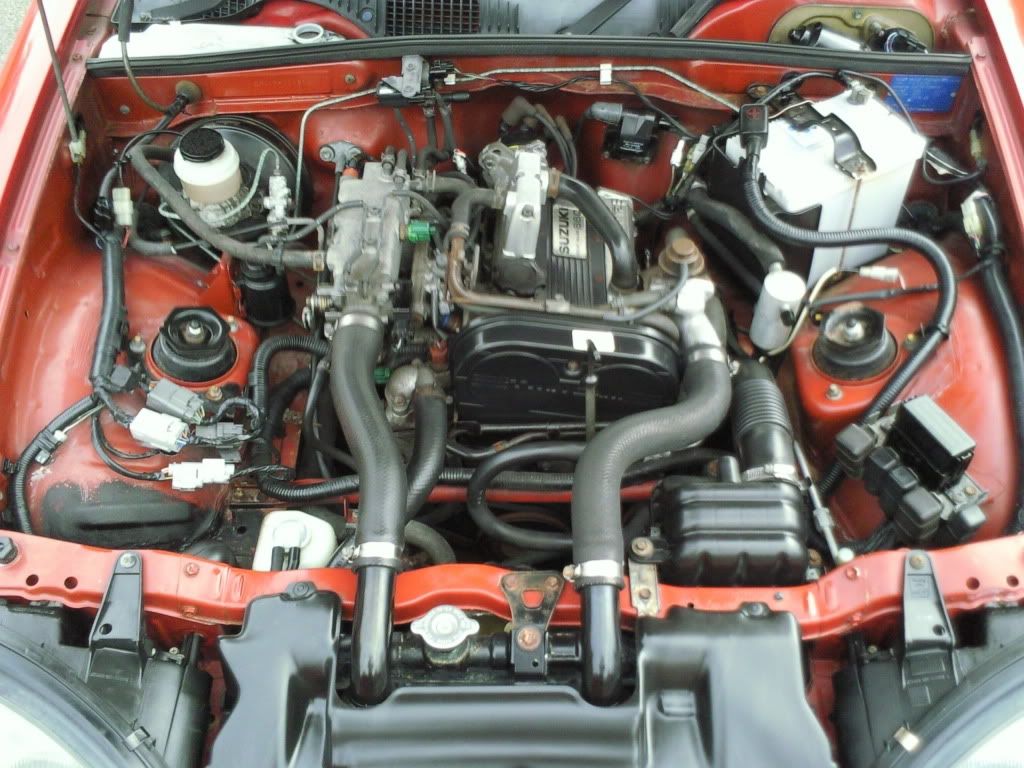
I had the engine cleaned yesterday and i was quite pleased with the result. Didn't look too bad after a clean. I love a clean engine bay and when i do change some bits in the engine its nicer to work on.
Before and after pics.
Before
After
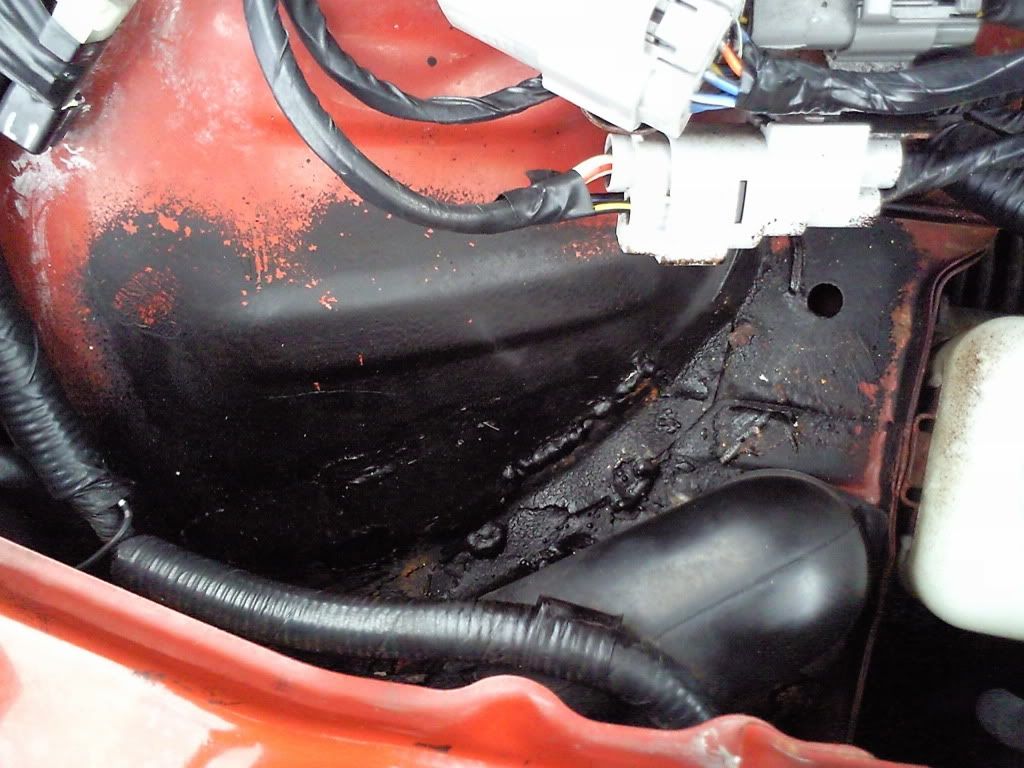
and here's the small welded patch. Is this a common area?
Makes a nice lil difference i think. Just taking my time with this lil bad boy.
Reply: 13
Yep, it is a common place.
Reply: 14
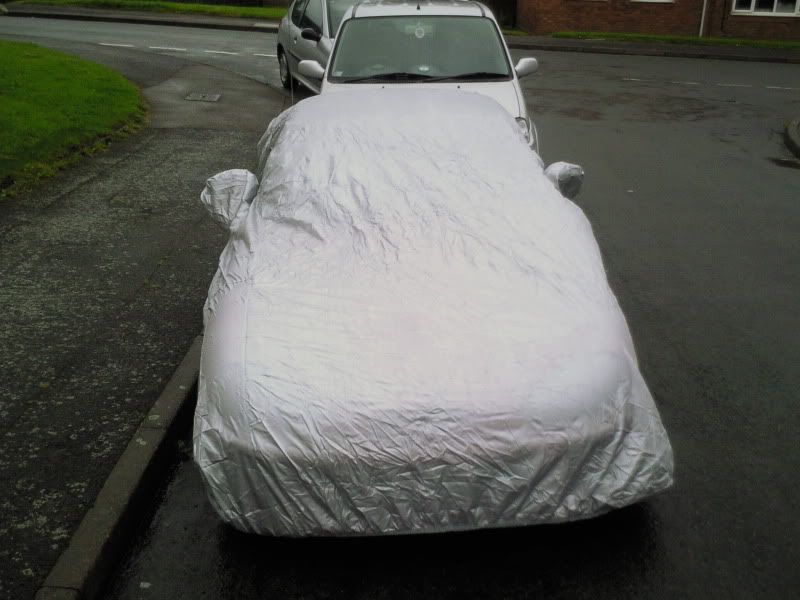
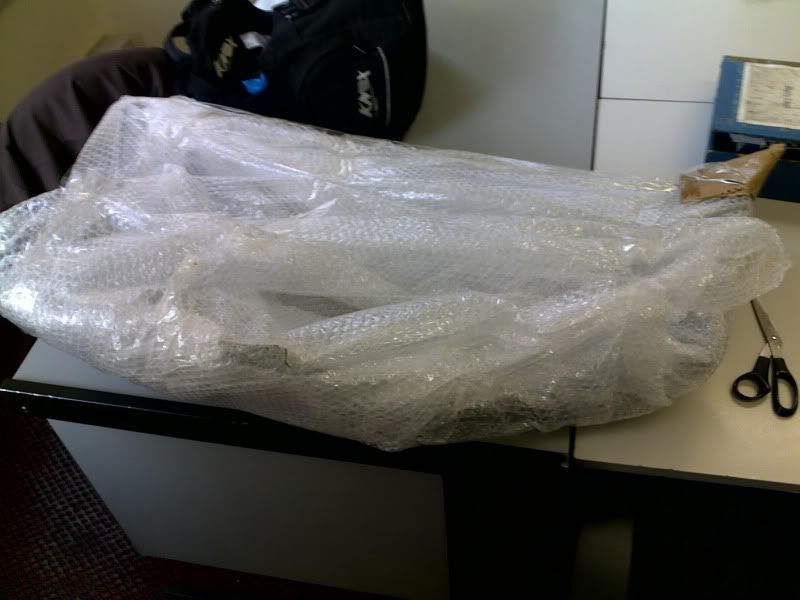
As rolf harris would say.. "Can you tell what it is yet?"
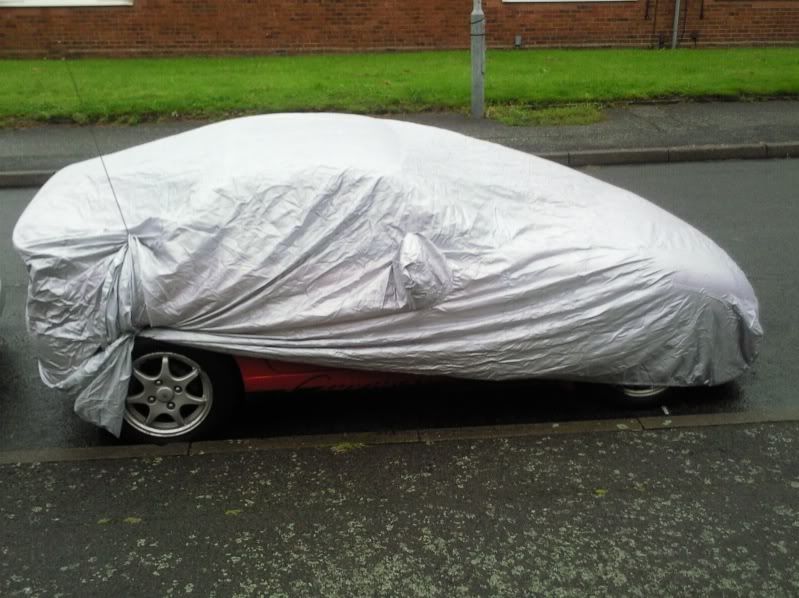
I bought a Car cover off ebay the other day. Just to keep the rain off when it's not in a garage and when its out front. Bought it off ebay lol
here's the link. It just needs some type of band or tie clips to keep it on the car incase any strong winds.
http://cgi.ebay.co.uk/CAR-COVER-BREATHABLE-OUTDOOR-UV-PROTECTIVE-FIT-UP2-14FT_W0QQitemZ250476796797QQcmdZViewItemQQptZUK_CarsParts_Vehicles_CarParts_SM?hash=item3a51949b7d&_trksid=p3286.c0.m14

Reply: 15
Quoted from Andy, posted Sunday, June 14th, 2009, 2:46:06pm at here Yep, it is a common place.
That what mine will look like after its MOT next week :'(
I do like Cappo's with rear spoilers :)
Reply: 16
As long as it looks like that after and not before (thumb)
Rust converter and waxoyl it ;)
Reply: 17
Plus a coat on white paint so it does not stick out like a sore thumb.. :D :D :D
Reply: 18
rust converter?
Reply: 19
http://www.hammerite.com/uk/products/ps_kurust.html
Reply: 20
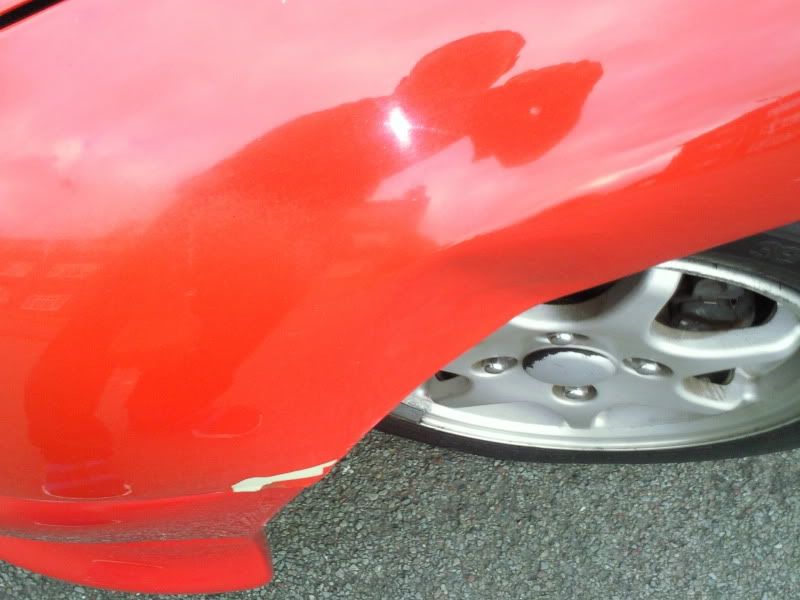
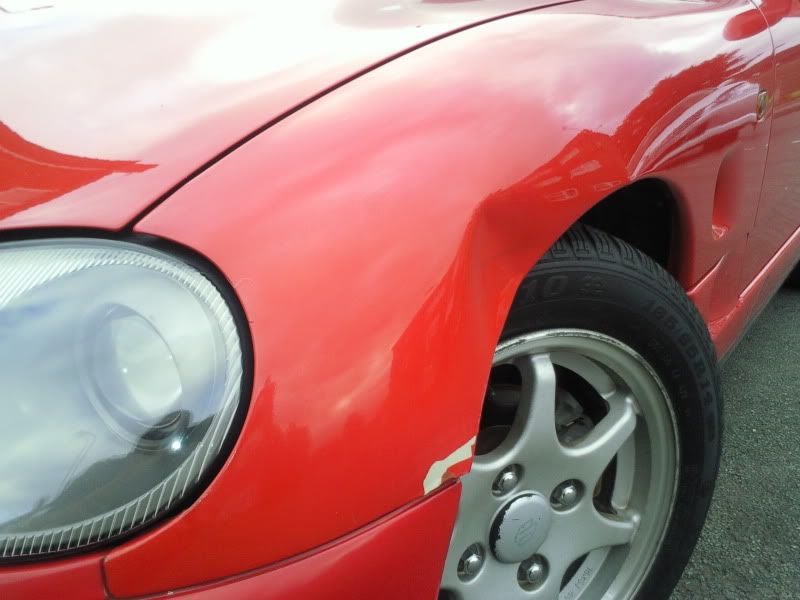
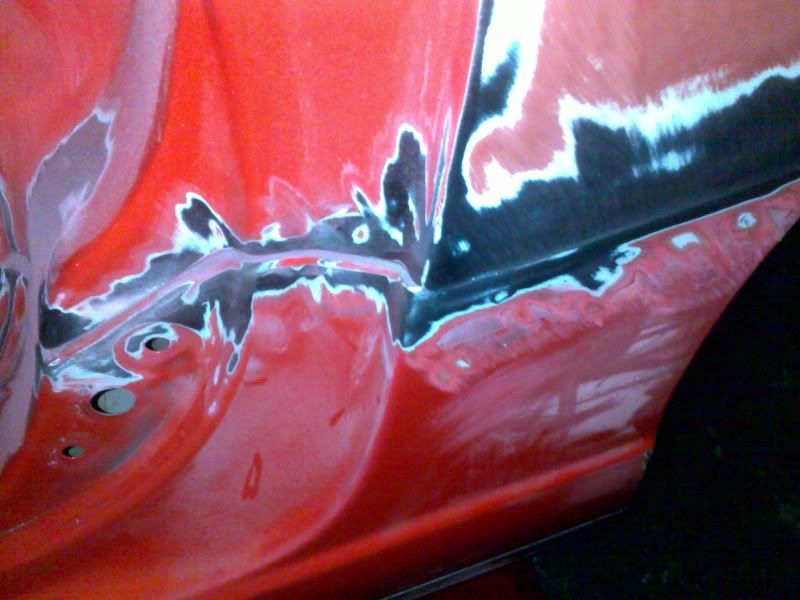
i can't believe i was finishing work this morning and i watched some stupid woman reverse straight into my capo! She worked next door and i cant believe how thick the woman was!! her rear drivers side bumper went into the front wing on a 3 point turn!!! She was like, we'll go through insurance.. i was like no.. it will be cheaper to source parts love!!
proof!
Reply: 21
Strange......you WATCHED......and she was still concious and able to speak...???
Common Place...??? not over here...lol
Lord, Love the Front bumper, 2nd next to mine....
was wondering when I started reading this thread, if only the ENGINE BAY looked as good as the reat ofthe car......then I got to the Bottom...DOH!!! Looking good.
Reply: 22
cheers Sneaza,
If i weren't going to Argentina on Sunday i would have thrown about 6oo quid at her! I'm buying all the bits i need bit by bit and going to eventually throw them all inn!
She's a little tatty really but she's got a good home now.
Still can't believe the dosy woman never saw my little cappo!!
Reply: 23
Update
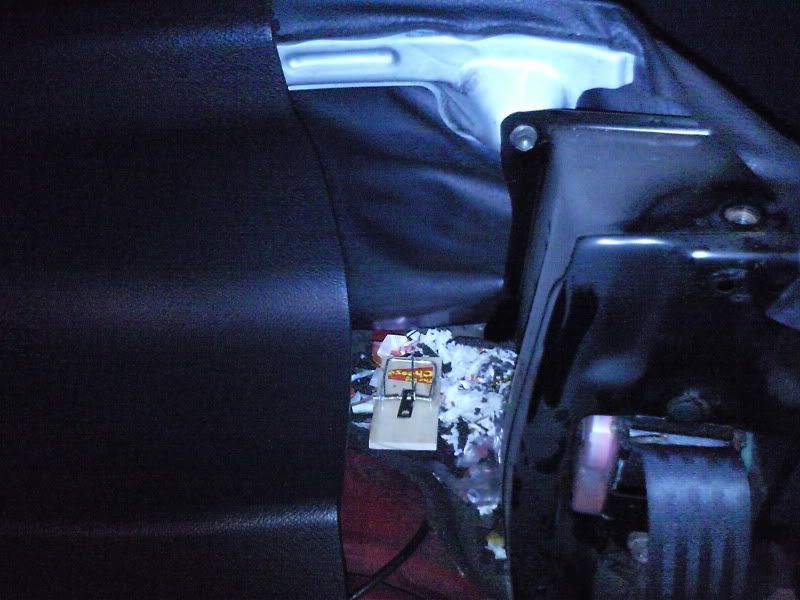
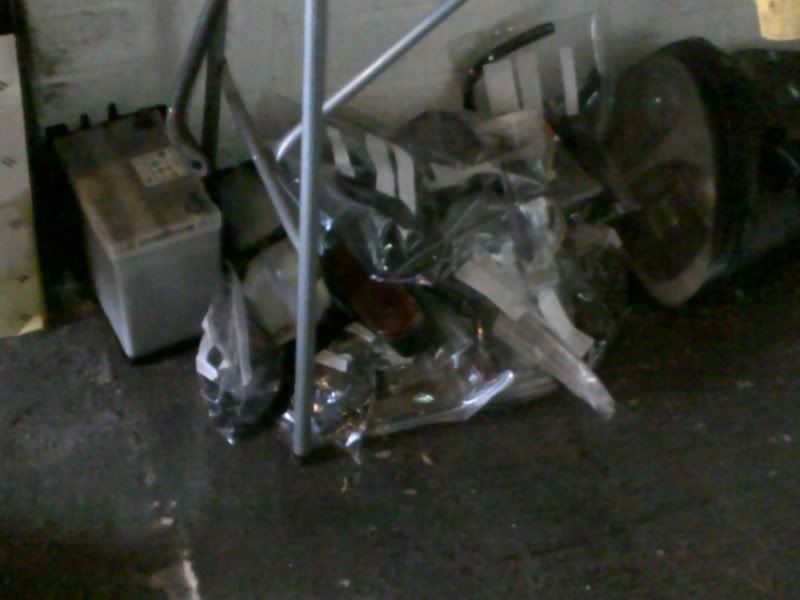
Well it's been long enough. Still on the forum most days but been messing around with mine. Been looking at ordering a few parts too. Here's what I have been doing lately. I had a few small issues but not with the car! The car is in a garage but I had to spent a few hours clearing it out. Then i was told there was a mice problem so spent another few hours blocking small holes with wood, filler and other stuff! lol
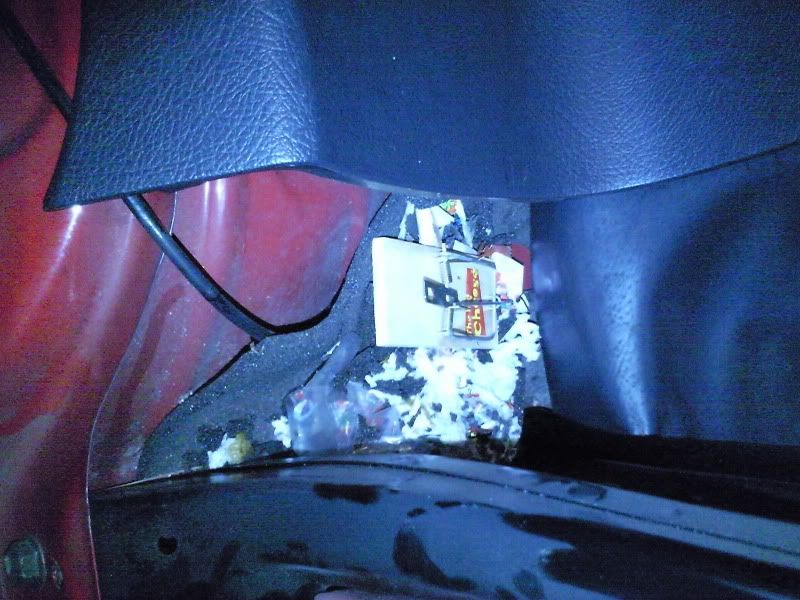
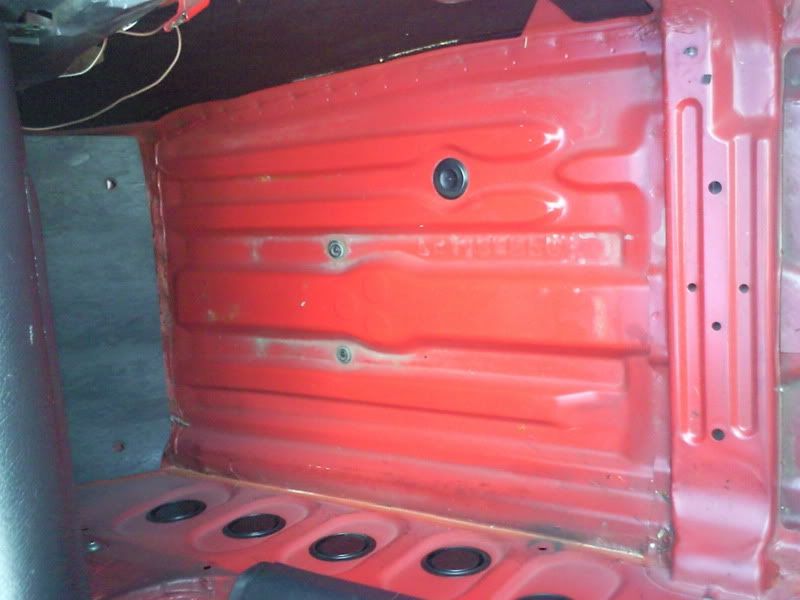
Left the car for a few days and turned it on and reversed it out the garage to see about 3 mice jump out from the underneath and run off! They had been nesting in the car! I had to strip the car and didn't know where to look! This is where they hid! lol
This got me thinking this would be a good deep space for a speaker too!!! what you guys think?? build some kind of speaker frame into the hole?
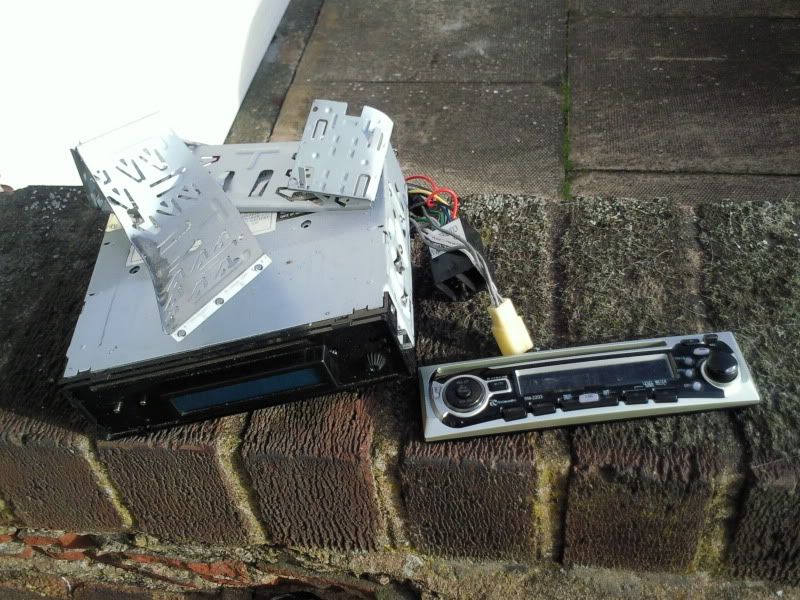
Old stereo out.
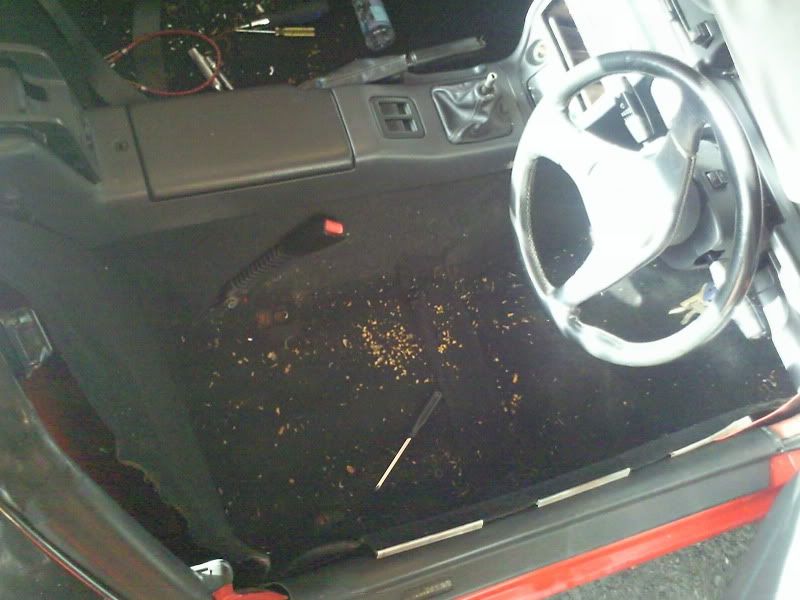
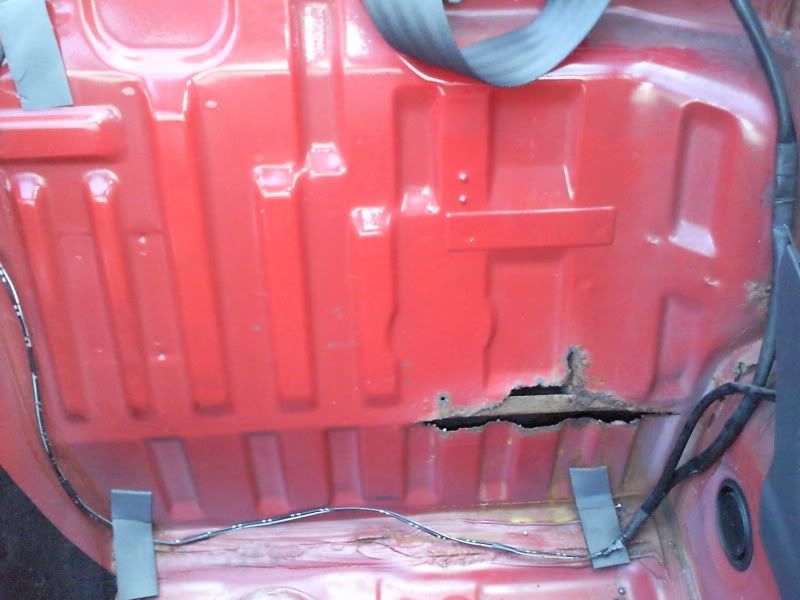
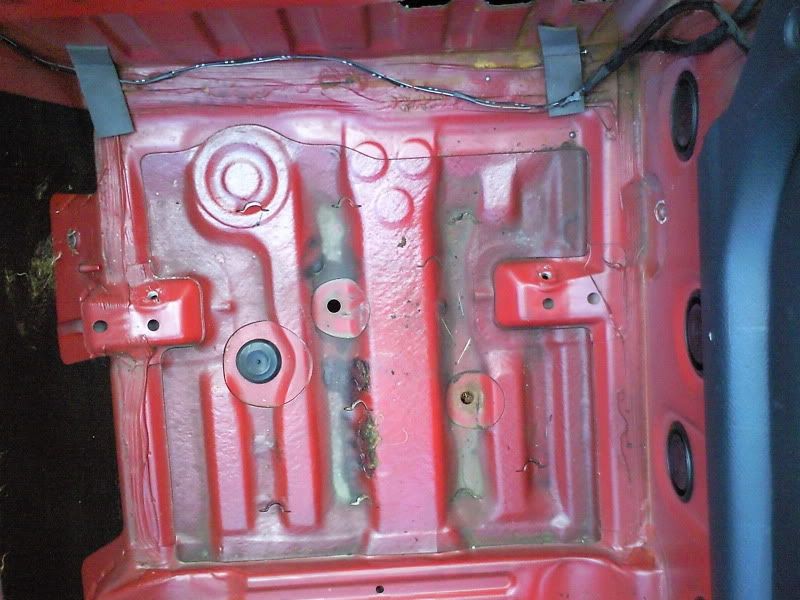
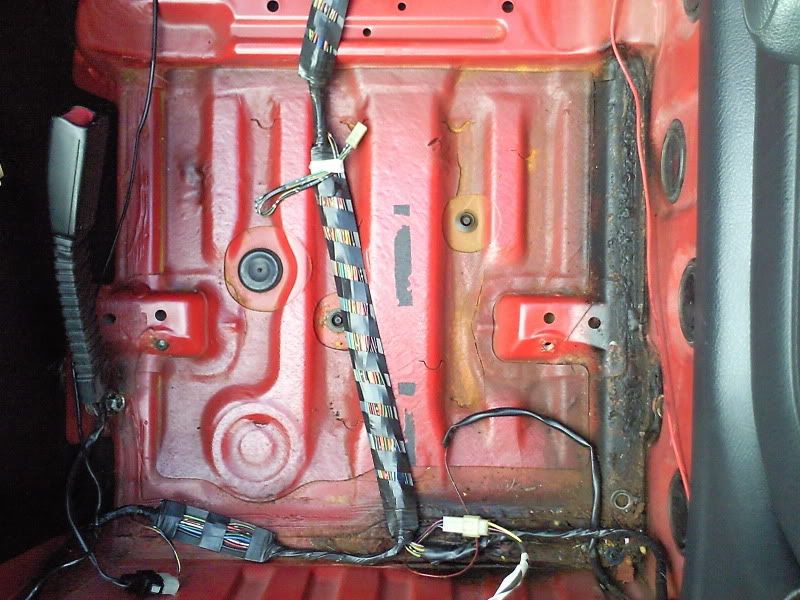
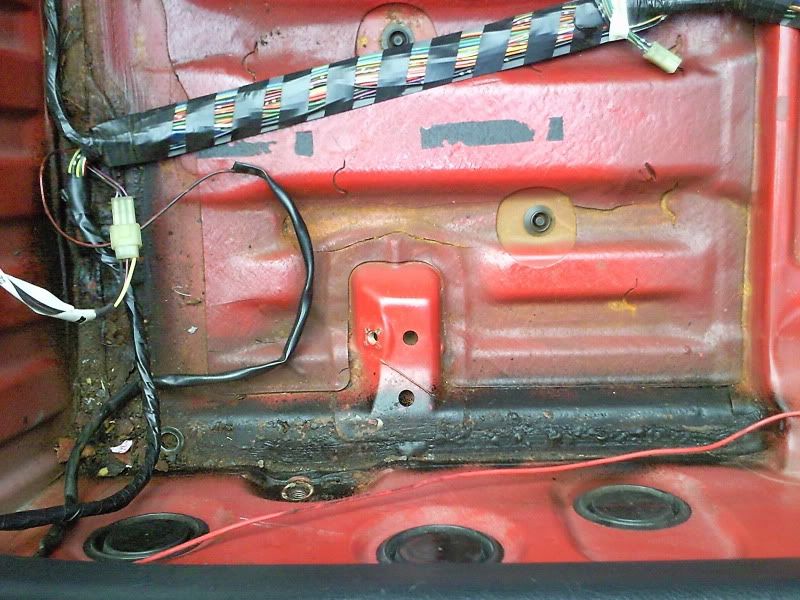
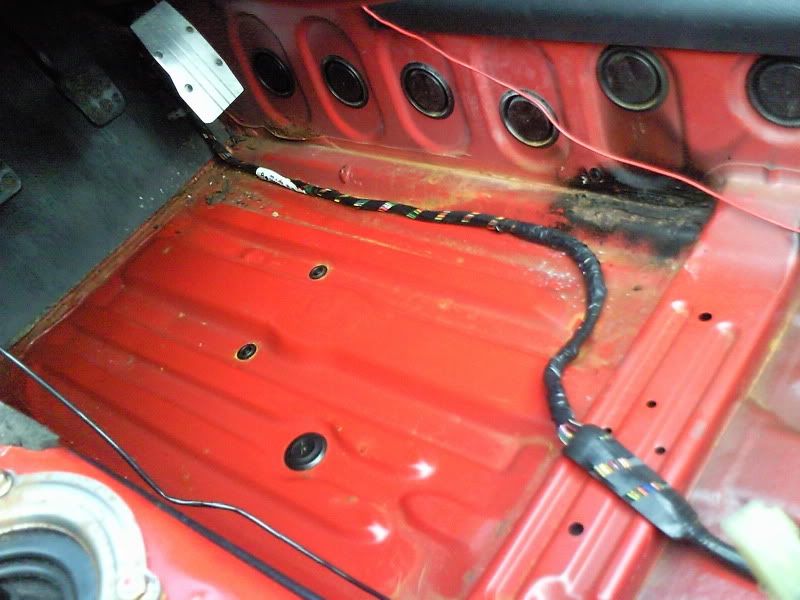
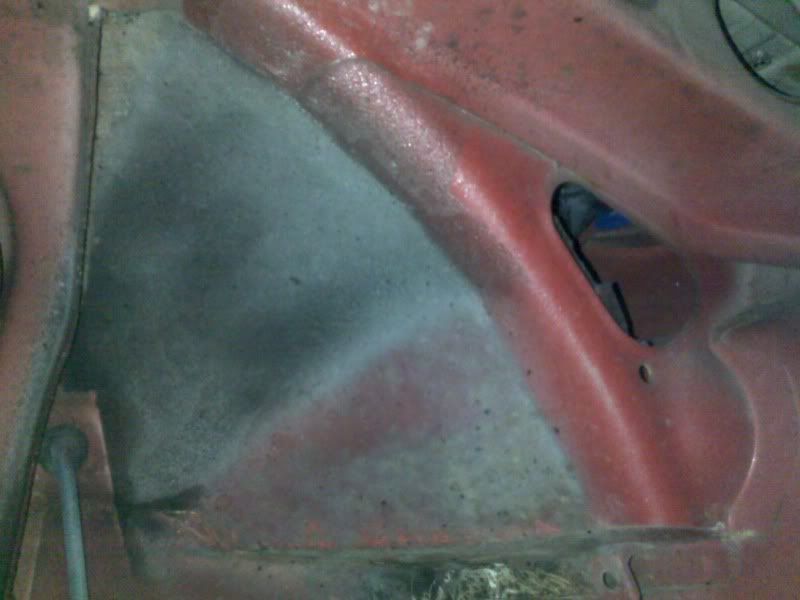
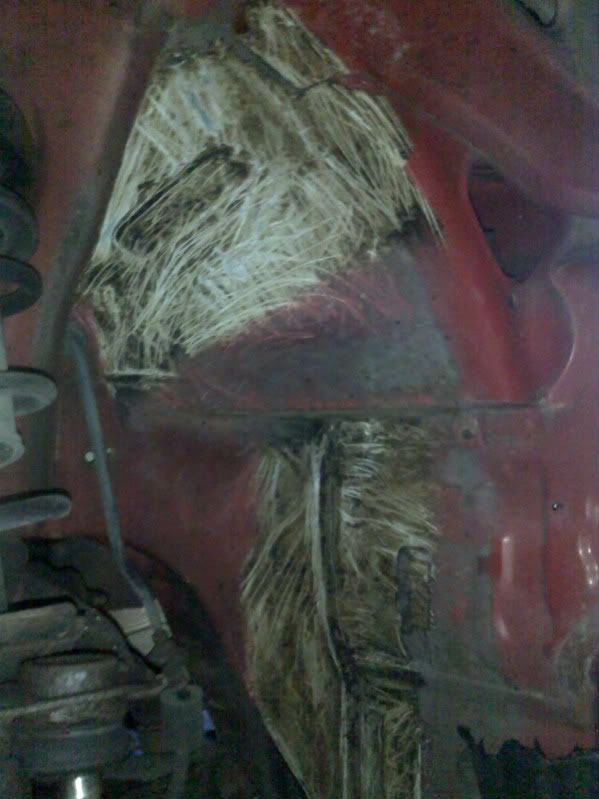
Then i had been reading about the dreaded carpet pull up so i had to pull mine up and assess the damage by rust. After i had taken the seats out. Really easy!! and pulled the carpet plugs out it was just a matter of the centre console etc. See below.
behind the seats on passenger side
Drivers Side
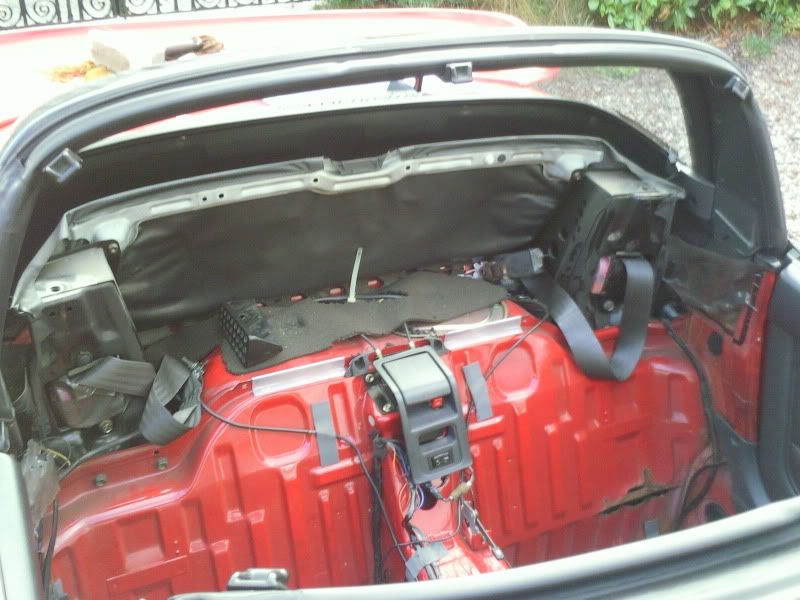
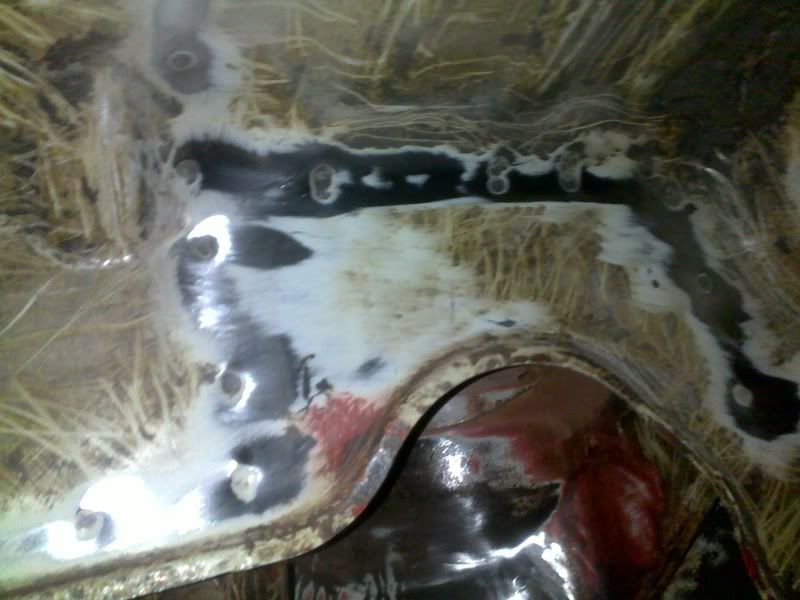
these are the worst of the rust in the floor plan.
What you guys think? Is the rust patch bad? You can see through the floor but its pretty small to be honest. I'm looking for an opinion on this cus i dont wanna throw money at it and you guys think it's bad lol
Reply: 24
That doesn't look too bad at all. The bit behind the passenger seat is common. Mine was welded up there a couple of years ago. The black areas are where previous welding has been done. I'd treat that and paint it. The bit behind the driver's seat is one to watch. I'd treat it with a rust converter and over paint unless it's bad enough already to cut out and weld.
Reply: 25
Lord, someone else had the same wing and giving it away...i think� :-/
If you want to follow his footsteps, let me know ;D
Reply: 26
Ive bought two wings already to be fair.. but mine are the english ones on a jap car.. but i'm having the holes for the idicators made flush.
Indicators are being put in the mirrors.
Reply: 27
Finally getting cracking now the weather is getting better. Even though the cars garaged it's still bloody freezing ha ha
When working alone I think you really have to be focused and persevere! I have an ipod tho to keep me flowing while i work on the car!! I have no mechanical skills at all and if it wasn't for the manual this would be in a garage and costing me a fortune!!!!! I'm sure there's a lot of us struggling without the manual.
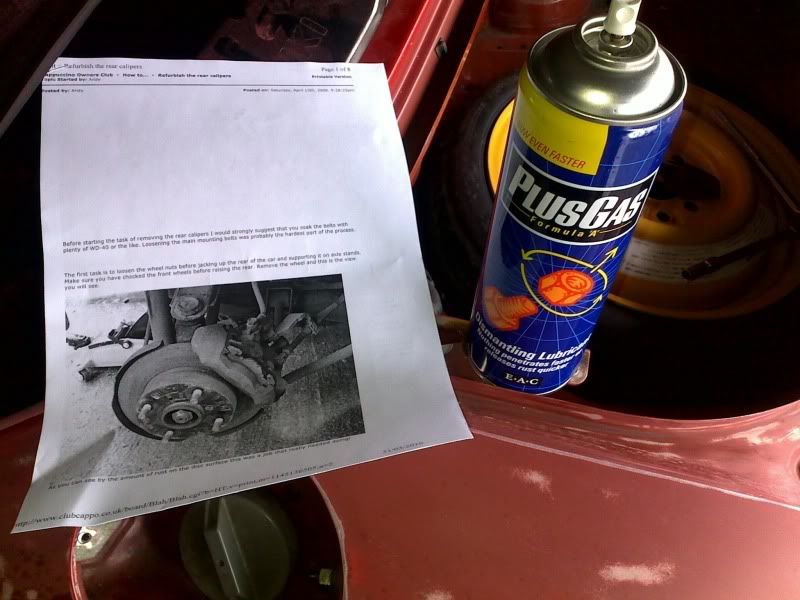
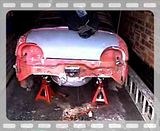
Got some axle stands and propped the car up using a jack. Bit awkward at times but i got there.
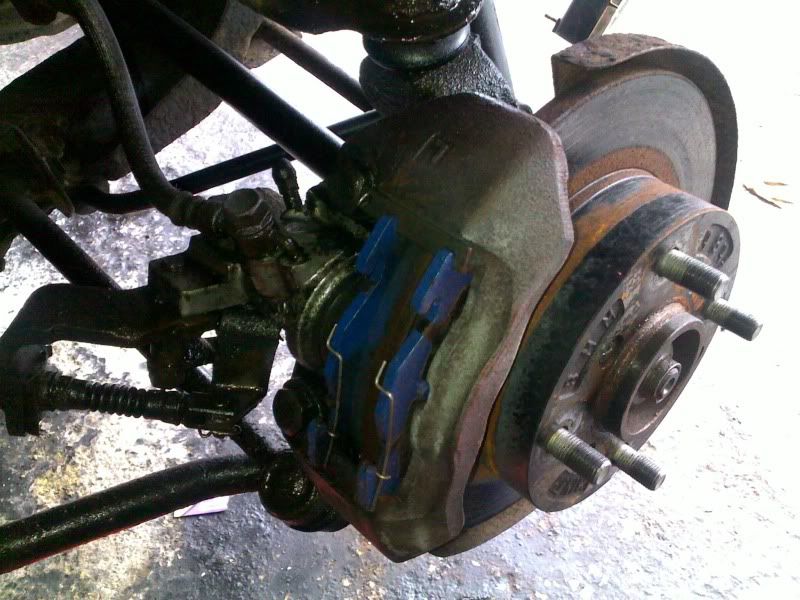
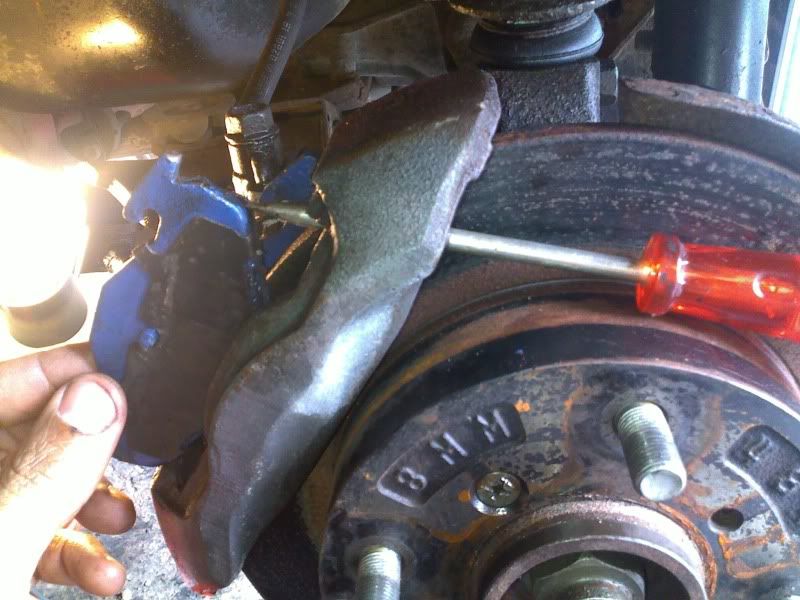
decided to take of the calipers and give them a good once over! Starting point lol
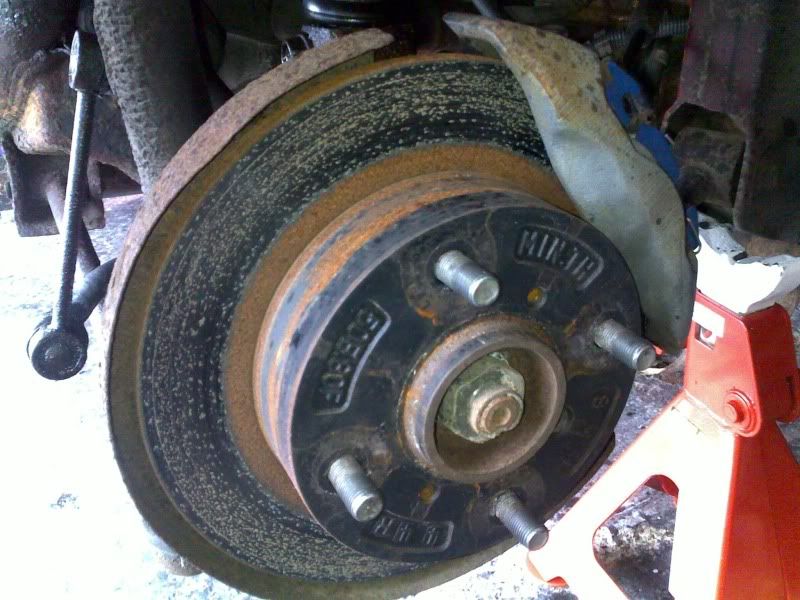
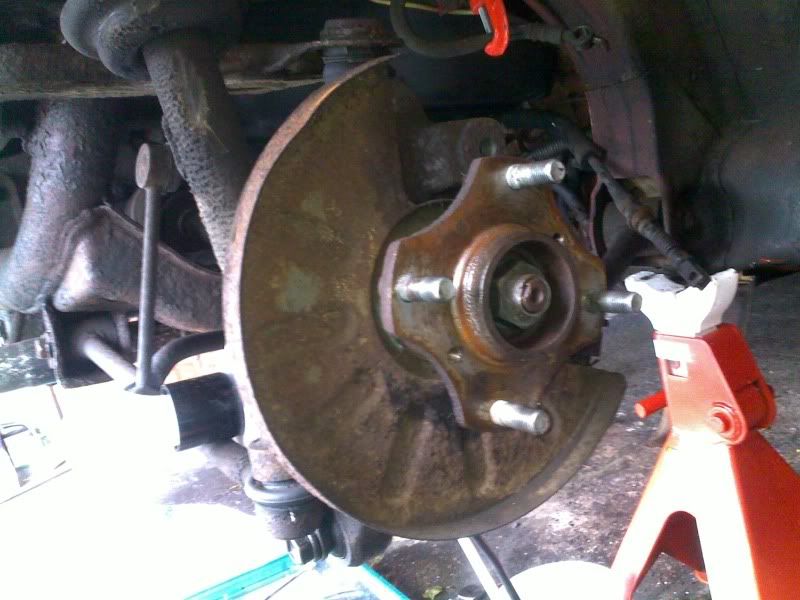
Took the wheel off!! Shape of the discs!
Took the discs out. Hey Andy. Could these pics go in the How too?
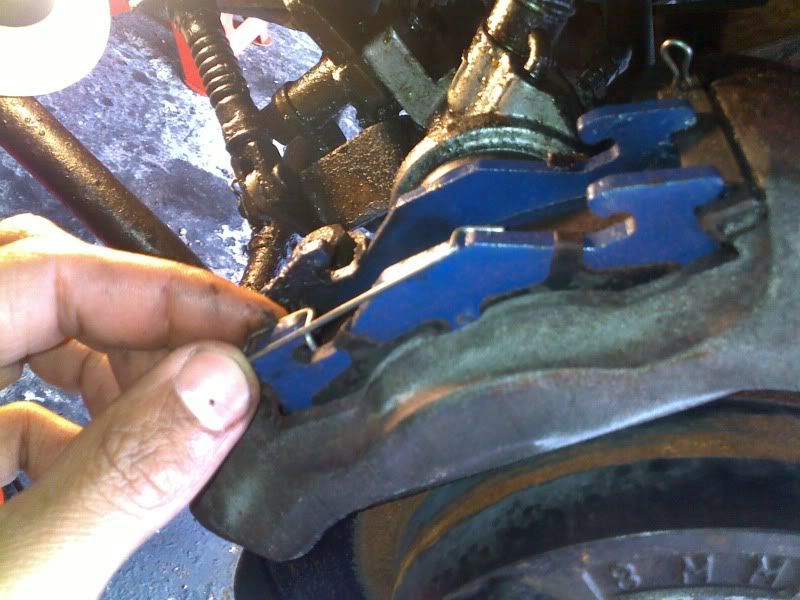
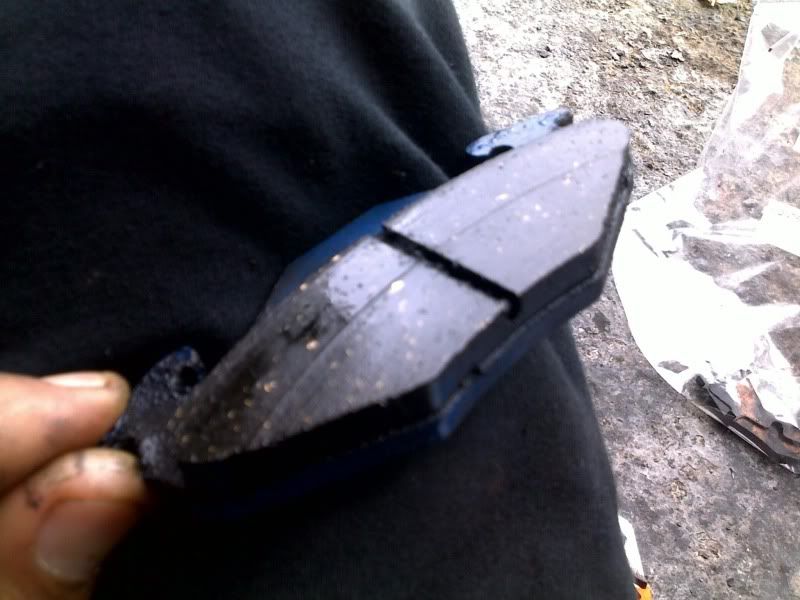
Old pads. Dont know what make they are but could be jap pads maybe? Anybody know what they are?
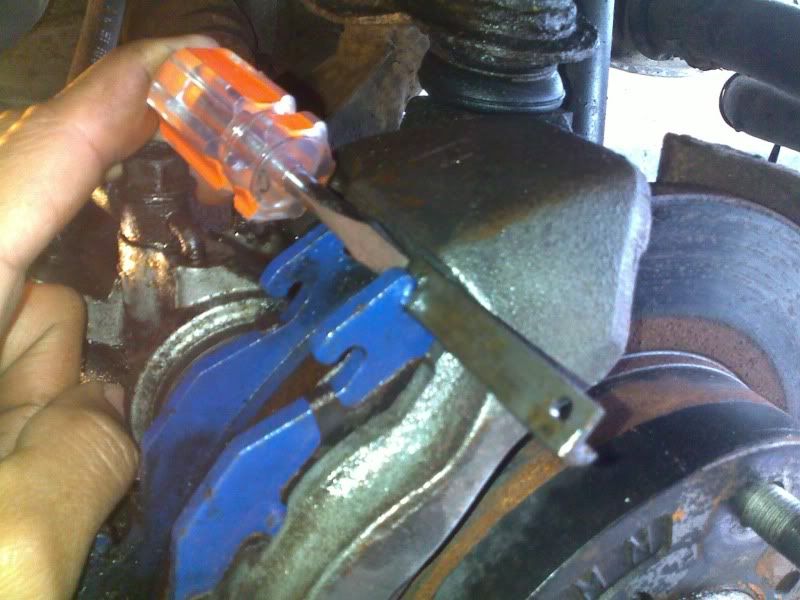
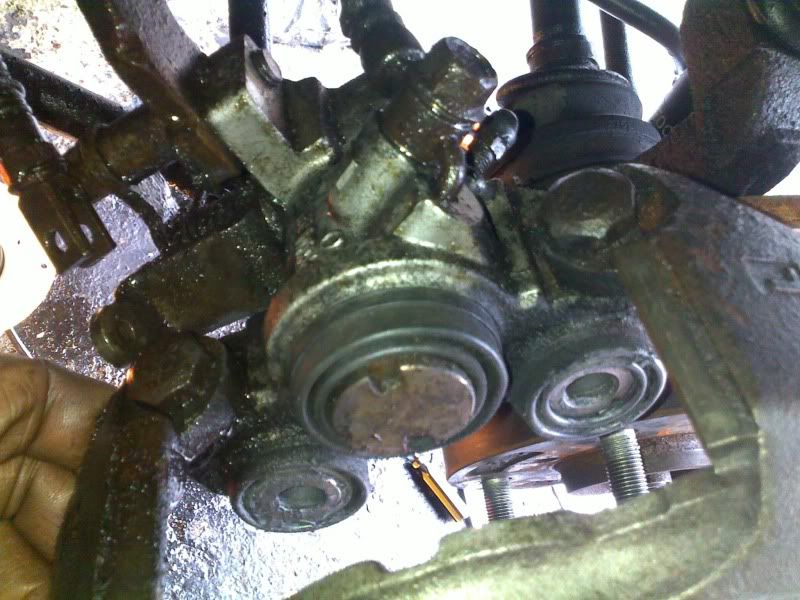
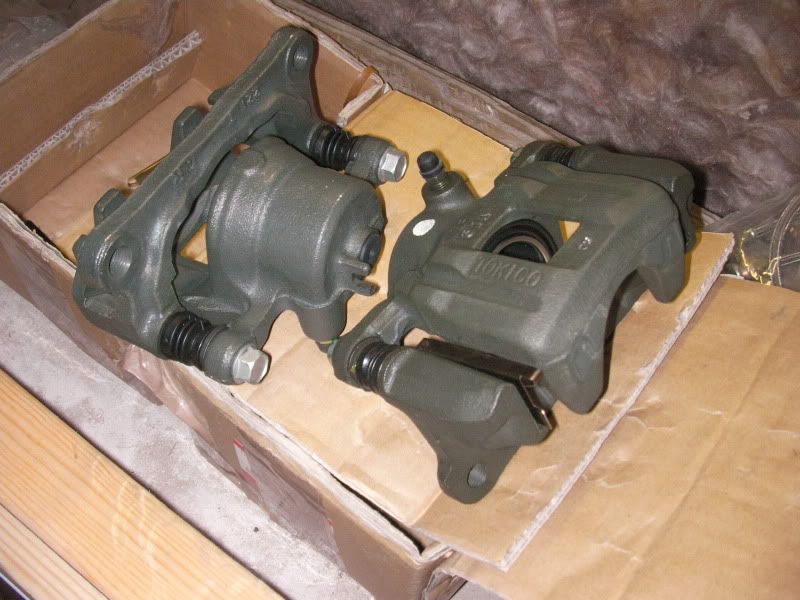
State of caliper. In pretty good condition to be fair from what i can see. Rubbers in good condition etc.
I'm going to give the calipers a clean and post the pic.

Reply: 28
Good stuff :) are you going to paint the shields and calipers while they are off? :)
Reply: 29
The blue pads are genuine Suzuki ones made by NABCO.
Reply: 30
I'm going to paint the calipers either black or red. It depends on the colours available. Never done it before. They're soaking as we speak. Giving them a clean. I've got some Folatec red caliper paint which i could use.
Reply: 31
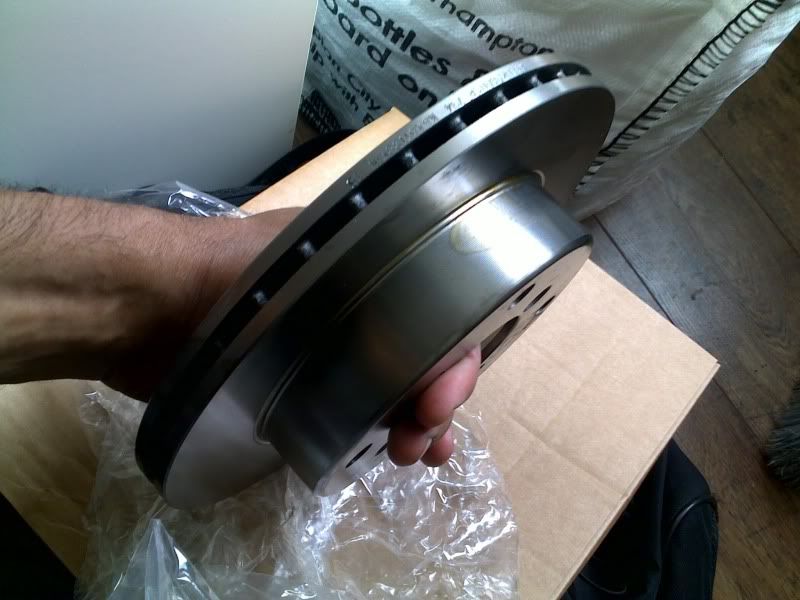
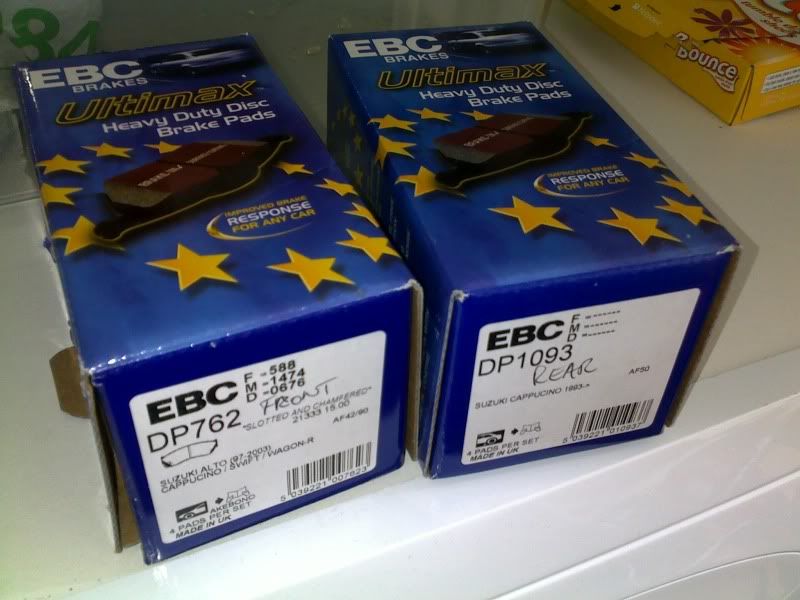
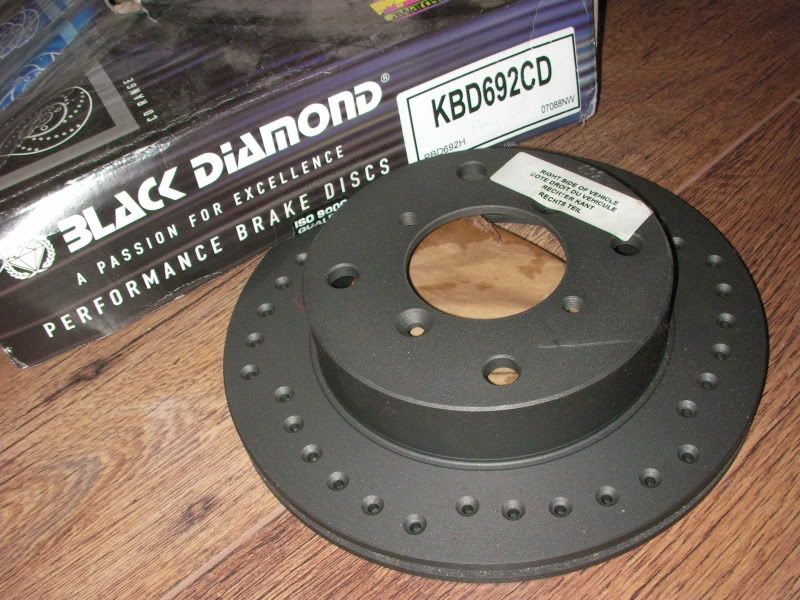
can anyone tell what this is lol
Brand new EBC pads and discs for front.
Reply: 32
I'm testing those pads on the front at the mo and i'm really impressed by them.
Reply: 33
Even though they are cheap I think they will be ok from what i've read. Unless you wanna go racing they're ok for cruising i suppose.
Reply: 34
I'm using on the Az-1 and my cappo - excellent unless your giving them a hard time on the track :)
Reply: 35
I've not used them on track but with sprited driving and braking they've excelled past other standard pads.
The idea is that i get a few different pads to test, bed them in good and propper and then do a 1/2 hr on track with each set and see which wears well / overheats / fades etc. We can then stock and sell the best pads and also i can get a percentage of my trackday costs paid by the company :D
Reply: 36
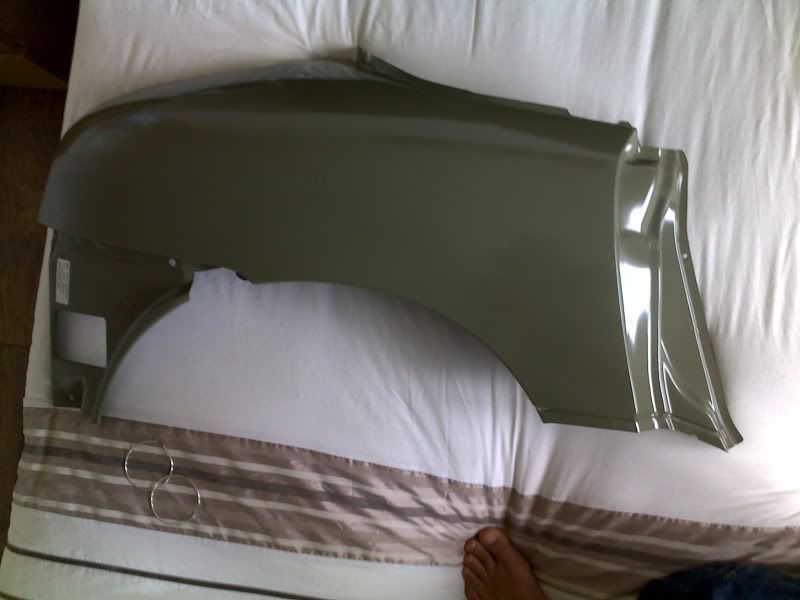
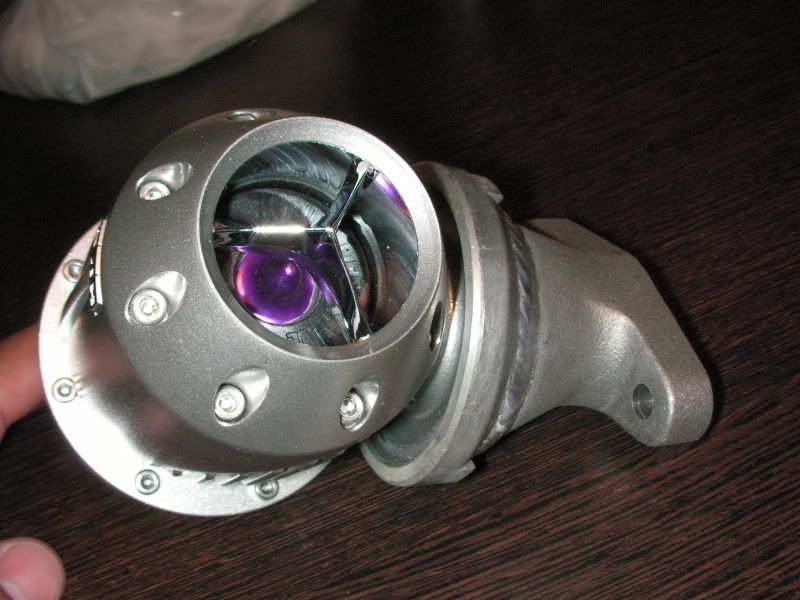
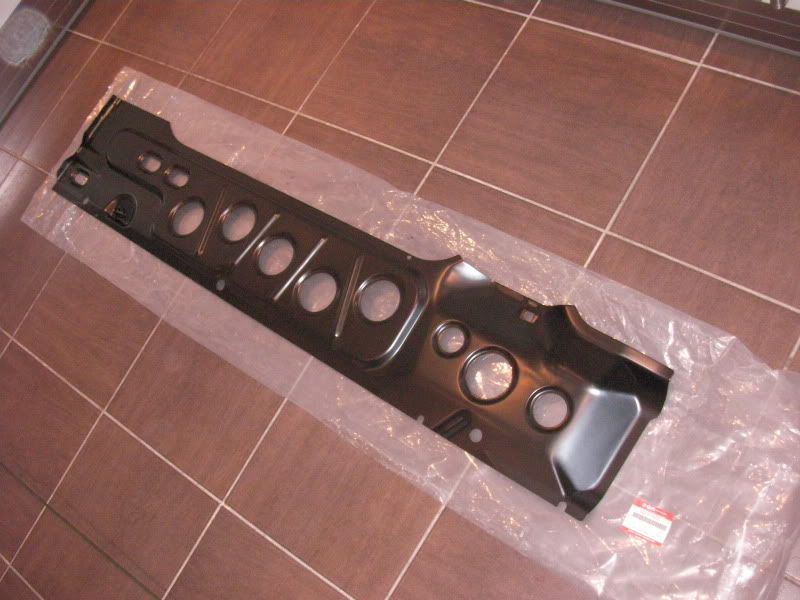
The wrapped up part is a.....
Reply: 37
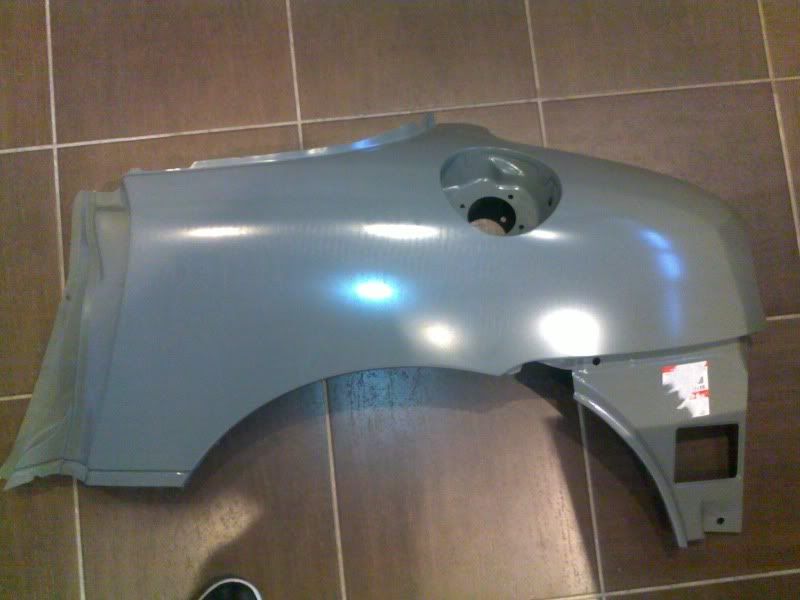
Quick questiong.. where did you get that panel from? Im in need of a red one (or two) :P
And the colour of that wrapping is Awesome imo. Would suit a cappo quite nicely!
Reply: 38
cappuccino sport I'm afraid....Cost me an arm and a leg! More bits due May!
Quick video of me and me mum in the cappo lol Just trying a video link lol
Reply: 39
Right. added some more parts this week. Got some more coming in two weeks. Building up a list of parts that will rival cappuccino sport lol
I made an error in ordering parts. I didn't fully realise what parts were needed. I'm ordering parts for the rear end as this is where the rust is at it's worst and i want it to be rust free lol.
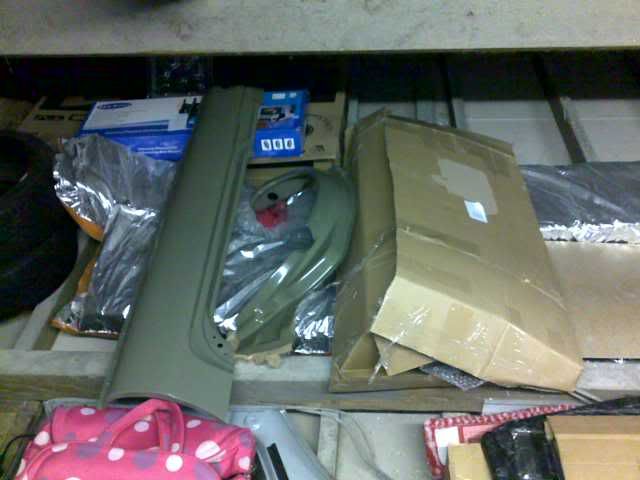
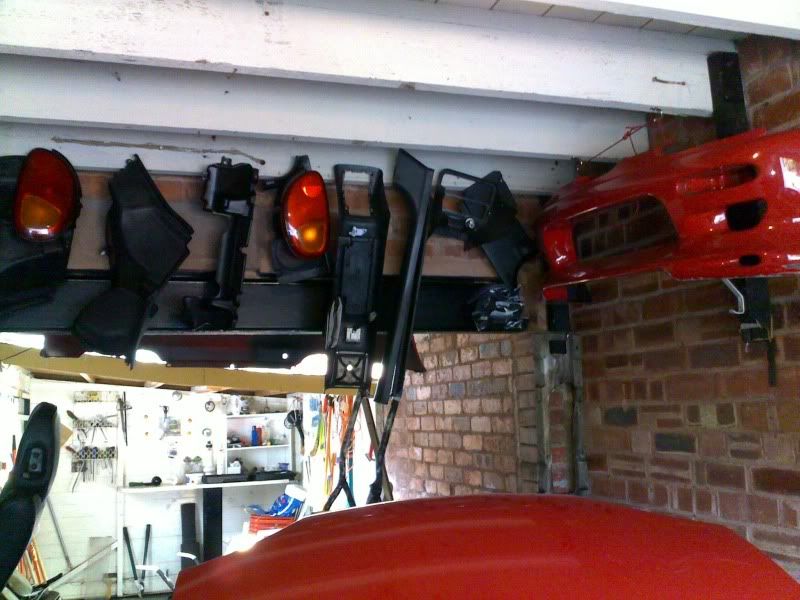
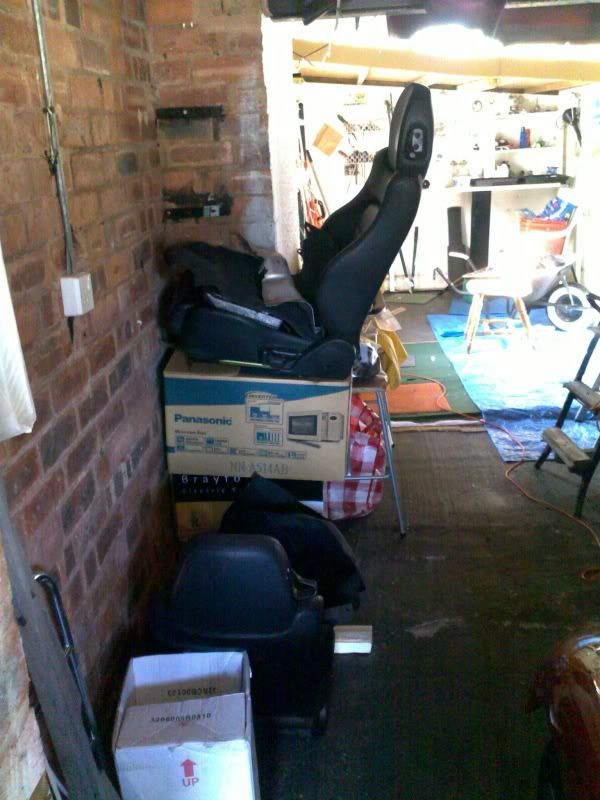
Thought i'd show you the working area i work inn. Garage is not actually mine so i'm grateful for that.
For those that have a garage I think it makes it a lot easier!! Esp if you have tools.
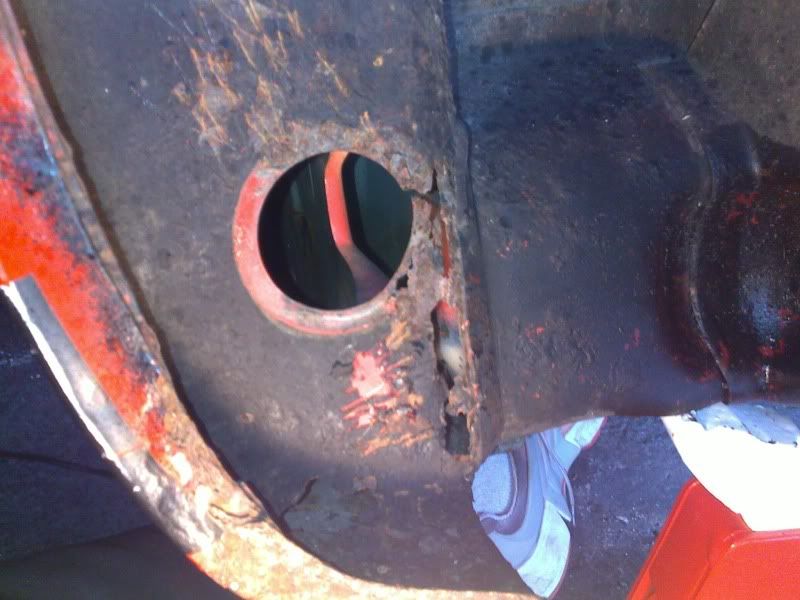
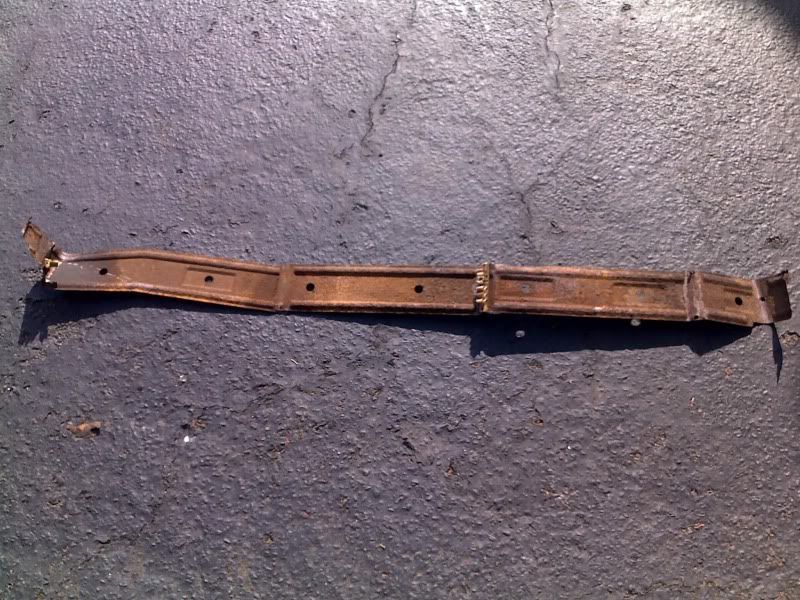
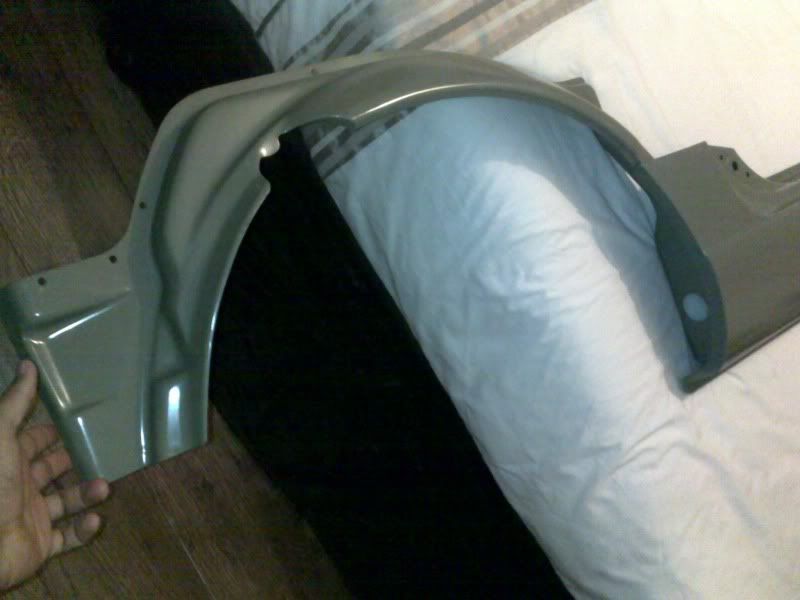
So this is the part i didnt mean to order but its actually needed as you can see!!!
63731 80F00
Just a lesson for those that don't realise, i think if you change the quarter panel you might have to replace the two other parts just mentioned.
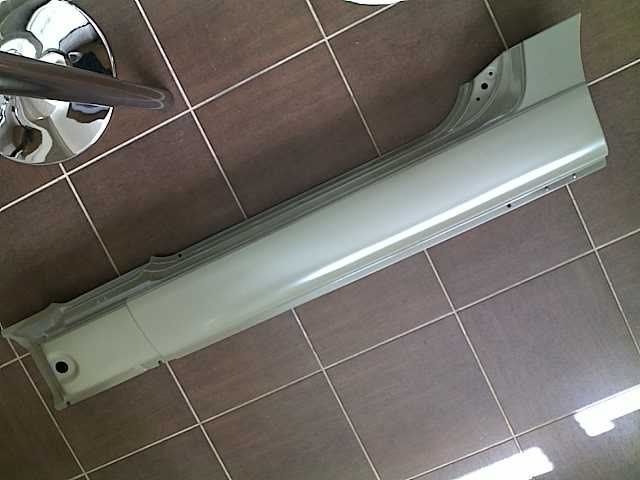
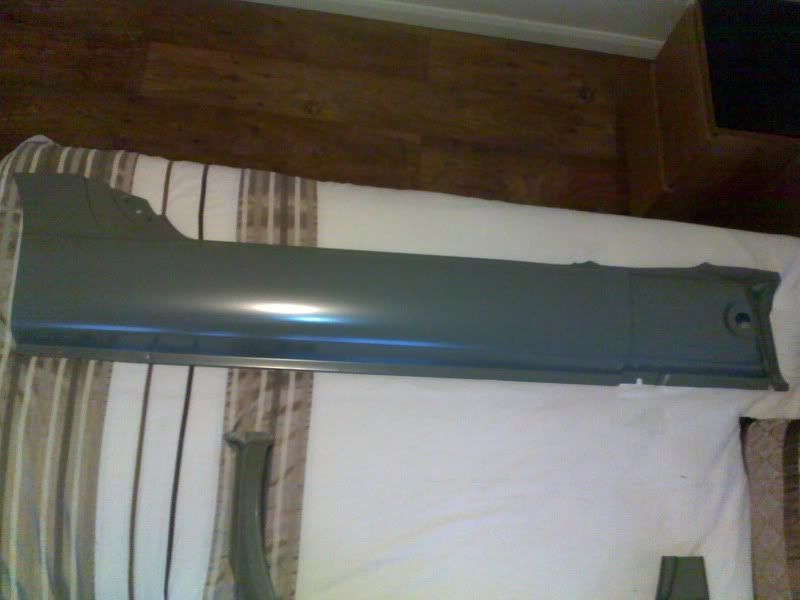
and new sill.
When i worked on the car last time I removed this which was a pain!!
and added the new boot. I have a spare red one but it has a little rust.


Reply: 40
nice and cozy in there eh!
will you be doing all the work your self?
Reply: 41
I cant weld, I'm not a mechanic but i'm trying. ha ha I'm trying to keep the costs to a minimum. If I left the car at a garage it would cost me an arm and a leg! Taking apart the car myself and it's not been too difficult. Just buying tools as I go along. I'm in my grans garage at the moment. now he football season is finished for me I can get cracking!
The idea is to rebuild sub frames while i buy all the panels I need. So need to get a move on.
Trying to find a good welder though!
A good painter! Cheap enough though.
A good sand/shot blaster/powder coater lol
that gave me hope after seeing the �14, 000 cappuccino. I wont be up to the same standard but when finished will be nice!
Reply: 42
Hi Lord, looks like you need to think about getting a move on before it costs too much in Hob Nobs!
Redditch Shotblast (nice and local for you) did my wheels and I also got a quote to do all the subframes / suspension arms / anti roll bars / brackets at �250 (Shot blast and powdercoat in satin black). I might take them up on this as they did an excellent job of my wheels. (group buy for 2-3 sets)? I think they're Cappo fans too!
Reply: 43
yeah but you know its summer.. ur gonna be driving urs ha ha
urs is a winter job lol
Reply: 44
Had a mess with the the cappo for about two hours yesterday. Well. Had a look at the rear sub frame again and decided to have another go, (scratched head previously) Found it difficult to detatch the drive shaft. Bolts were stiff as fook!!
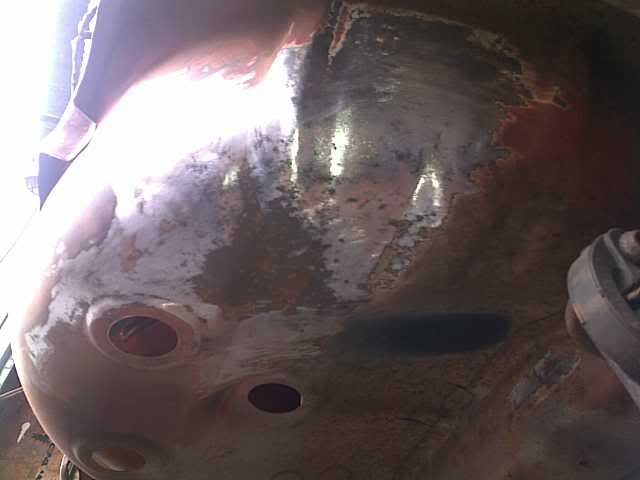
Thought i'd have a mess with some of the surface rust under the rear floor. Where the spare wheels sits. I� had a play with the drill and two types of pads. One is a red scouring circular pad and the other is about 20 small sand paper squares that rotate. Not. Use the sand paper one fisrt then the scourer. As the scourer is a softer pad and finishes off the paint nice.�
before
after ish
before
after
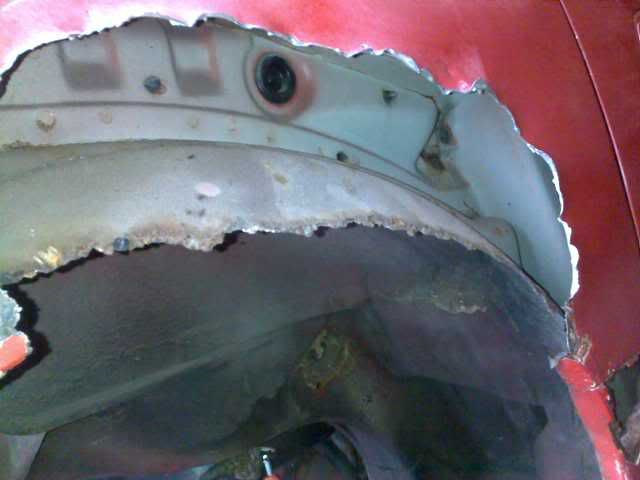
ripped a hole in the quarter panel to see where the part i ordered attaches and to see if there's further rust.
Reply: 45
Quoted from lord, posted Friday, May 7th, 2010, 10:52:49am at here Found it difficult to detatch the drive shaft. Bolts were stiff as fook!!
Any tips on this as I tried this on my silver one and got nowhere.
Reply: 46
i'm useless at technical requests!!
basically. 4 bolts that hold the shaft on at the base of the diff mounted to the rear subframe. Put a screwdriver in the shaft to stop it turning. 14ml spanner i think to undo the 4 bolts. But u have to undo the diff and jiggle about because the shaft sits inside the diff about 1/2 an inch.
any good?
Reply: 47
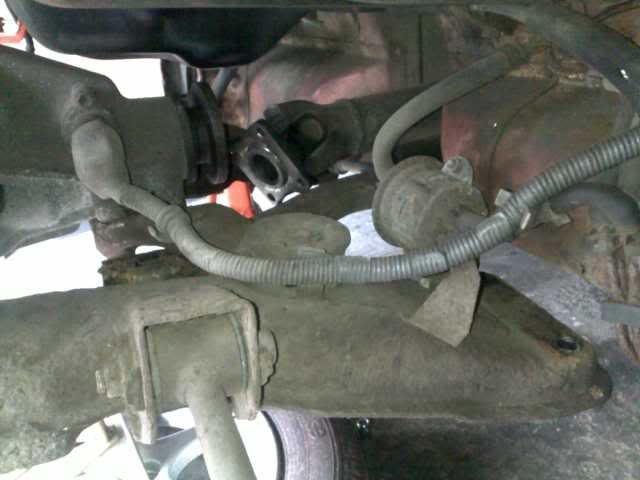
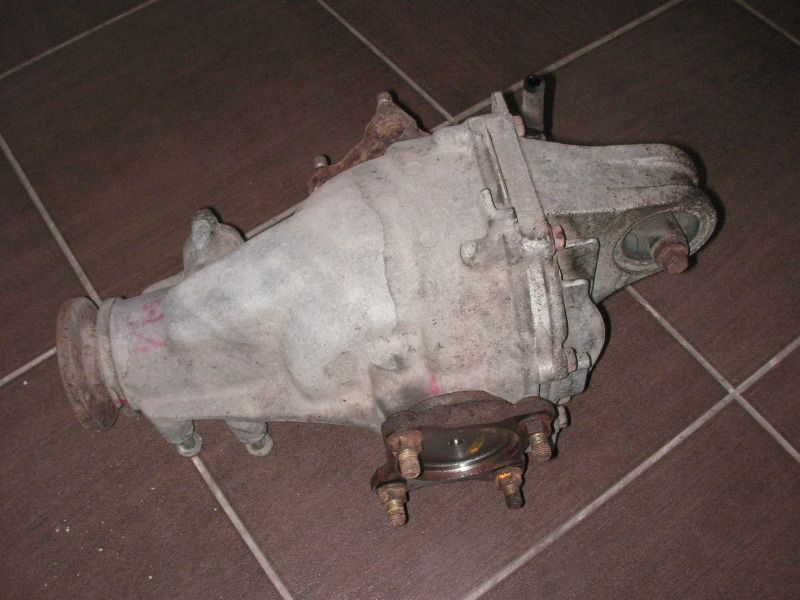
Finally got the rear subframe out today!! Thats a big believe me. Undone the Fuel filter once the frame had been moved out the way a little. Disconnected a hose that goes to the rear diff..
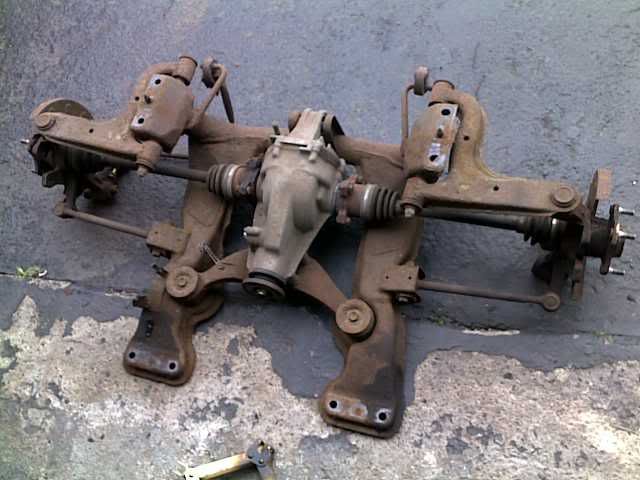
Is this a diff??? How can you tell?
Reply: 48
yea it can be tricky to remove the main drive shaft from the rear diff
i had to remove it a while ago to install some Suzuki sport diff bushes and a Suzuki sport lsd, which i installed with out removing the rear sub frame,
and was easy enough,
i just used the biggest screw driver that fit, to lock up the shaft at the joint and
removed the 4 bolts,with a ring spanner,careful not to damage that joint with the screw driver!
remember to mark the shaft how it attaches to the diff housing,you want it to go on as you took it off,as the shaft is balanced
and installing it random like, could cause it to unbalance, which will do in your bushes in no time,or worse,
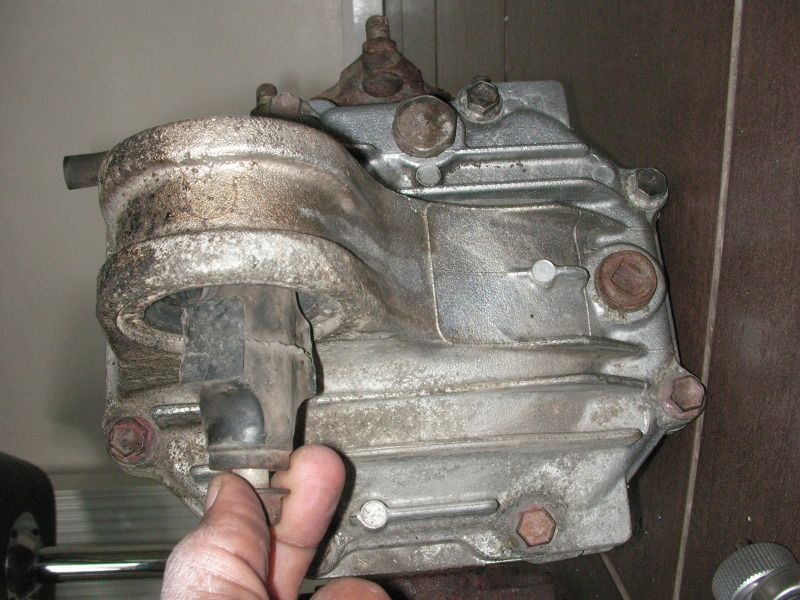
as for the diff,
you can see your diff housing in that pic, you wont be able to tell what
you have until you open the housing and look inside,
the diff housing is full of oil so drain it before you open it, there should be a square drive bung in the diff, you can use a 3/8" ratchet with no socket to open it, careful not to damage it!
then remove the rear cover on the diff housing
then if you have an lsd it should look like this,
[img][/img]
that's a Suzuki sport diff, but the cusco looks similar,
do not take the diff apart unless you have a replacement,
but opening it to check and replace the diff oil wouldn't hurt,
Reply: 49
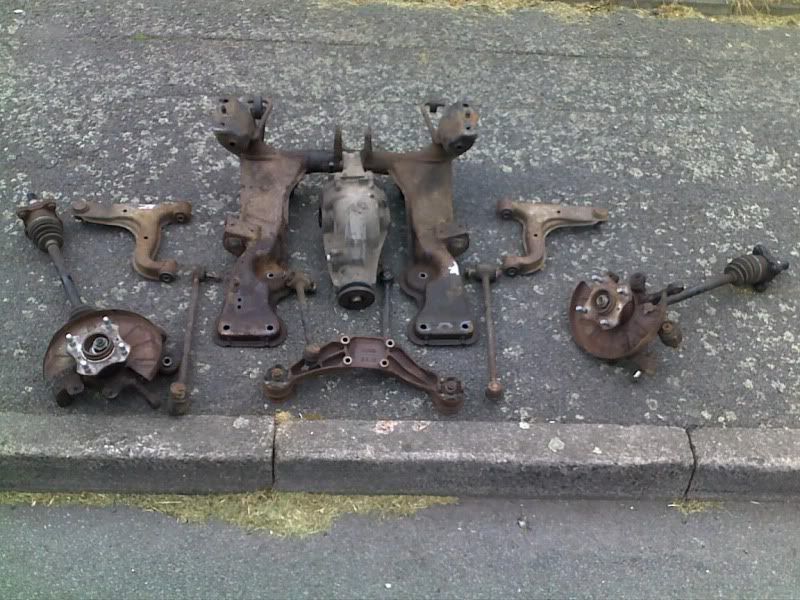
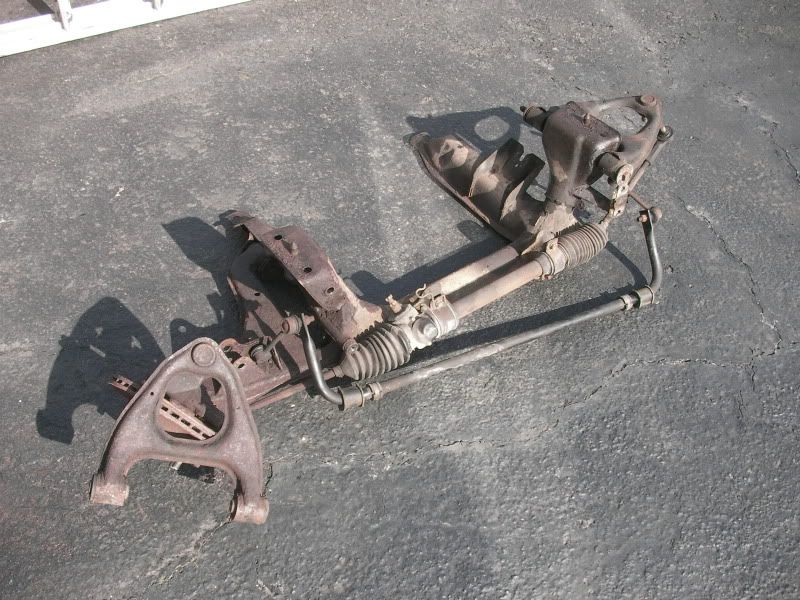
Undone most of the parts on the rear sub frame but some of the bolts are right buggers! ha
Just looking at local shot blasters/powder coaters etc.
Well here's a quick video and image of the rear subframe. After looking at the cost of the rear diff mount rubbers i was in shock!!!
http://www.cappuccinosport.com/section/store/action/product_view/id/2638/
I was like.....there goes my holiday this year!!! I can not believe how much they are!!!
Image of main.
??) :X :X :X(cry)(cry)(goodjob)(cry)
Reply: 50
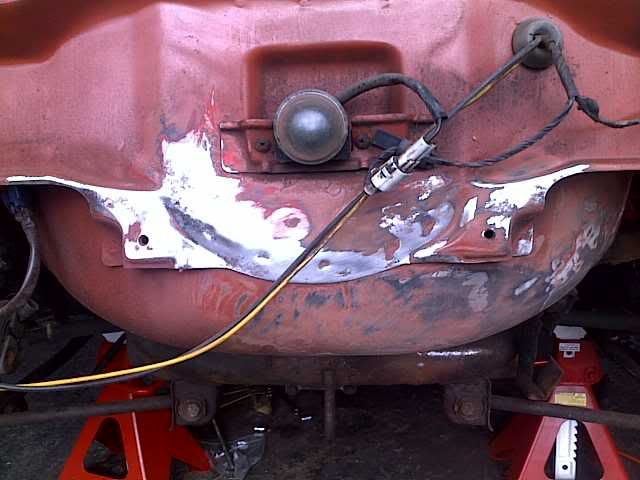
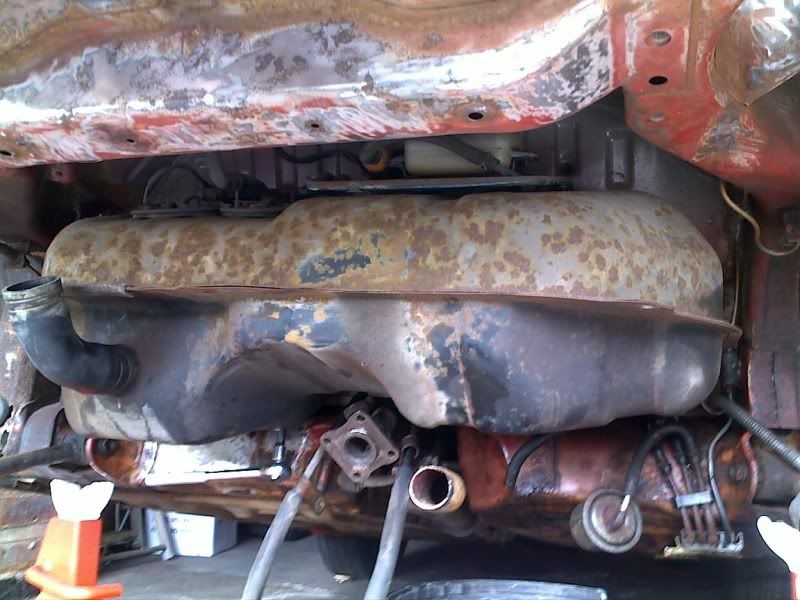
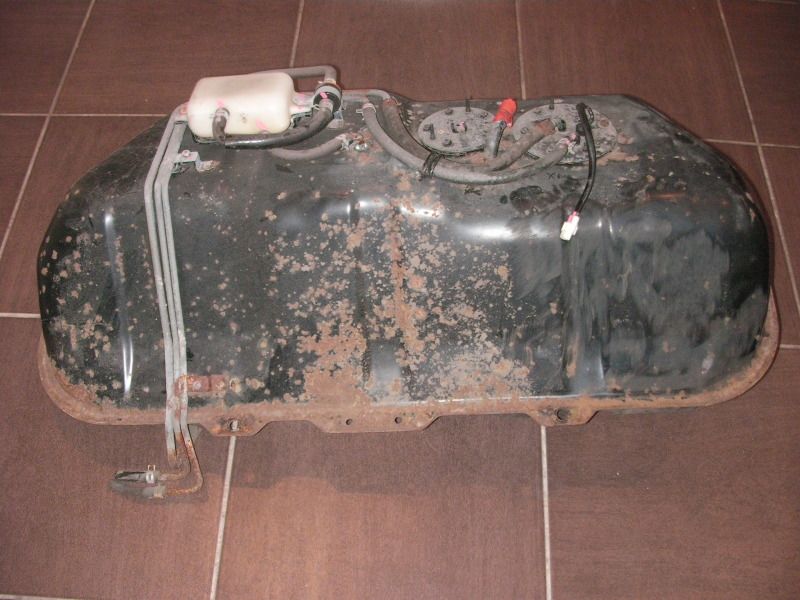
More progress, step by step. Today was a little frustrating when getting parts out. Especially the petrolo tank lol
managed to get it out. Only just. The rear bolts� that hold the brake lines are awkward and sit in front of the petrol tank bolts. For those that have done it before.
make sure u get as much petrol as you can out the tank. Believe me it can catch you out lol
Then fuel filter out and drained.
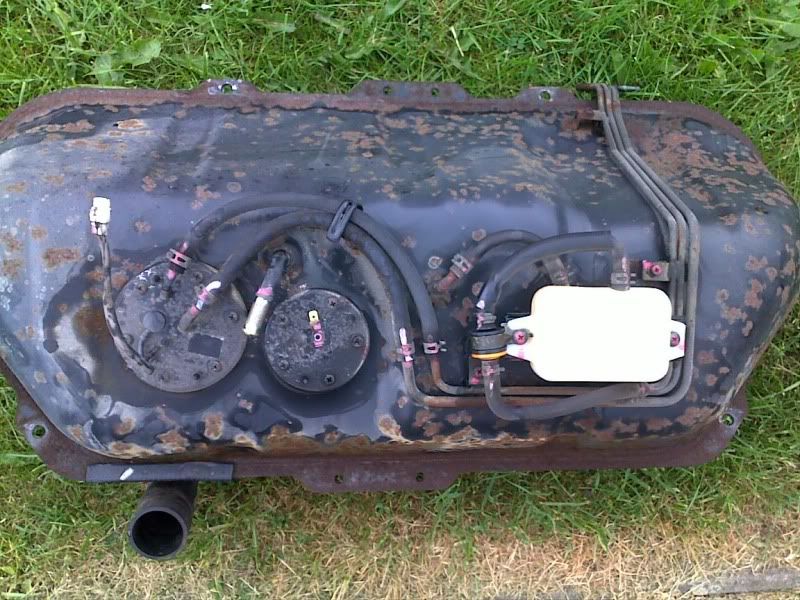
Fuel Tank!
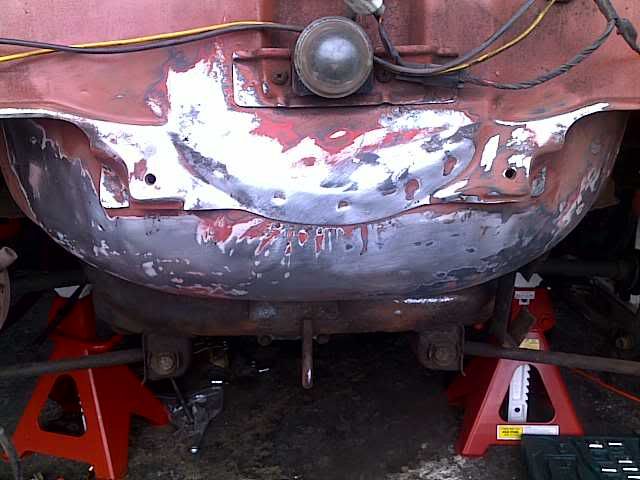
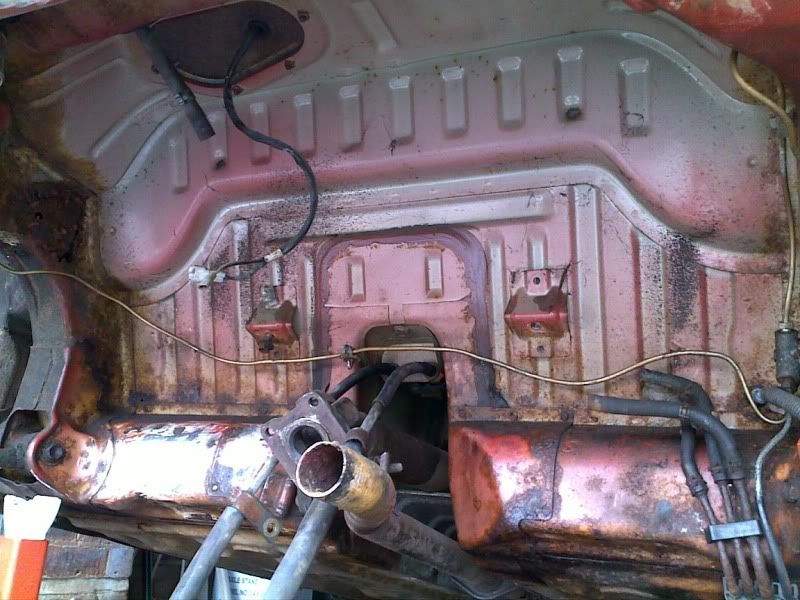
rear where tank was, one slight rust issue after the tank was removed, lol
and last subframe out ready to be shot blasted!


Reply: 51
Excellent work going on here....Are you planning on doing the body work repair your self or bringing in a body shop?
My "look faster" parts just arrived from Japan, I am considering the options for a restore, I can do the stripping and (hopefully) the re-building my self, but welding, painting etc no chance...
Have you had to buy any specialist tools so far??
Cheers
H
Reply: 52
With regards to the body. Well, if i had the money i would have it dipped! But thats like two grand over here! Thats silly money! But that would make the car last a lot longer lets face it.
So, I intend to do most the work myself at the moment. It's in a relative's garage so I work on the car when I can. Like today, after work from 3pm till 7pm. All I intend to do is scrape away as much surface rust as i can and prep most of the body panels. (Mainly front end and roof panels) New Quarter panels and sills anyway. I've had no special tools at all. What I would have bought is a mechanics power drill, with rachet end as it can take rusted bolts off with ease! (Dont know the name lol)
When i've done what I need too I'll get it to a garage and workshop! Re spray and and panels put on. Additional sand blasting underneath and sealing.
Reply: 53
A quick video of the process so far and how far i've got lol
Reply: 54
Met Paulo for the first time today and bought his panel off him.
and hey presto... 125 quid later its ready for the loft lol
Reply: 55
Not really updated for a while. AsSimply Red said"Money's too tight to mention" lol So things have been going slowly. Last few weeks Ive spent my time on Holiday in morocco and sorting my main car out when i got back.
I have found my powder coaters and sand blasters in Wolverhampton.
Been strippping the car for bits to powder coat like sub frames etc. Front subframe coming out end of next week and dash week after this.
I'm having the car sand blasted in the engine bay and underneath prior to welding.
for people doing the same. One Hint. freezer bags. lol Half the cappo is in freezer bags lol
One bag-few more lol
Told to remove any protective underseal prior to blasting...Before
After
Completed both sides of removal. My mechanic is helping me remove the engine. Dont have craine lol
Reply: 56
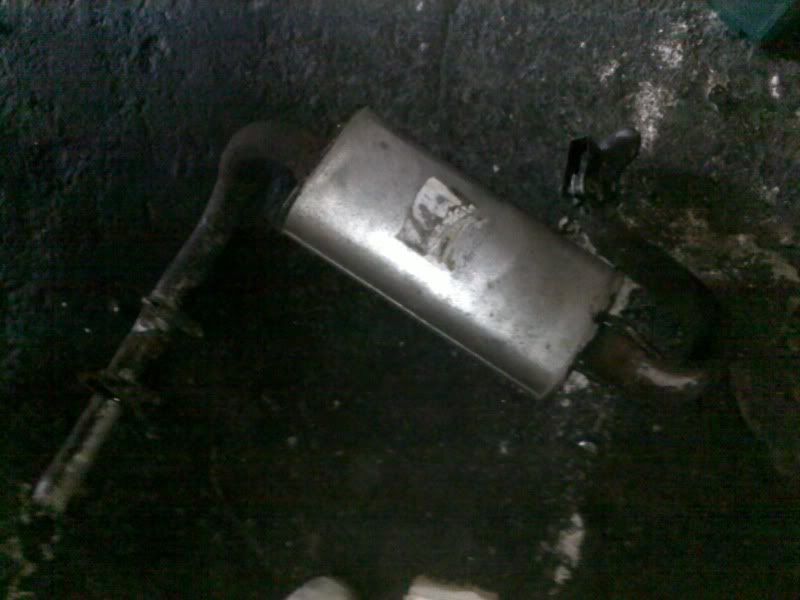
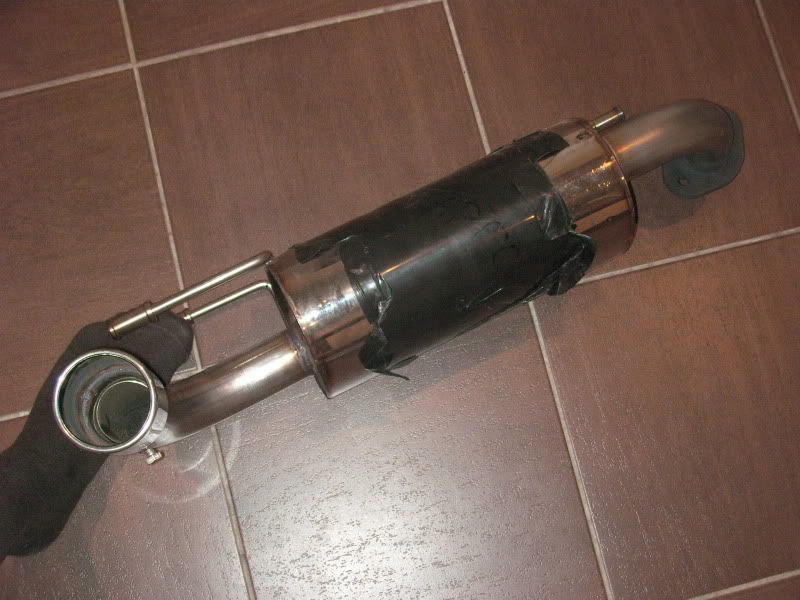
This made me laugh. guess what car this was meant to be for? Made me laugh when I pulled it off lol
Reply: 57
Is the sticker to cover up a hole in the muffler? :)
Reply: 58
Capgun ur funny lol NO!
its off a Peugeot 206 though.
Reply: 59
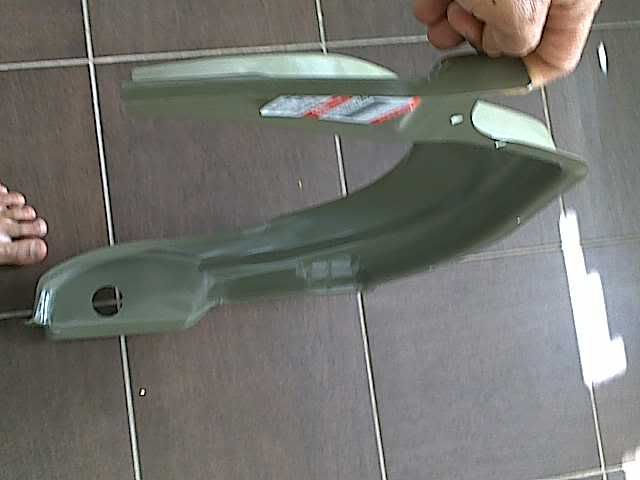
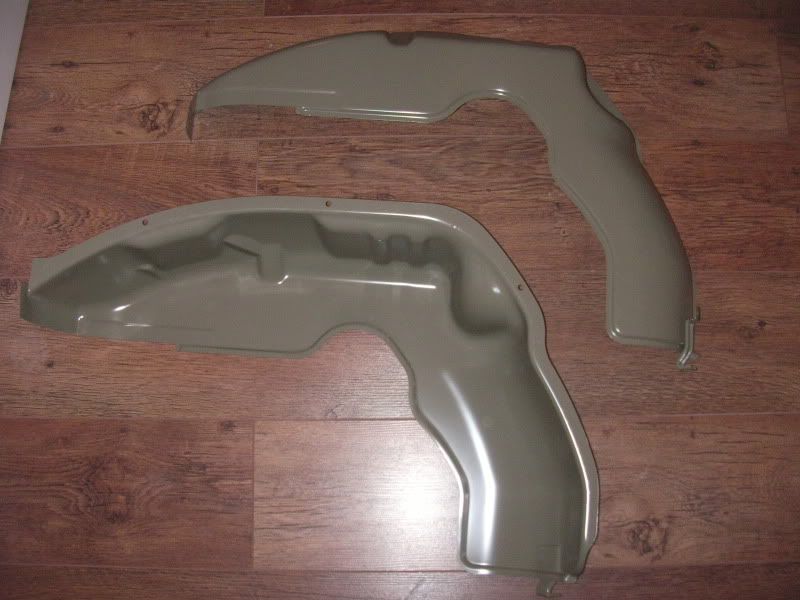
So the build continues to progress with new parts from Cappuccino Sport. They arrived saturday after a long wait. I'm so happy they're finally here. Here you go.
this is them joined together. The next pieces to the puzzle is to order the inner arches which also connect to this section. Once the final two pieces are ordered that the rear end sorted. Then me cappo will have a nice back end lol
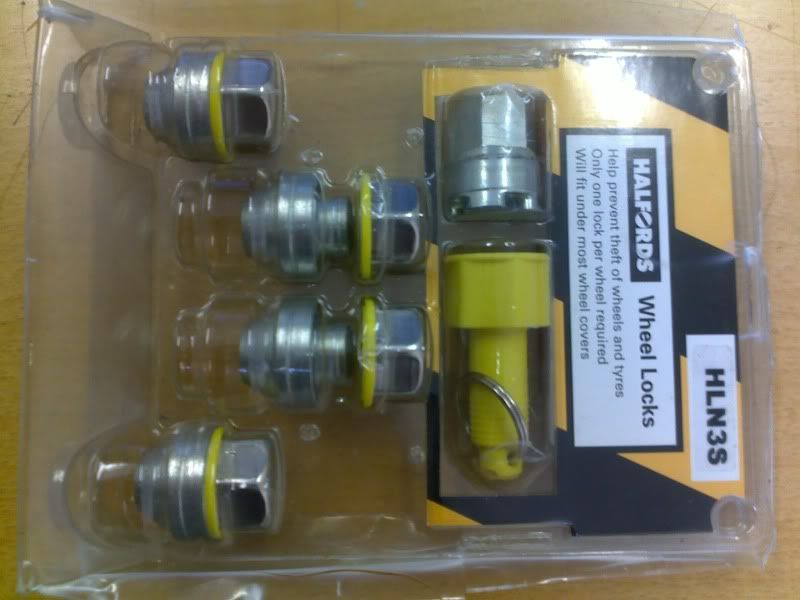
also got these guys. Anybody come across these lil bad boys!! lol Got em off ebay but havent manged to try them yet lol. They should fit.
Reply: 60
as requested.. i dont really know what colors u have in mind but i guess dark red = maroon? and this is as close as i can get to bronze.. hope this helps
Reply: 61
Yes Soongster. Thanks for the post above. Gives me a lil idea of what I'm aiming for mate. Thanks.
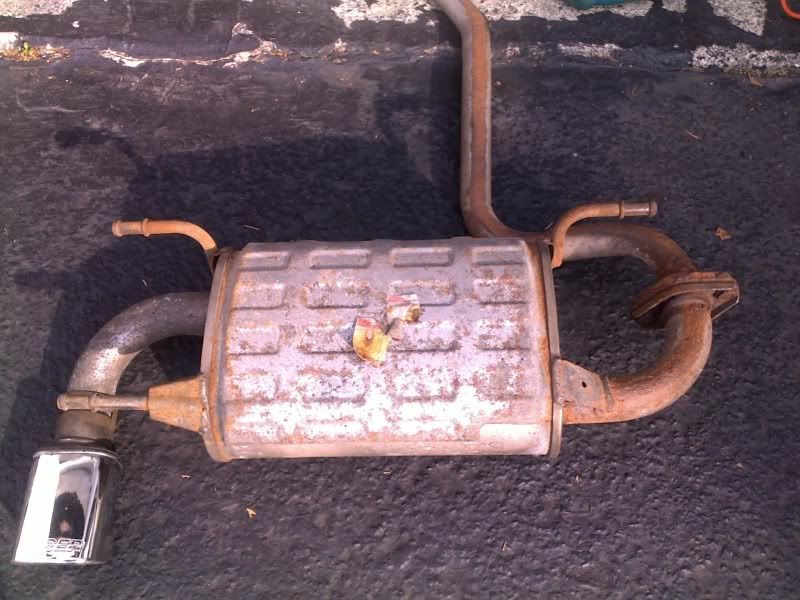
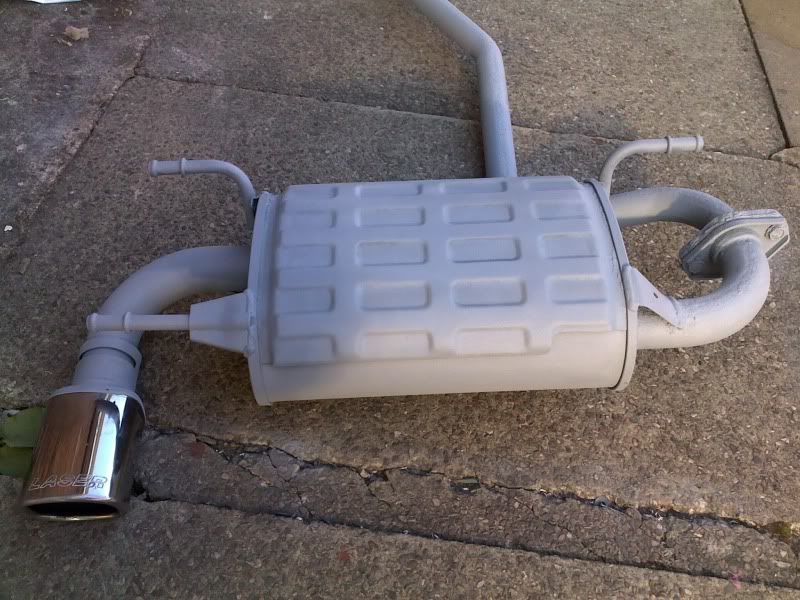
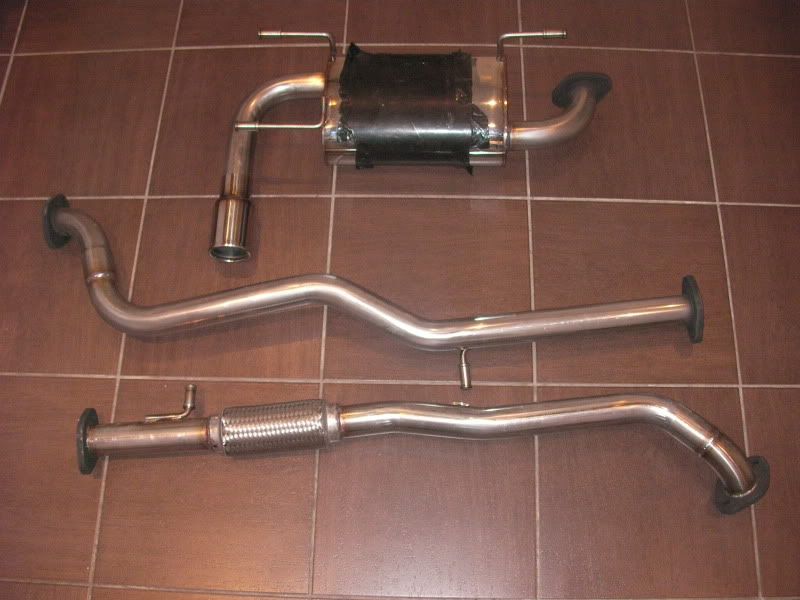
I bought this from michael from the FOR SALE section. Got it for 30 quid on the way my visit to manchester. It's a laser exhaust too. Cleaned it up a little and removed only minor rust. Only bad part about the exhaust is the middle (at the joint) section to the back box. The rest of the exhaust should be good for over 12 months at least! Not a bad lil buy.
anybody ever tidied up an exhaust? using paints etc????

Reply: 62
Just updating my thread as Ive got noithing better to do. The cappo is my only car now after my other baby was written off. My insurance dont wanna pay out. thats a whole other story!
Here's the rear under arches
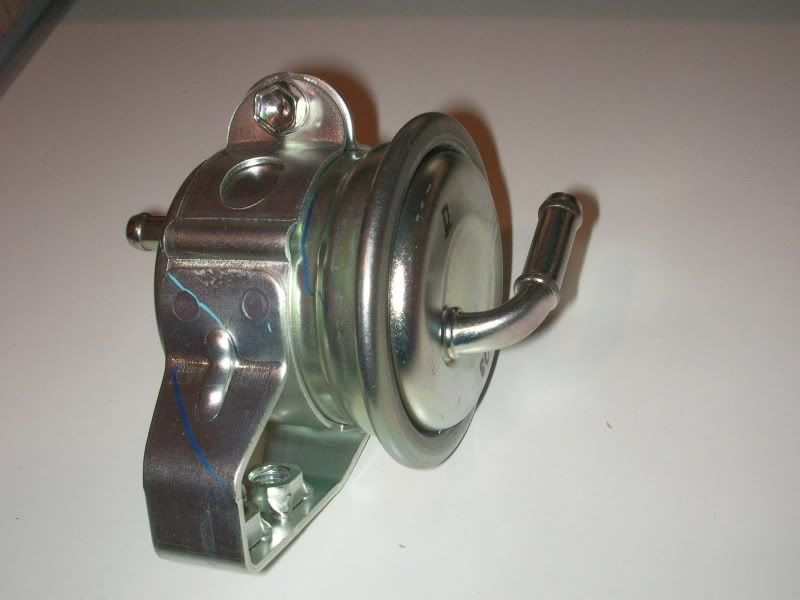
and the genuine filter.. bloody expensive if u ask me lol
got some pics of the exhaust painted lol.. i'll put that up at some point. But thats most of the panels sorted and thats a sigh of relief!
Reply: 63
Good to see you are finally getting it together..........How long before you get those panels on the car ...???
Reply: 64
personally mate I'm not sure. Glad to get the panels. I'm having a personal nightmare ha ha
Ismashed my main car up three weeks ago and now my insurance is playing silly buggers! I am officially broke lol Money is tighter than ever.. but there's always room for the cappo restoration..
Prob at this rate july next year mate!
Reply: 65
Sorry to hear that mate, insurance are quick to take your Hard Earned, but a Bastad to give any back, at least they're ALL consistant on Both sides of the Pond...lol Think Cappi thoughts.......
Reply: 66
Well i thought i'd give an update.
No pics though. As yet. Well I've not completed a lot on the car at the moment. Just havent had the time or the money really to do much. After writing off my car Ive not been mobile at all! ha ha So getting to the cappo is a lil harder.
The parts list is building up though. Thanks to Dany at Cappuccino sport for getting my bits.
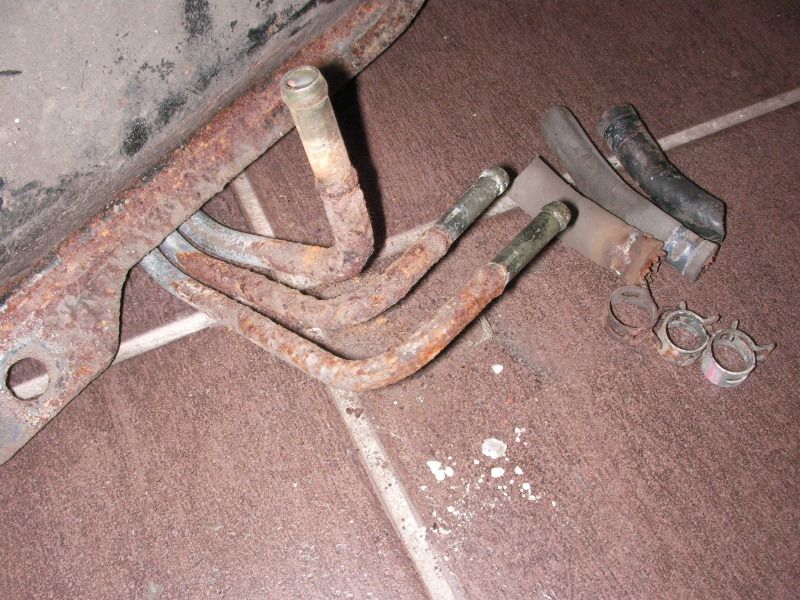
Pipe fuel �28.54 GBP
1 Fuel Return Pipe �23.09 GBP
2 Clamp, fuel pipe �4.54 GBP
1 Fuel Pipe Clamp �1.46 GBP
4 Clamp, fuel pipe �9.76 GBP
1 Fuel Pipe Clamp �1.46 GBP
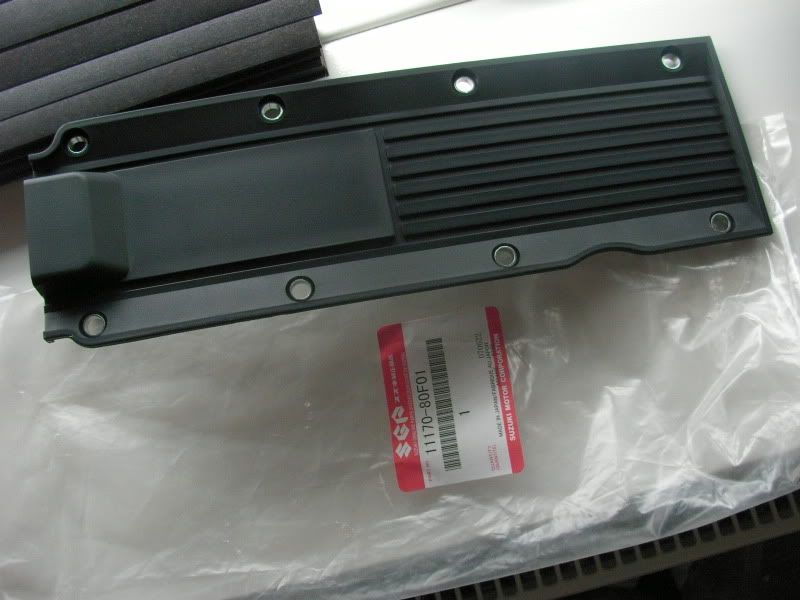
1 Fuel Pipe Cover �15.81 GBP
1 Fuel Pipe Cover �11.24 GBP
1 Fuel Pipe Cover �15.81 GBP
2 Rear Brake Dust Cover �34.14 GBP
1 Rear lamp panel RH �48.94 GBP
1 Stay, front bumper lower
There's no more body panels to buy now. just metal sheet for welding ha ha
It's more things off the list ha ha
Need to shot blast and powder all suspension
Buy suspension bush kis
New wheels
Welding
Re spray
Reply: 67
While you've got the panels off. . .�� what are the chances you could weigh them???� please??� (yes, I am slightly obsessed with the weight of a Cappuccino)
Reply: 68
all the new panels you mean??
sils, arches and quarters???
Reply: 69
If you could? It would be much appreciated.
Reply: 70
No worries..
Reply: 71
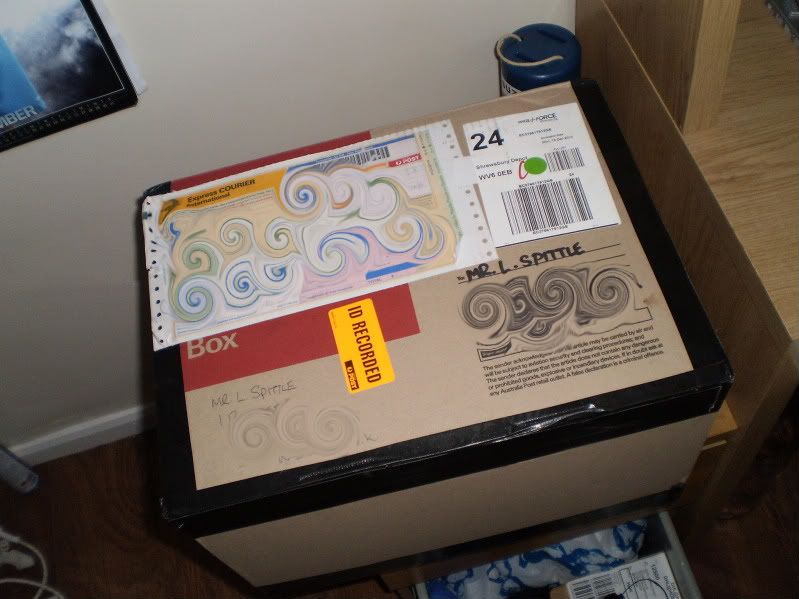
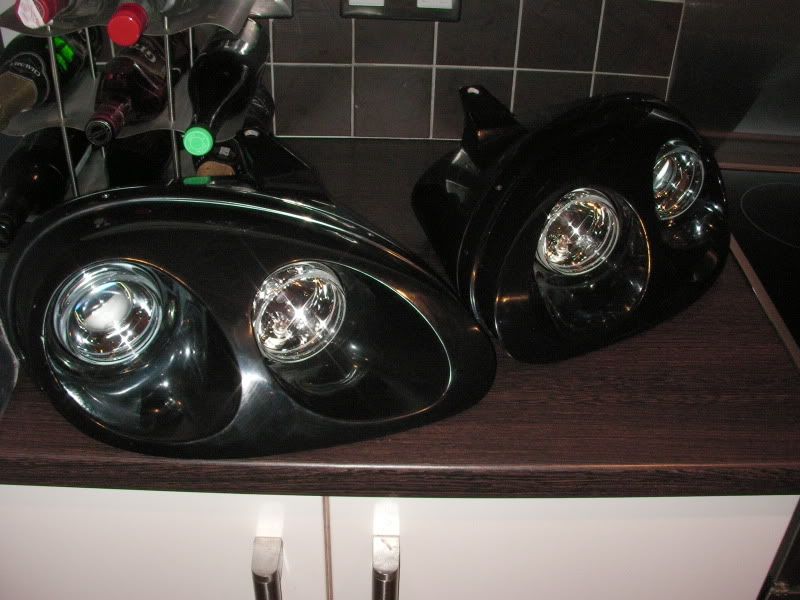
Well santa came to see me Christmas eve lol
he bought me these bad boys from Santa's little helper, Sneaza! ha ha
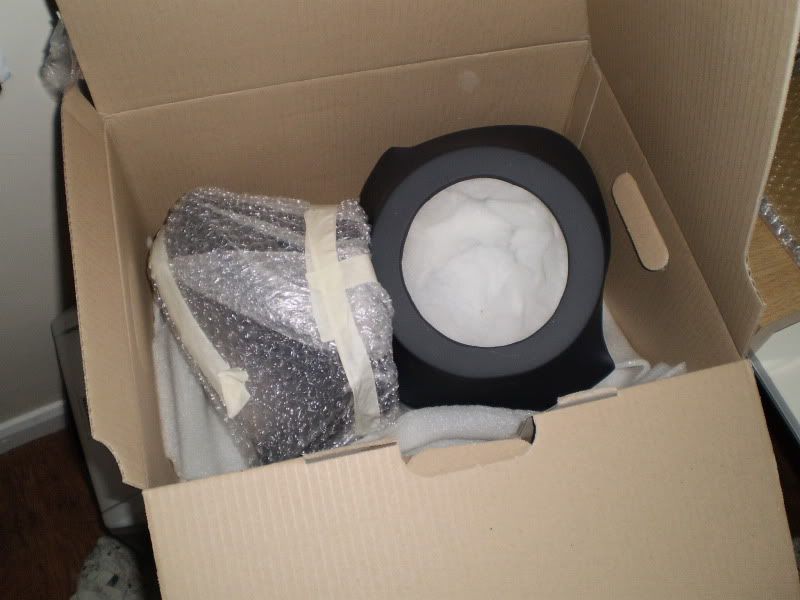
Couldnt wait to open the box!!!
and there they were! Ready and good to go!!! Thanks Sneaza. The guy should be on the Top Gear wall. Under Uber cool.
single close up.
Reply: 72
Just some more bits I thought i'd add. As I can now upload some more pictures. Lost my memory card reader lol
Break dust covers- New front and back now
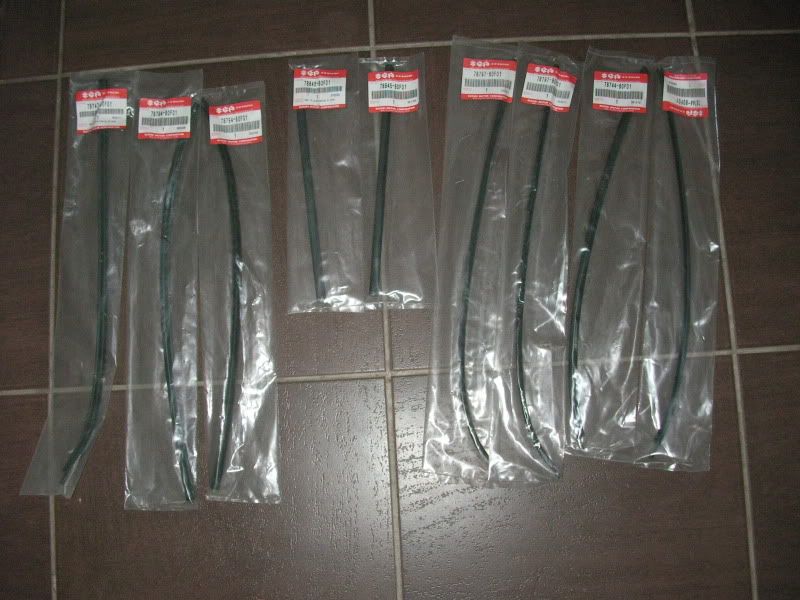
Got my fuel lines sorted.
Got me a new Panel from Cappo sport Looks like a good fit lol. I have taken the paint away from the seams so its easier to see and when it comes to taking the panel off its easier. Inside and out.

Reply: 73
Looking good, nice progress there.
Reply: 74
wouldn't really call it progress to date lol...i suppose it is in away
just saving for the bits!! lol
Reply: 75
(thumb)
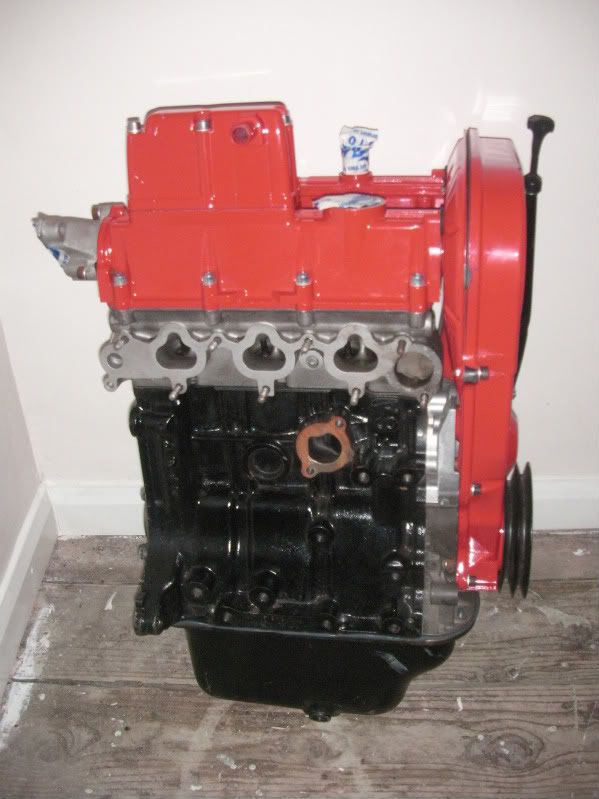
You should be able to match the gaskets up pretty easily to the bare engine. Looks a pretty comprehensive set to me though although perhaps one or two missing.
Perhaps James at Fairfax can give you all the details of what's been done if you let him have the engine number.
Reply: 76
I think this is an engine Cappuccino sport sold on ebay a while ago (3 - 4 years? The same time they we selling the Hayabusa shell)
If it is, it's what Cappuccino Sport call 'stage three', which the ebay ad at the time claimed 160bhp. (without specifying you'd need turbo, injectors, ECU, intercooler, exhaust manifold, decat pipe and a new exhaust system).
But before you get carried away cantact Cappuccion Sport / Fairfax!
Reply: 77
It will be a used engine that has been worked on so that it is as new. It certainly hasn't been run since being done by the look of it.� So it's both new and used I suppose...
Reply: 78
That engine was on ebay a month ago..
http://cgi.ebay.nl/ws/eBayISAPI.dll?ViewItem&item=250741970409
It said it's supposed to rev up to 10.000 in the ad description. I asked the seller about it and he didn't seem to know much about the engine. Only that he bought it at 2200,- a few years back.
Reply: 79
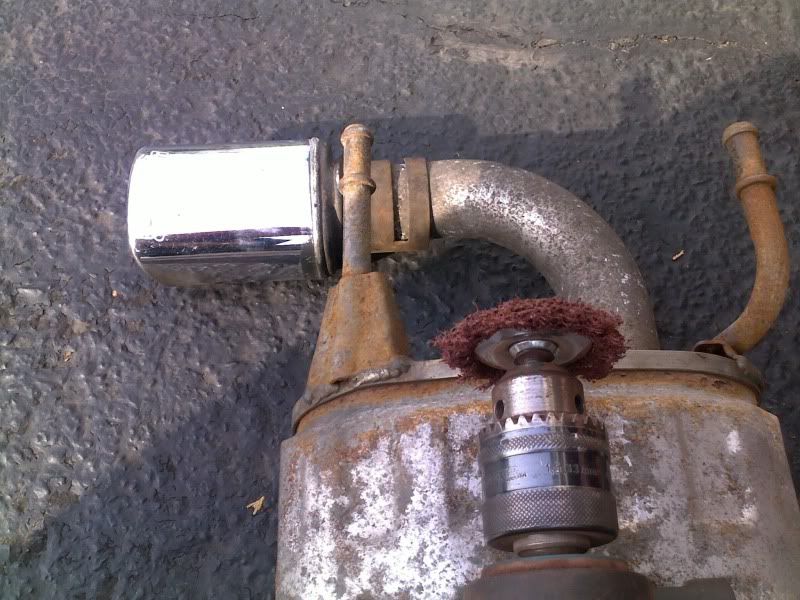
Just a quick update as I couldnt find the pictures before. Three's a picture of my exhaust in the middle of the page before I cleaned it up.
All I did was use the brush on the end of my drill bit to clean the exhaust up. Worked well I think but not sure about the colour. Maybe should've gone with the black. Anybody ever done this to theirs???
Laser exhaust before
After prep and spray.
I've also been starting to prep the car for removal of the panels/ Never done this before so it's all trial and error at this point. It cant do any hard as im replacing the panels anyway. I suppose it will save me money when it comes to the prep!
Under arches
Very slow but as soon as the weather heats up i'm on it!!

Reply: 80
Lord,
Nice job of cleaning up the back box. That's a standard exhaust with a branded trim welded on though.
Where are you going to get the shell blasted?
Reply: 81
Found a place near me in wolverhampton.
theyre doing all my subframes too.
Reply: 82
Quick Post.
Just� a quick update s to what I've been doing on my cappo to date.
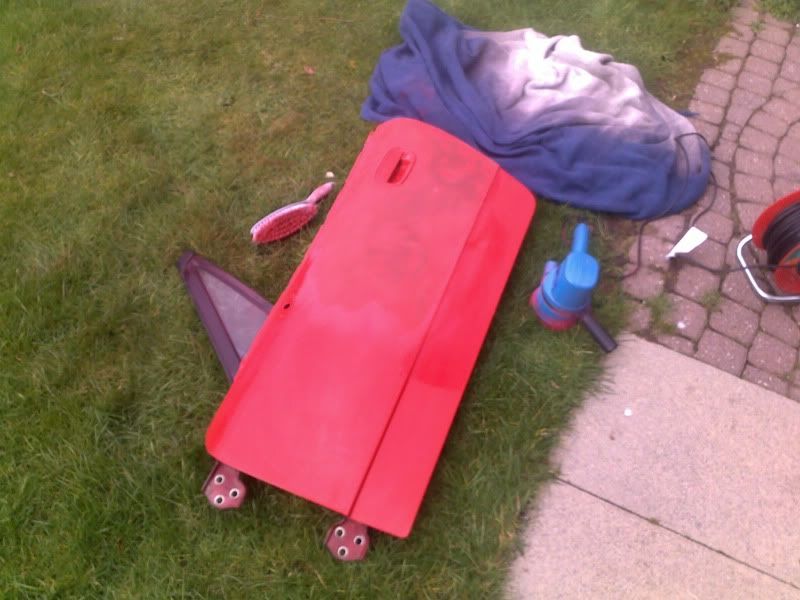
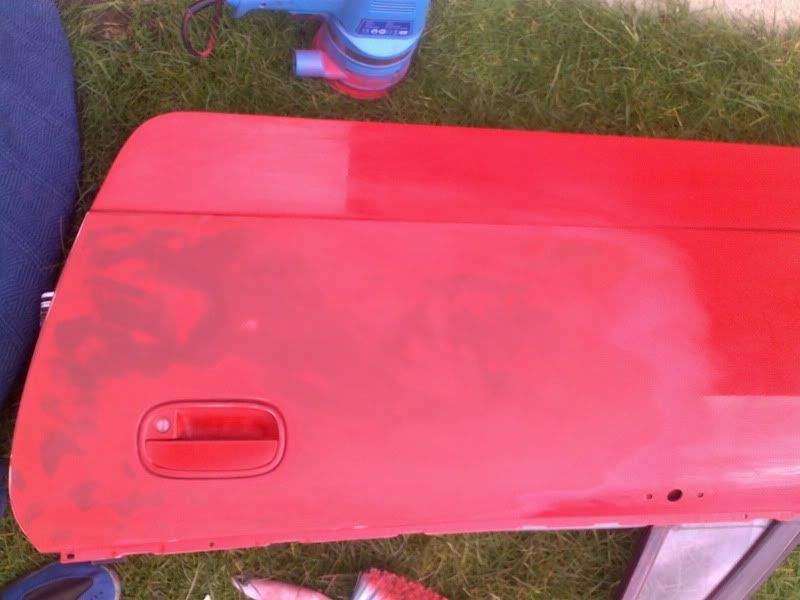
Taken time to start prepping panels now and starting to learn myself lol
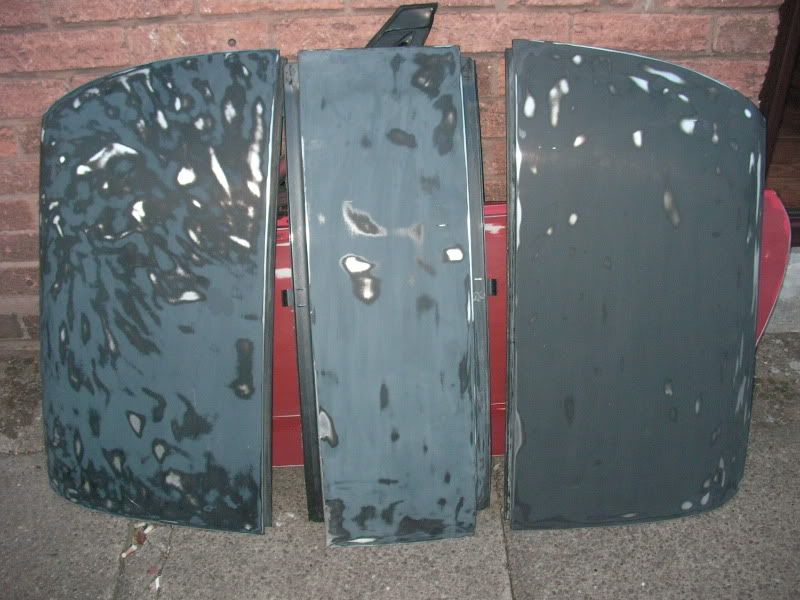
Started with the roof. Then i sanded the door. Doesn't look that bad Feels better lol
Roof panels
Door
I just think you need patients and the right tools when prepping.
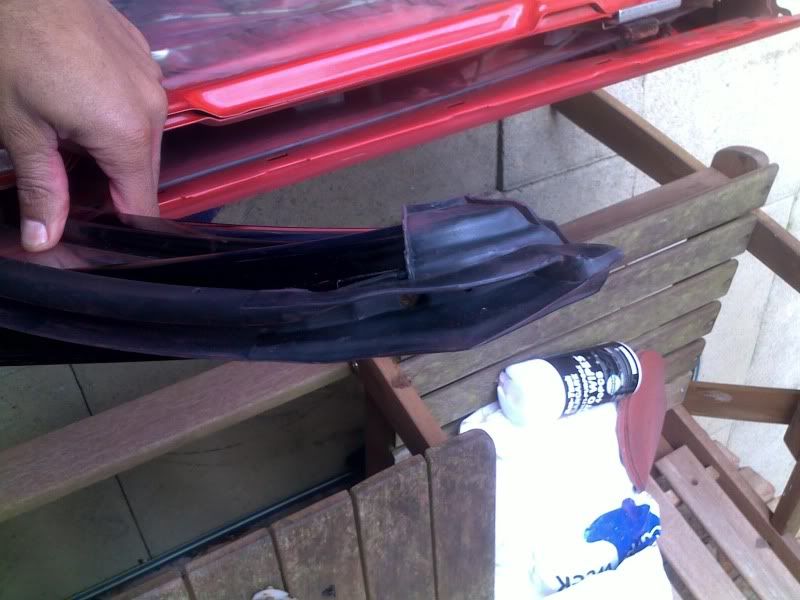
anybody know how to undue this by the top??


Reply: 83
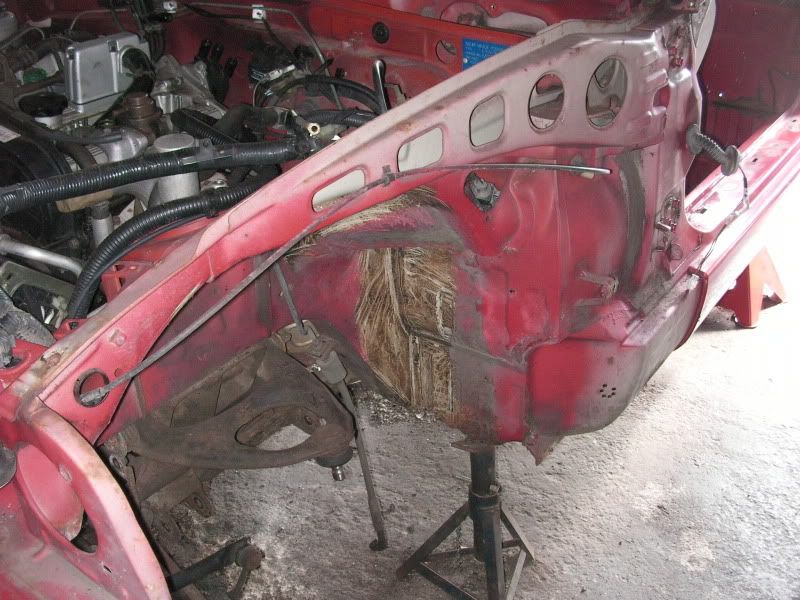
taking out the engine Friday Hopefully.
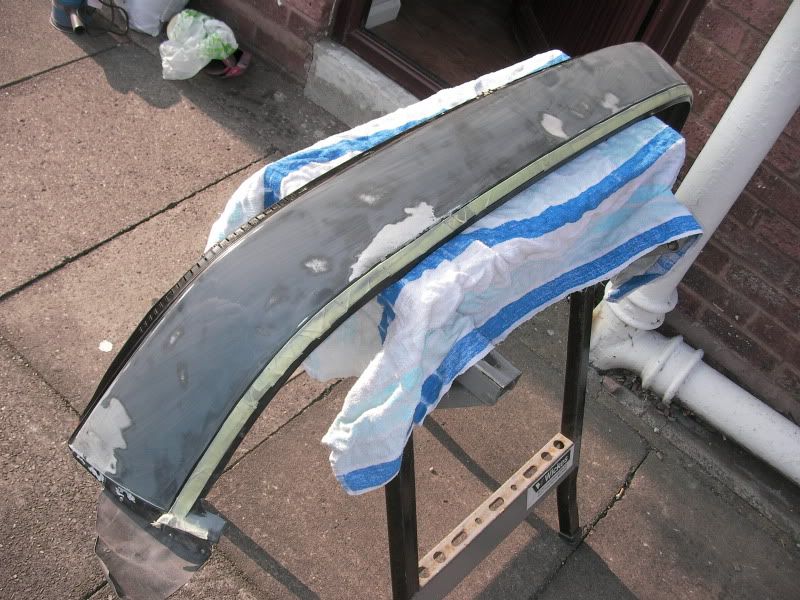
Just took a photo of the wing that I could not get off!!! ha ha
I had the roof panel off and had began sanding it down. Came out well.
Reply: 84
ohhhhhhh well done I am looking forward to watching you progress Lord. what colour are you going, keep up the great work it is sooooooooooooooooooooooo worth it :)
Reply: 85
I was looking at a metallic red for the bod but light, and a DARRK... metallic red for the hood and wheels but still not sure ha ha
Reply: 86
Sounds smart, cant wait to see it come along :) I love metallic paint it really lifts a car
Reply: 87
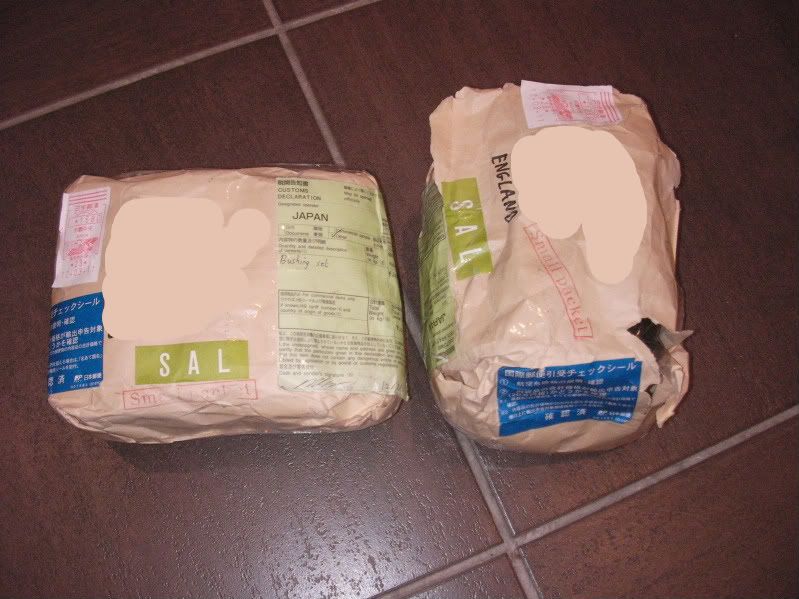
Firstly had some Good news. My mate Sold dave came up with the goodies from Japan.
Came in two packages!!
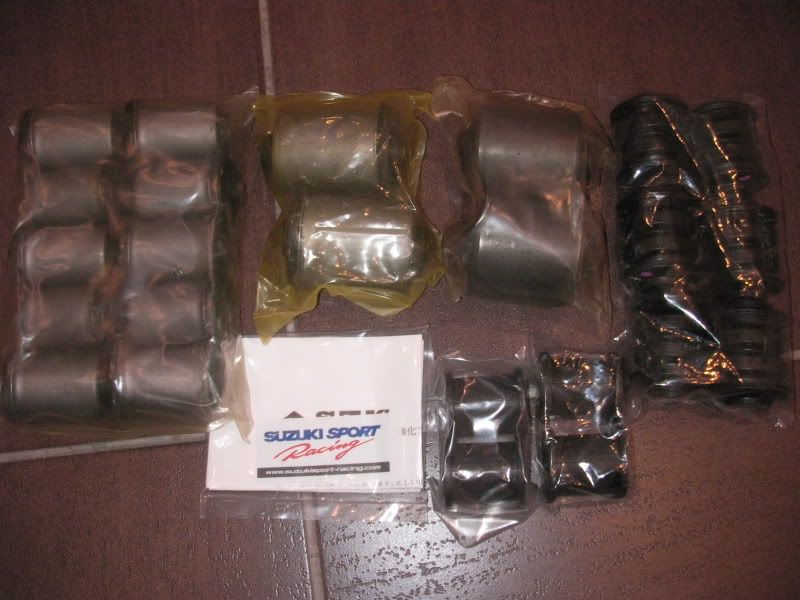
Anybody any experience of removing the bushes from sub frame???? and replacing?
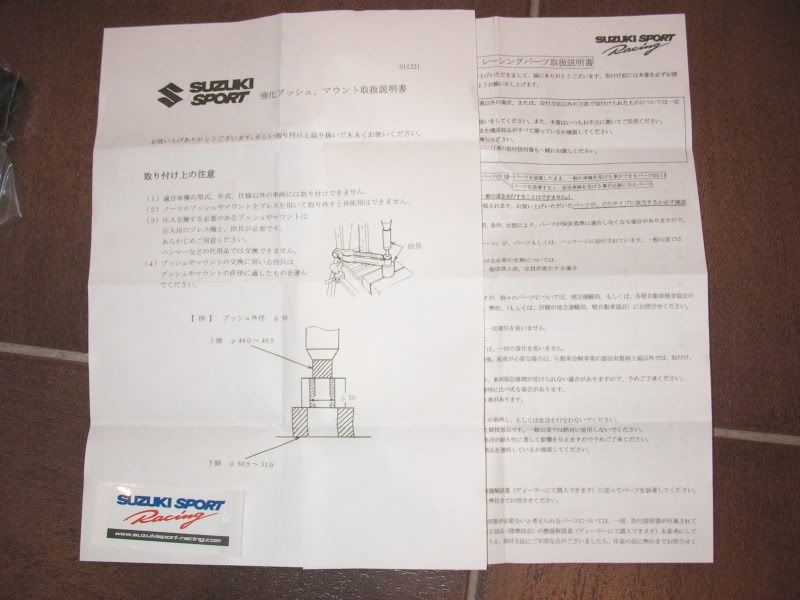
The instructions are in Japanese and the bushes are colour coded?
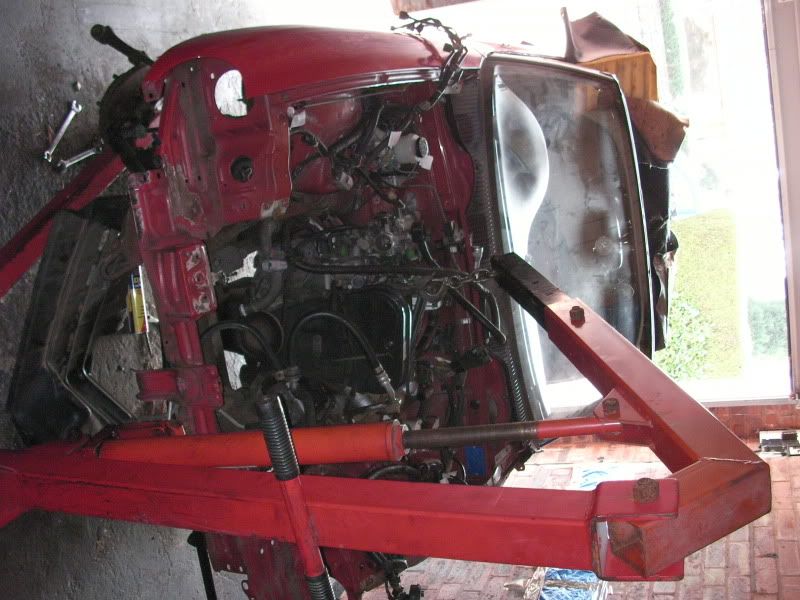
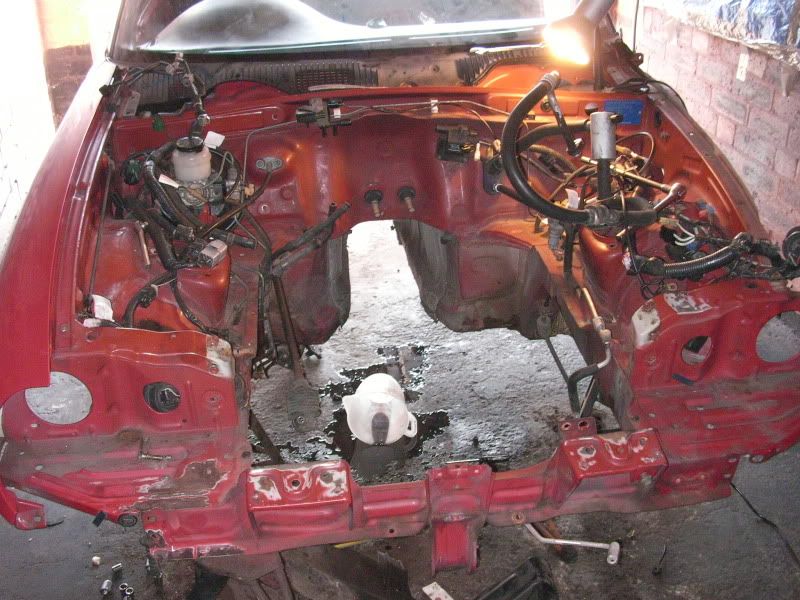
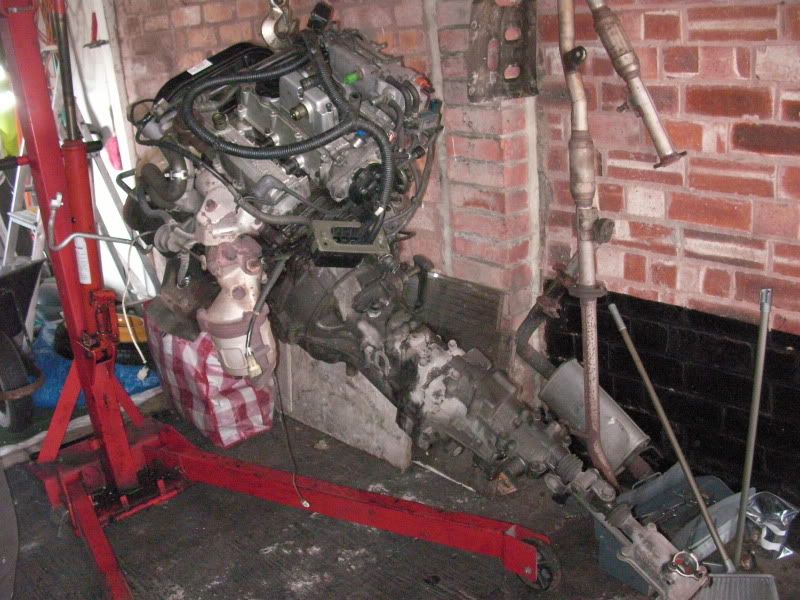
Right. Day off today and worked on the car. Picked up my mate AJ and we began to work on the carin the morning. Today was a sign of progress believe me!! The main aim of today was to undu the engine mount, gearbox and all other wiring linked to the engine.
Engine bay
Cappo engine out.
Today is the start of the final stripping for the engine bay to be painted i suppose. Just gonna have a good look at the engine. Make sure all is well.
Reply: 88
Hey Lord,
When you think you be fitting those bushes :)?
Any chance i could get your old bushes when they are out ?
Thanks
Ming
Reply: 89
why u want old bushes???
Reply: 90
Am going to ask to get a set of poly bushes made up.
Reply: 91
Just� a quick update really. Stripped some parts off the engine today. Was just working on the car briefly to see what I need to do next.
Ended up sanding the front bumper for 2 hours and it's come out ok so far. Still want to sell but no takers as yet.
Got the rear subframe in my car and off to have the bushes removed etc. Any tips on front subframe?? In terms of removing bushes? Any does or dont?
need a few other things like boot seals etc
Reply: 92
Well. Just a quick update. need to get a bit of consistency now the weather is getting better. Ive had all the subframes out now and looking to get them either shot blasted or sandblasted over the next few weeks. Just need to order new boots for front and back subframes.
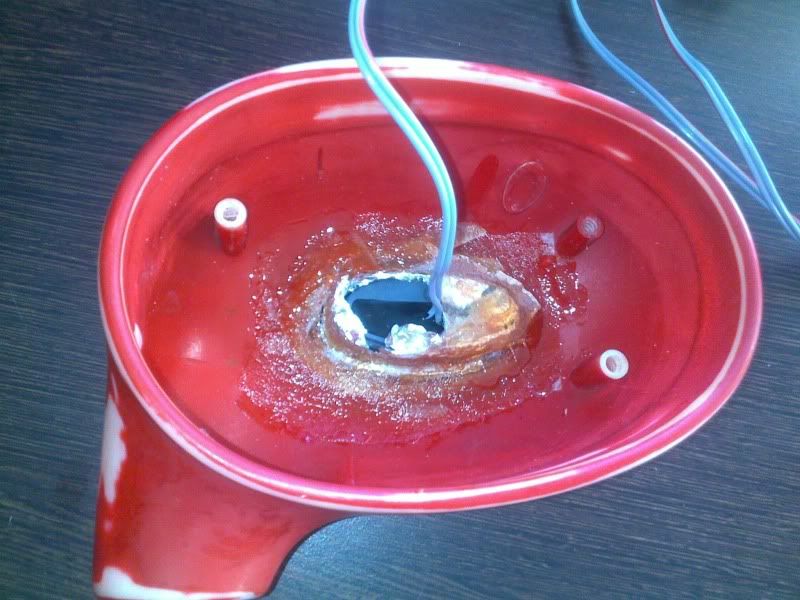
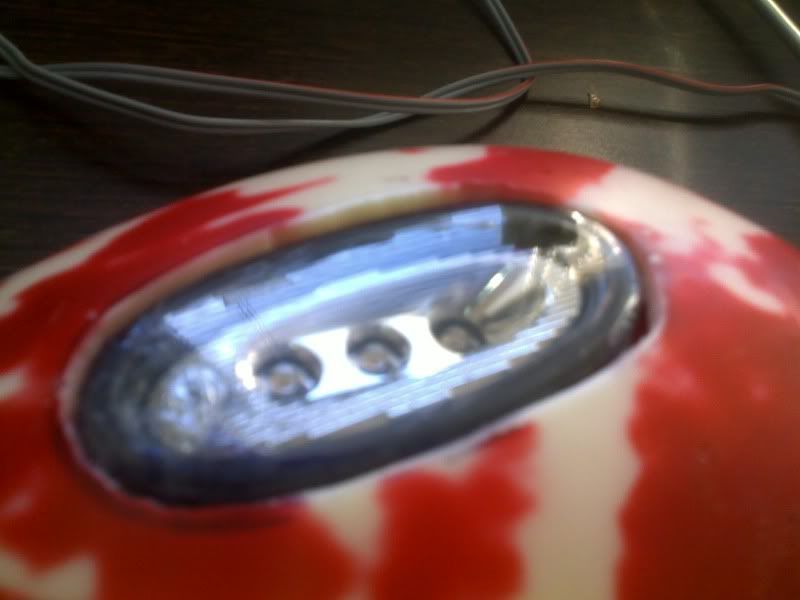
Thought I'd catch up on my wing mirror challenge. (Sneaza have a look at this lol)
So i cut the holes out I needed to do and started with the fibreglassing. The whole Idea was to get the LED indicators flush inside the mirrors. getting there slowly. Here's a few pics of the progress. I want them finished by the weekend ready to be painted!
Inside the Mirror.
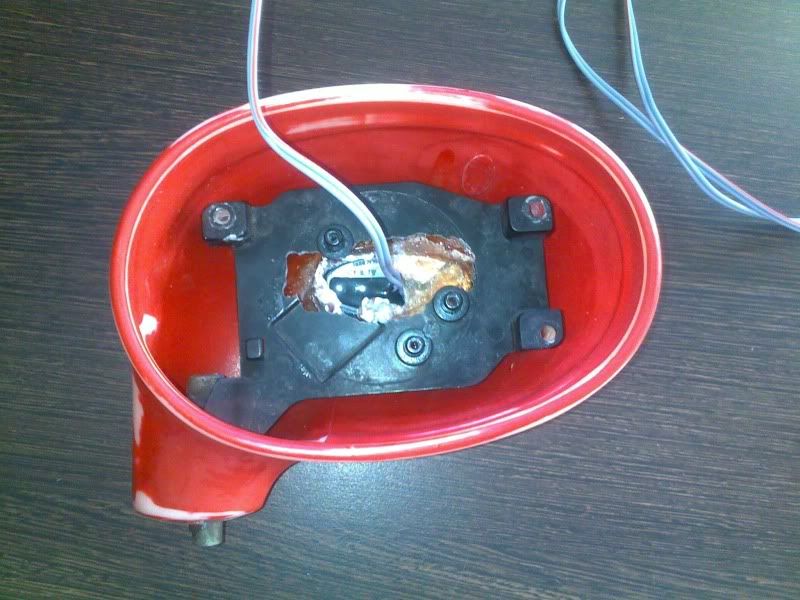
Inside with the bracket on
Reply: 93
Looking good Lord.....
Reply: 94
THAKS OH GREAT MASTER OF FIBRE! LOL
LOOK IN THE LAST PHOTO? SEE THE GAP WHERE IVE CUT THE TEMPLATE OUT? THERE'S A SLIGHT GAP NOW BETWEEN THE MIRROR AND THE LIGHT. WOULD U USE THE BODY FILLER OR THE GLUE FOR THE FG?
Reply: 95
Would mask off the Light using Gaffa Tape....because it's thicker than Masking tape and won't rub through when Sanding.
Then would use 'Fibreglass Body Filler' (because it will bond better) and smear across the whole thing pushing into the gap, taking care not to much pressure on the lens, as the Filler starts to harden, with a Stanley knife blade, score the edge of the Lens, this will allow you to sand the area and when you remove the tape, it should break away easily to give you a clean edge.
When dry Sand off smooth...........Then remove the Tape from the Lens
Reply: 96
Now why didnt I think of that!!! ha ha To the shops then!
Reply: 97
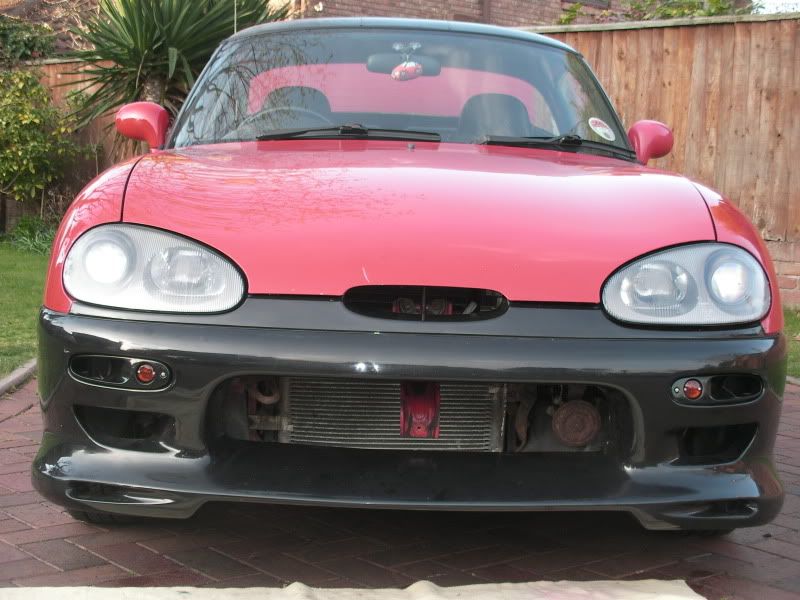
I've decided then.
I'm not going to go all out and PIMP the caps to something it isnt, massive wheels and big bumpers. I just want to make it look nice and standard, feel smooth like it came out of the factory, have a nice new interior and sound system!
Removed old BIG spoiler....
Replaced front bumper with standard....
No mad colour schemes....just a rover 75 dark red... and standard roof colour/ wheels same colour.
just a pointer of the direction mines going! lol
Reply: 98
Hows the body coming on?.
Reply: 99
Well Ive not been to the gym in ages!!!!
Reply: 100
If you've not been to the gym the cappo must be nearly finished then :P
Reply: 101
Well I just thought i'd update my page as I've been looking at everybody elses!!
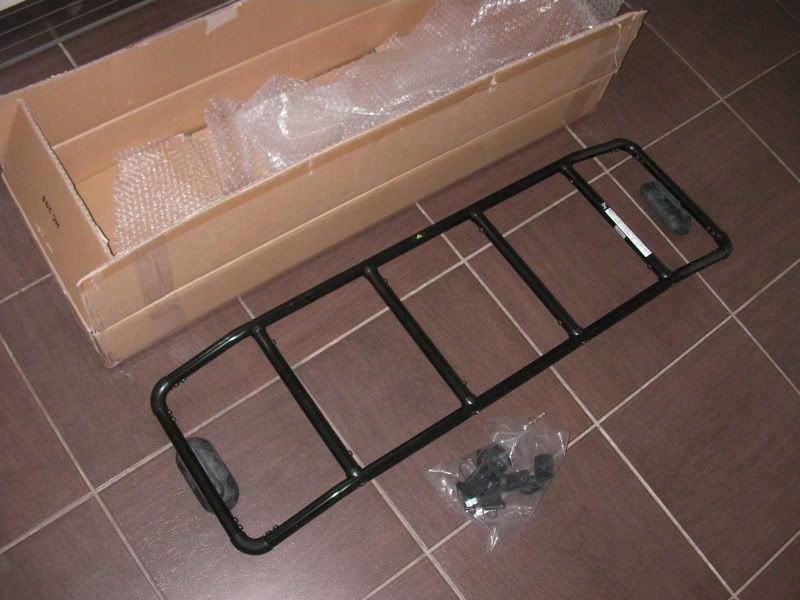
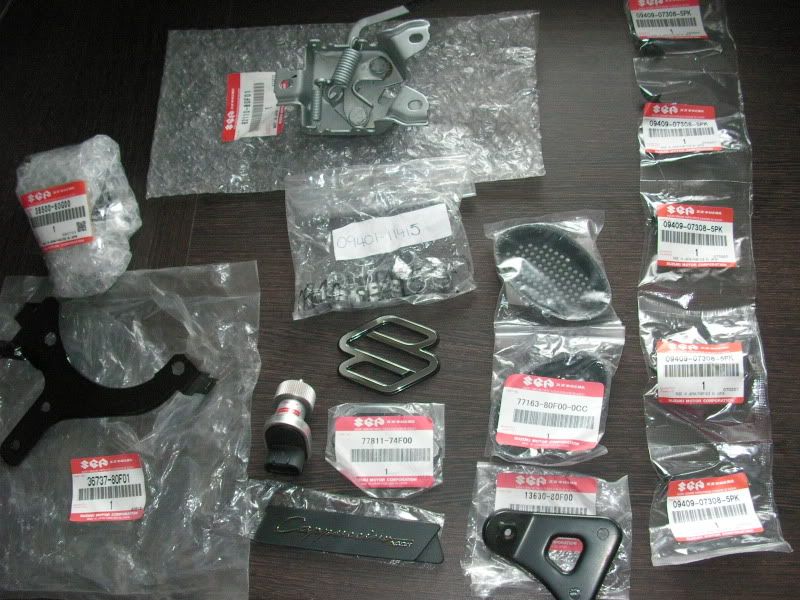
Just bought a few bits really. Just thought i'd share with you guys what I have bought now.
First is the boot rack. Thought i'd buy this as I'm looking to do a bit of touring in the future!
This is probably my second modification lol I bought this as I love the design! It's just a simple design too. Should help studry up the front end too.
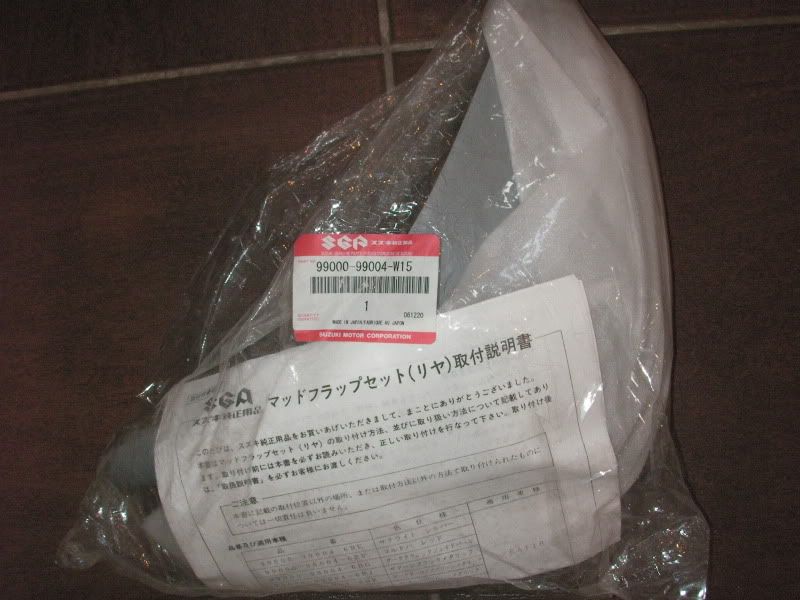
Ive got a set of rear mudguards.
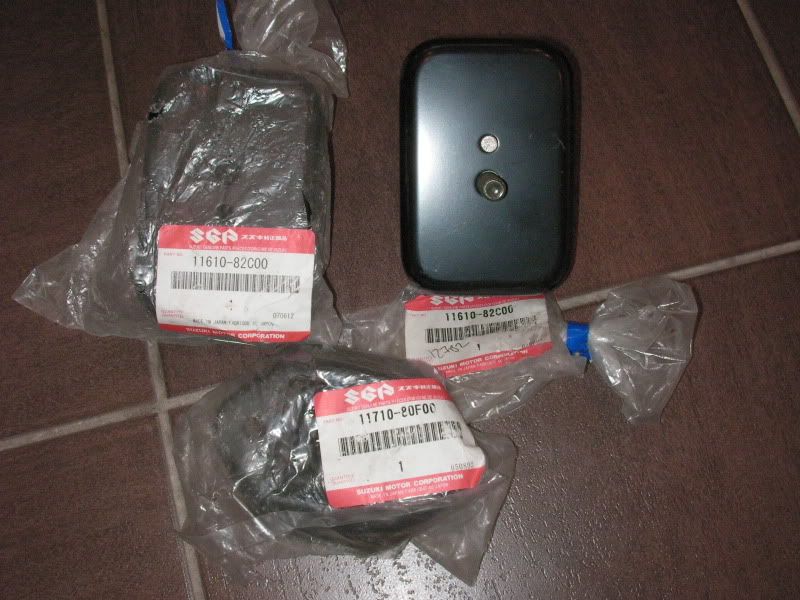
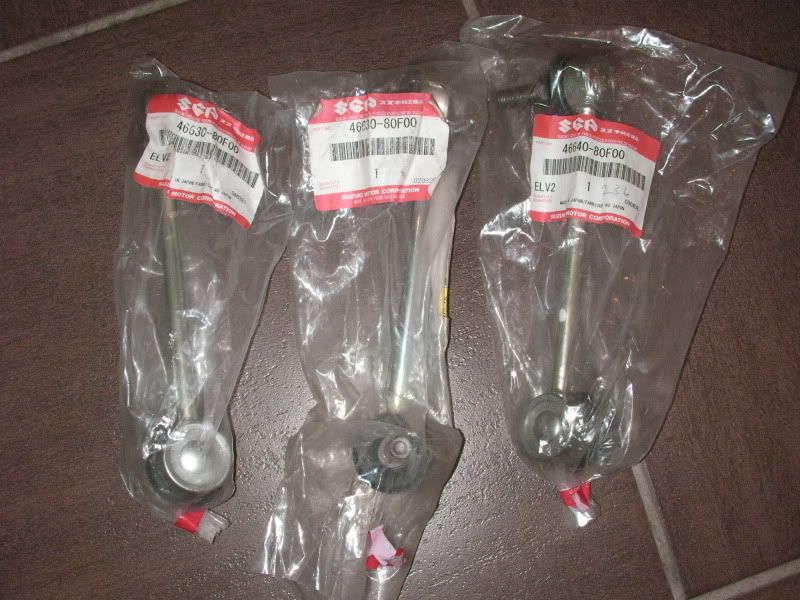
All my engine mounts! should be three of them!
Like I said. just a quick update guys.

Reply: 102
Have you started making a car out of all these parts yet ;D or have you got some sort of parts buying fetish....
Reply: 103
I've decided on what colour to do my cappo!!
http://autopartcar.com/2012-bmw-6-series-coupe/
It's not really a fetish lol I's more of an obsession....
I was sorting out my subframes until some pinched it!!! Along with my petrol tank!
Reply: 104
Have you had a price for putting the panels on and painting it yet?
Reply: 105
nice work Lord, wish I had the patience to strip mine like that, mines a bit rustier than yours too
Reply: 106
Right.. Not done anything to the car yet but ive been getting a few more bits inn!!!
Luckily Ive got access to another Cappuccino to drive lol In the mean time!
Front Bumper!!
Rear bumper spoiler
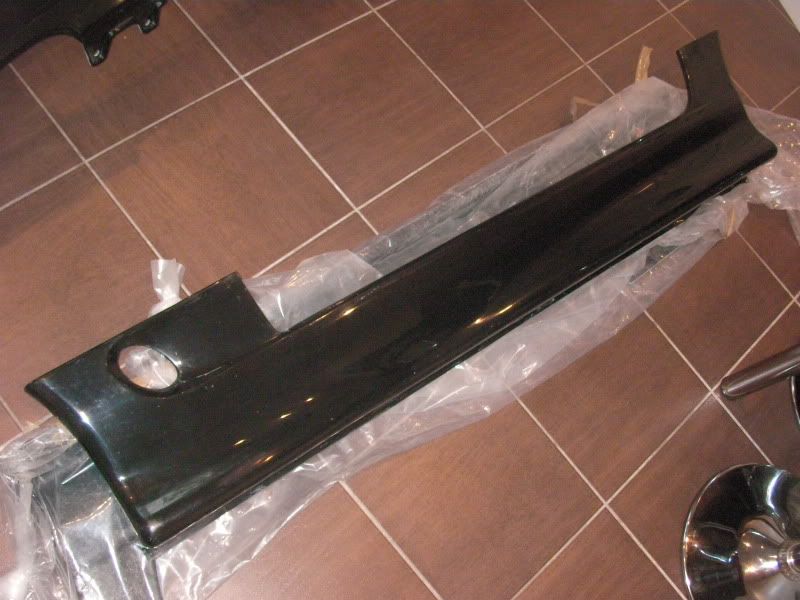
Side Steps
Air Intake
Cover
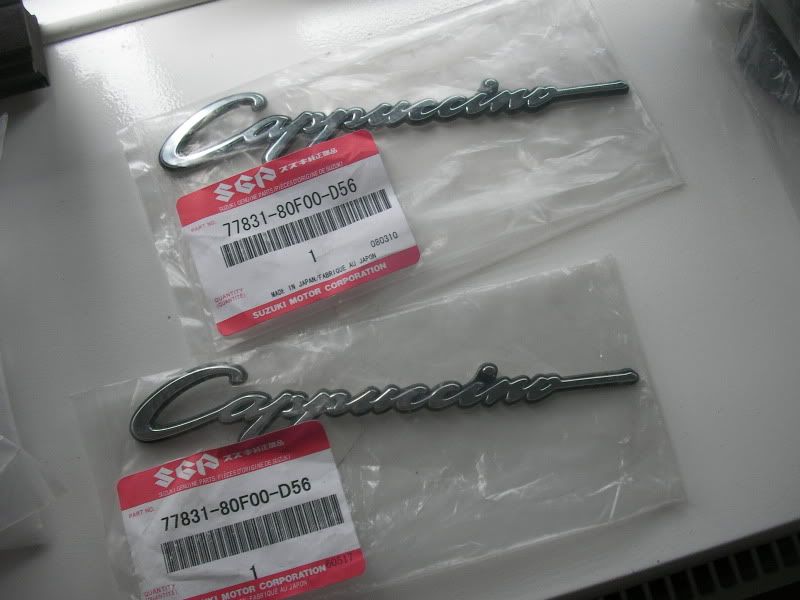
Badges!!!
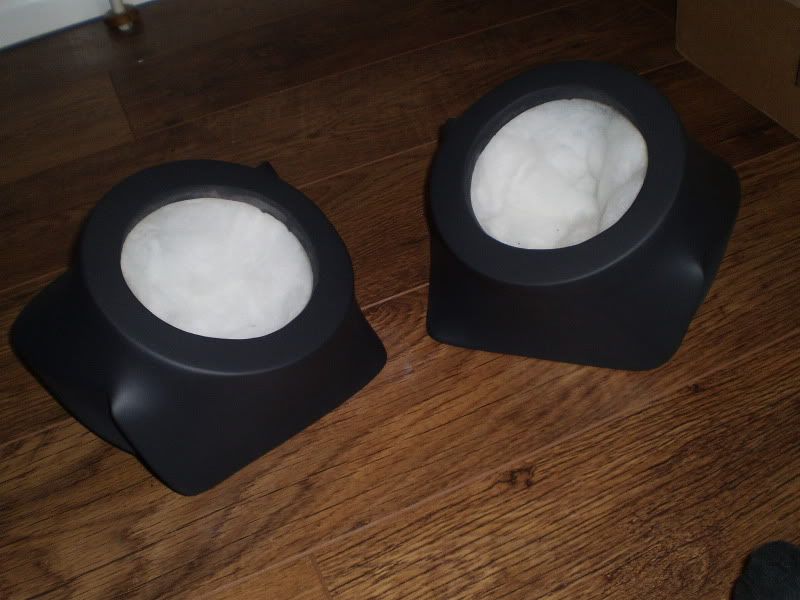
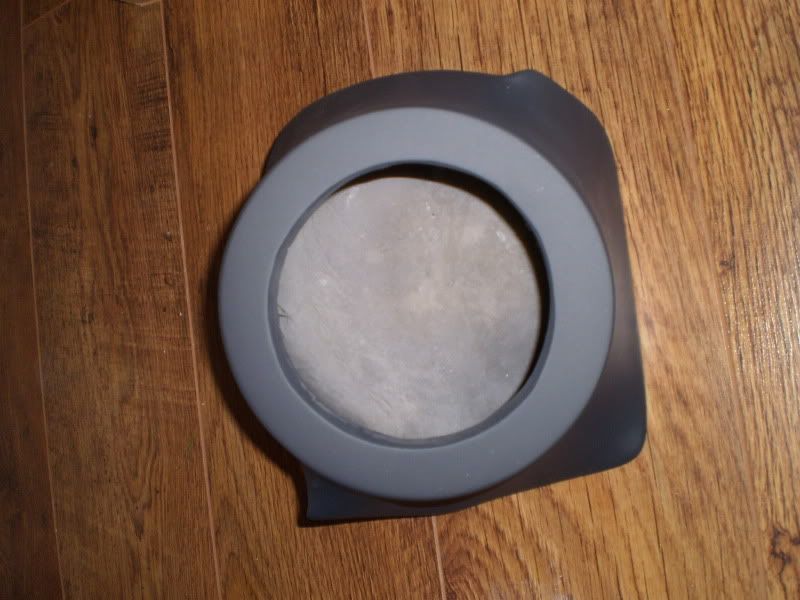
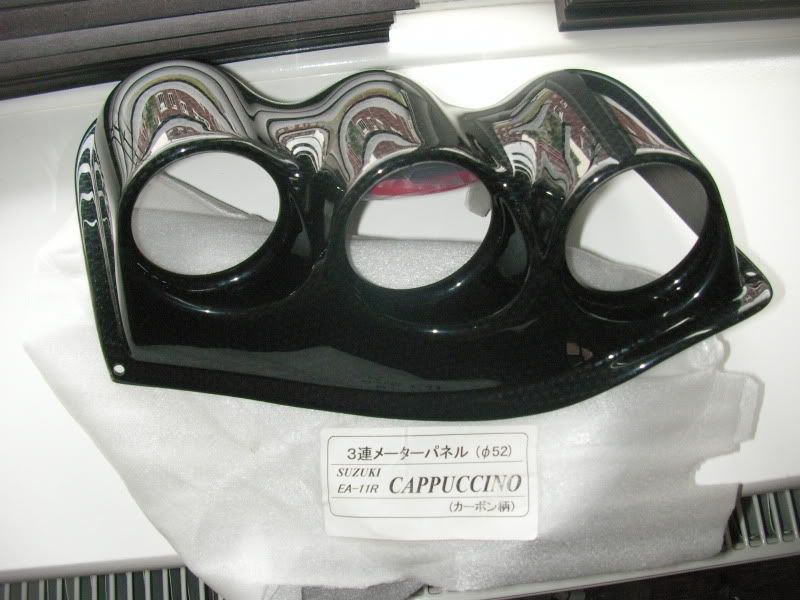
Pods!
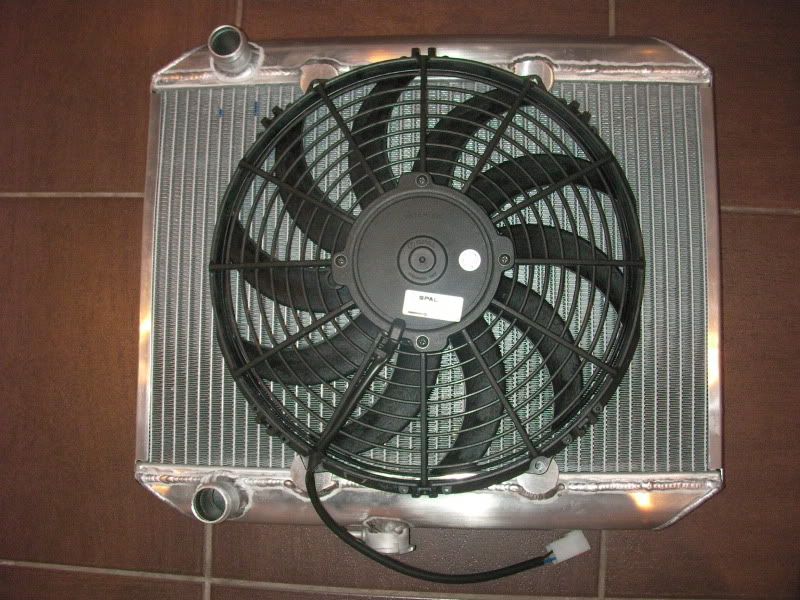
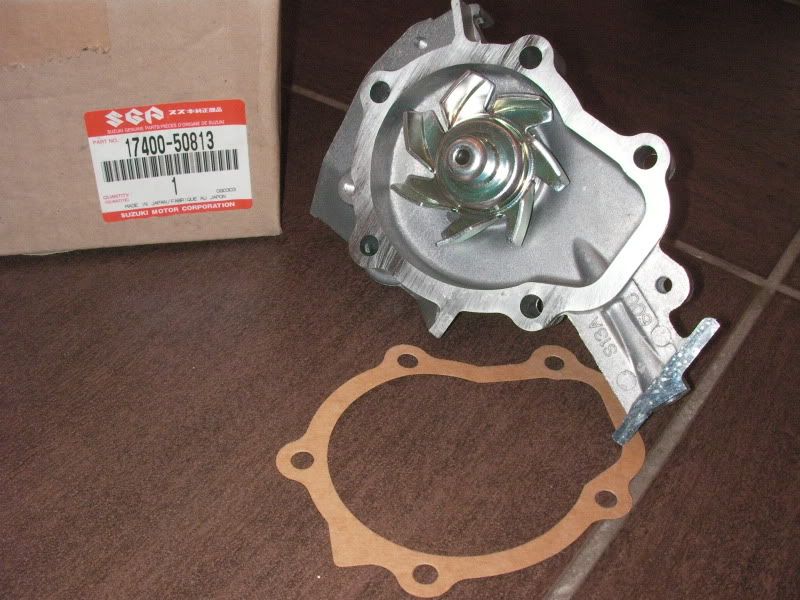
Sports Rad and fan!!
Exhaust
Engine bits
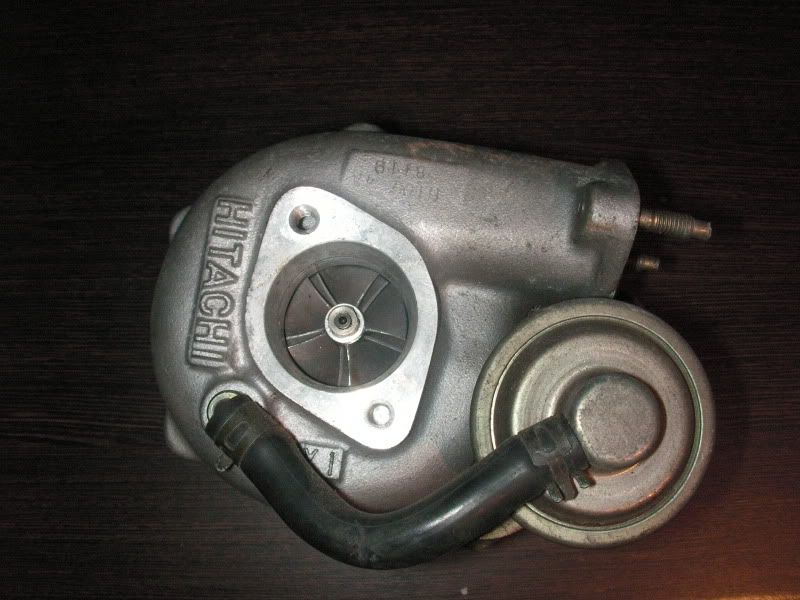
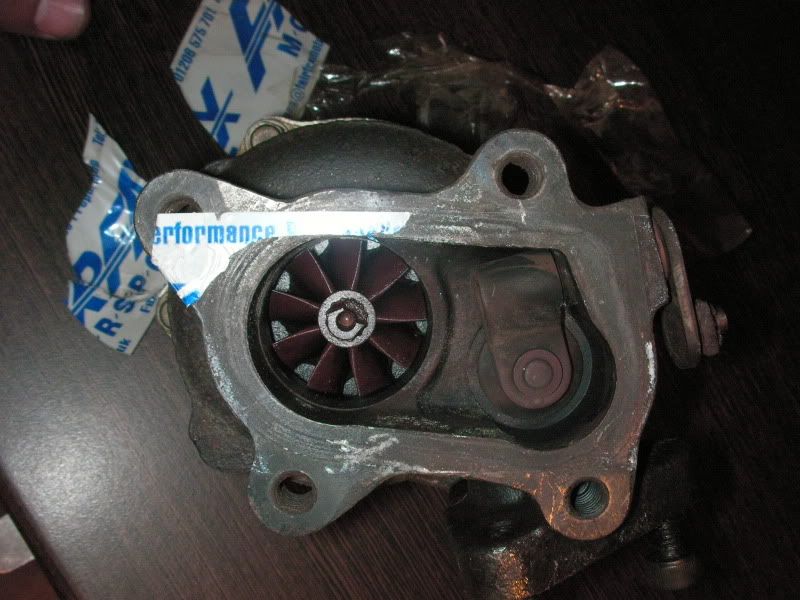
HT07 4A TURBO!!!!
Engine! Bught another one!! A lovely gentleman named Don had my last one for his AZ-1! lol
Suspension
Roof seals

Reply: 107
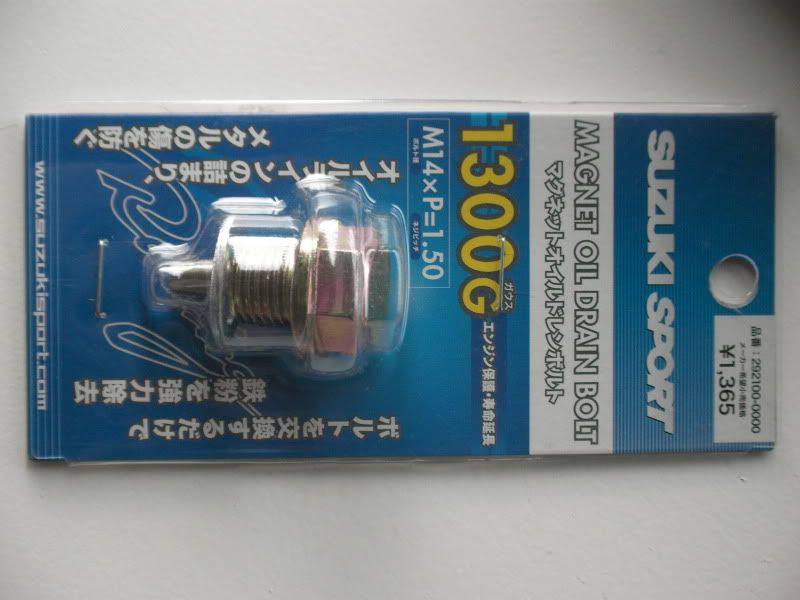
Some of the bits we can tell where you got but where'd you get the other parts like rad and that neat lil sump plug magnet?
Reply: 108
Nice parts !
I too would like to know where you got the rad and fan :)
Reply: 109
Lil update on last ever lot of purchases!!! Not buying anything else for a little while now! lol
First of all. Get myself a little can for my sports rad.. Can someone enlighten me as to what this does lol
Want the cappo to be reliable and I know these cost an arm and a leg. Well worth the purchase, costly tho.
For my engine.. ideally I'd want it in black but its ok.
Got a bag of bits n pieces. Some badges and some engine bay bits to tidy up.
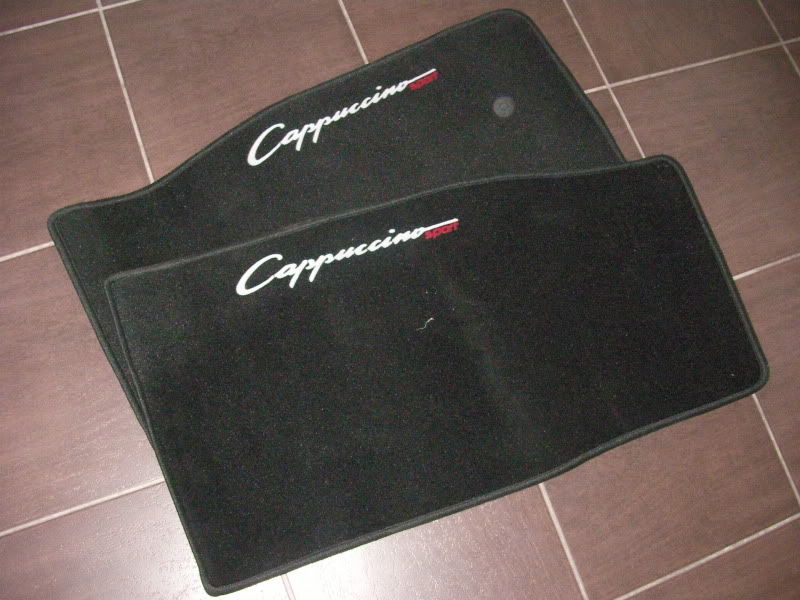
Gave my other mats away and bought these. Look nice but quality isnt as good as originals!!
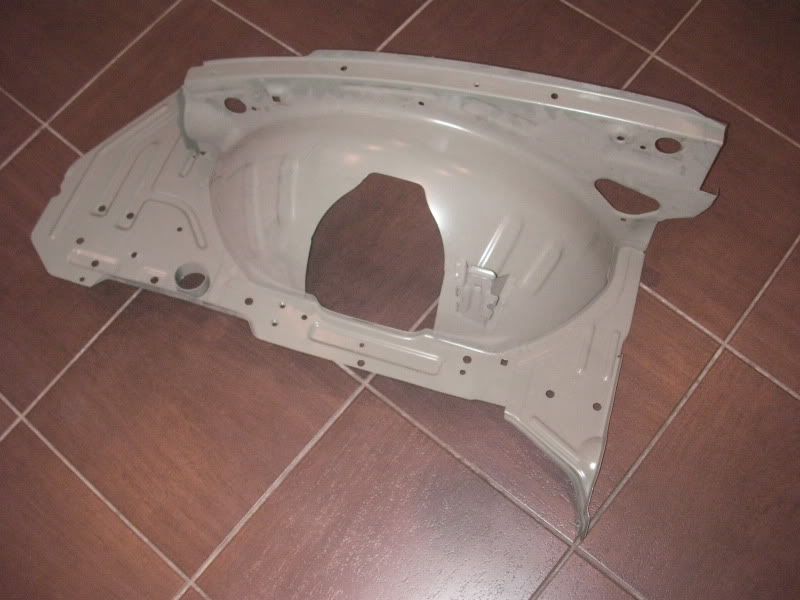
This part is rusty to hell on my cappo! Previous welding job done to a poor standard!!
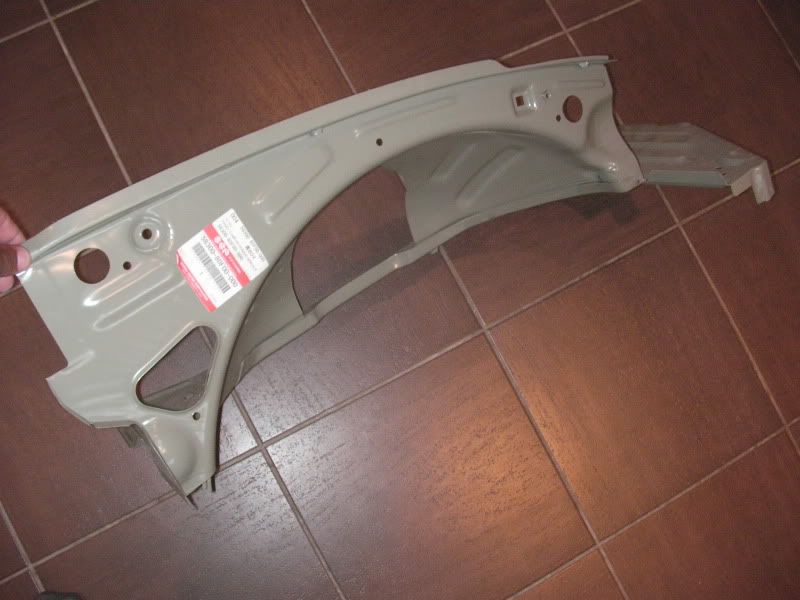
Another panel rusty on mine!!
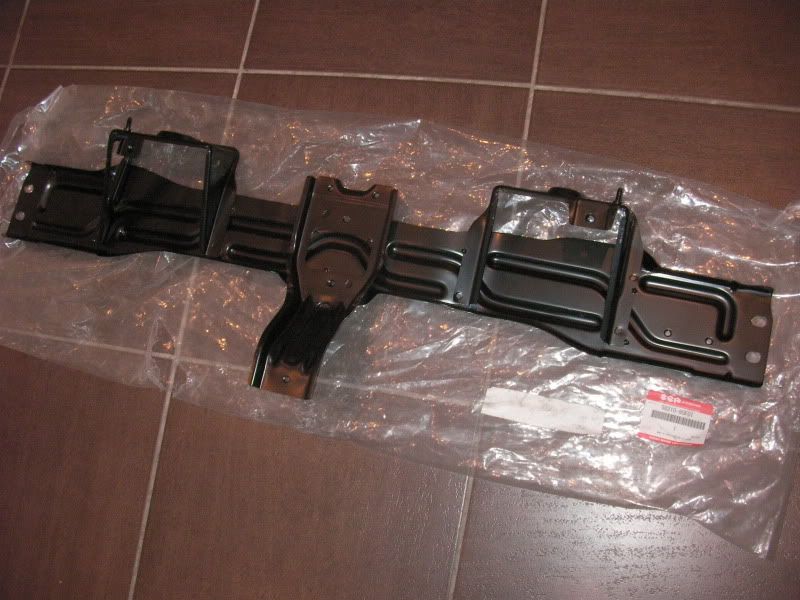
Waited ages for this one to come and it finally did!!!!
Thanks Cappuccino sport! x
Reply: 110
Awesome stuff there, this will be very nice once its finished.
Reply: 111
Quoted from lord, posted Tuesday, August 16th, 2011, 5:37:27pm at here
First of all. Get myself a little can for my sports rad.. Can someone enlighten me as to what this does lol
some sort of radiator breather tank or external header tank?
http://www.cardwells.co.nz/Our_Brands/Sub_Brands/Peterson/MenuId/31.aspx
"Radiator Header tank.
Used when a remote fill point is required or when radiator cap requires raising to be the highest point in the system."

Reply: 112
Thought i'd update my diary for you guys. I've been doing a few Arthur Daley and Derek Delboy Trotter dealings and I've landed a few items.....
Thought I might show you them all...
Firstly.... saves me rebuilding my fronts! Front Calipers good to go inn!
Closely followed by these bad boys... I've been told they are Cappo but how would I know to be sure??
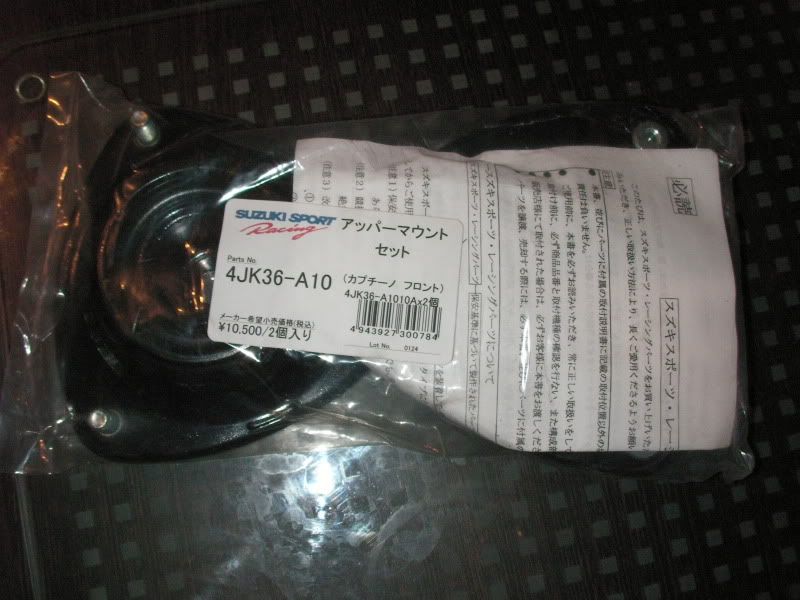
Suspension top mounts. Suzuki sport.
and finally these bad boys!!!I've been after these for a while!!!!!!!!!!
And yes you have seen them on someones car very recently lol

Reply: 113
lord, where did you get the triple gauge pods?? how big are they? im looking for 42mm ones
btw im loving all ur parts! drool.........
Reply: 114
Hey Lord. Getting quite a collection of parts there mate! ;) When did you get your suspension top mounts? Did you get them direct from Suzuki Sport? I just got new springs and bushes from them this week, and at the time I placed my order, they told me the top mounts were discontinued :-/ What sort of suspension system will you be using?
Reply: 115
Well, I got most of my parts online through ebay, doing a few dodgy dealings, like swapping lol
http://www.ebay.co.uk/itm/Suzuki-Sport-Cappuccino-Front-Strut-Top-Mounts-Upgrade-/230672179932?pt=UK_CarsParts_Vehicles_CarParts_SM&hash=item35b52222dc#ht_1187wt_1141
I swapped my mounts for that clutch that was never gonna fit mine lol Try this link. There's some left on this link!!!
The pods were through salerooms on ebay. As for suspension, it's all about wat wheels i go for and what look I want. I'm more than likely going to go with 14's or 15" wheels. I've not looked into it fully but I need too...!
Reply: 116
Very Dodgy Swapping Dealings :P
I got them as aprt of a complete set from Monstersport Japan i already had the fronts courtesy of ebay, so these were surplus the rears arent really necessary unless your running a savage plate diff an need to counteract the slow speed torsion forces generated when turning by the diff.
Couldnt believe how small the clutch was but it did highlight an issue with a german manufacturer who is making the wrong size clutch for the cappuccino. :( hopefully they can get me a replacment for today
Reply: 117
im soooooooooooooo looking forward to seeing this cappo finnished you have a great collection of goodies there Lord where on earth did you get the mats I need new ones they look good and I would love the lights they are sooooooooooooooooooooooooooooooooooo smart :)
Reply: 118
I'm also soooooooooooooooooooooooooooo pleased with the lights! They have to be the most wanted item on my list! I was pleased to get them believe me!
I can't wait to get it on the road myself.. it's just expensive lol Need to get a rear subframe and all the bits next! Got some more ideas for the caps today after attending KeiKarsinthePark..
Literally just got back from it! Good little event that was! Met a few more members and some interesting people.
Reply: 119
Hey Lord!!
What is the likelihood of being able to get my hands on a pair of those front headlights.
I suppose the obvious question is. Where exactly did you locate them and how much?
Reply: 120
You would have to go through Yahoo auctions for them now mate so it's gonna be difficult.
Speak to Jesse streeter or Sold Dave??
Reply: 121
It's not a picture but its still an update...
I was working on my old engine.. pulled the turbo and cat out as Ive not seen the car for a month! Been working my a** off lol
As we all know Ive got the stage two engine but????? Whats worth keeping as a spare from the old engine? before I transfer any bits to the new engine is there anything ive got to be weary of?? I'll keep the turbo and down pipe for now... manifold looks in good health.. no cracks...
Anybody want any bits of the engine PM me.
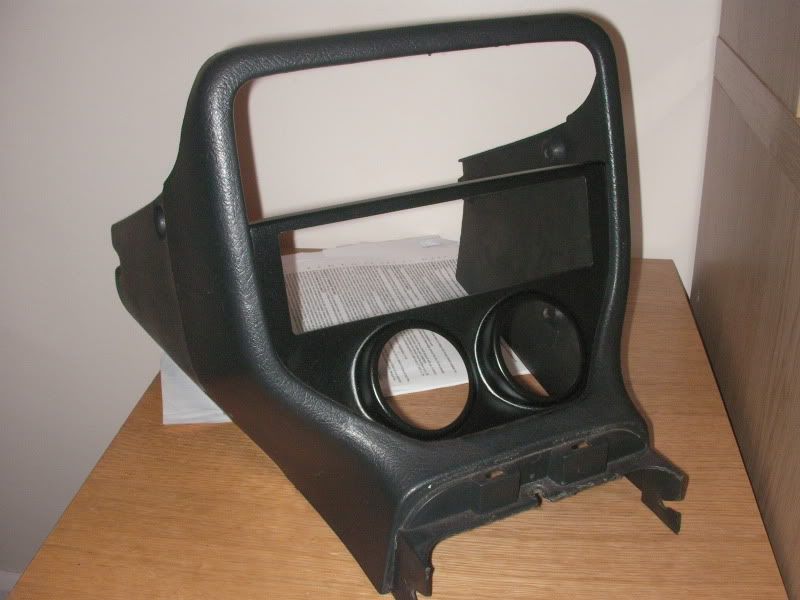
then I dropped this 52 guage holder in cus it was easy...Is this worth being painted when the cars being done???
Reply: 122
Well another little update.
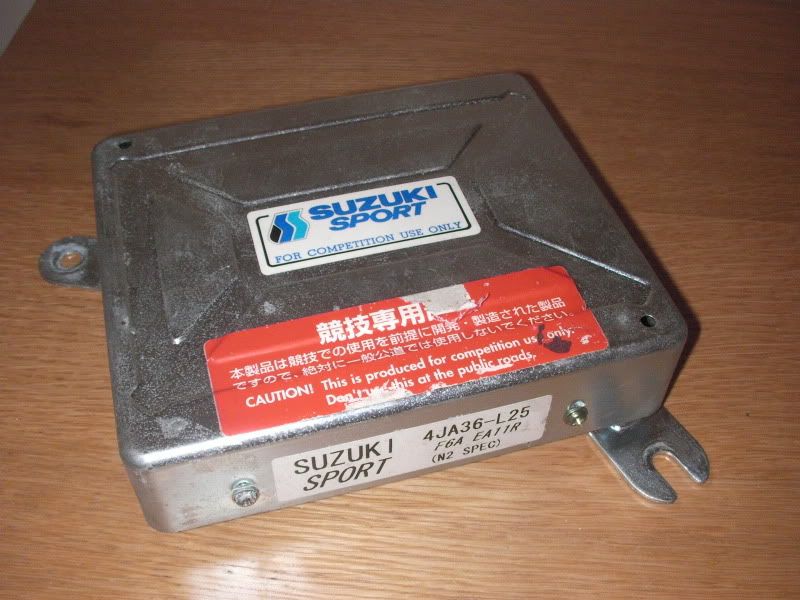
I had my parcel today and I'm a very happy man he he. Thank you very much Tiny. It was an absolute pleasure doing business. I finally have my N2 and getting ever so closer to completion of getting all the major components to start throwing my bits together.
this is a speed cutter... Whats the max a cappo will do? lol

Reply: 123
Correct me if i am wrong, but doesn't the N2 Ecu disable the speed limiter anyway?
so many shiny bits!
Reply: 124
i dont really know the max but ive done 180km/h. Took a while to reach though lol.
Reply: 125
Quoted from lord, posted Thursday, October 13th, 2011, 11:44:18pm at here Well another little update.
this is a speed cutter... Whats the max a cappo will do? lol
well you can get 240km/h speedos so... ;)
Reply: 126
Quoted from kayfour, posted Friday, October 14th, 2011, 2:44:40am at here Correct me if i am wrong, but doesn't the N2 Ecu disable the speed limiter anyway?
so many shiny bits!
Correct! Lord, with the N2 you won't be needing a speed de-limiter!
Reply: 127
Are you sure...??
Whats it worth then
Reply: 128
I didnt know that
new ones are about �50 so you could probably sell it and get the injectors you need
http://www.ebay.co.uk/itm/Toyota-Starlet-Glanza-4E-FTE-EP91-EP82-GT-V-FUEL-RAIL-ALL-4-INJECTORS-/270824398178?pt=UK_CarsParts_Vehicles_CarParts_SM&hash=item3f0e645d62#ht_1381wt_1185
RE the max a cappo will do i have had it round to 0 before (downhill at Donnington) but its quite frightening when its on the M of MPH (no idea how fast) 100-120mph ish.
Reply: 129
shameless ripped from cappuccino-sports.com
"- 45% power and torque improvement - cancelled the speed limiter -"
its the same as the N1 which the limiter was removed
put it on ebay i guess and see how much it goes for!
Reply: 130
~130mph is definately possible with an N1 equivalent cappo ;)
Reply: 131
Quoted from Chernoby1, posted Friday, October 14th, 2011, 10:59:28am at here ~130mph is definately possible with an N1 equivalent cappo ;)
GPS verified too ;)
Reply: 132
whats the de limiter worth then??
Reply: 133
Guys I need some advice.
Ive got My stage 2 engine rebuilt by fair fax motorsport, 2" exhaust, Sports Rad, decat, N2 ECU and a HT07 4a turbo.
No Manifold to match, No Large Oil Cooler and other bits and bobs....
The question is do I swap my HT Turbo for a Suzuki Sport Turbo to match the N2?? I'm a bit lost. Dont know what to do guys.
Reply: 134
Yes swap the turbo ...... or swap the ecu to match!!!
Ming
Reply: 135
See that front inner arch panel, how much did you pay for it ??
Thanks
Ming
Reply: 136
PM'd
Reply: 137
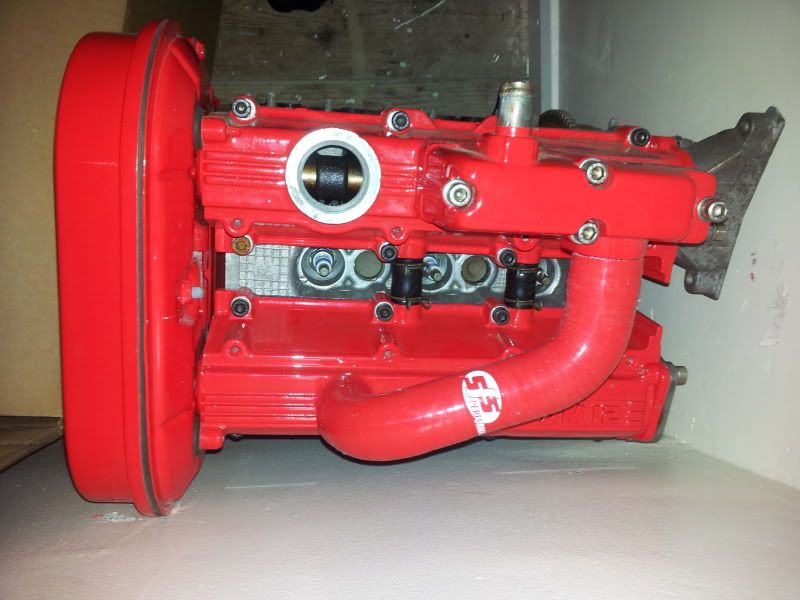
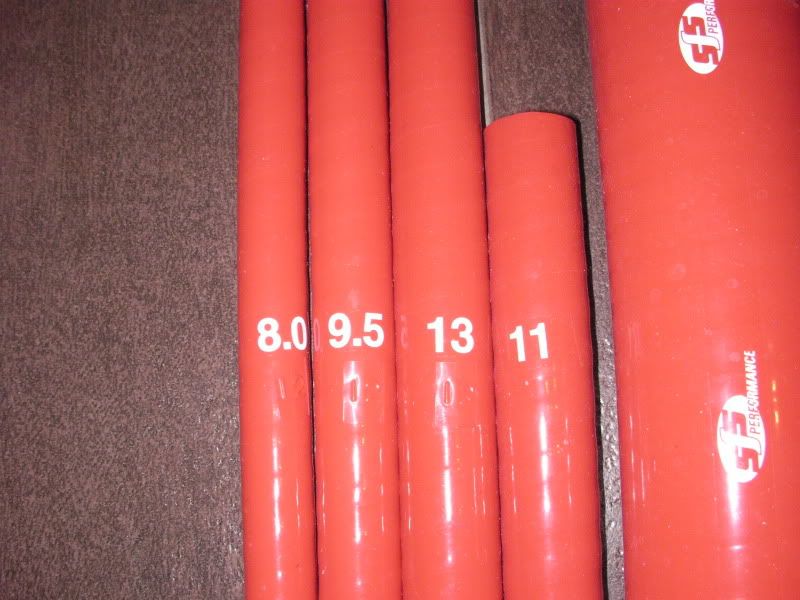
Right. Not done much over the festive period. I've just taken some pictures of the sfs piping that I have. Has anyone else got this kit? I think there's one or two who have this kit.
I've put one pipe on the engine to see how it looks. It looks smarter.
but what about clips?? Would you use the existing clips, cable ties, or buy some fancy ones?
This is the kit. 23 pieces. Has anyone got a manual on how to fit or is it self explanatory? Who else has fitted this kit?� What do these numbers mean?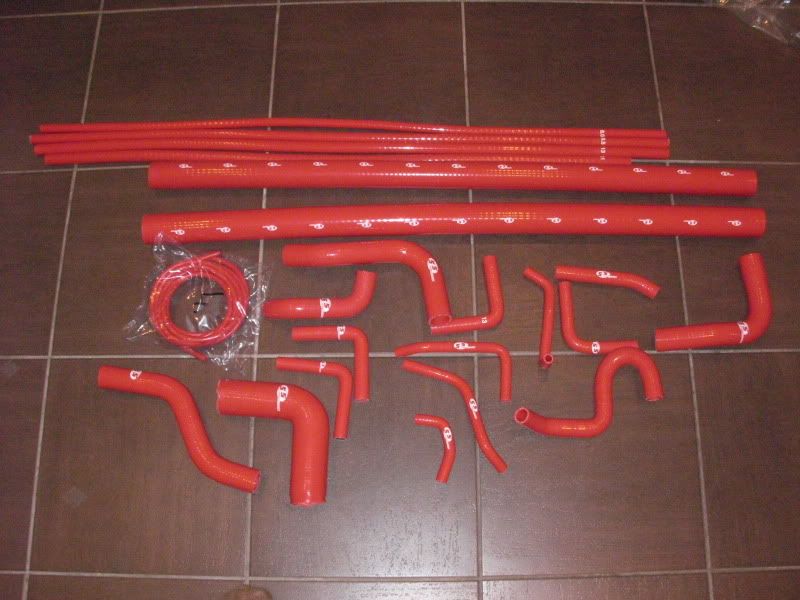
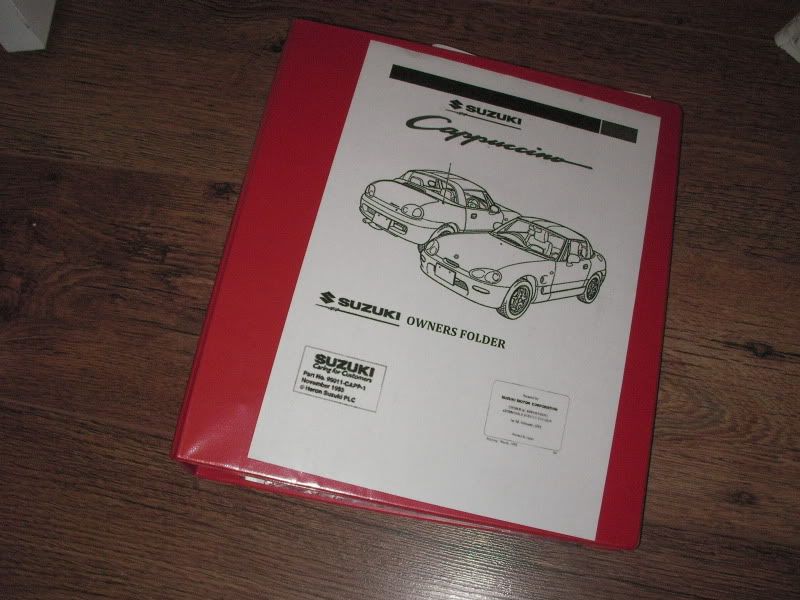
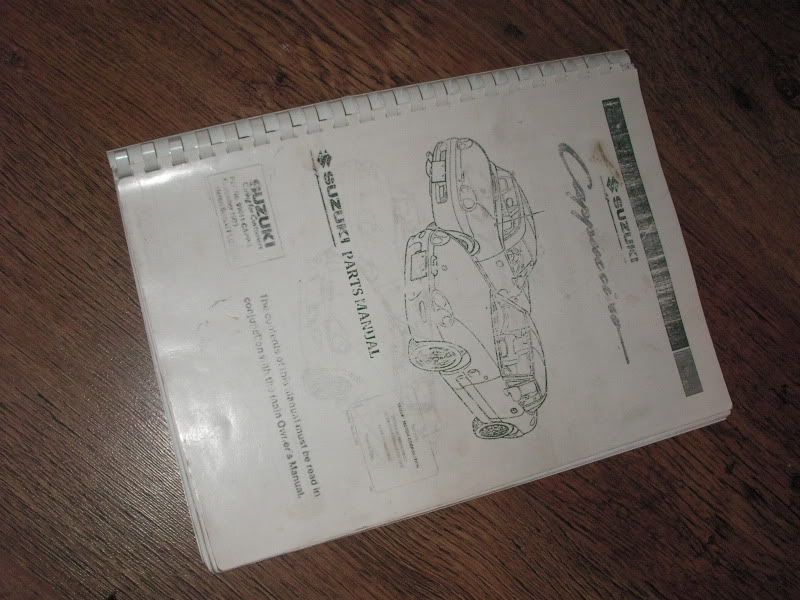
Also Just thought i'd share a little something. This is me trying to be organised. lol. I dont know if anyone else has done this but I've got my Folder in red I made up. Helps me keep everything together. I also put the manual and parts number book together for reference.
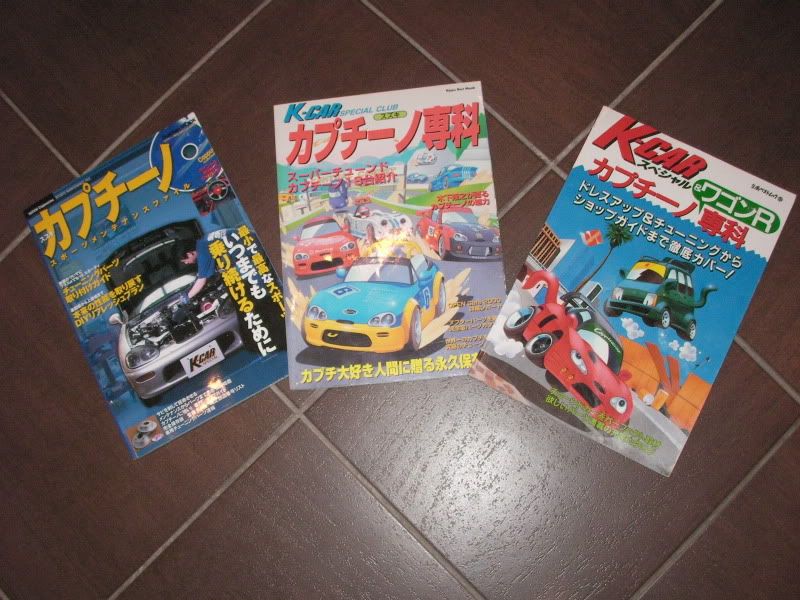
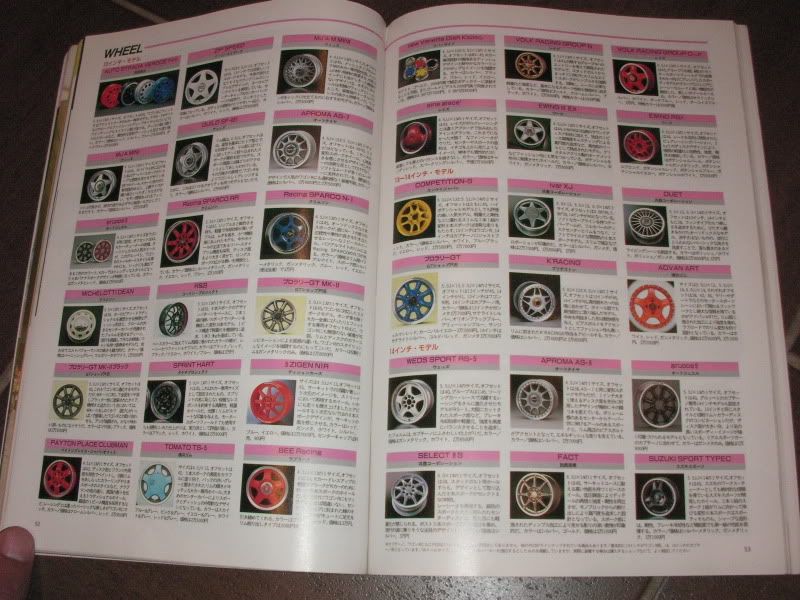
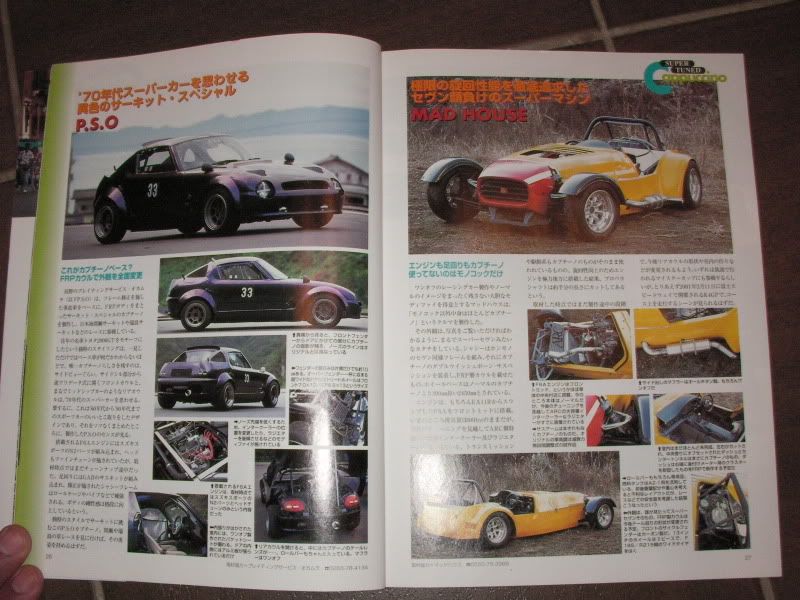
Ive also got these mage which have all sorts of info in them!! Quite interesting. Some really good builds etc!

Reply: 138
If memory serves the numbers are just the pipe dimensions, fitting most pipes are self explanitory. Just pay attention to the oil pipes, its a very specific type of pipe that's supplied, it should be easy to distinguish from the standard pipe though. With the cam case breather pipe make sure you have it the right way round, theres not much difference but there was a problem with it popping off if not fitted correctly.
Make sure that if you replace the brake vacumn hose you fit a one way valve inline, otherwise you could knacker the master cylinder. And see if there's anything you can coat the pipes in before you start using them, all the silicone hoses i've had tarnish really bad when they come into contact with oil (which is quite often with the BOV i use).
Reply: 139
a little treat for myself lol
http://www.cappuccinosport.com/section/store/action/product_view/id/2449/cat_id/4/
Reply: 140
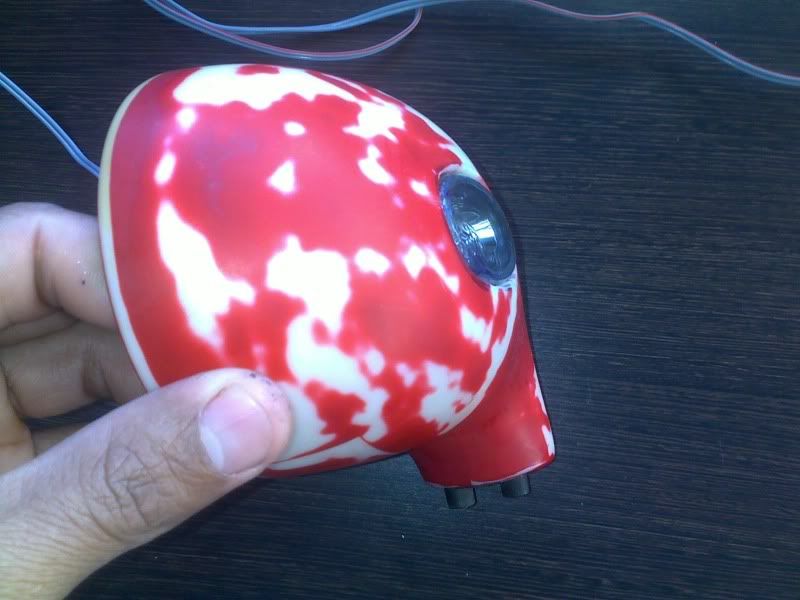
My mirrors are done. Just need a light fill where the lenses are and ready to paint.
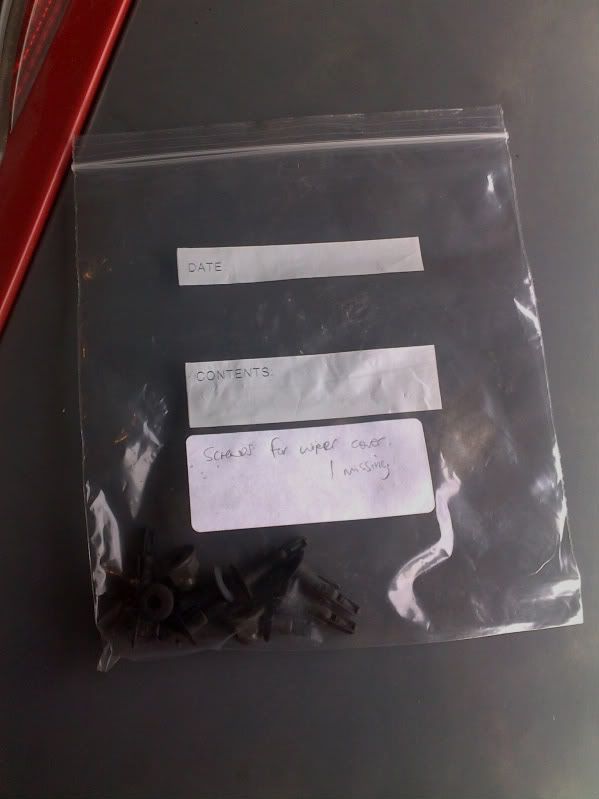
Anybody got a spare cover please?
I forgot about this. They were sitting in small box in my loft.
Anybody got two screws that go into the bottom of the mirror? and two screws that hold the inside of the bracket?

Reply: 141
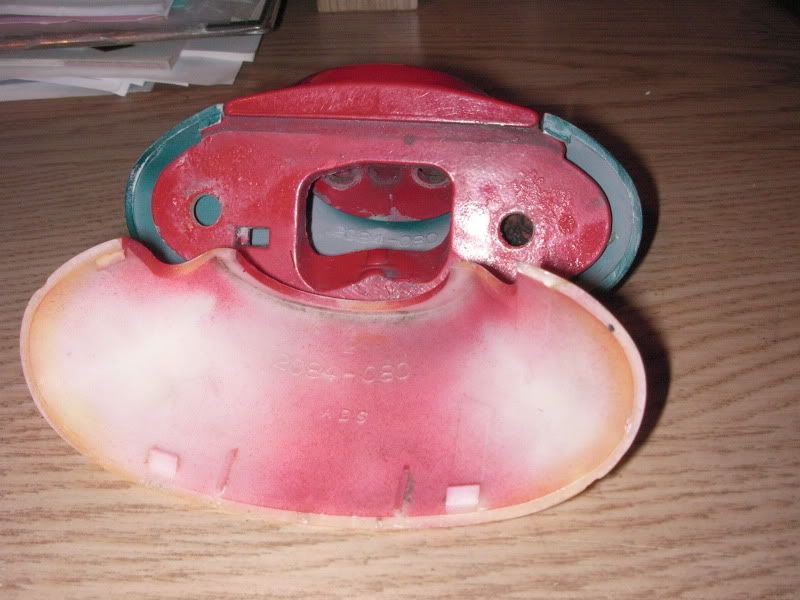
I managed to get the Father in law some bits for his cappo so he was pleased. I managed to pinch a great part for the Cappo and I'm sooooooo happy!! He didn't want to let it go but I couldnt blame him ha ha Ive always wanted this part to go with some other bits I had.
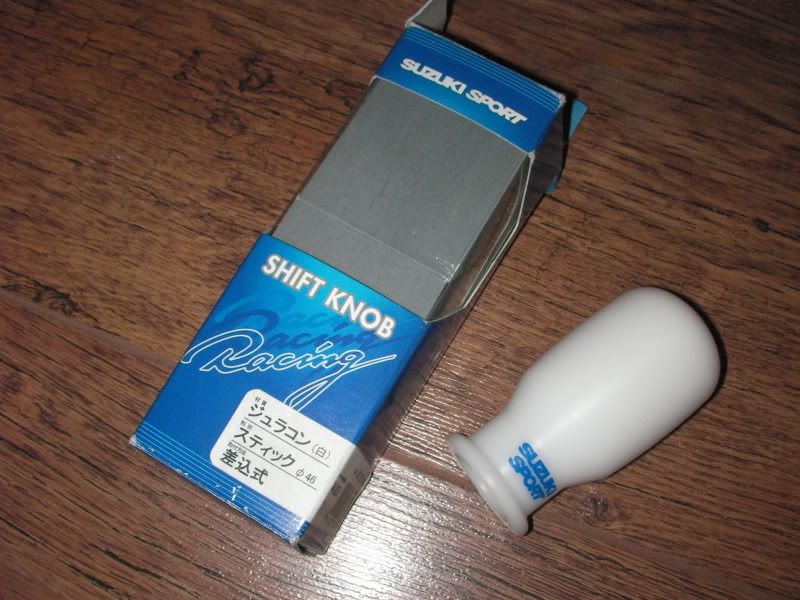
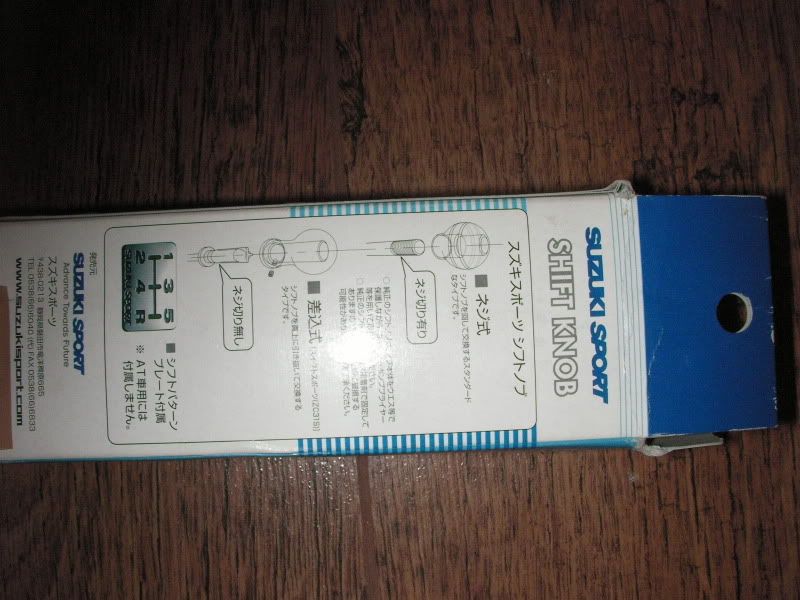
Got some interior bits. Got a white Gear knob to go with the white dials. The only thing is that the gear know didnt come with the inside bracket that helps you to screw it into the gear knob?????
Anybody know where I can get it from??? Please. Its the image above the 1-5 gears image.
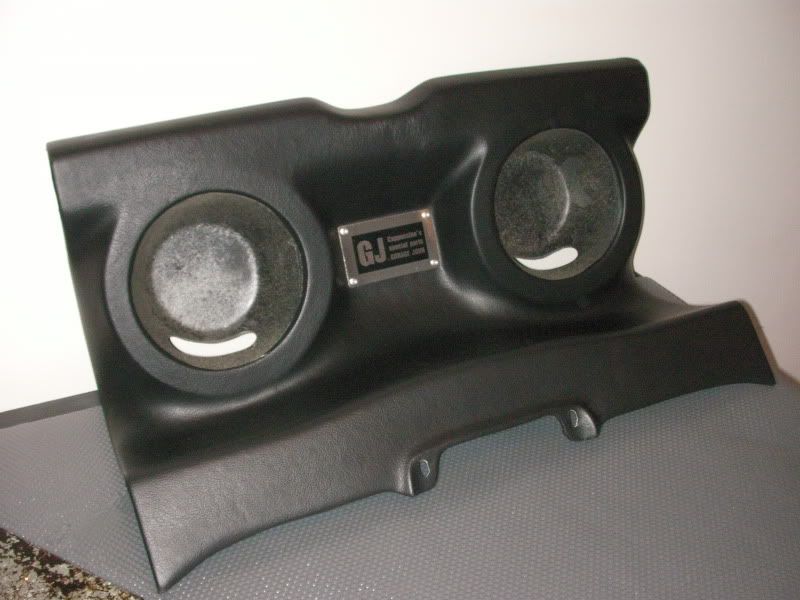
Got the Garage john speaker shelf. This is my favourite part to date. Its rare and it looks like a factory part.
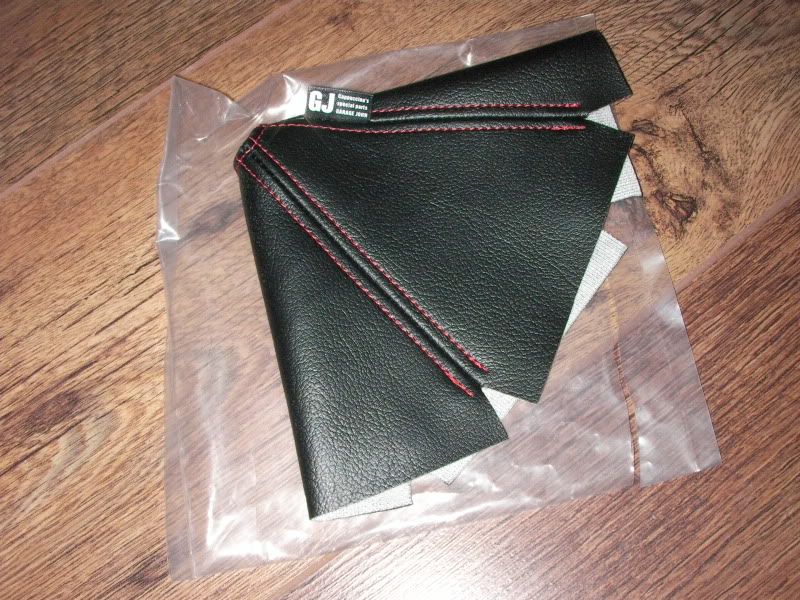
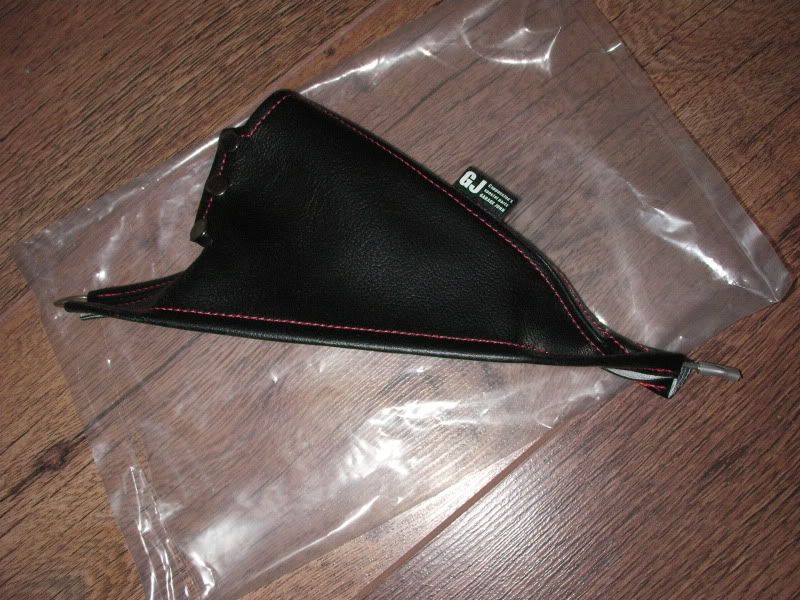
Garage John handbrake and Gear lever leather set.
Which goes with this. Cant wait to install this and see how it feels.
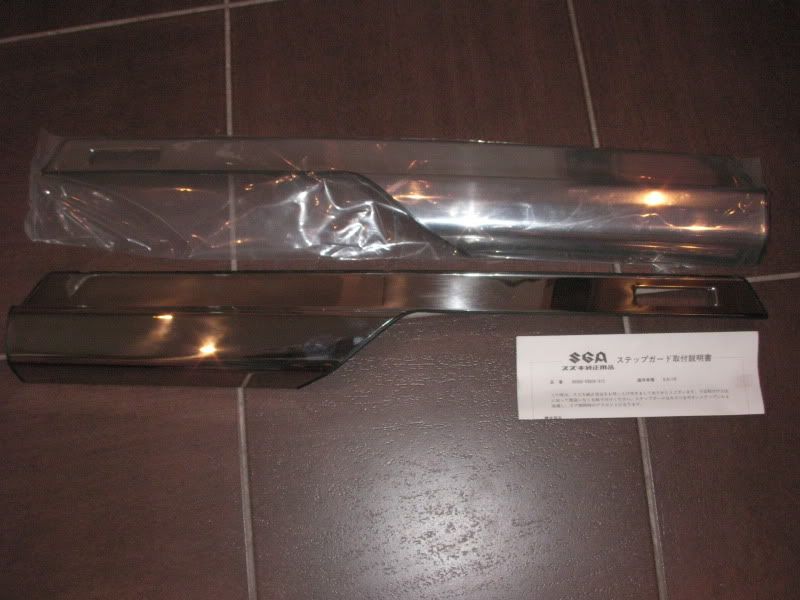
This is a part that I bought a hell of a long time ago and I finally got my hands on it. Door sll protectors in stainless steel.

Reply: 142
Lovely bits, where did you manage to get hold of the Garage John goodies?
Reply: 143
Hey Lord,
Same question as Nikki. Ive been trying to get onto GJ for months
Reply: 144
I got the speakers from the father in law. the other bits are via the old cappo sport and ebay.
Reply: 145
Few more bits I had forgot about.
Now I have these i'm selling my old EBC brakes front and pads to go with.
Anybody know of this or how it works????? Please. ?????
New washer bottle. My old one is now going to a new home for free to Canada hopefully.
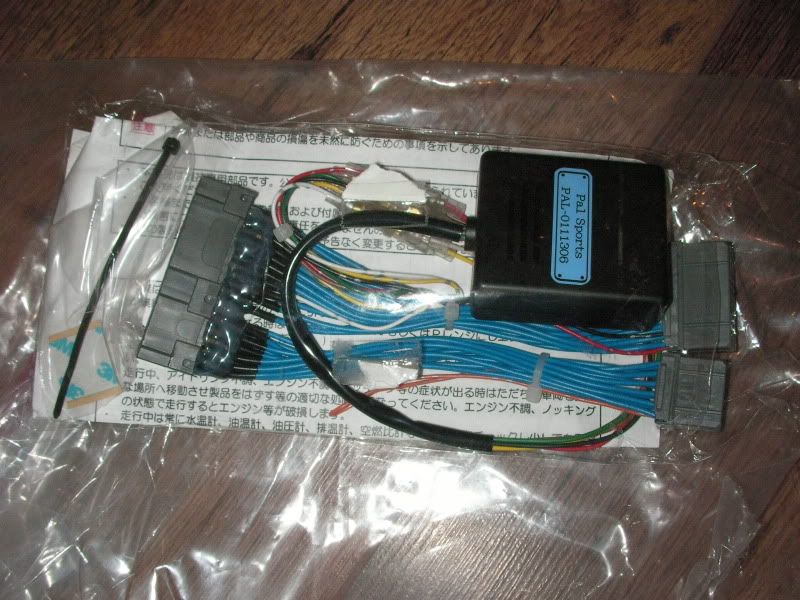
Reply: 146
It's a pal sports delimiter. You plug it in between the ecu so you dont have to cut the wires. I guess another delimiter that you have no use for haha.
Unless you're not gonna go with the n2 anymore?
Reply: 147
Ill sell the other one first. lol
Any takers?
Reply: 148
I want so many parts you have in here lol!!!!!!
loving the build thread!!
Ming
Reply: 149
Thanks ming....getting there!!!
Reply: 150
p.S I want a set of those hose kits!!!
Linky :)?
Ming
Reply: 151
Wow I am amazed at all your new parts,
with respect to your suzuki sports shifter knob, it does not need the extra bit?
Mine just screws straight in and i think I have the same one as yours
Did you notice much difference with the short shifter compared to normal as the cappuccino is pretty short anyway?
+1 to hose kit link! I like!
Reply: 152
I haven't fitted a single part yet. lol.
now i will now i have my wheels!!
If you wanted a hose kit i can enquire if you guys want. ??
Reply: 153
yeah lord you suppose to get back to me on the hose kit... still waiting :P
Reply: 154
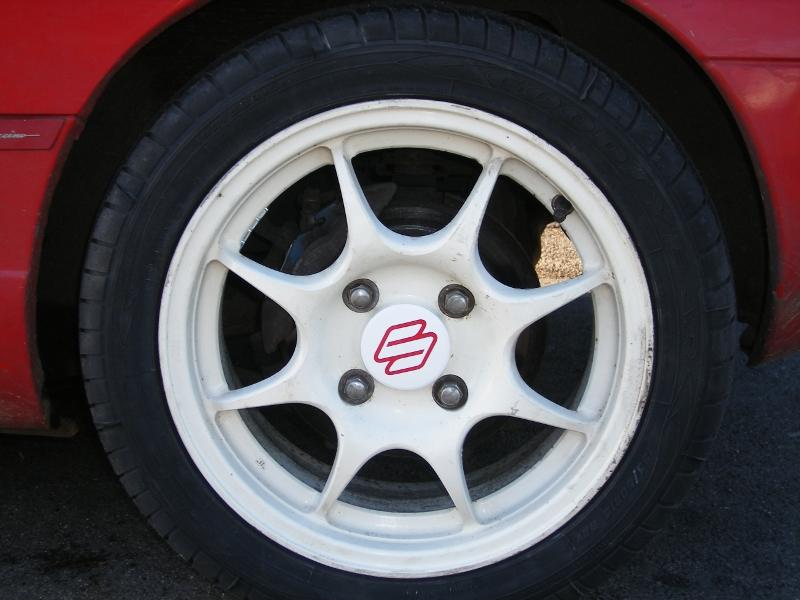
So.. Ive been waiting a little while for my next item to arrive. I was very anxious as I had to wait but they were well worth the wait. Thank you very much. I'm so happy. The dream is getting closer. I cant wait to get them shot blasted and re painted. They should be a direct fit... im hoping.
This picture inspired me!!!
http://www.clubcappo.co.uk/board/Blah/Blah.cgi?,b=CIG,v=display,m=1174261087,s=,highlight=honda+wheels
anybody know where I can get centre caps from??
from experience best size tyres!

Reply: 155
Lord, they will just fit, but I did buy spigot rings for mine,� 64.1mm OD, and 60.1mm ID on ebay for around �10.� Ebay might be your best bet for centre caps too.
When you get caps, if you want stickers for them drop me a pm.
Reply: 156
That would be great if you could ask about the hoses lord!
Going to get them painted white again?
I would be guessing ebay, or your local honda forums in the uk!
Reply: 157
yeh parcel force ar opfficially rubbish, glad you got them safe and sound, cant wait to see them on the car, feel i should have lept them in a way!good luck and enjoy!
Reply: 158
I've got them so really happy....you have pm TJ...a small token of my gratitude.
Anyway....anybody got any ideas what colour to paint my car??? lol
Reply: 159
I like those wheels (thumb)
As for the colour, well this is a question, im going to re-paint mine but am undecided on the colour, I keep changing my mind (doh)
Reply: 160
P.S I really really want your Garage John speaker shelf, give it to me (bigsmile)
Reply: 161
Quoted from lord, posted Sunday, January 22nd, 2012, 12:43:20am at here
Where you buy this?
Directly on their website?
Reply: 162
Quoted from nikki, posted Friday, March 2nd, 2012, 4:32:49pm at here P.S I really really want your Garage John speaker shelf, give it to me (bigsmile)
lord you need to get get GJ speaker shelf fibreglassed and make a few copies of it, I want one too.
Reply: 163
Not really sat down and looked at a list so here goes. Obviously all my other parts are new!! But not listed.
Updated List of mods to my Cappuccino:
Engine
FairFax Motorsport Stage 2 Engine rebuilt
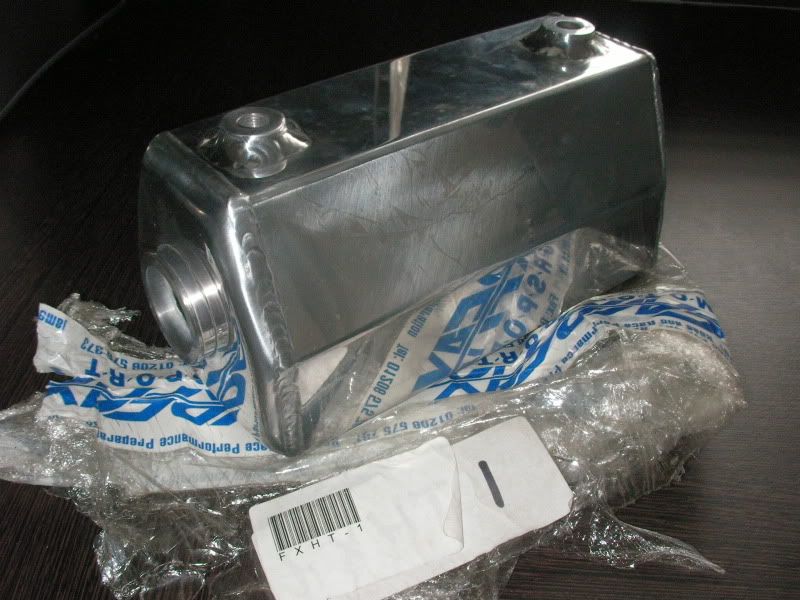
Fairfax Alu Engine Cover FINALLY GOT THE CAPPUCCINO PLATE COVER!
Fairfax Large racing Radiator and fan with expansion tank
Stainless Steel Intercooler pipes with red connectors
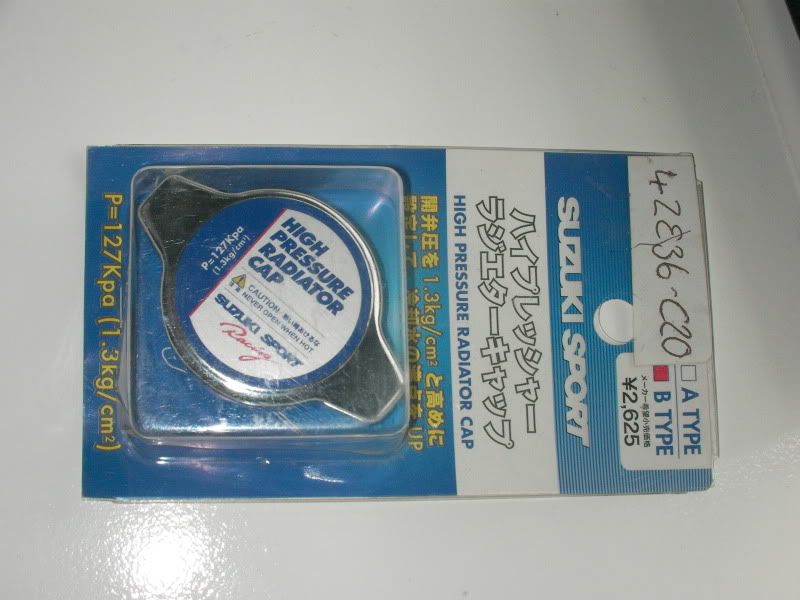
Suzuki Sports Radiator Cap
Yellow power cable for engine bay
SFS Silicon Engine Hose set. 22 piece
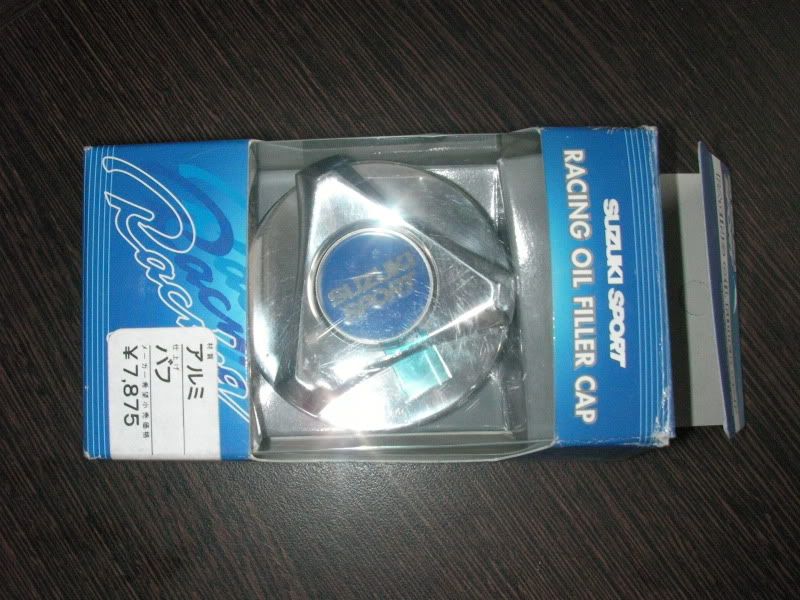
Suzuki Sport Oil Cap
Suzuki Sports Low temperature thermostat
Suzuki Sport Magnetic sump Plug
Steves Super duper ARC copied Air Filter
Suzuki Sport engine strut brace
Suzuki Sport N2 ECU
Suzuki Sport Turbo (Needed)
Hitachi HT04 Turbo
Flange adaptor kit for the Hitachi Turbo (FXEX004)
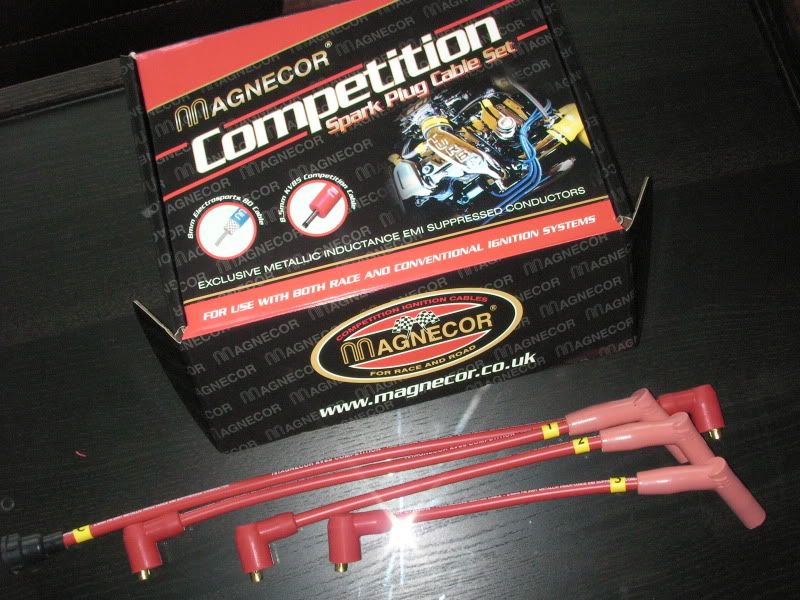
Magnecor Sparkplug leads 8.5MM
NGK DCPR9EIX sparkplugs
Suzuki GTI spark Plugs
Fairfax down pipe
Cappuccino Sports 2.0 inch Stainless muffler (with new rubbers) Front to back
Apexi Turbo Timer
New Denso Injectors 295cc
Garage John bonnet dampers! Rare
Interior
Small Steering Wheel omp
Suzuki Sports Shift knob in white
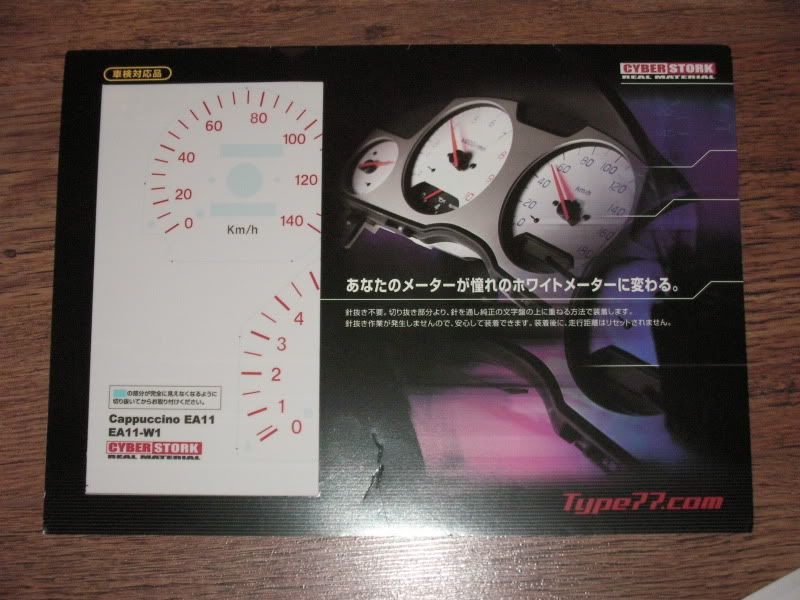
White Dials
cappuccino sport mats
Triple Guage holder
Double Guage Holder
Single Suzuki Sports Carbon Fibre Gauge Holder� (I know!! Not sure on configuration)
FairFax Roll Bars in polished stainless steel
Steve's super duper rear strut brace (In boot)
Garage John Twin Speakers shelf
Garage John Gear Lever Gaitor
Garage John Handbrake Gaitor
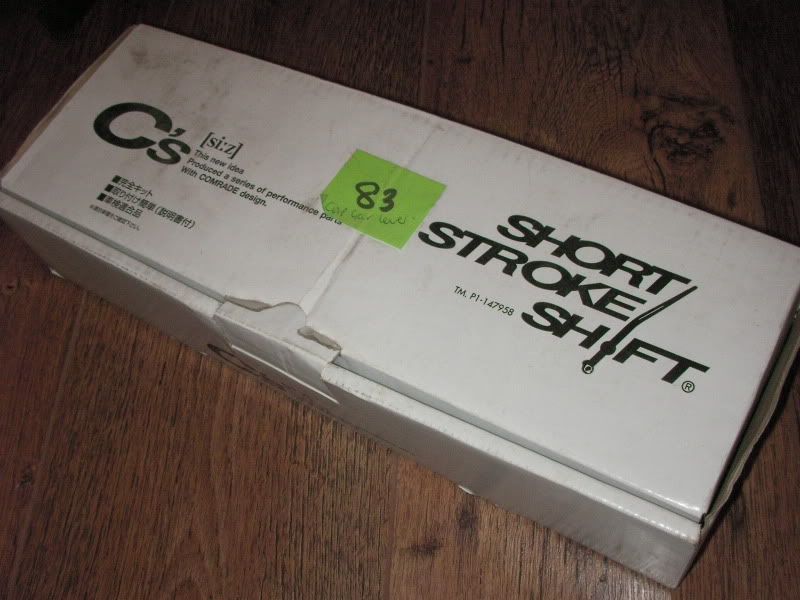
Short Shifter Kit
Stainless steel sill protectors
Super Dave sneazer speaker pods NOT SURE TO FIT??
Exterior
Heartland Front Bumper
Heartland Side Skirts
Heartland Rear Lower Lip
Front Indicator vents with light fit into bumper
My Funky front Lights!!
Rear LED Lights!!
LED Indicators built into mirrors home made
under braces x2 HOME MADE OFF FORUM
New Rear boot rack genuine
cappuccino sport badges
Suspension/Rims
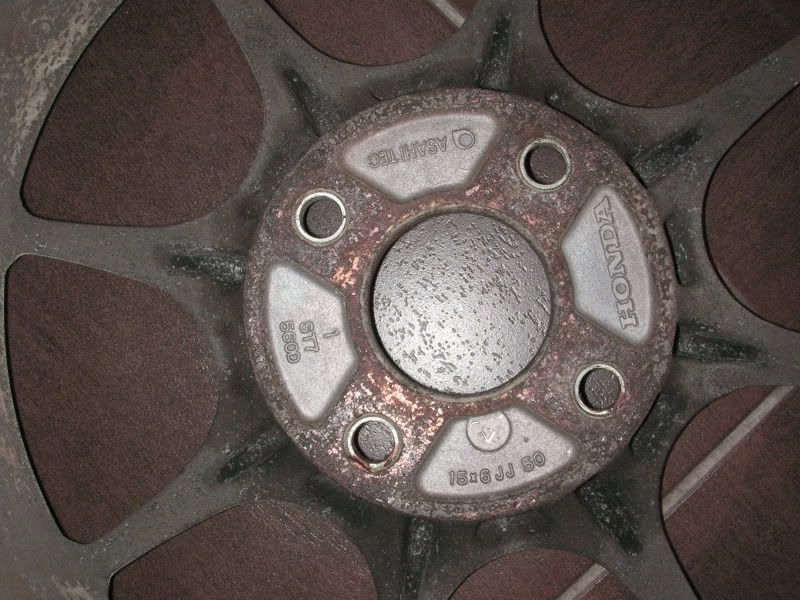
'96 Integra TypeR rims 15x6'' 4x114.3 +50 (Not sure about tyres)
Suzuki Sports Light weight wheel nuts
NEW bc COILOVER KIT! Finally arrived!!
Suzuki Sport Bush mounts and diff set.
New front calipers
Black Diamand Fast Pads ORDERED
Black Diamond Drilled Discs
Stainless steel hoses
Exedy Clutch
Prob missed one or two things!!
Reply: 164
Quoted from japtaxi, posted Friday, March 2nd, 2012, 11:24:50pm at here
lord you need to get get GJ speaker shelf fibreglassed and make a few copies of it, I want one too.
Very good idea if you ask me, Lord???????
Reply: 165
If somebody wants to copy it they can!
But i'd want a large deposit!!!!! To get your money back! To make sure it comes back safe and sound!
Reply: 166
Well I would offer.....lol, but a few things to finish first.....
Reply: 167
Right. Iput the Honda Wheels on the Father in Laws Cappuccino. Has someone ever had this issue with wheels?
Put the wheel on and It was touching the suspension on the inside of the wheel. Here's the pictures.
Here's where the wheels s rubbing ?? Is this a spacer issue??? Anybody got any links for a spacer??


Reply: 168
Not good, i only just noticed the pic on the previous page of the inside of the wheel giving wheel dimensions :(
The wheel you have there is a 15 x 6 with 50 offset, so are approximately 15mm further� towards the suspension on the inside, with a tyre added you could be a bit more.
You might be saved however, the cappo has a neat little feature that when the rear wheels are loaded the wheel is pushed out a little, i couldn't say how much but what i would do is get a wooden block say about 4"x4" and if possible a rubber mat (a large mouse mat would be good) and lower the wheel down onto it using the matt to protect the rims of the tyre.� Then measure how much clearance you have.� I think though that you will have to add spacers also as if you catch a little air in the car with the wheels on and the suspension unloads you could end up doing either the strut or the wheel some damage.
Spacers can be bought at halfrauds pretty cheap and if you do some searching may even be able to find some online that are hubcentric (think thats the term), this way the 60.1mm hub lip which you idealy need to be sitting the wheel on is provided by the new spacer.� This does all depend on whether the wheel studs are long enough to cope with the spacing.� Wheel fitters have a rule that the wheel nut should have atleast 3.5 turns till tight.� A 5mm spacer should allow this but any more and you could start having troubles.� Also will the arch have enough space to allow for the wheel to be projected a further 5mm out?
One BIG thing that you need to take into account though, are you planning on running custom suspension on your car?� My suzuki sport coilovers have a smaller diameter compared to stock shocks giving me approx 15mm of extra inner clearance.
There's still some variables you can play with to make them fit, question is, is it worth it for these wheels? are you gonna get the width tyres you want after any mods required to fit them? and do you want to use spacers as they can cause the wheel to be slightly off centre and vibrate?
Reply: 169
Thanks for the info key. honestly. i never knew wheels could be such a problem if they aren't the EXACT fitment!!
This is a nightmare! Ha ha
hmmm. what to do.
Reply: 170
Just to let you guys know,� my other half works for Archenemy.� So if you do need to stop any rubbing problems on the outside after you fitted the spacer give me a shout and he should be able to help :)
Reply: 171
The OZ Chronos do this on our Capp (+46mm offset) but only at full droop (no weight on suspension). Failed the MOT on it last year, so I put standard wheels back on (for the test)
When the suspension is loaded up it moves away from the spring pan, not sure this will be enough with +50mm though.
Maybe adjust the camber slightly to get no contact at full droop, you should then be OK when driving.
Reply: 172
I had another look at this on Wednesday. I only looked at this when the wheel was up in the air and there was no weight on the wheel. These pics show the wheel away from the suspension when it was dropped on the weight of the car.
From what Ive been told. I'll need some Integra type R wheel bots and a spacer of 50mm.


Reply: 173
so ive just purchased these.
When they come i'll do a test fit.
http://www.ebay.co.uk/itm/5mm-ALLOY-WHEEL-SPACERS-SHIMS-SUZUKI-CAPPUCCINO-/300603689254?pt=UK_Cars_Parts_Vehicles_Wheels_tyre_Trims_Trims_ET&hash=item45fd604926#ht_1334wt_936
Reply: 174
I am fine with spacers just not with universal. Get one that are to the cappo spec. 4x114.3 with the correct centre bore size.
Reply: 175
Could someone find some. drop me a linky!! Struggling here
Reply: 176
I think it would be a custom job, they would have to be steel i'm thinking as the small lip needed to transfer the correct bore would be to fragile in Alu.
Reply: 177
Hmmm i know eibach makes hubcentic in alloy, much much ligher than steel. Worth e-mail them, if they make them for suzuki then they should have some readily available!
Ming
Reply: 178
http://www.venommotorsport.com/manufacturer_product.php?manufacturer=HR&category=Wheel&product=Spacers
They do have them for suzuki, so you need to confirm if their PCD (4x114.3), Center bore size (60.1) matches with the cappo.
If they are then you are onto a winner!
P.S they have it listed for suzuki swift, the older model 1990 ish do share the same spec as the cappo!
ming
Reply: 179
Cappo centre bore is 60.1, and PCD is 114.3x4 so they should fit.
Reply: 180
http://www.ebay.co.uk/itm/290686009597?ssPageName=STRK:MESINDXX:IT&_trksid=p3984.m1436.l2649&autorefresh=true
Hey guys. just bought this. what u think??
Reply: 181
Thats a pretty good price, seller is just a few miles down the track from me :)
Not sure about the presumption A/F reading, how do you presume A/F? but �15 for a turbo timer is a good price.
Reply: 182
Agree it is just a turbo timer, i am against using one ... just drive slow for the last half a mile or so :).
Reply: 183
Anyway the turbo timers been paid for so on its way.
As for the wheels well. I've got the spaces now. here's how they look. I've only got 10mm spaces as its perfect. they are aluminium. seem ok quality and chap enough for a test. 9 quid.
Pictures to follow.


Reply: 184
Having looked at the spacers I'm not a fan of really.
As the weather was sweet today. I thought I would look at the heartland kit as I have the same kit as the father in law. This is not my cappo but the father in laws. (Yes I got him to buy one.) We looked at fitting and how the kit fits compared to standard fitments. It's gonna have to be put on carefully. Kinda delicate.
Has anybody got experience of fitting this?Got any pictures of instillation? any further info would be greatly appreciated. Thanks guys.
From the Front.
From the back
From the Side


Reply: 185
Got a few parts coming this week and they should be coming Wednesday!
I went and splashed out on a complete set of new suspension coilovers! Ive joined the club and gone and got myself some as I think it's a worthwhile investment!
http://www.dcperformance.co.uk/cheap/645085/suzuki/bc-racing-v1-series-coilovers/l-02-v1-vs.html
I have the same as Nikki....and I think they look like a great deal to me.
Reply: 186
Hell yes. When I get my cap next week I'm having a set of these :D
Reply: 187
You joining the club ha ha
Reply: 188
Finally got the bits I needed for the engine.
I couldnt find the gasket set. Managed to get one off ebay few months ago but never put it up here.
ps. Anyone fitted a turbo timer to their car yet?


Reply: 189
Right lord, these are the spacers you need:
http://www.ebay.co.uk/itm/WHEEL-SPACER-10-mm-Renault-Suzuki-Nissan-CB-60-1-PCD-4x100-5x108-4x114-3-5x114-3-/180849794361?pt=UK_Cars_Parts_Vehicles_Wheels_tyre_Trims_Trims_ET&hash=item2a1b7cdd39#ht_1288wt_1399
There are the spigot rings you need for the DC2 wheels
http://cgi.ebay.co.uk/ws/eBayISAPI.dll?ViewItem&item=130674151030
I also just got a set of the exact wheels at a very good price :).
Ming
Reply: 190
I just got the sipgot rings, are you 100% sure 10mm spacers will do the job :)?
Am just going to order them if you are sure lol.
Ming
Reply: 191
those ones you ordered look good!!! The ones I ordered are sh*t!
Reply: 192
Yup, get them! They have the holes drilled for 4x114.3 and the most important part is the center bore 60.1!!
Can't wait till i get my rims :).
ming
Reply: 193
Also where did you get all those gaskets? Dealer?
Reply: 194
they come on ebay a few months ago. Never really sorted them out as the missus put them up lol
Reply: 195
Some goodies have arrived!!!!
Pics later!
Reply: 196
YES can't wait lol!!!! Do you just keep on buying stuff for it lol?
Ming
Reply: 197
Well these bits have been in storage for a while until my other ones were purchased.
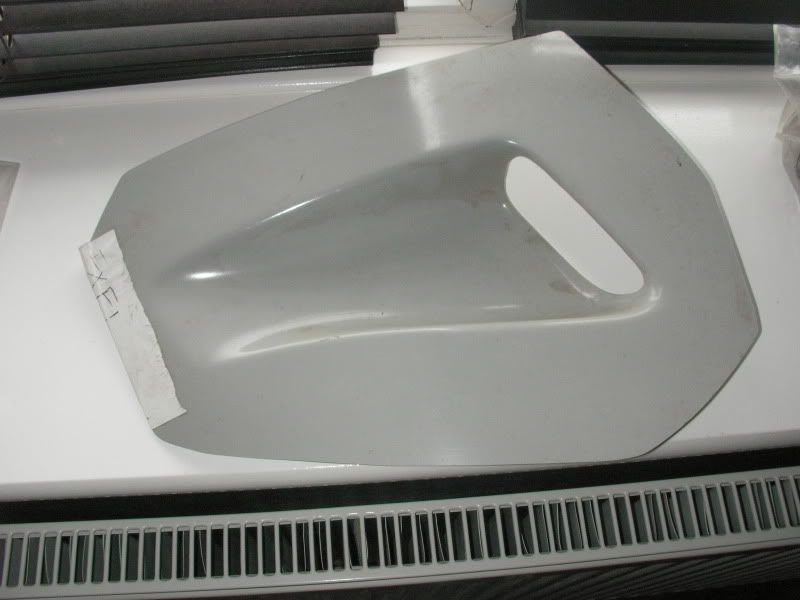
Firstly and my favourite. I've always wanted these. But lets see how they fit first. Anybody who was these, have they had issues fitting? Other than cutting the plastics?
Here's the pic of the base. You can see the plates are all at different angles to fit correctly.
Had to get some injectors as the standard ones are not large enough. Denso injectors 295cc.�
https://www.neweraparts.com/Default.aspx?tabid=66&addmessage=success_You+have+added+SARD+Fuel+Injectors+-+All+Models!+to+your+cart.&language=en-US
Will these fit ok guys?
Got these to go with the rear quarter panels. They go at the top by the boot lip.
To go with my lightweight wheels I now have my red....lightweight locking wheel nuts. They are soooo light!!Test fitted them and look pretty good.
http://www.cappuccinosport.com/section/store/action/product_view/id/2862/cat_id/4/
Air Filter.
It's good to have these. I suppose it makes things easier lol Are there any cappo's with these bad boys? http://www.garagejohn.com/gj-ex.htm
Some other bits include my inner sill.
ive got more bits but theyre second hand parts. Just highlighting my goodies.


Reply: 198
Today was christmas for me lol
I had bought these last week or so but there was an error with my paypal. lol So finally they came today and i'm very pleased. Happy with the overall quality of the springs and dampers. Can't wait for them to go on the car with the wheels. Very Happy.
Here they are.
Here's what comes with them. The tool, stickers, instructions and brochure. I nice little package altogether.


Reply: 199
Im so getting these sexy things.
Reply: 200
Yeah, where'd you get them and what did you end up paying for them?
Reply: 201
This where I got them from. Great website. Cheapest online and great service too. Dan is the guy you will deal with overall. The link is directly to the Coilovers I have bought.
http://www.dcperformance.co.uk/cheap/645085/suzuki/bc-racing-v1-series-coilovers/l-02-v1-vs.html
I paid 605 delivered.
I asked Dan for a group buy. 5 people gets you 5% off
10 people gets you 10% off
Reply: 202
Received mine two weeks ago, these coilovers sure look good !
However the included instructions were either written by a monkey, or auto-translated from an alien language :D
Reply: 203
Ha ha.
they do look good. bit expensive though but a necessity for our ageing cappos trust me.
mine will be sitting in a box for a bit longer lol
are they easy to fit!??
Reply: 204
Didn't fit yet, lol. I still have a lot to do before doing so (get engine out, get both subframes sanded and painted, for instance...). I guess they will also sit in their box for a while.
Reply: 205
Am jealous lol :P!!!
Am gonna buy it once i have done what i want to do first :)
I take it both of you also have a set of bushes to fit too ?
Ming
Reply: 206
for the whole suspension? Arms and everything?
Ive got a full set?
Reply: 207
Tidy, that be my next purchase i think ... but they are like �300 + :(
Reply: 208
Got mine from sold save, great buy and easy to deal with!!!
Reply: 209
Before they go on. anybody got a link too some covers?
Like these?
http://www.lancerregister.com/showthread.php?t=301672
Found these just.
http://www.demon-tweeks.co.uk/Search.do?method=delegate&n=1737&p=244240&s=coilover+covers
Reply: 210
I mentioned something like this in nikki's thread, invaluable i think after all the agro i've had with my suzi sport coilovers. I've seen them listed on a UK coil over site.
Reply: 211
if anyone get them, please do up date on the fitting on those BC coilovers!
Thanks
Ming
Reply: 212
Nikki has posted some details.
Reply: 213
Right. Just looking at the next thing to complete for now.
I'm looking at some LED's for the front bumper. As you can see this is the same configuration as mine so those bumper thingy's are blocking my daytime running lights as it's an air vent. This is where the Led's come inn.
Looking at these.
http://www.ebay.co.uk/itm/8000K-12V-2x8W-LED-Daytime-Running-Lights-Lamp-for-Benz-Higher-Power-Light-/170717533200?pt=UK_CarsParts_Vehicles_CarParts_SM&hash=item27bf8ed410#ht_4699wt_904
Thing is, anybody had an experience of running them?
Do they last? Do i need to buy 4 sets ha ha
Wiring going to be an issue?
Reply: 214
Had a quick delivery today.
Managed to get the Ignition Leads from ebay. Took a while to come but i heard it was weather related as to why i waited but good seller.
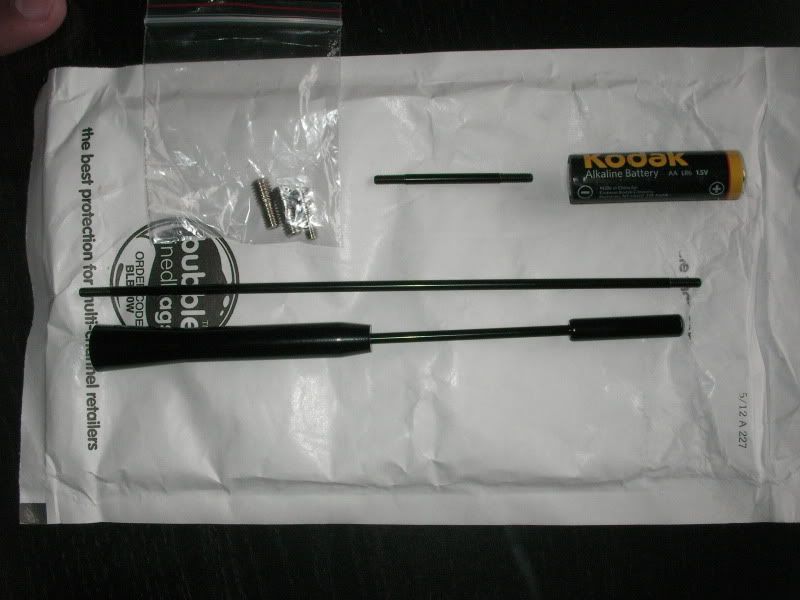
Then I enquired about the antenna on the forum and was provided to the link. And these came today. Quality aint bad and if someone pulls it off then it aint gonna cost the earth lol �3
Reply: 215
I didn't know they took batteries :D
Reply: 216
That's for scale only..That's something my missus would say!
Reply: 217
Quoted from lord, posted Wednesday, April 25th, 2012, 8:18:30pm at here That's for scale only..
You don't say! :D
Reply: 218
ha ha..........!!
Reply: 219
Just a quick update. Travelled for an hour and twenty to collect some bits as I'd been looking for them for a loooooon time. Finally managed to get the Rear Subframe, diff and petrol tank but it's still not over...
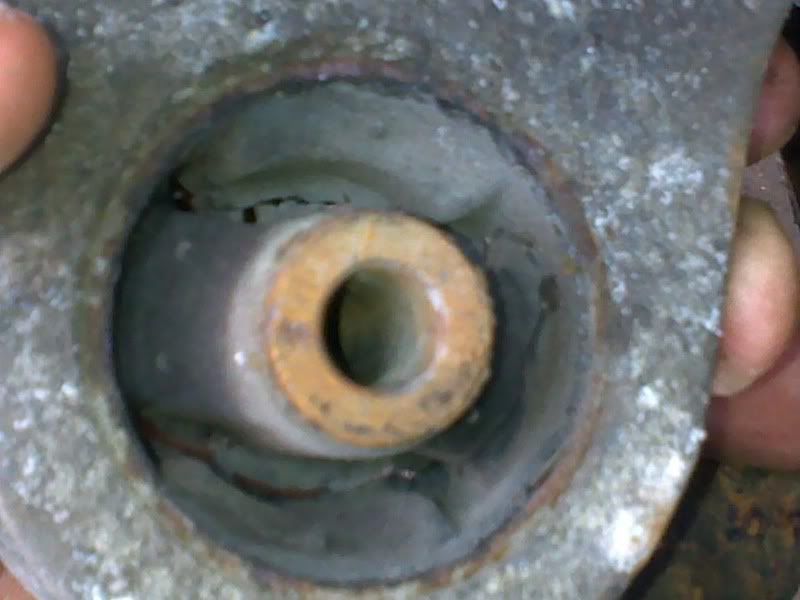
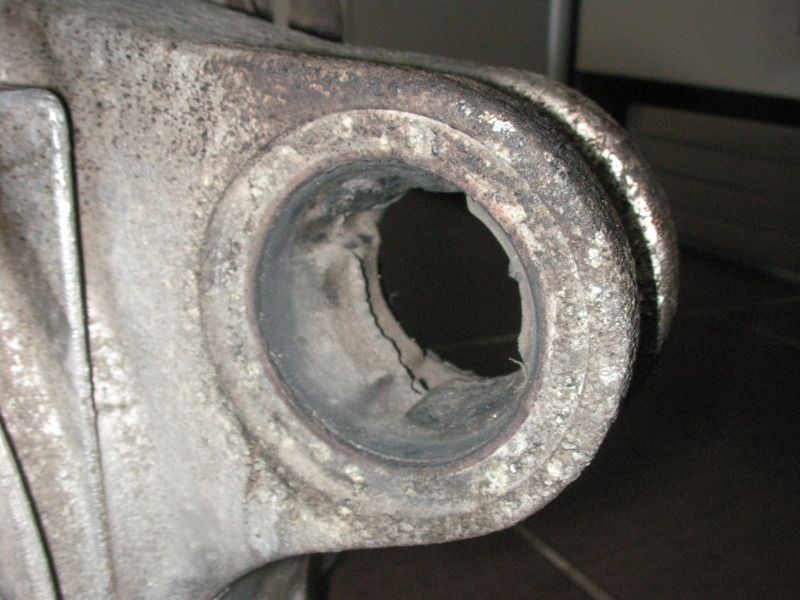
Firstly here's the Diff. How will you know if the Diff is any good???
The rear Mount is shot!! But I wont replace the bush until I know the Diff is ok. I can actually pull the bolt out lol, it's that shot.
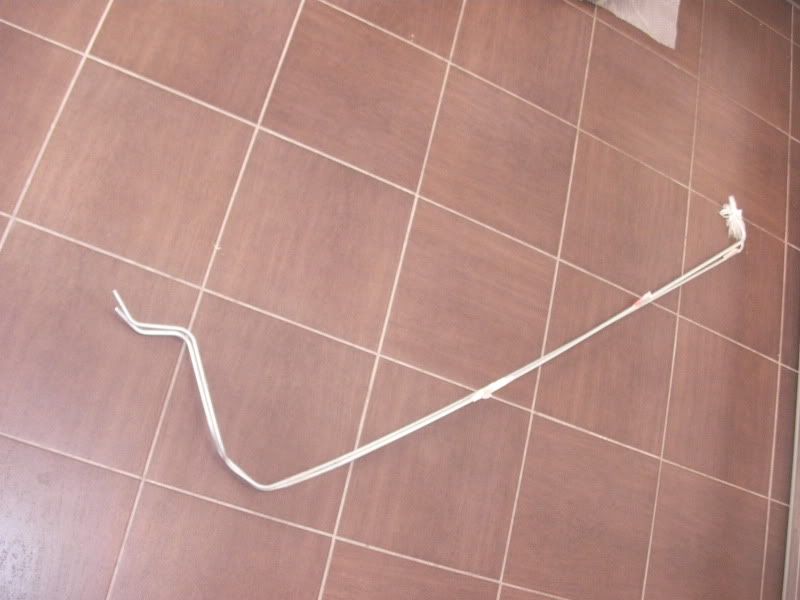
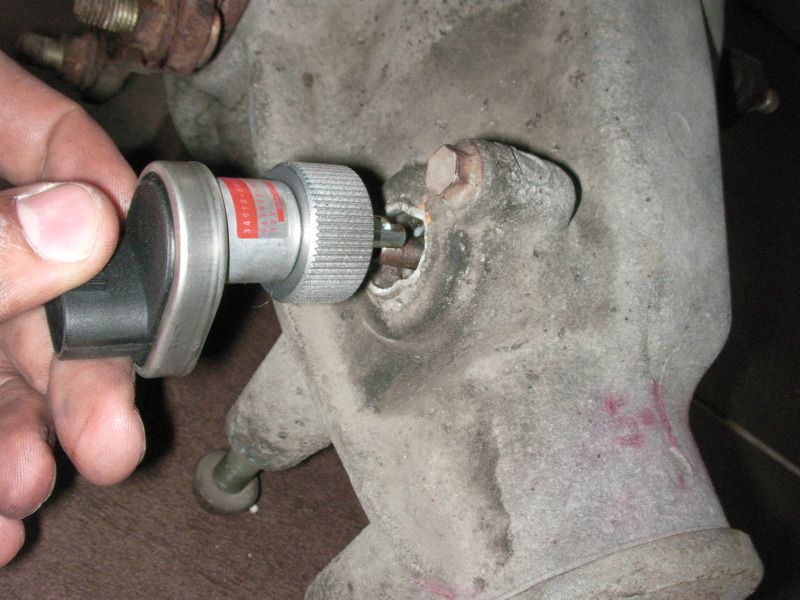
I'm going to need this part. Can smeone help me locate one? Anybody got one lying around?? Just undo the screw and its the speedo drive.
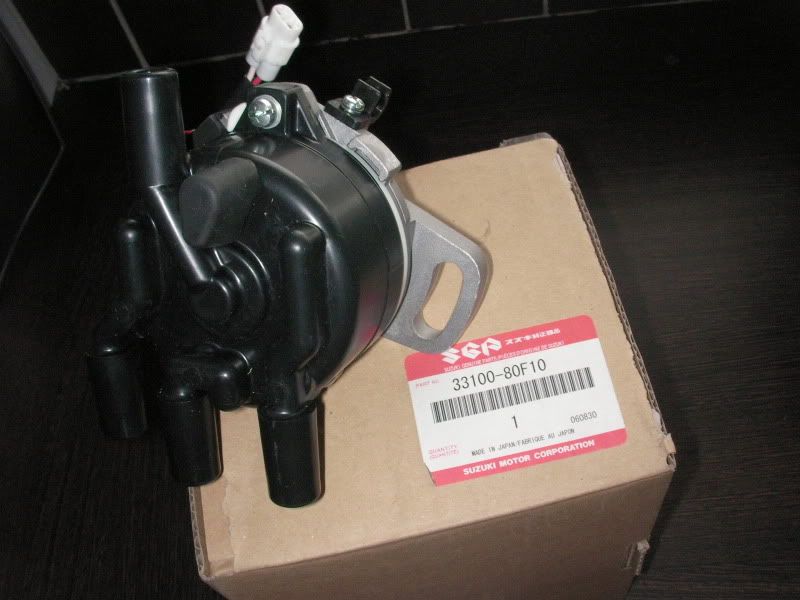
The next thing for me to do is replace the Fuel pump as Ive now got a fuel tank for my car. lol
Replace these fuel lines.
Get the petrol tank Powder coated as there's surface rust etc.
I know you replaced yours Kei. PM'd on info.
How do you know wether your tank is rusty or not lol
Reply: 220
you can use fuel pumps from older lancer EVO or silvia/200sx S15 fuel pumps with minor mod if you want higher flow rate ones :)
Reply: 221
I tried searching and lokoing in the manuals, where abouts is the fuel pump and how is it arranged? Trying to figure out how to fix fuel surge on the track so I was hoping either a solution was found here or I'll have to jack it up and roll up the sleeves. May consider an externally mounted pump with a pickup at the bottom of the tank and/or some fuel safe foam
Reply: 222
The fuel pump is accessed from behind the seats, remove the rear plastic centre panel and below that is a metal panel you remove to gain access to top of tank, i think the easiest way of removing fuel surge is foam, but i normally just bring a couple of cans of fuel to track days to keep tank above 1/2 full.
Reply: 223
go to http://www.frost.co.uk, they do a tank sealer for the inside. so you can have it powder coated then seal the inside to be sure.
As for the diff, really the only way i know is to spin it and feel for roughness at certain point and listen for any abnormal noise.
Cappo diff doesn't seem to go like other car, so i would bet it be good to go! Unless it was ran with low to no oil.
Ming
Reply: 224
With regards to the diff.... when i spin it there's minimal grinding. Is it meant to grind at all or is it meant to be smooth??
Reply: 225
Well presumably there is no oil in it at the moment so I wouldn't be spinning it too much anyway.
Reply: 226
http://www.palsports.co.jp/item.php?catid=64
anybody know what this is
Reply: 227
Quoted Text MPIS multi-pulse ignition systems
※ The price will be tax
Performance has been improved engine response for combustion efficiency of engine performance is significantly improved by attaching the MPIS, will also contribute to low fuel consumption for faster rise of the torque, accelerator wasted work is reduced. MPIS thought along with the environmental performance tuning has created the next generation think of the future of tuning. Product quality is to have them return to normal automatic return circuit In case you have trouble using a power transistor to follow up to 150,000 RPM, noise filter circuit, by any chance the product. Models can be installed without any problems in the engine room ECU unit, as it is also the perfect waterproof treatment.
The person who purchases will be sold at a price (including tax) � 29,925 including installation and you can send in the one-touch coupler of ADIC-P before the ADIC-P.
After Boone X4 � MAX JB-DET Copen Storia X4 Minor: Fits
(Including tax) � 39,690 ~: price
★ 29,925 yen for the three-cylinder Suzuki K6A New release for 39,690 yen for Daihatsu (including tax) (tax included)
Photo is test.
I've still no idea :D
Reply: 228
Quoted from lord, posted Wednesday, May 9th, 2012, 9:59:40pm at here http://www.palsports.co.jp/item.php?catid=64
anybody know what this is
Go on! your going to tell us you've got one :D...
Reply: 229
Or three? :D
Reply: 230
yeah Ive got it.....
But its sitting in the box cus I dunno!! (As scooby doo would say)
Reply: 231
Your a star mate :D
Reply: 232
Quoted from lord, posted Wednesday, May 9th, 2012, 9:59:40pm at here http://www.palsports.co.jp/item.php?catid=64
anybody know what this is
You've got 10 wires coming from the box, the red and black are power, 2 (1 in 1 out) or 4 (2 in or 2 out) of the wires are the speed delimeter and i presume the rest are boost cut wires.
Reply: 233
the reason why i got it was possibly for the adaptronic or the N2.. would i be able to use it with this??
Reply: 234
If it is just a de limiter and boost cut then any aftermarket ecu you add will make this void. If you look somewhere in the adaptronic section, i think Don posted a picture with the ECU pinout layout, if you compared it to what you've got you'l be able to see what things are being played with by the black box.
Reply: 235
man why do you keep buying stuff you don't know what it is :P
Best thing to do is use it in the other cappo you got and see what it feels like !!
Ming
Reply: 236
Ive got a box of dandelions and some old socks. Make me an offer ;D.....
Reply: 237
Might try it on the father in laws.
i always knew he would get a cappo anyway lol
As for bits. I've been very good at buying bits lol. made the odd error or two lol
Reply: 238
From the translation I posted above it doesn't look like it is a delimiter though nor is suitable for an F6A either...
Reply: 239
Like the name suggests - mulitple spark iginition system? More than one spark per iginition cycle to get more complete combustion. I guess it only works on the K6A as it's coil on plug?
Reply: 240
Ahhh, i presume thats come from the ex cappo sport stock, if so things are starting to make sense. A few years back Pal sport made no devices for the K6A as i found out when i tried to fit a delimiter to Gregs car prior to delivery. The K6a has a totally different connection on the ECU, perhaps this was bought afterwards as a result.
If so Greg is the only person i know who can use that device and only on this site very occasionally.
Reply: 241
Quoted from Cappo, posted Thursday, May 10th, 2012, 7:01:08pm at here Like the name suggests - mulitple spark iginition system? More than one spark per iginition cycle to get more complete combustion.� I guess it only works on the K6A as it's coil on plug?
Now that makes sense :D
Reply: 242
Well well well.
I have to say this forum is very addictive. Even when at work it got raised Im my supervision that club cappo had become a dominant feature in my working day. Quote lol
anyway. Just thought i would update as this is a diary and prob the first post in a while with no pictures. Lol.x
I've been having a look at the father in laws cap and been running around after that occasionaly.
As for mine. Well everything money permitting. Ha
Thought id give a realistic breakdown of what i need to do.
Engine
need to buyanother sfs 22 piece of hose kit in red
Not sure whether to go with n2 and 295 injections as its a stage 2 engine
Do i go with an adapt ecu. Prob more likely.
Still need an uprated fuel pump for the tank.
Then throw all together!
Powder coat some engine parts too.
Suspension
powder coat all the sub frames?
Take out old bushes and install New ones!
Got a few bolts to replace. Some New ones. Need to buy New gaitors also.
Honda wheels need refurbished also!
Still looking for centre caps. Lol
Then i need tyres all round
All braces need powder coating. Too many bits to list!
INTERIOR
i would love a leather and carpet re trim but that's out of my budget for now lol
I want to do something with the underside of the roof panels. Put something on it or embossed a cap logo at least.
SHELL
needs a lot of work but luckily I've got all my panels and the rest can be welded etc.
Full re spray. Including floor maybe. Then welding to floor. Small sections.
OTHER
New battery
mot
tax
window tint lol
prob a rolling road for a tune.
think I've covered most bases. Lol. But there's still a lot to do. Bloody hell
Reply: 243
JA71V(2カプラー)JA11C・JA12C(MT)・JA22W(MT) SBLC-011
JB23W 1型~6型 SBLC-019
カプチーノ EA11R・EA21R(MT) SBLC-011
aha.... looked on the sheet it came with.
SBLC -011/012 all way to 019. So it fits 011 to 019
Reply: 244
Right.. where do I start.
First of all guys I'd like to say to the forum I'm gonna be a Dad for the first time and I cant wait! My partner has just gone three months so thats good news. My baby isn't due until March.
The bad news is I've weighed up my options and I'm not going all out as the cost is going to kill me. I wanted the car shot blasted and fully resprayed from top to bottom. It's also a Jap car and my insurance is just to steep. That would be the logical thought of things. I've had to weigh up my options with what I have and haven't got, the full cost of the restoration to the spec I've had in my head.��
I've only gone and bought another cappuccino!! This is how I know I'm cappuccino obsessed!
This is what ive bought. I've bought it as the miles are really low and it's clean. The floor is very rotten around the rear bulkhead and that can be done. I think it was holding water while it was stood. The boot floor is clean with very minimal surface rust.� The engine bay is super clean and it only needs a jet wash. Only a few screws are rusty. It's a UK car and it's cheaper insurance for me and I can finally put my private plate on it.
I have to clear my gran's garage as I've run out of time so my other cap needs to go! i'll be listing all the items in the for sale section. I'd prefer if someone bought the job lot instead of buying the bits separate.��
http://www.ebay.co.uk/itm/Suzuki-Cappuccino-only-27000-miles-spares-or-repair-/271052323212?pt=Automobiles_UK&hash=item3f1bfa398c#ht_721wt_962
Here's the pictures.


Reply: 245
Congrats & Congrats again!!
THAT is the way to do it!!
Reply: 246
Congratulations to you both - that's great news!
Congrats on the new purchase too. Makes a lot more sense than spending the amount you would need to spend on your other one I'd say (thumb)
Reply: 247
Congrats! Nice mileage too :)
Reply: 248
I drove it today and getting it next week as not too far from me. The boot had never been opened. it was owned by a 70 year old and only did 3k in ten years! Then let it stand for 2 years so the son sold it as the poor dear was not well. Needs a good service. Brakes are shot. Discs are corroded and rusty. But pulled really well! Felt solid enough. All I need to do is get her a floor and replace with my sills.....looking for an MX5 floor... Not sure which one though.
26 k is really low...but needs work and will be a great car when done.
Reply: 249
Just thought i would provide a quick update on this cappo. My old one is now in the process of being welded and prepped for race use. Can't wait to see it in use again!
Here are a few pictures of the car as it pretty much is.
rare mesh
Wheels are all fresh
Inside. It still has the original stereo...
inner arch
Close up


Reply: 250
Congrats. You say you have all panels. Where did you get them from and how much? (If you don't mind me asking!!!! lol) I need all the sills parts.
Reply: 251
The days of getting parts cheap has gone...Some of us were lucky to get panels very cheap. Now its dealers and randomness I'm afraid.
Reply: 252
Quoted from generic, posted Thursday, October 18th, 2012, 3:38:54pm at here Congrats. You say you have all panels. Where did you get them from and how much? (If you don't mind me asking!!!! lol) I need all the sills parts.
I have a brand new driver side inner sill panel and a brand new passenger side middle sill panel, if your interested?
Reply: 253
Quoted from lord, posted Thursday, October 25th, 2012, 11:03:37pm at here The days of getting parts cheap has gone...Some of us were lucky to get panels very cheap. Now its dealers and randomness I'm afraid.
Your telling me,� I've just paid a fortune from Suzuki for a timing belt, pulley and oil filter :(
Reply: 254
Updated List of mods to my Cappuccino and new parts to be added to car when finished.
Engine
ex
FX156� � � � � � ��� � Fairfax Alu Engine Cover FairFax Motorsport
B04-05-28-05� �� Cappuccino Plate Cappuccino Sport FairFax Motorsport
FX � � � � � � � � �� �� Fairfax Large racing Radiator and fan with expansion tank
FX64� � � � � � � �� �� Stainless Steel Intercooler pipes with red connectors
4ZE36-C10� � ��� � Suzuki Sports Radiator Cap
� � � � � � � � � � � � �� Suzuki sport 1.4 mm head gasket
17400-50813� �� � Water pump inc gasket
12821-70B02� � �� sping for tensioner
12810-81402� � �� Tensioner Cam belt
4943927128012� �Suzuki Sport timing belt
294310-2810-YL� Yellow power cable for engine bay
SFS22Red�� � � ��� � SFS Silicon Engine Hose set. 22 piece
� � � � � � � � � � ��� �� Suzuki Sport Oil Cap
4.94393E+12� � ��� Suzuki Sports Low temperature thermostat
292100-0000 �� �� Suzuki Sport Magnetic sump Plug
Copy� � � � � � � ��� � Steves Super duper ARC copied Air Filter
� � � � � � � � � � � � � � Steves manifold
751570-2800 �� �� Suzuki Sport engine strut brace
4JA36-L27 � � � �� � Suzuki Sport N2 ECU
71004-AS002 HKS Blow off valve Super SQV
� � � � � � � � � � ��� �� Magnecor Sparkplug leads 8.5MM
NGK DCPR9EIX� � sparkplugs
Suzuki GTI spark Plugs
EDP � � � � � � ��� �� Fairfax down pipe
� � � � � � � � � � ��� � Cappuccino Sports 2.0 inch Stainless muffler� Front to back
4JB36-D10� � � �� �Suzuki Sport Exhaust Rubbers
� � � � � � � � � � ����� Apexi Turbo Timer
4GA36-K10 � � ��� New Denso Injectors 295cc
� � � � � � � � � � ��� � Garage John bonnet dampers!
12140-50E50-000� Cappuccino piston rings (3 in set)
14810-80F00� � �� Fuse, Thermo Catalyst sensor
38450-80F00� �� � Brand new Washer bottle.
15910-80F00� � �� Cable accel
23710-80F00� � �� Clutch cable
11710-80F00� � �� Rear engine Mount
11610-82c00� � �� Front engine Mount x2
SC09T� � � � � � �� � Exedy Clutch� 243
SD02H� � � � � � ��� Organic Racing clutch plate� 175
Genuine suzuki release bearing
� � � � � � � � � � ��
Interior
Omp.� � � � � � � � � � Small Steering Wheel omp
831140-0000.� � �� suzuki Sports Shift knob in white (needs inner piece)
SpdCovWhRd� �� � White Dials with red writing
IntMatVel � � � � � � cappuccino sport mats
MPS001-CFL� � � � � Triple Guage holder
CRUXGAUGE52MM� Double Guage Holder
851530-2800.� � � � Single Suzuki Sports Carbon Fibre Gauge Holder� (I know!! Not sure on configuration)
� � � � � � � � � � � � � �� Steve's super duper rear strut brace (In boot)
� � � � � � � � � � � � � �� Garage John Twin Speakers shelf
� � � � � � � � � � � � � �� Garage John Gear Lever Gaitor
� � � � � � � � � � � � � �� Garage John Handbrake Gaitor
Css.� � � � � � � � � � � � Short Shifter Kit
99000-99004-915.�� Stainless steel sill protectors
Exterior
Roof
78797-80F01�� � �� RR LH Molding Side roof
78747-80F01� � � � RR RH Molding Side roof
78797-80F01� � � � FR LH Molding Side roof
78744-80F01�� � �� RF RH Molding Side roof
78845-80F01� � � � RR RH Molding CTR roof
78745-80F01�� � �� RH Molding Side No 1
83821-80F00� �� � �LH Front outer Weather Strip
SAPFIL.� � � � � � � � Front Indicator vents with light fit into bumper
HLKHID-SH.� � � � � My Funky front Lights!
FX146.� � � � � � � � � Rear LED Lights!!
TRIP 591� � � � ��� � �LED Indicators built into mirrors home made
under braces x2�� � HOME MADE OFF FORUM
99000-9900R-E01�� New Rear boot rack genuine
B04-09-27-03Bk� �� cappuccino sport badges x2
77550-80F01-0CA�� Garnish back window
62630-80F00� � � � � Balk head brace x2
64310-80F00� � � � � RH Quarter Panel
64710-80F00� � � � � LH Quarter Panel
64211-80F00� � � � � RH Outer sill
64611-80F00� � � � � LH Outer sill
63731-80F00� � � � � LH Rear wheel outer Panel
63331-80F00� � � � � RH Rear wheel outer Panel
71714 80F00� � � � � Stay front bumper x2
72322/1-80F00� � �� Inner plastic Mud Guards
Running Gear
55321-80F00� � � � � Front brake dust cover x2
55621-80F00� � � � � Rear brake dust cover x2
15873-80F00� � � � � Fuel Pipe Cover
15872-80F00� � � � � Fuel Pipe Cover
15871-80F00� � � � � Fuel Pipe Cover
15897-60A00� � � � � Fuel Pipe clamp
15861-80F00� � � � � Fuel Pipe return
15811-80F00� � � � � Fuel Pipe
54402-80F00� � � � � LH Brake Cable
54401-80F00� � � �� �RH Brake Cable
Suspension/Rims
Honda� � � � � � � � � � '96 Integra TypeR rims 15x6'' 4x114.3 +50
WN1.25RD� � � � � � �� Suzuki Sports Light weight wheel nuts
640510-2800� � � � �� Suzuki Sport Bush mounts and diff set.�
� � � � � � � � � � � � � � �� Bc coilovers and protective sleeves
55102-70C30� � � � �� New front calipers both
55830- 50E10� � �� �� Calipers kit rear 3
45723-60B00� � ��� �� Seal Set ball joint
46640-80F00� �� �� �� LH Joint Stabilizer
46630-80F00� � �� � � RH Joint Stabilizer
46202-80F01� � ��� �� Rear Upper arm
46201-80F01� �� �� �� Rear Upper arm
46305� � � � � �� � � � � Rear trial Arm 1
Black Diamand Fast Pads ORDERED
KBD692d� � �� � �� �� Black Diamond Drilled Discs
470561-2800� � � �� Stainless steel hoses
[b]
Reply: 255
Thought you had sold the stage 2 engine? :-/....
Reply: 256
That's not a list of mods - that's a list of parts to fit a capp.
Get them on there and, as you would say - get some pics up!!!
Reply: 257
The stage two engine is sold I'm afraid.. doodlepug or what ever. I dropped it off to tauntun for a drive lol
I'll get pictures up....most of em are up...
Reply: 258
What do you mean. Have you got all the parts actually on a cappo :o :).....
Reply: 259
as in most of my parts are up in pictures through the thread...
I still owe you the de cat!! Been so busy Ste... sorry.
Reply: 260
If you lived further north it would have been done now because i would have been round yours till it was ;) Don't worry about the de-cat i know you have had a lot on :)
Reply: 261
Can someone help me find the release bearing for the clutch please. Do i have to go with the Exeddy stuff or can I go genuine??
These are the clutches I have, which are matched.
SC09T Exedy Clutch 243
SD02H Organic Racing clutch plate 175
Reply: 262
Suzuki one will do :)
Reply: 263
There on back order when I wanted one the other day from Suzuki
Reply: 264
how much about 50
Reply: 265
yea was about that mate. although euro parts said they can get one for about �38 if memory serves me right
Reply: 266
Finally got the cappo onto some ramps the other day and dropped the garage owner a drink. Wow this ones rusty but it was cheap, however its a UK Car and the miles are soooo low. It's also got history and loads of receipts etc. So this is the one to restore....for me.
Got underneath and was not a good sign. It's the floor that needs complete replacement!


Reply: 267
Wowzers
Reply: 268
Where did the previous owners park it? In the sea???
Surely when they first saw that starting to happen they should have thought - hmmm think this needs some protection...
Reply: 269
Is it just the floor? What about the sills and arches etc.
Reply: 270
the floor.. say about 30cm in is so fragile....
it was left with mud which has just ate away at the skin... it still needs a good steam clean to see the full extent. The sills are ok ish.. not fully inspected..
It was an old lady 72 who left it outside for two years!!! The arches are going at the bottom. Luckily I have them all.
Need the floor then im ok!
Reply: 271
Its a shame because its a straight unmolested cappo.
Reply: 272
were all gona need some floors at some point so lets work together and get some or find some alternatives.....
Then build an electric one ha ha
Reply: 273
What about an MG midget floor :-/ Small front engine rear wheel drive and they still knock parts out for this sort of thing like theirs no tomorrow so the prices could be reasonable.
Reply: 274
i'll see ....
just sent an email to James at Fairfax for a quote lol
Reply: 275
The classic mini floor doesn't look far off but the prices Ive just seen are a bit steep. An MG floors about �150 all in.
Reply: 276
add that to the technical section please...
Reply: 277
You will never get one thats a perfect fit just fairly near when chopped back to size. It goes without saying that the more common floor pans are going to be cheaper. The mx5 could be a good one. I just did a quick search and went past a site that does the mx5 and mg/mini stuff all in one place. I'm not saying that any of these would be ideal but its a good starting point. next thing to do is get the tape measure out ;)
Reply: 278
Hi guys.
A quick update. Been try into source a local garage to me to get the welding sorted. Ill be getting quotes by the end of the week and I've found a local garage with a bake. The work they have done looks good so far to me.
I finally got my hands on one of Steves manifolds. It came today after my mom missed the post. It looks good I have to say. Here it is next to my de cat.
Here on its own
I put the two on my spare turbo.. Just sizing up!!
Just waiting for my gasket to arrive and minor goodies!!


Reply: 279
More bits turning up today ;)
Reply: 280
iiiiiiiiiiiiiiiiiiiiiiiiiiiiiiiiiiiiiiiiiiiiiiiiiiiiiiiiiiiiiiiii !!!!!!!!!!!!
Reply: 281
Wow at the amount of rust you guys have on the roads, so lucky us down under dont have to deal with that problem!
And that last picture you can really see how small the turbo is!
Hope to see more pictures of the parts!
Reply: 282
I wanna get them on the bloody car!!!
Reply: 283
Final bits arrived today. That's my suzuki sport head gasket. 1.4mm to go with n2 and other goodies.

Reply: 284
Well had a little play today, whilst baby sitting lol
The car is being attacked by mice!!! Lol before
After. My garage John goodies are looking good.


Reply: 285
I like those Garage John bits, very nice :)
Reply: 286
How's the floorpan research going mate? You appear to be stockpiling parts like myself :D wait til the warmer weather before getting stuck in aye? ;)
Reply: 287
He's got me on the floor pan gig. Ive got motocraft doing some research but they don't work on the same time frame as the rest of mankind ;D
Reply: 288
It's doing my head in!!!!!
Reply: 289
I wont give up on it :)
Reply: 290
The one guy I got a quote from doesn't want the work....lol he just said...big job mate....and left.
Reply: 291
Motocraft would clamp it in the jig. Your talking of taking a big lump of the car away with the floor and all the sills. You would save a lot of money by striping it to the bare shell first.
Reply: 292
I'm struggling for anyone to take on the job of doing my cappuccino resto... WTF!
Reply: 293
Why? :-/
Reply: 294
Should bring it down here. Plenty of decent car restos that would love too :)
Reply: 295
People just hmmm n rrrrrrrrr ... N dunno.......and trying to rip me off. I've got 3k for all the work including re spray and welding etc. the car is drivable still
Reply: 296
Is this what you want doing.� Take it somewhere and let them strip the car back to the bare shell engine out and everthing. Put a full floor in all six sills, rear wheel tubs, rear quarters, paint the full shell including the underside and roof. strip and blast the subframes and other suspension parts and powder coat. Fit the Suzuki sport bushes. Put the car all back together . Hey presto like brand new.
Reply: 297
Yes....
Reply: 298
You also have a body kit and those fancy back lights. If your thinking of putting them on they don't just bolt on and away ya go. Another few days work just for these bits ??) Everyone will have different opinions of how much it should cost but i think it will cost a lot more than 3k to do it as a turn key package.
Reply: 299
The kit has gone. Just the lights left....
Reply: 300
The lights need the panel on the car altering so they fit. I did Andy's
Reply: 301
Oh I see. That's why I sold the kit. Less rebuild cost mate!!
Reply: 302
Its a hard thing to put a price to but if you could find a body shop to do it between other jobs to fill gaps in on there working weeks and have the car for a long time. that would bring the bill down. The biggest saving you could make would be to strip the car yourself and put the parts back on yourself. You would know how things fit and how it should look better than any body shop. It would probably be more cost effective to get that shell from Marc its 90% there.
Reply: 303
Have to agree with Steve that there is a lot more than �3k worth of work there. We kept the cost down on my rebuild by Steve doing a lot of the work :D
We basically stripped it down as much as possible beforehand and then left it with them forever. As Steve said above this was so they could work on it in their slow work periods to keep the costs down. We then reassembled the car ourselves again to keep the cost down.
Reply: 304
I think it can be done by someone locally maybe...
I'll strip the car as much as I can. The shell is in good nick i tell you and the shell has never been touched. It's just the floor 30 cm from the sills. I'll update with pics by the weekend!
Reply: 305
I had a little tat yesterday and played about with the floor. I looked at the seat anchor points. The floor connecting to the sills etc.
Took away the sealant and dug the edge of the floor away. Corroded all round the edges of the back of the bulk head.
Where the rear of the floor connects to the thicker sheet metal was tidied up. It wasn't all doom and gloom.


Reply: 306
Good luck with it man :). Seeing pics like these makes me not wanting another cappo !
Ming
Reply: 307
I thought mine was pretty terminal, but i can't see any daylight through mine so i guess it's not so bad :/ I'm close to the �14k mark now inc. Cost of the car, just think of what could be had for that :O could get a nice 911 for that!
Reply: 308
Quoted from doodlepugg, posted Saturday, May 25th, 2013, 6:09:14pm at here I thought mine was pretty terminal, but i can't see any daylight through mine so i guess it's not so bad :/ I'm close to the �14k mark now inc. Cost of the car, just think of what could be had for that :O could get a nice 911 for that!
That is mental!!! You building a competition car or ?
Reply: 309
It's just gonna be a reliably quick Cappo, for use on road and track. Though it will be a little wild to drive on the road!
Reply: 310
For those who have bc coilovers here you go....I've just bought these and I think they're a good buy. 7 a corner. Isn't bad to protect the coilovers...
http://cgi.ebay.co.uk/ws/eBayISAPI.dll?ViewItem&item=170971979175
Reply: 311
Very important buy, i've learnt from my SS coilovers that grit beats ally thread everytime and can cause quite a headache.
Reply: 312
I wouldn't fit mine without it. So are your threads battered?? Can't you throw loads of copper grease on em too?
If you wanna adjust them this is ideal. So you know your threads are ok.
Reply: 313
The ally adjustable seat spring has threaded and now locked in place, only way to free it is cut it off :(
Reply: 314
Oh lord. How long has that taken to get like that??
Reply: 315
It didn't take long, i spose it comes down to ensuring they were totally clean before height adjustment, i obviously missed some dirt and then it got caught in the thread and no amount of force would then get it to rotate off.
Reply: 316
Oh crap :/ definitely a good investment then!
Reply: 317
Quoted from lord, posted Sunday, June 16th, 2013, 11:06:05am at here For those who have bc coilovers here you go....I've just bought these and I think they're a good buy. 7 a corner.� Isn't bad to protect the coilovers...
http://cgi.ebay.co.uk/ws/eBayISAPI.dll?ViewItem&item=170971979175
Thanks for the link ! Just bought a set :)
Reply: 318
Well I had a little play with the coilovers covers just. I was looking at the fitment. It's a thick neoprene and the fitment is ok. They cover the shock and spring fully.
Ok so put them on with the Velcro. Not happy thinking they could get ripped off or fell off. I've got some tie ups in the house. Some long ones and they just fit.
What I've managed to do is thread the tie up through the top. And once I've done this I've put one top and bottom. It's a tighter fit. I wish it was longer.
Finished
As you can see there is one issue. Could they slide down from the top.?
They sit just off the top spring. Can anyone see the issue.


Reply: 319
Tie it tighter around one of the coils. Can't see it causing any issues tbh!
Reply: 320
Wow not stated the car for months and it started first time only with the jumper starter lol
Before this the battery was dead ! I had to pump up the tyres too lol luckily I had my[/URL]
The engine is soooo sweet still and made me want to drive her lol I took her round the block with no boers and lights and still felt sweet ! Brakes were binding and it sounded like I was on a railway track with no tyres lol[/URL]
Still a joy even in this state
Reply: 321
Each time I click the key in the ignition it just makes me want to drive it. Alas, not long now!
Reply: 322
Pulled out out again and started the bad boy. Needed the battery starting but was ok once fired up.
Cleaned the back end up nice for a quick was. People have been talking about using all purpose cleaner apc on detailing world. Flash cleaner with lemon. They reckon it's good for most things. Diluted it with water 1-10 water and put in a pressurised water bottle.
Wings were in very good condition and the lower cowlings. I'm going to prep them myself like I did last time.


Reply: 323
Decided to start getting some parts ready so I started prepping the rear lights before paint.
Andy did you fibreglass this section to the lights. Let it set and then undue or just leave it ? And what bulbs did you use? Normal bulbs? Can u use led bulbs?


Reply: 324
Just left them like that in case they needed to be replaced at any time. I did want to use LED bulbs and despite paying over the odds for ones that were meant to work the indicaators still flashed to quickly so had to use standard. You will need to check which type of pin bulbs are required too as I can't remember.
Reply: 325
Had a go at sanding the front bumper ready for prime and paint.
Cleaned fully using all purpose cleaner and suds.
I started off using a wet sand paper
Started on a 220 grit and went all over
Then used a 400 all over
Then used 600 to smooth off and got into nooks and crannies
Smoothed out a lot of bumps such as stone chips. Got a small repair to complete but going to use the fibre glass resin already set in the tub to go behind the year to give some solidity.
I want a square intake that I want to add onto the bumper like a take off one but only want one on the same side as the air filter like on yours kei
Or I might fabricate a vent hole where the bumper angles back just after that line.


Powered by e-blah Platinum Series © 2007