|
|
 Author Author |
 The Whole 3.6 Yards (currently 11413 views) The Whole 3.6 Yards (currently 11413 views) |
| nikki |
| Posted on: Sunday, December 18th, 2011, 1:44:17pm |
  |
|
|
Time for your weekly fill. Unfourtunately noting too exciting has been going on.
I Had a few issues with the injector seals perishing and they have been in and out 3 times. Now they are all fitted with the seals from the old injectors and all seems well. While this had been going on somehow the little plastic cap that goes on the end on the idle control valve had dislodged itself and started to make sucking sound that left me scratching my head for a few days wondering where it was coming from. Thankfully its all fixed and back to normal 
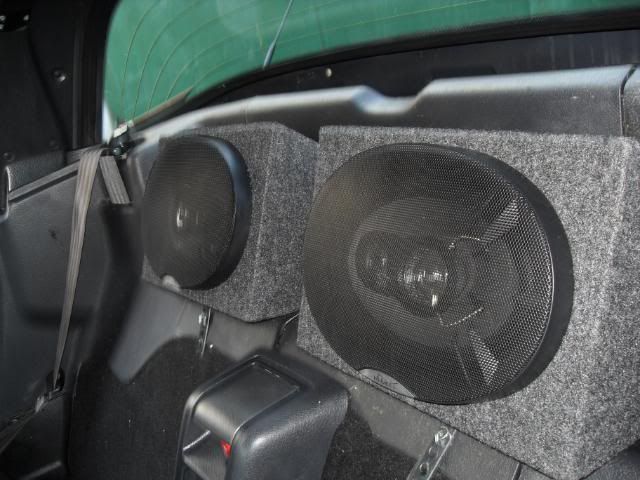
I did grab a picture of my 6x9's though. Not as pretty as a Garage John or similar, but they sound good
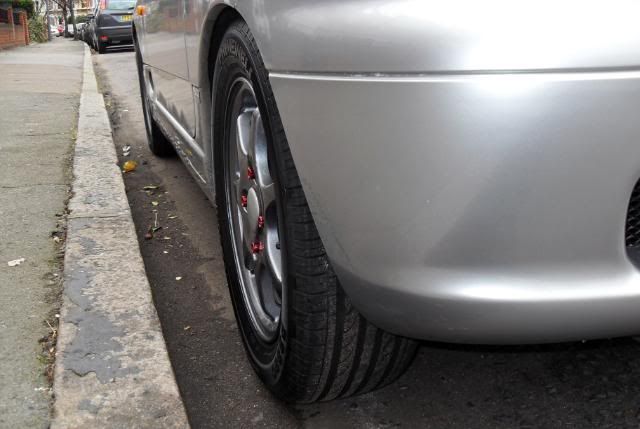
Recently I had also noticed that my two of my tyres seemed to have given up holding air for any decent amount of time. They have a fair amount of tread left on them but on close inspection all the side walls had age cracks and a chunk or two missing from bad parking from previous owners. I do want new wheels, but as we are in the middle of winter I decided just to get a set of cheapy tyres to get me though to spring time. I think I may have also managed to wrangle them as a work expense, which makes it sound better when I tell you I spent £180 on something called primewells (who? ).
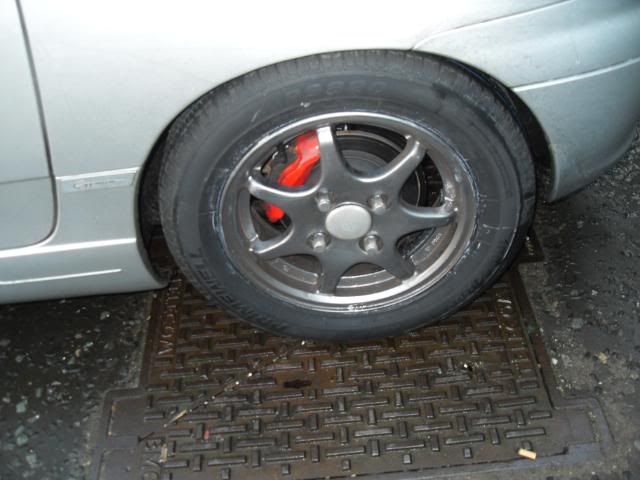
They are black, rubbery and round  They're also 185 section and 60 profile as opposed to the 55s that were on there. You may also note from that shot that I have removed my rear mudguards for now as one had some damage on it. They're also 185 section and 60 profile as opposed to the 55s that were on there. You may also note from that shot that I have removed my rear mudguards for now as one had some damage on it.
Friends following me had noticed that my lights had a slight flicker to them so I also spent some time re routing and cleaning earths. My roof still seemed to be leaking, I'm starting to think this may be why carbon roof panels are such a popular modification in Japan So I spent a bit more time playing with the seals, mainly at the ends. Its rained quite a bit last night so I will check shortly 
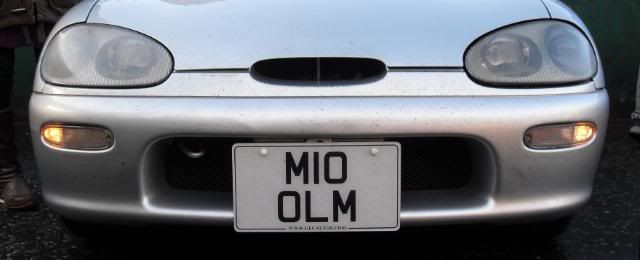
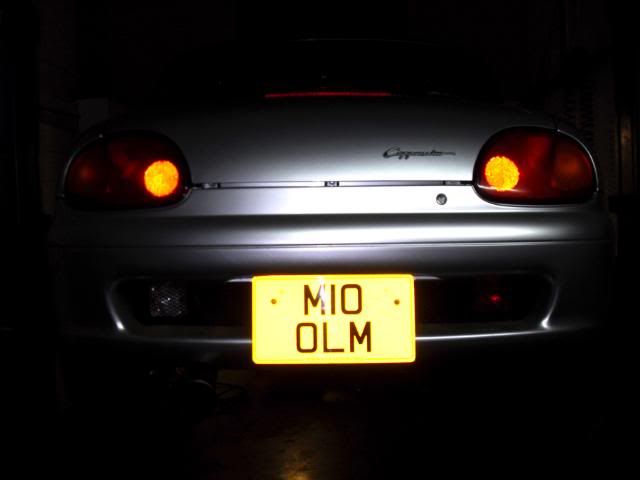
And finally I also bought myself some............mainly for the grammatically incorrect Japanese name  ...............Piaa Hyper Dimple Super LED 501's for my sidelights. ...............Piaa Hyper Dimple Super LED 501's for my sidelights.
Before
After
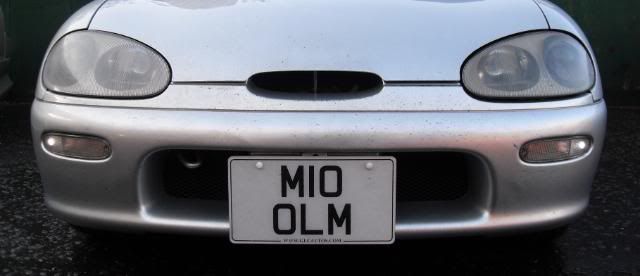
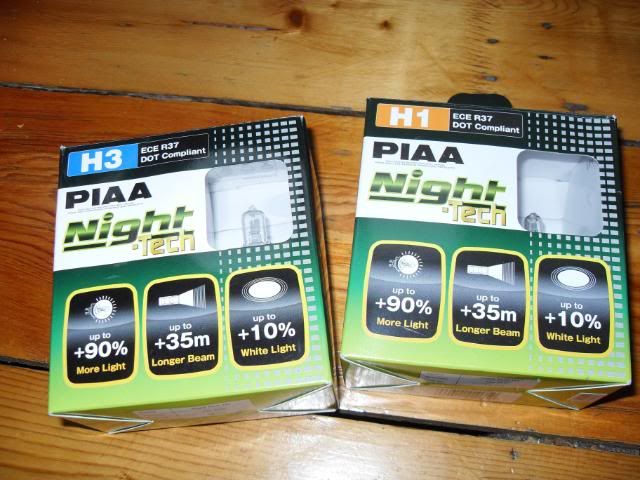
They dont seem to fully light the casing up for some reason possibly due to the daytime picture, but are much less yellow and emit a nice white light so I am happy. I have also added some Piaa H1 and H3 bulbs to my Christmas list so they'll be joining the lighting party at the front shortly  |
Last modified Sunday, December 18th, 2011, 1:50:30pm by nikki |
|
 Logged Logged |
|
|
 |
Reply: 40 - 333 |
|
|
| Andy |
| Posted on: Sunday, December 18th, 2011, 7:56:16pm |
|
|
Official C.O.C Contributor


Gender:  Male Male
Posts: 23604
Posts Per Day: 3.48 |
|
| That's because standard bulbs emit light all around whereas most LEDs simply send it straight forward. Mine are exactly the same. I have bought some others though to try that have several LEDs which should emit light through all angles and hopefully light up the entire case. |
Drop me a PM if you would like to be added to the ClubCappo Member Map. More details can be found here.
We now have an official Facebook group as well as a page! See here |
|
| Logged |
|
|
 |
Reply: 41 - 333 |
|
|
| nikki |
| Posted on: Tuesday, December 27th, 2011, 3:05:02pm |
|
|
|
Well over the festive season I seemed to have aquired a few more Cappuccino related goodies
I bought myself a catch tank
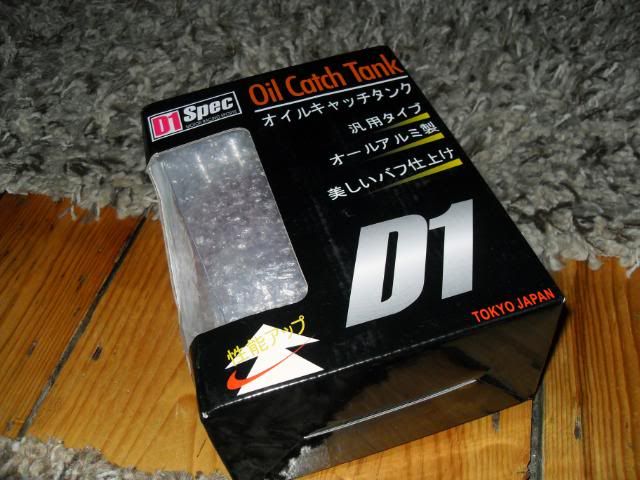
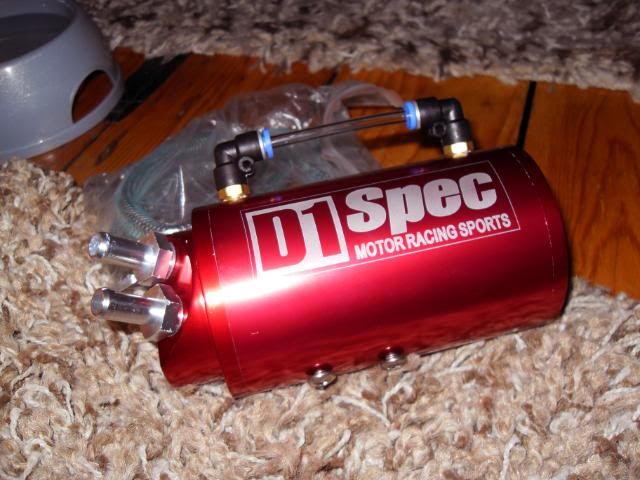
Looks like this out the box, red of course
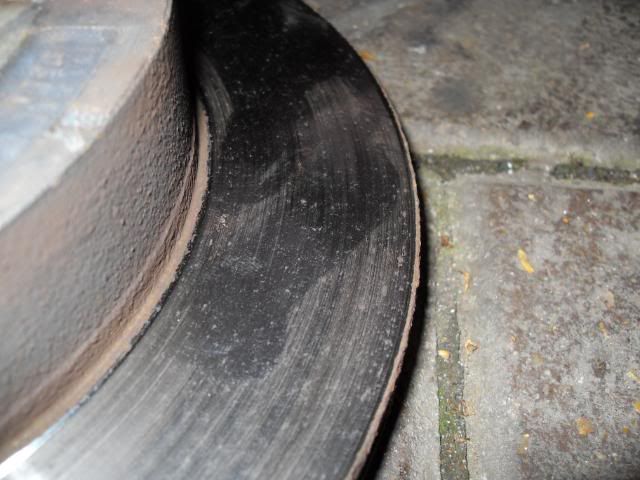
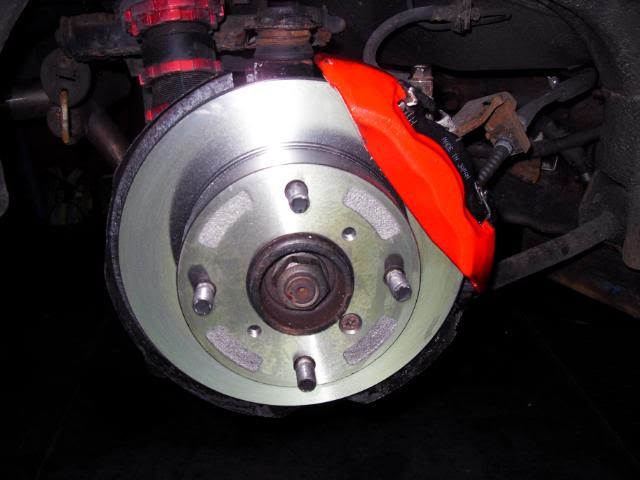
And I happily got these rear discs for Christmas as my current ones have a nice groove in them
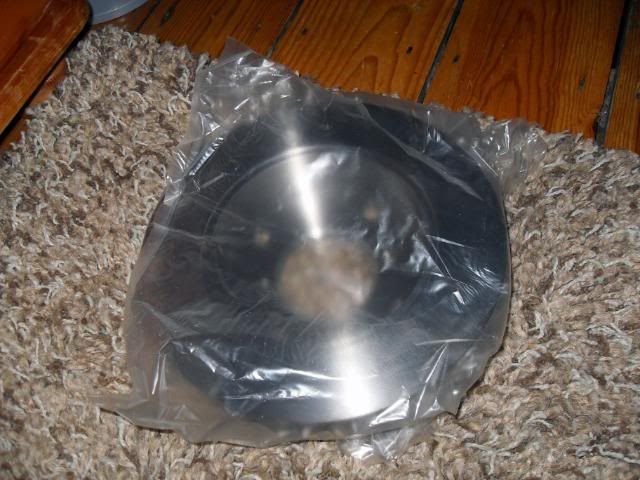
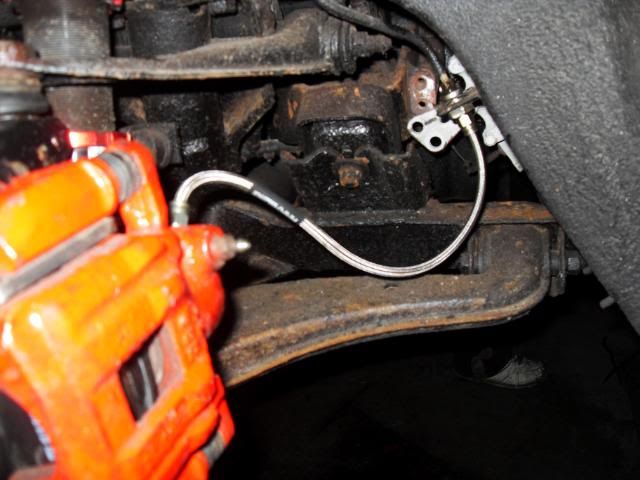
To go with them I have ordered some Black Diamond Predator pads all round and some new front discs too, although they have not turned up just yet. These did though
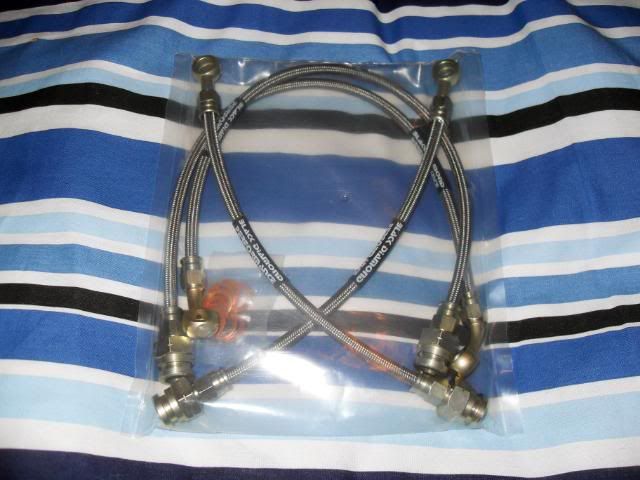
So I can wait to get that little lot on 
Another present I got was a set of new wheel nuts that dont give the appearnce of my car looking like a scythed chariot as per the current ones. I asked for either black or red ones.....can you guess? yes ......

Just to show the depth difference between old and new

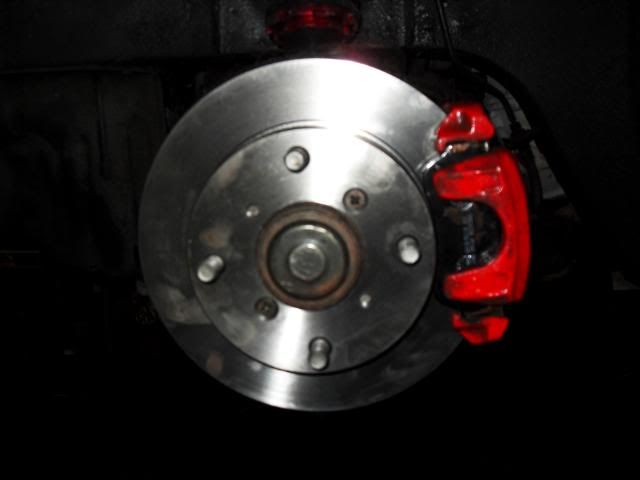
And fitted
I was going to hold off fitting them until I got a new set of wheels, but I think they make a nice subtle change all on their own

And as also mentioned earlier, I got these
Daytime comparison shots didn't really help though  Still took some though Still took some though
Before
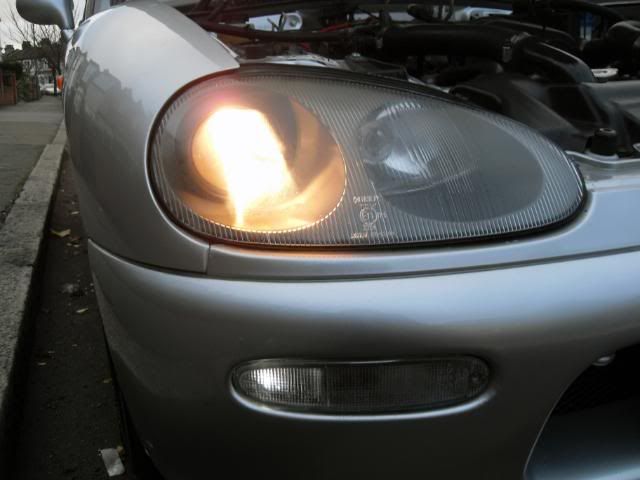
After
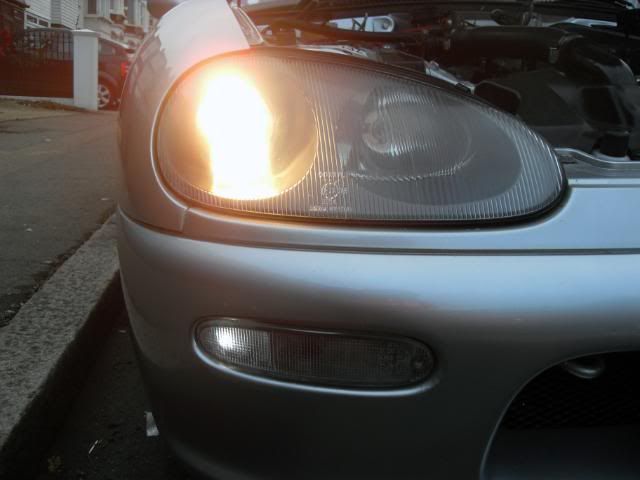
Not an amazing difference, so I tried to get my passenger to get a shot when we went out for a spin in the evening, but the shutter speed was too slow for a decent shot 
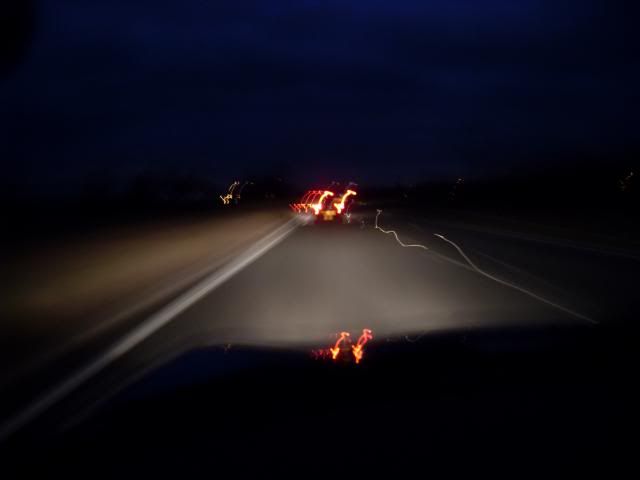
They light up the road much better than before.
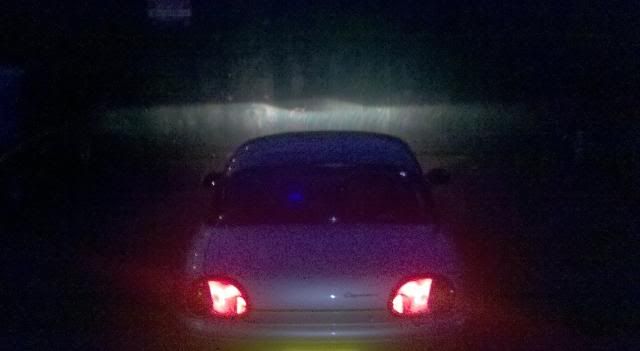
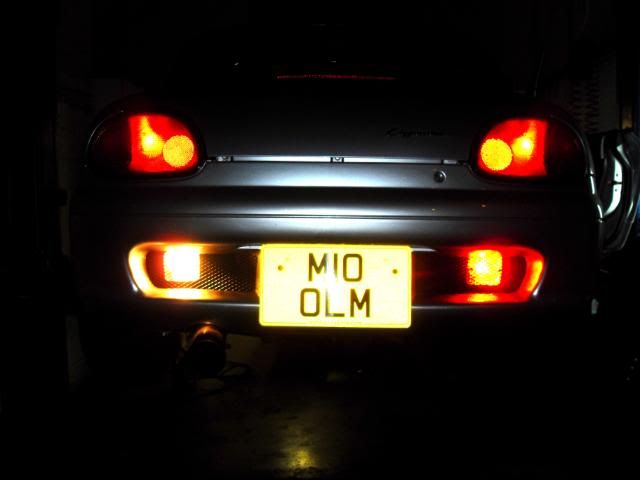
Afterwards I did manage to get a nice dark head on shot for you.
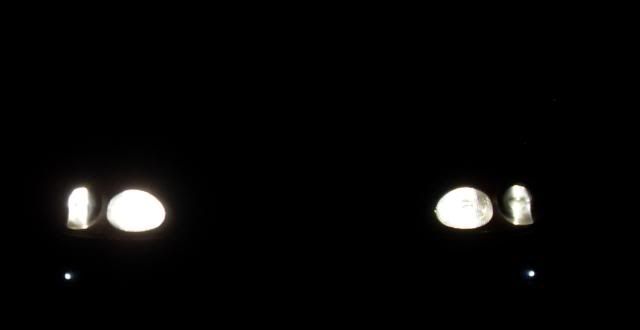
Thanks for looking |
|
| Logged |
|
|
|
Reply: 42 - 333 |
|
|
| Andy |
| Posted on: Tuesday, December 27th, 2011, 3:14:45pm |
|
|
Official C.O.C Contributor
Gender: Male
Posts: 23604
Posts Per Day: 3.48 |
|

Did Black Diamond have those hoses available off the shelf or did you have them make them up for you? They aren't listed on the product lists I've got... |
Drop me a PM if you would like to be added to the ClubCappo Member Map. More details can be found here.
We now have an official Facebook group as well as a page! See here |
|
| Logged |
|
|
| |
Reply: 43 - 333 |
|
|
| nikki |
| Posted on: Tuesday, December 27th, 2011, 4:44:47pm |
|
|
|
| I ordered them through Crest Motorport, they were not advertised on their website but i spoke to Alex, got them ordered and they only took a couple days to come |
|
| Logged |
|
|
|
Reply: 44 - 333 |
|
|
| lord |
| Posted on: Tuesday, December 27th, 2011, 6:49:38pm |
|
|
|
| Where the discs from?!? Costs! |
Last modified Wednesday, December 28th, 2011, 12:01:23pm by lord |
|
| Logged |
|
|
|
Reply: 45 - 333 |
|
|
| Avar |
| Posted on: Wednesday, December 28th, 2011, 7:27:14am |
|
|
|
| Yep costs please, specially for the lights, can you also do a piccy of the lights shining at a wall, i'm intrested in seeing what the cut off is like. |
|
| Logged |
|
|
|
Reply: 46 - 333 |
|
|
| nikki |
| Posted on: Wednesday, January 4th, 2012, 10:27:42pm |
|
|
|
“ |
Quoted from lord, posted Tuesday, December 27th, 2011, 6:49:38pm at here |
” |
Where the discs from?!? Costs!
|
|
Disc and pads details are:
Panther Silverline (front) £30.00 (LK Performance)
Blue Print (Rear) £72.00 (local motor factors)
Black Diamond Predator Pads - Fast Road - Front £30.00 and Rear £40.00 (LK Performance)
http://www.lkperformance.co.uk/ |
|
| Logged |
|
|
|
Reply: 47 - 333 |
|
|
| nikki |
| Posted on: Wednesday, January 4th, 2012, 10:30:43pm |
|
|
|
| Black Diamond Braided Brake Hoses cost £61.00 delivered from Crest Motorsport. They are not advertised on the website so either email or call Alex http://www.crestmotorsport.co.uk/ |
|
| Logged |
|
|
|
Reply: 48 - 333 |
|
|
| nikki |
| Posted on: Wednesday, January 4th, 2012, 10:42:12pm |
|
|
|
“ |
Quoted from Avar, posted Wednesday, December 28th, 2011, 7:27:14am at here |
” |
Yep costs please, specially for the lights, can you also do a piccy of the lights shining at a wall, i'm intrested in seeing what the cut off is like.
|
|
The Piaa H1 and H3's were gifts but I believe they were around the £30 a pair mark The Piaa Hyper Dimples were about £15 a pair.
They were all bought from various places on the internet, basically just shopped about for the cheapest
|
|
| Logged |
|
|
|
Reply: 49 - 333 |
|
|
| lord |
| Posted on: Thursday, January 5th, 2012, 10:07:14pm |
|
|
|
| Thanks for the update. Have you fitted the brakes yet?? |
|
| Logged |
|
|
|
Reply: 50 - 333 |
|
|
| aardvarks |
| Posted on: Friday, January 6th, 2012, 4:28:37pm |
|
|
|
“ |
Quoted from Andy, posted Sunday, December 18th, 2011, 7:56:16pm at here |
” |
That's because standard bulbs emit light all around whereas most LEDs simply send it straight forward. Mine are exactly the same. I have bought some others though to try that have several LEDs which should emit light through all angles and hopefully light up the entire case.
|
|
In reply to Nikki as well, these Leds are also installed in the holders at right angles to give greater coverage of the lens.
http://www.aceparts.com/leds/s.....ior-number-plate.htm
|
Last modified Friday, January 6th, 2012, 4:31:15pm by aardvarks |
|
| Logged |
|
|
|
Reply: 51 - 333 |
|
|
| Andy |
| Posted on: Friday, January 6th, 2012, 6:56:48pm |
|
|
Official C.O.C Contributor
Gender: Male
Posts: 23604
Posts Per Day: 3.48 |
|
These were the ones I bought but haven't had chance to test fit yet...
http://www.ebay.co.uk/itm/160538479350 |
Drop me a PM if you would like to be added to the ClubCappo Member Map. More details can be found here.
We now have an official Facebook group as well as a page! See here |
|
| Logged |
|
|
| |
Reply: 52 - 333 |
|
|
| ycming |
| Posted on: Friday, January 6th, 2012, 11:24:01pm |
|
|
|
|
| Logged |
|
|
|
Reply: 53 - 333 |
|
|
| nikki |
| Posted on: Saturday, January 7th, 2012, 11:05:51pm |
|
|
|
“ |
Quoted from lord, posted Thursday, January 5th, 2012, 10:07:14pm at here |
” |
Thanks for the update. Have you fitted the brakes yet??
|
|
No, was hoping to do them today but didn't get the chance, shall be doing them next Saturday now |
|
| Logged |
|
|
|
Reply: 54 - 333 |
|
|
| nikki |
| Posted on: Saturday, January 7th, 2012, 11:07:40pm |
|
|
|
Yes that's the one
|
|
| Logged |
|
|
|
Reply: 55 - 333 |
|
|
| nikki |
| Posted on: Saturday, January 7th, 2012, 11:19:42pm |
|
|
|
I also managed to get some pictures of the cut off tonight, as Kei requested All shots are main beam as opposed to high beam
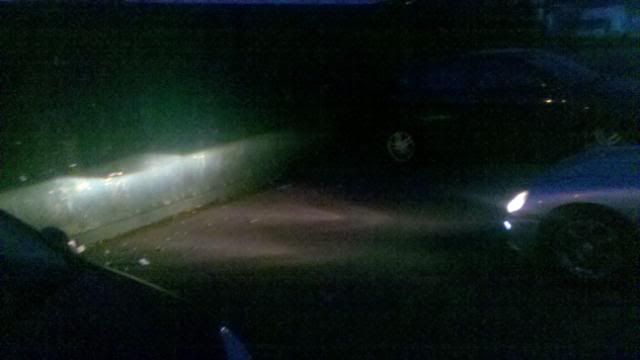
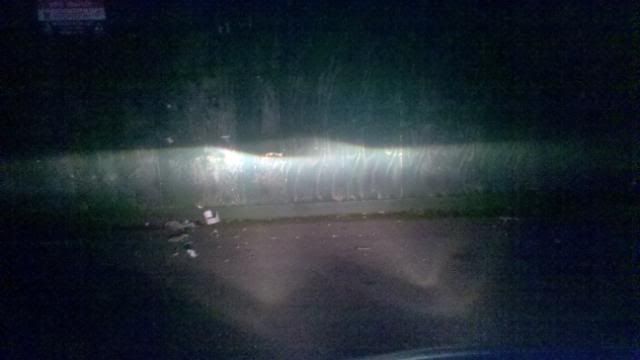
 |
Last modified Saturday, January 7th, 2012, 11:21:44pm by nikki |
|
| Logged |
|
|
|
Reply: 56 - 333 |
|
|
| nikki |
| Posted on: Sunday, January 15th, 2012, 1:18:18am |
|
|
|
Time for the first propper update of 2012.
It nearing 3,000 miles since I bought her, so she had her second oil change in my ownership.

And then we got on with doing the brakes. Here are the old fronts

Still had a bit of life left in them but I thought I may aswell change them too
Newies (mucky paw prints were cleaned off after )
Brake lines on the front went smoothly...
Rear set up
The rear lines didn't play ball and the left side rounded off. The next join on the pipe looked like its tucked nicely up out the way, so we left it how it was for now and will try and fix it when i drop the subframe and tank to attack the rust.
Got my catch tank fitted
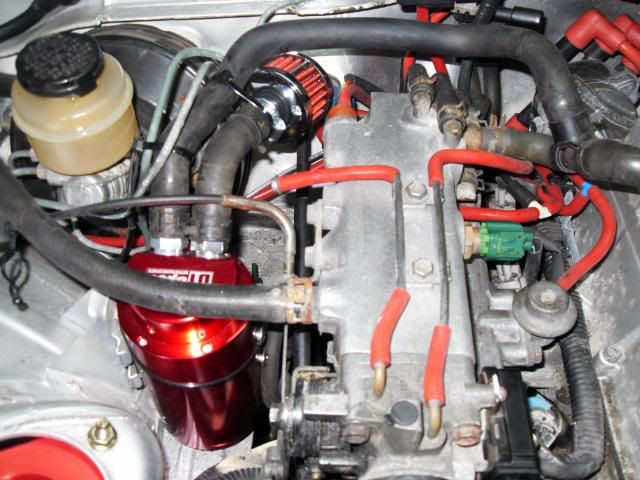
Close up of the routing chosen, sadly no red hoses that size to hand....at the moment
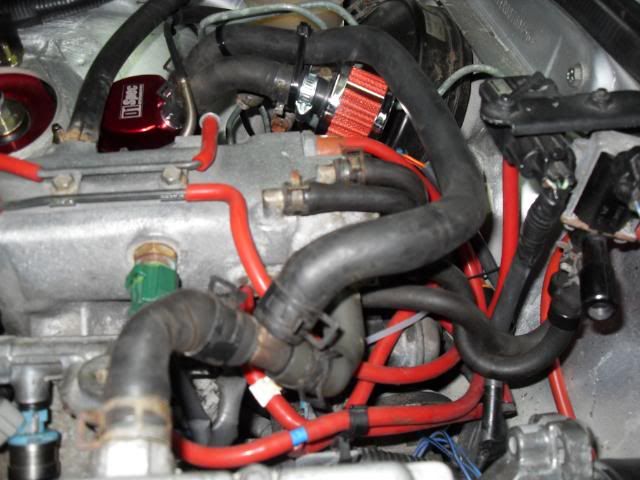
Which also meant I could loose the pipes at the front and blocked off the take offs left
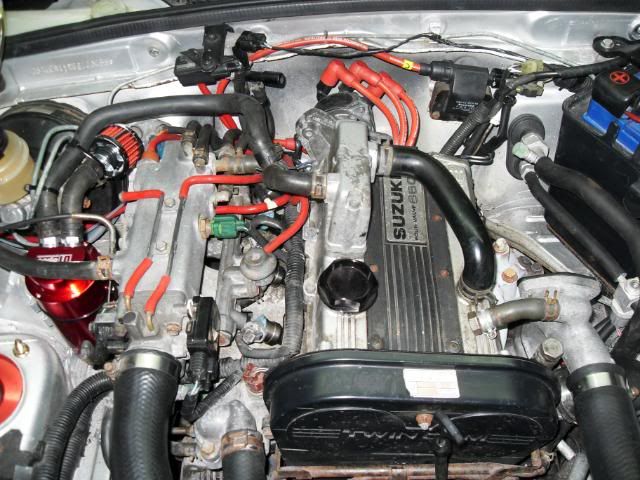
And now the bay looks a bit like this. Also note I have removed the hook for the engine crane to tidy it up a bit. Will keep hold of it in a safe place and pop it on if I ever need to take the engine out.
And now time for another subtle mod.......

My old reversing light had seen better days
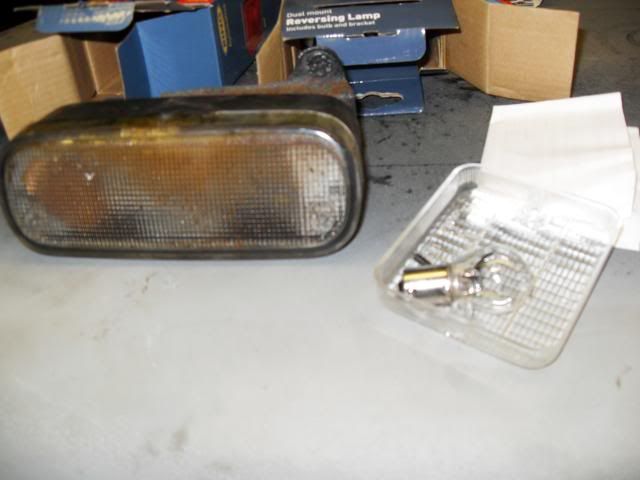
So I got some new mesh, removed the old ones. Then I fitted nice new mesh that doesnt have a hole on the middle After that was done I then mounted the new lights behind the mesh, Handily mounting them on the chassis rails It was getting dark but looks a bit like this:
Off
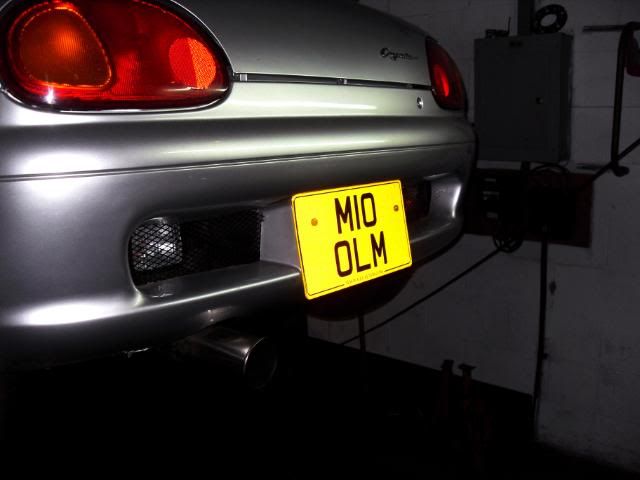
On
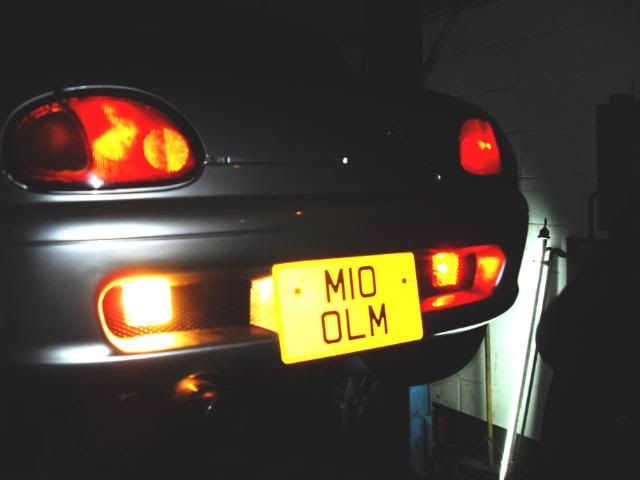
Will try and grab some daylight shots for you all soon C ya! |
|
| Logged |
|
|
|
Reply: 57 - 333 |
|
|
| nikki |
| Posted on: Sunday, February 5th, 2012, 11:53:55pm |
|
|
|
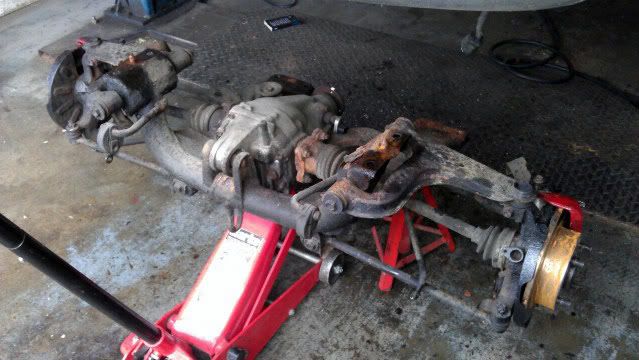
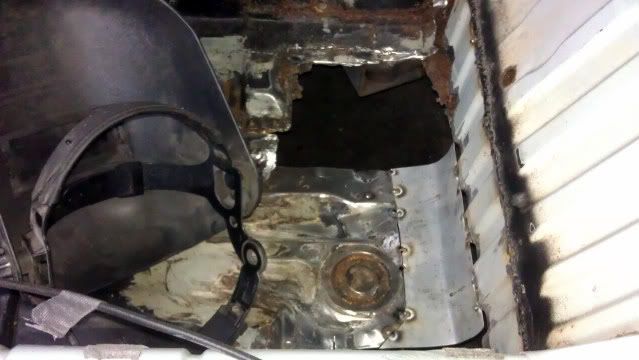
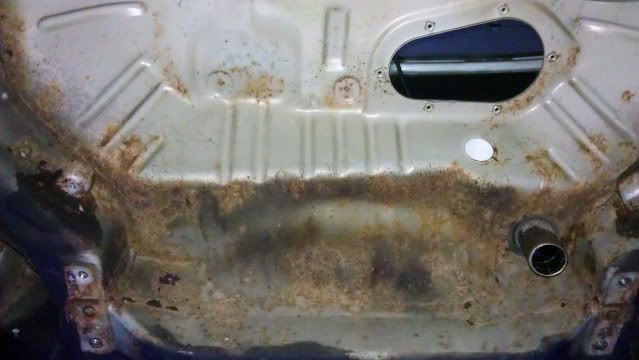
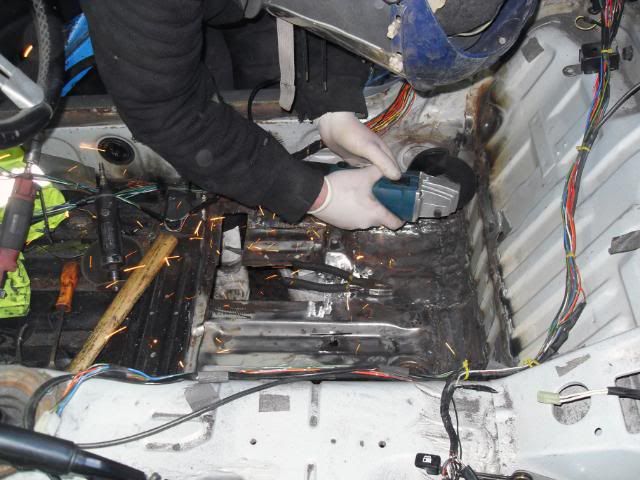
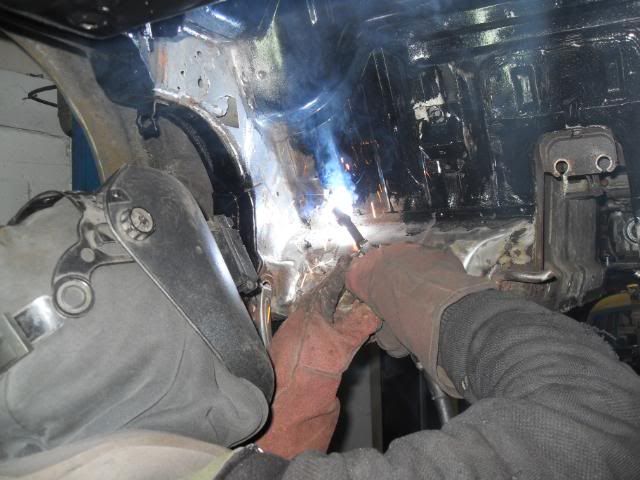
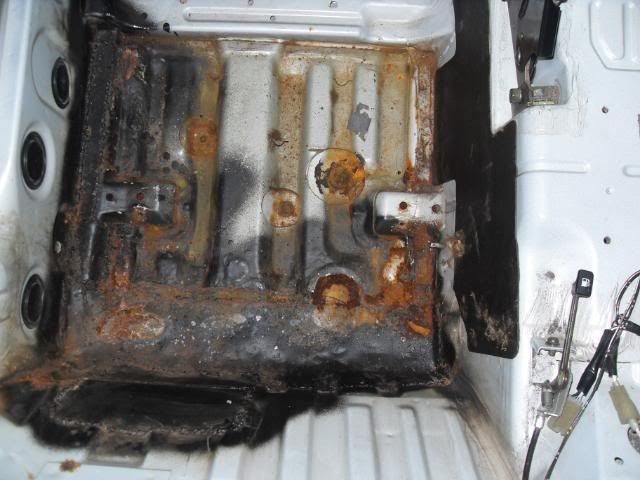
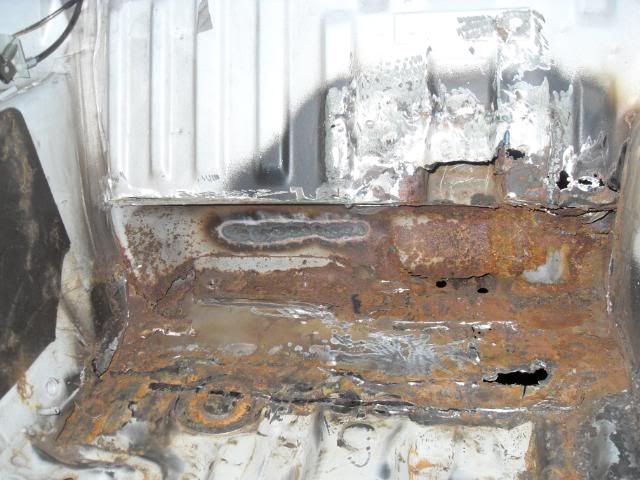
Went down the garage to start of my rust repairs on Saturday, which started by removing this
And my fuel tank and the carpet so we could takle the worst, but by no means the only bit to do
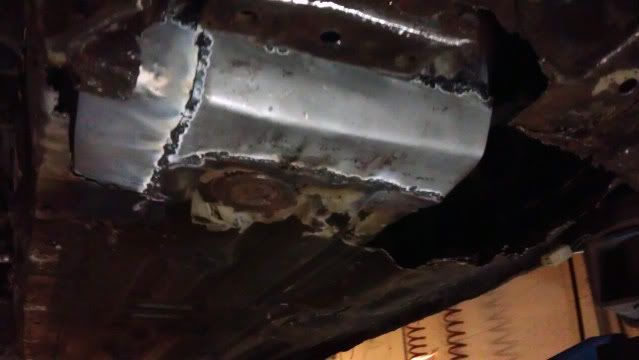
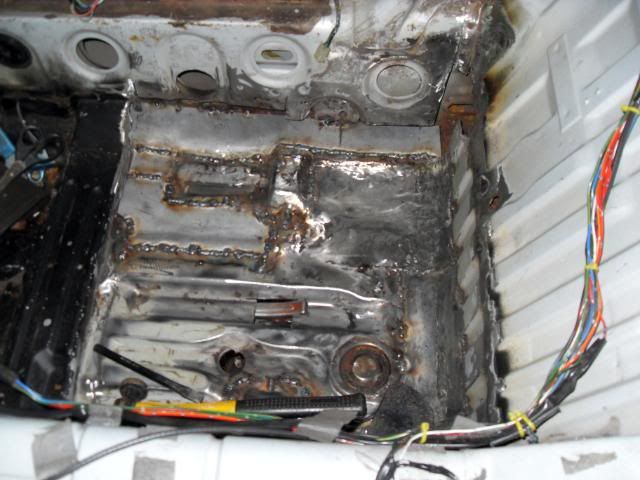
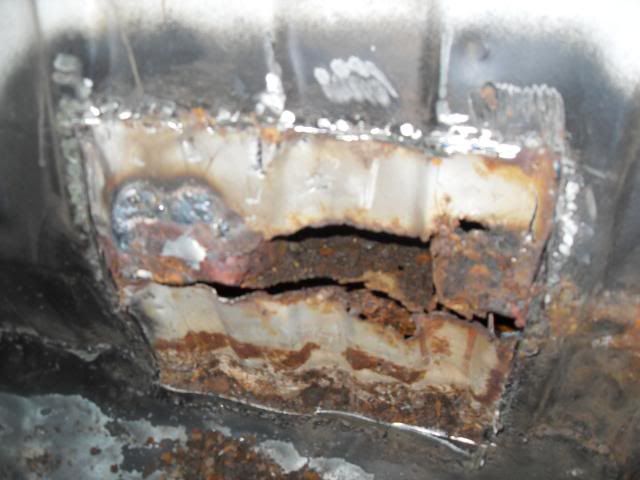
The old repair inside was removed, and it was cut out in sections and new metal tacked in to keep some strength
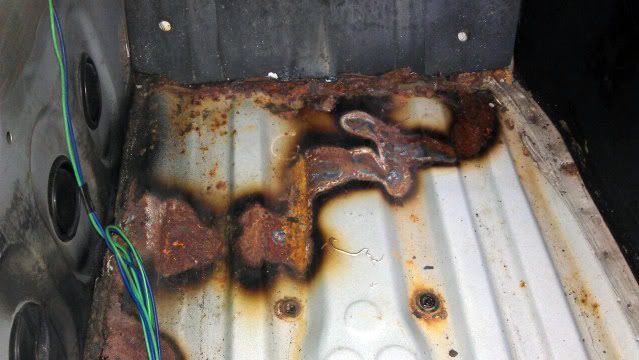
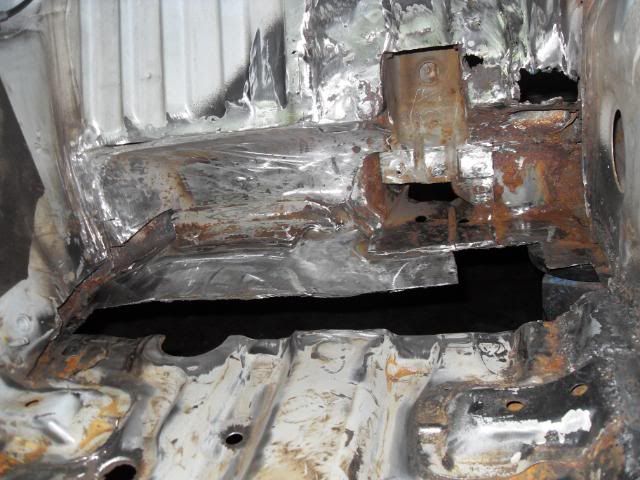
Unfortunately while the carpet was out we noticed some holes at the front of the footwell too and more dodgy repairs that will need attention

Same on the passenger side too
but no time for that today. While the subrafme assembly was out I gave it a quick wire bush to remove the loose rust
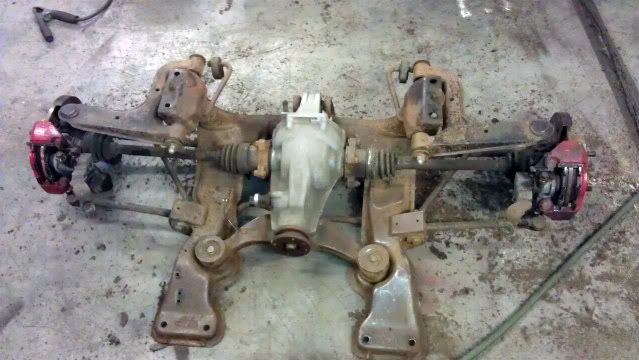
Then a quick coat of Por 15

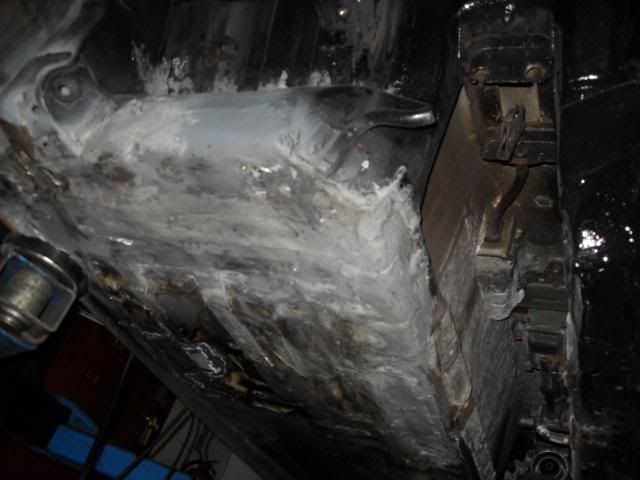
As welding would be occuring we removed the tank to reveal yet more surface rust and a few small patches (50p in size) that need to be addressed.
Slowly started to build up the inner and outer floor pans
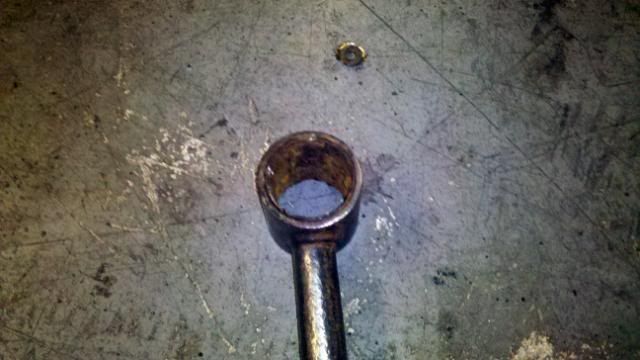
Unsure of the correct discription of the arms, but the bushes where shot, the bolts holding them on snapped when we tried to remove them and the Remanence of the bolts had rusted itself to the bushes on both sides. We removed the bush and tidied the arms up.

More Por 15

Now it was getting quite late in the evening now and we had brought nothing with us to replace the knacked bushes. Ingenuity and a bit of luck prevailed. Handily a mk1 Cortina is undergoing a long term restoration at the garage and had a selection of yet unfitted poly bushes, one set of which fitted lovely and snuggly into the arms without removing the outter metal sheath of the old bush

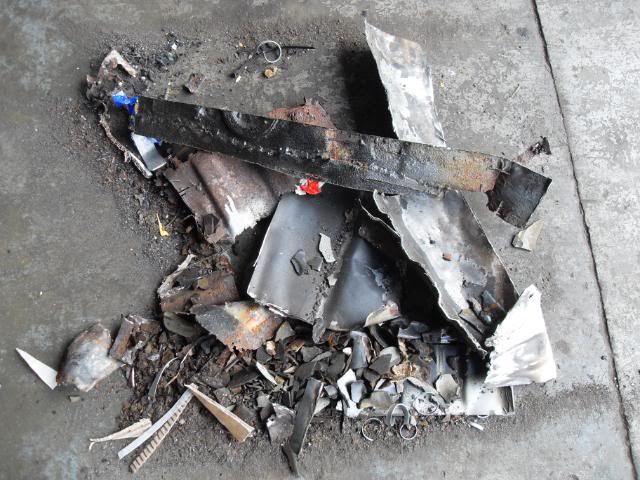
Now we ended up spending a long saturday night getting this sorted and inveitably this happened.....
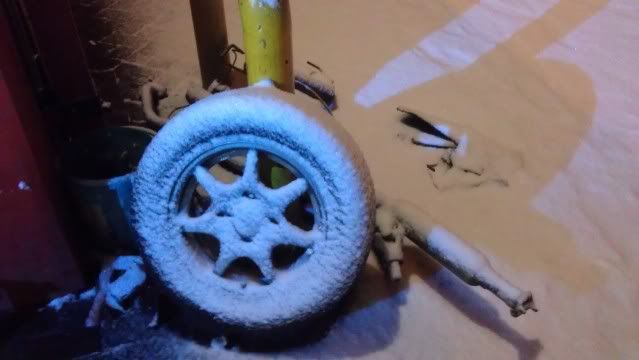
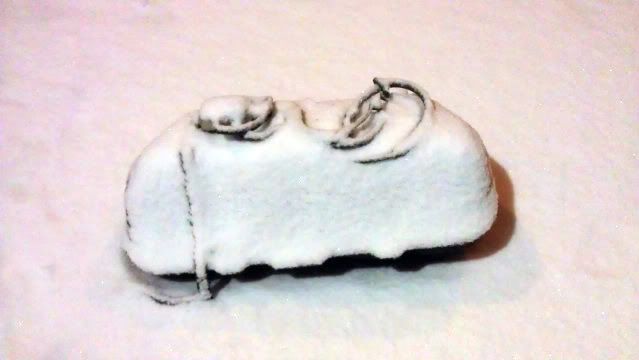
This is the fuel tank outside as we was welding
For some reason, possibly cos it was so cold we ended spending all night doing this and ended up driving home in the snow well past 5am. As you can imagine we were very tired and very cold. We ended up not getting any more pictures, but I can tell you we finished off the rear of the floor, but didn't dress the welds and propperly finish up. The car was refitted with just a drivers seat, no carpet and the bare essentials to get me home and to work next week and we will be continuting the saga next weekend. Hopefully things should come apart a bit easier second time round. |
|
| Logged |
|
|
|
Reply: 58 - 333 |
|
|
| nikki |
| Posted on: Sunday, February 12th, 2012, 7:49:06pm |
|
|
|
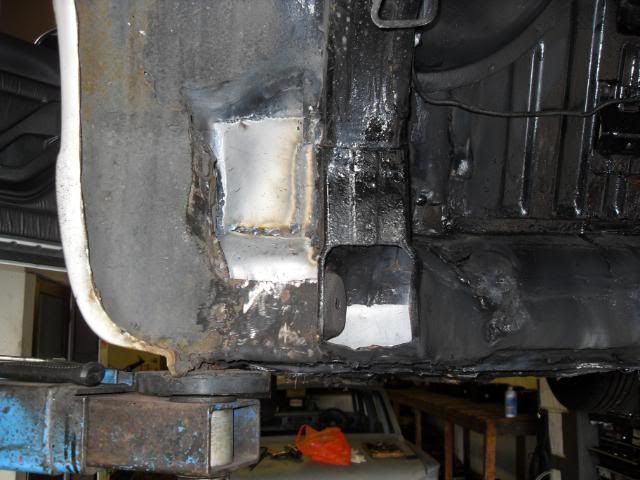
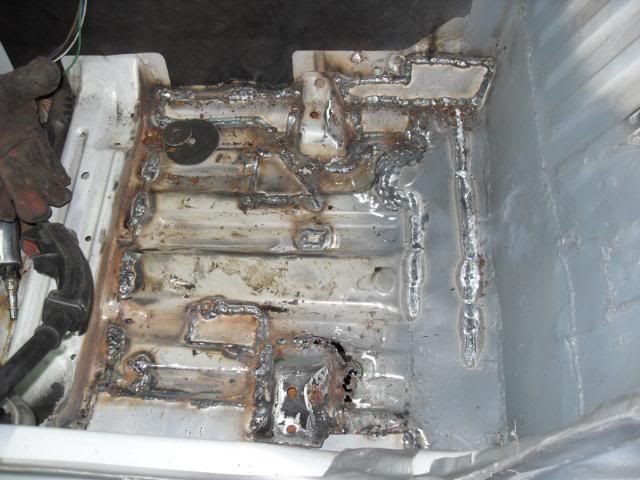
This is where we got too last week. As you can see we ony had time to give it a quick covering with primer and the salt on the road is already doing a good job at turning it back into rust again!

So we made a start with the wire brush and grinder to tidy the welds up
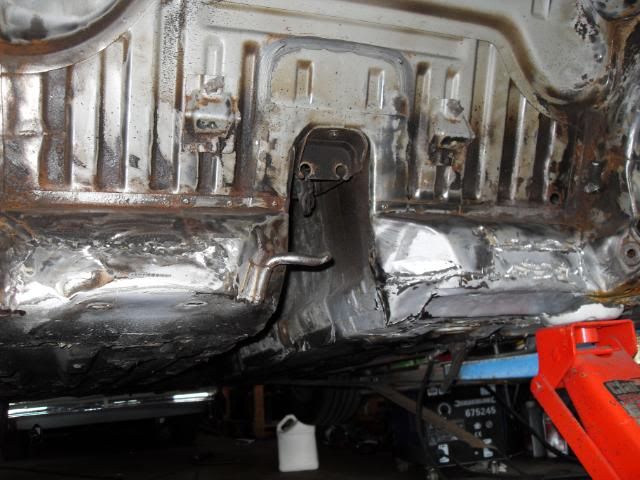
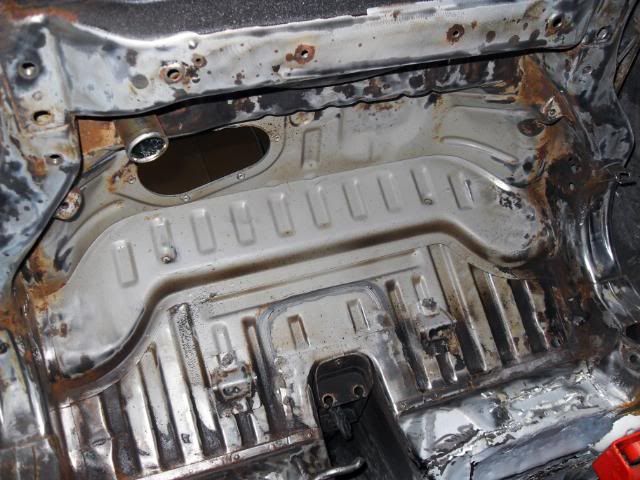
The floor was slowly starting to come back together too
Nearly there
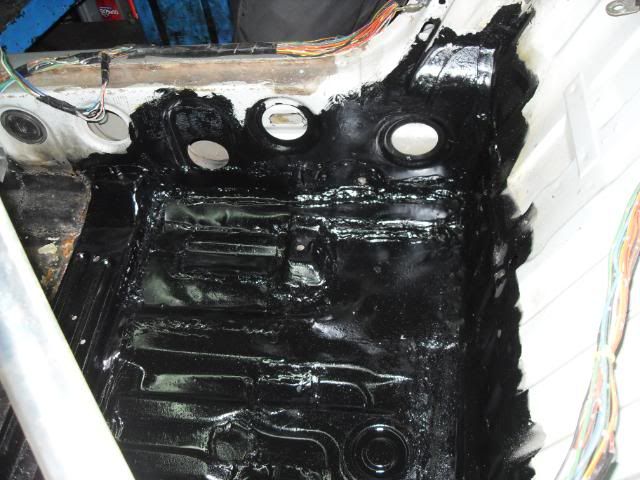
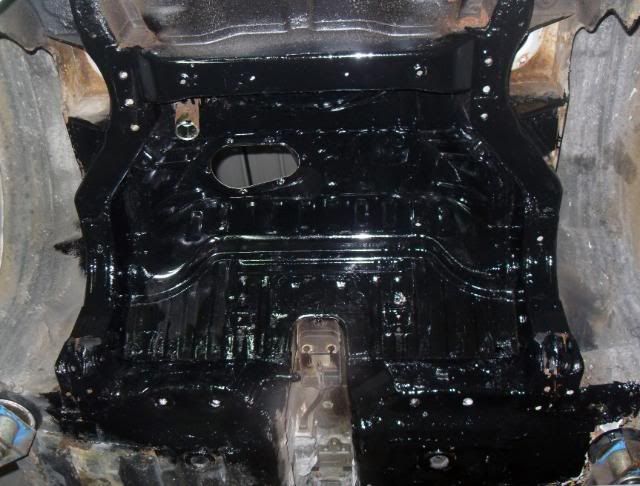
Tidied the welds a bit then added some tiger seal and lots of Por 15 and when it was all done it looked like this
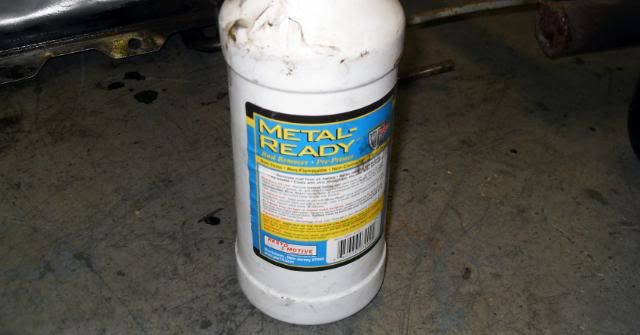
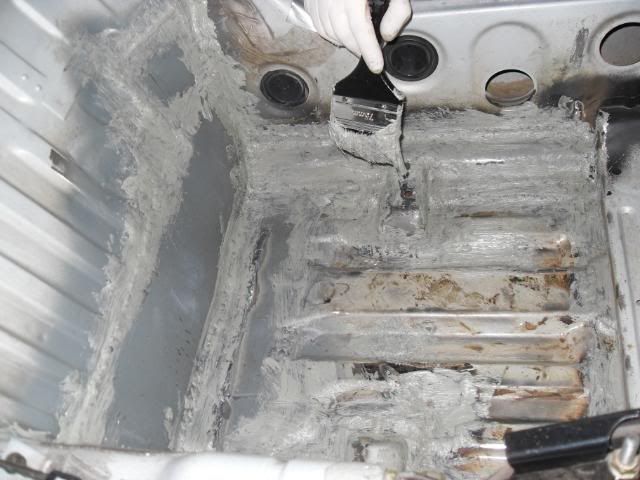
Meanwhile, the tank got taken back to bare metal

The seam still had some rusty bits that the wire brushes just wouldn't get off so any questionable areas were coated in this
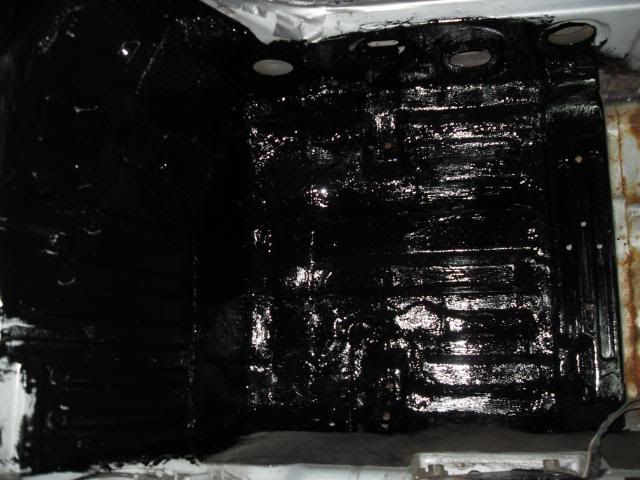
Then more Por 15
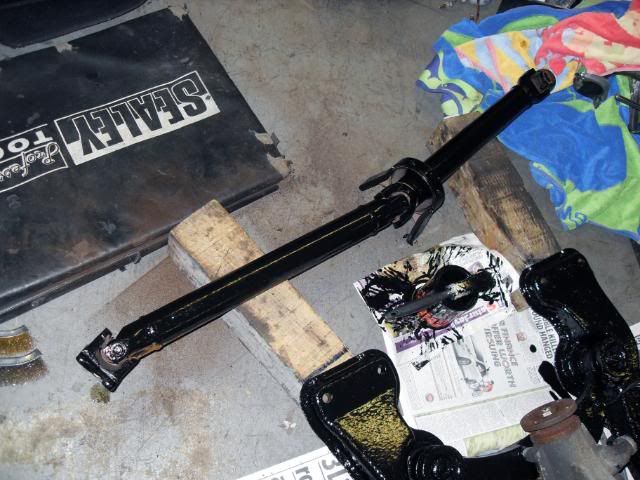
Everything ended up with a coating of it, including us, the prop
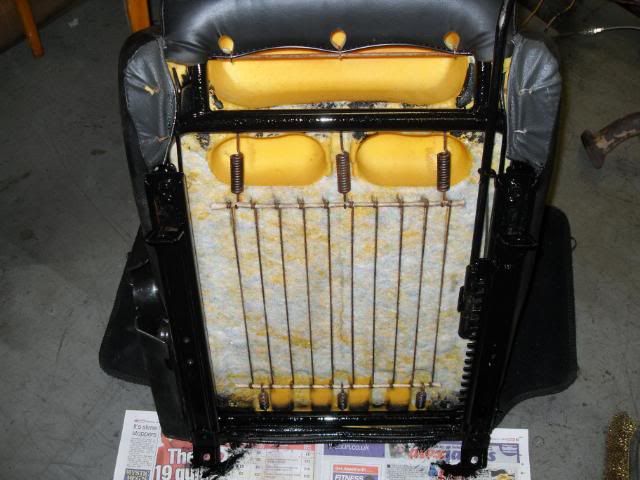
Even the seat frames
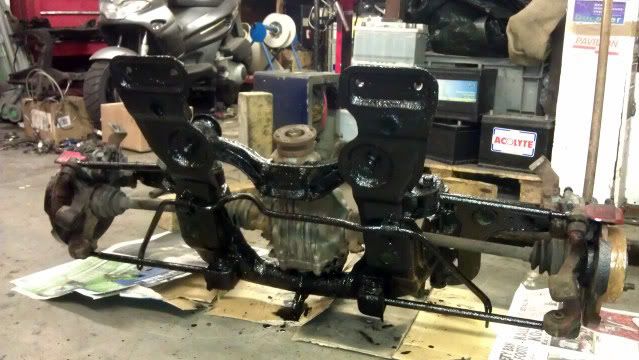
And the subframe got its second coat, although I still managed to miss a few bits

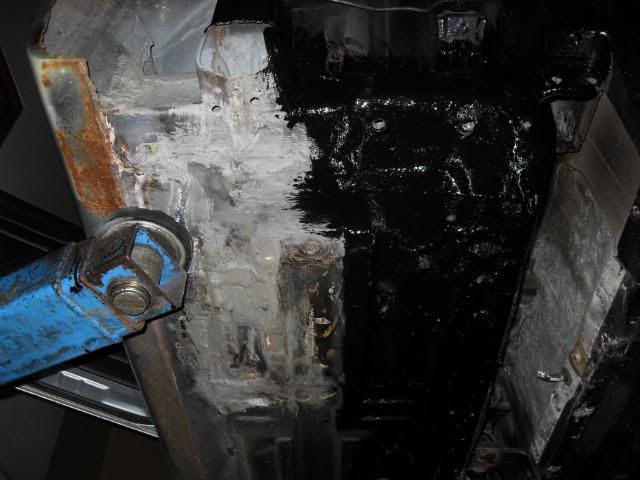
Back under the car more rust was attacked and metal readied
There were four little patches to do under here, a pair on the inside of each chassis leg like the picture....
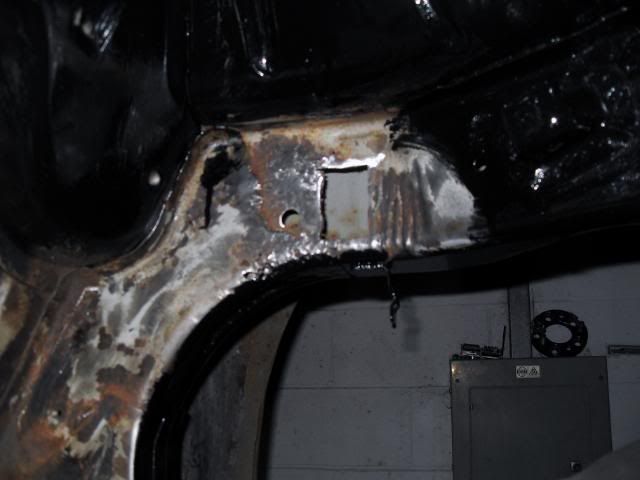
......and two little patches above the subframe mounts on each side.
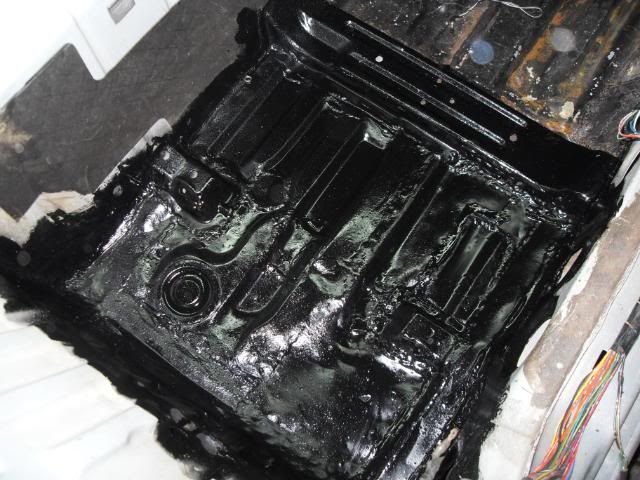
Then more Tiger Seal and Por 15 until it looked like this
Everything came apart alot easier the second time round and we had reached this stage by 9pm.
Lines back in place
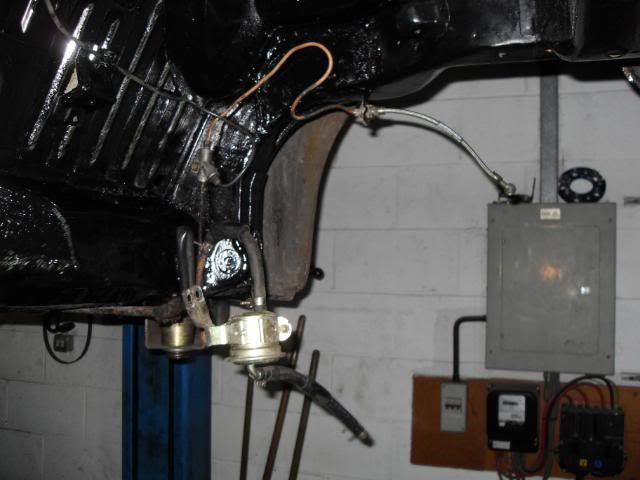
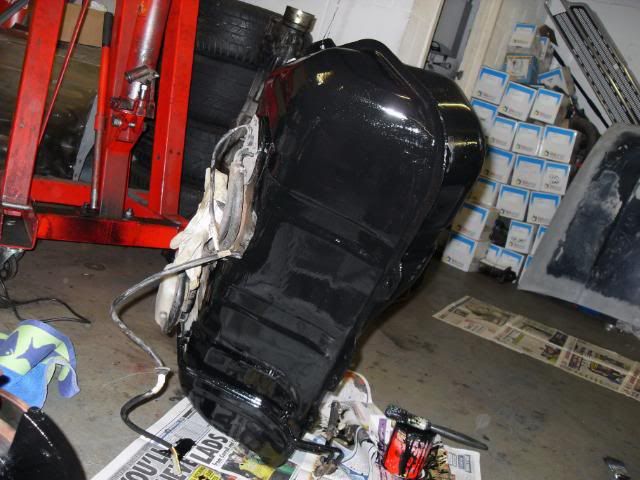
Unfourtunatley though the paint took forever to dry in this cold even with a heat gun helping it along so we had alot of standing about waiting. Eventually we started to assemble when it was a bit tacky still. Here is the tank back in place complete with fingerprints

And finally the subframe.
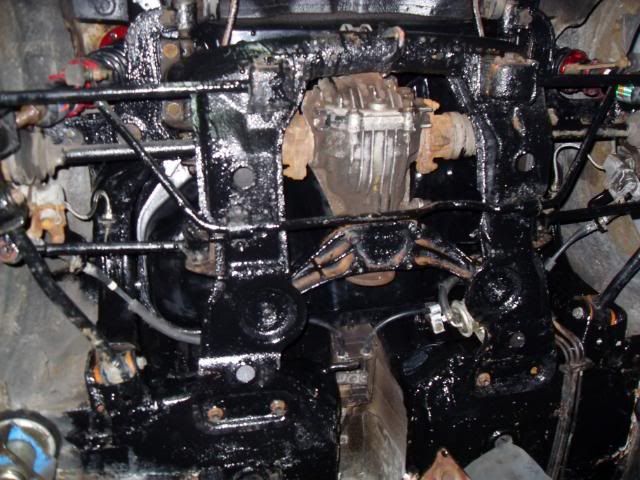
We got back a bit earlier than last week, but it was still a fair old slog. Thats the main bit of my rust addressed now, but there is still the matter of the sills, the front of the floorplans on both sides and a bit of rust behind the bumper, so I'm sure they'll be many more days like this to come
|
|
| Logged |
|
|
|
Reply: 59 - 333 |
|
|
| lord |
| Posted on: Sunday, February 12th, 2012, 8:39:25pm |
|
|
|
Man you do not mess around!!!
bish bash bosh!! |
|
| Logged |
|
|
|
Reply: 60 - 333 |
|
|
| nikki |
| Posted on: Sunday, February 12th, 2012, 8:59:21pm |
|
|
|
| Lol, there is lots to do, so no time wasting allowed |
|
| Logged |
|
|
|
Reply: 61 - 333 |
|
|
| mitogeri |
| Posted on: Monday, February 13th, 2012, 12:45:43am |
|
|
Big Member

Posts: 192
Posts Per Day: 0.12 |
|
| wow ,impressive keep up the good work |
|
| Logged |
|
|
| |
Reply: 62 - 333 |
|
|
| nikki |
| Posted on: Saturday, March 3rd, 2012, 10:40:23pm |
|
|
|
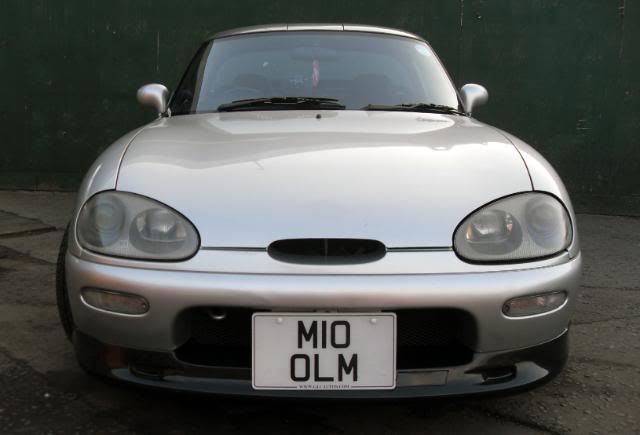
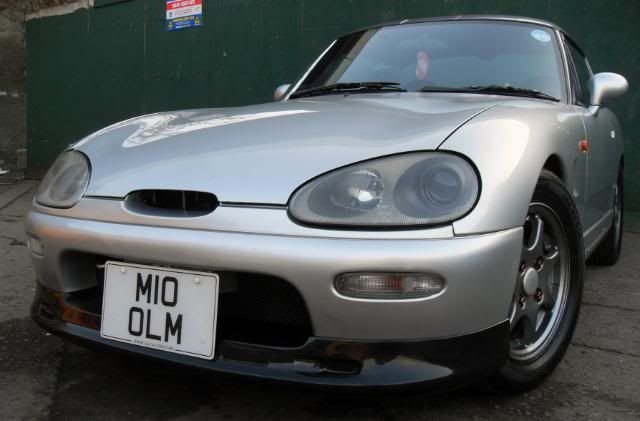
Small update. I ordered myself a new distributor cap and rotor arm, and a new alternator belt to replace my slightly squeeky old one which all got fitted today. I also got hold of a take off front lip from Lord , thank you very much. I fitted it today and its a great fit it slipped on so well that it held itself in place without any fixings.
Some test fitting
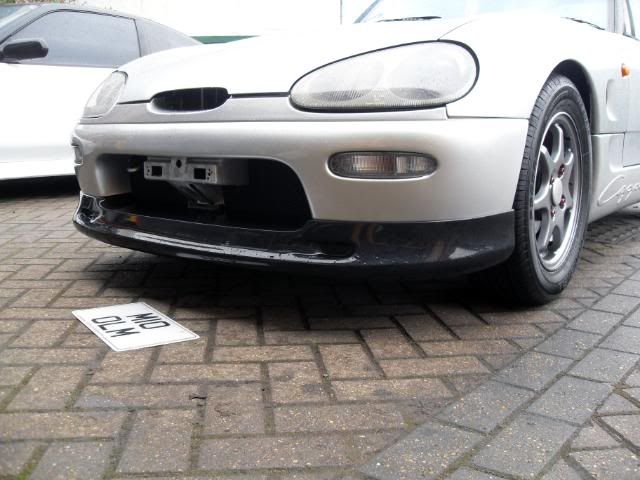
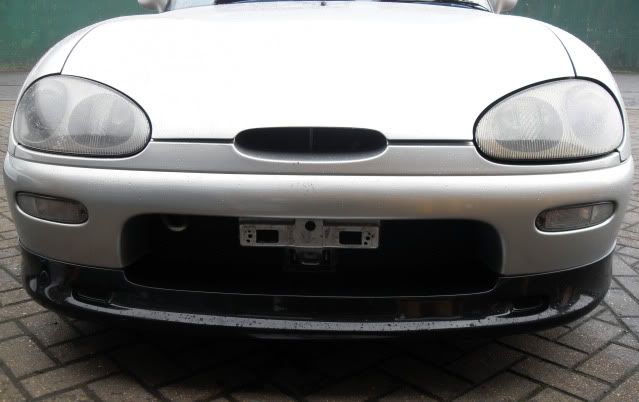
I fixed it propperly and added a few new supports and to be sure though

It was just meant to be a test fit, but I was so pleased with it I've left it on. It will get painted eventually, but I dont think it looks to bad as it is for now.
|
|
| Logged |
|
|
|
Reply: 63 - 333 |
|
|
| lord |
| Posted on: Saturday, March 3rd, 2012, 11:14:29pm |
|
|
|
| That looks decent that!! Still a bargain! Not many cappos with that front lower lip....! |
|
| Logged |
|
|
|
Reply: 64 - 333 |
|
|
| nikki |
| Posted on: Wednesday, March 14th, 2012, 9:26:46pm |
|
|
|
Guess what?
[Gameshow Voiceover] IIIIIIIITS WELDING TIME!!! [Gameshow Voiceover/]
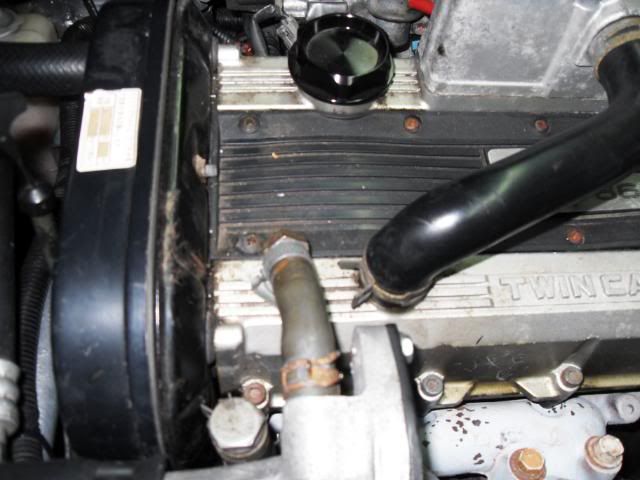
Before we get started let me just show you my gear oil lid masquerading as a bung
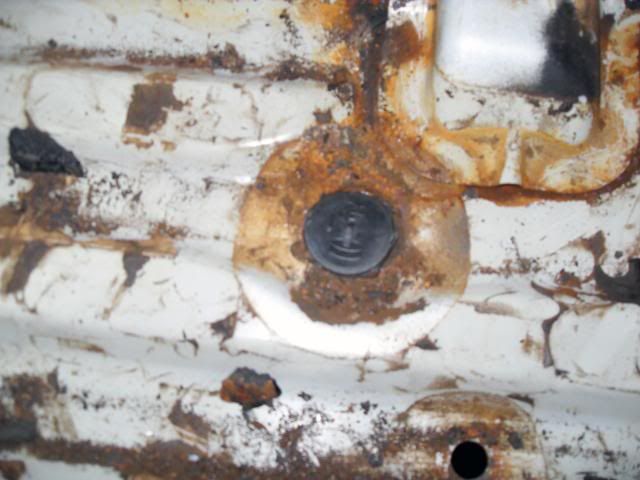
Oh dear......
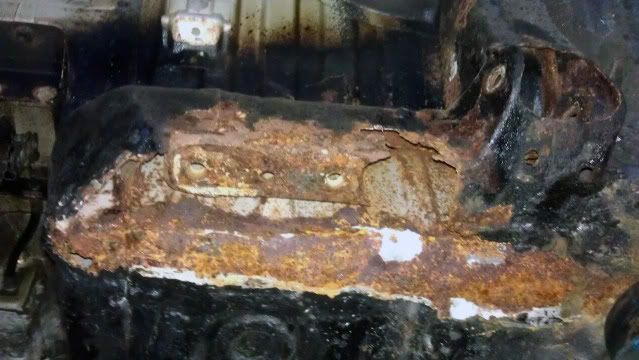
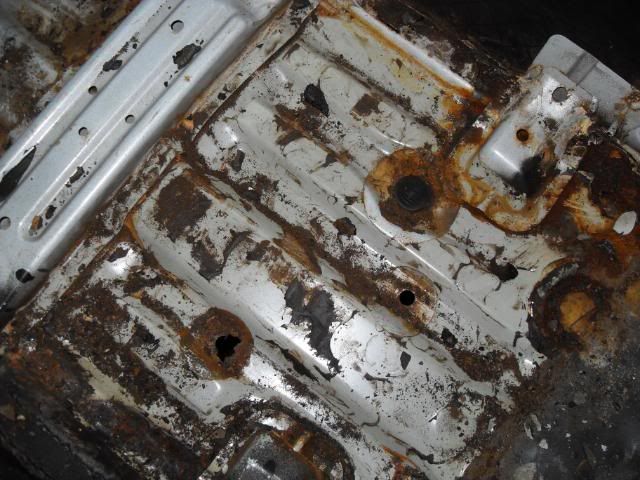
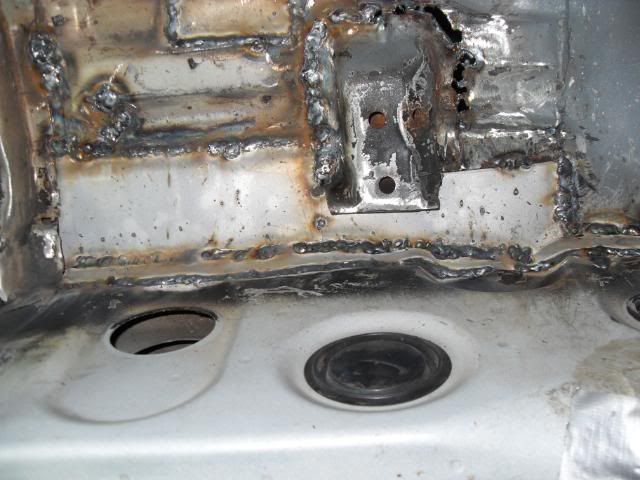
Here is the passenger side. On the face of it just surface rust yes?
[Gameshow Voiceover] AHH, SUCH A SHAME I'M AFFRAID THATS THE WRONG ANSWER! LETS SEE WHATS BEHIND PATCH NUMBER 1!![Gameshow Voiceover/]
[Gameshow Voiceover] THAAAAATS RIGHT, YOU'VE WON SOME MORE RUST, WOO!!! [Gameshow Voiceover/]
And so it went on, who ever welded this car needs shooting.....in the face......in front of his family
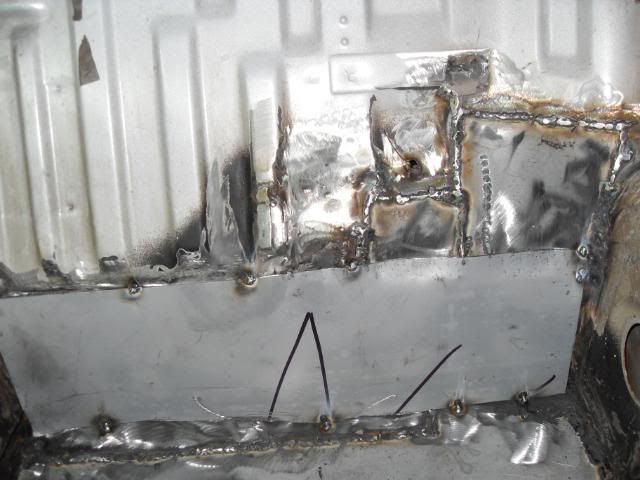
Got it in a workable state
Fixing

Fixing some more

Scrap
Painted inside
Then plated
Got painted outside when it was finished too, but forgot to get pics.
I think it best your on first name terms with my welder and mechanic due to the amount of work he is putting in. He is called Dal While Dal was busy doing that I decided to take my filler cap off as it had surface rust on the inside. I ended up removing all the paint back to bare metal treated it and have painted it in satin black with a small dash of laquer.
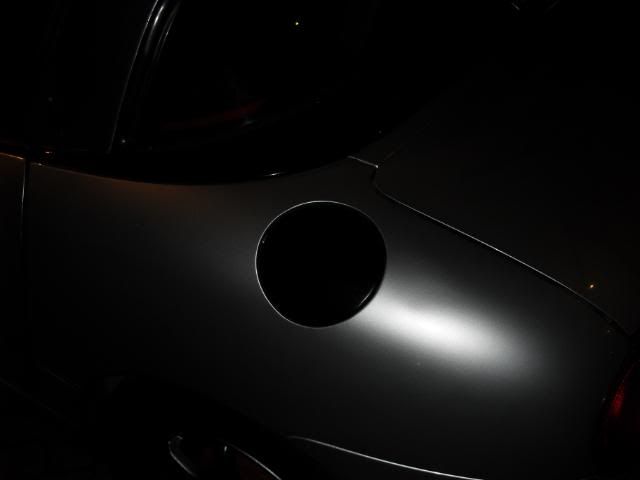
The car does need a repaint, and it slowly does seem to be turning black. Damn sight better than rust brown though!
Thanks for looking
|
Last modified Wednesday, March 14th, 2012, 9:35:07pm by nikki |
|
| Logged |
|
|
|
Reply: 65 - 333 |
|
|
| Ricou |
| Posted on: Thursday, March 15th, 2012, 11:11:36am |
|
|
Maximum Member
Posts: 1110
Posts Per Day: 0.65 |
|
Oh dear, that was some rust ! Good work.
“ |
Quoted Text |
” |
[Gameshow Voiceover] THAAAAATS RIGHT, YOU'VE WON SOME MORE RUST, WOO!!! [Gameshow Voiceover/]
|
|
|
|
| Logged |
|
|
| |
Reply: 66 - 333 |
|
|
| lord |
| Posted on: Thursday, March 15th, 2012, 12:35:04pm |
|
|
|
Fair Play Nikki.....
This Cappo is getting some much loved love!!!!
Do have to pay for all this work or is it free ha ha |
|
| Logged |
|
|
|
Reply: 67 - 333 |
|
|
| nikki |
| Posted on: Monday, March 19th, 2012, 6:01:47pm |
|
|
|
“ |
Quoted from lord, posted Thursday, March 15th, 2012, 12:35:04pm at here |
” |
Fair Play Nikki.....
This Cappo is getting some much loved love!!!!
Do have to pay for all this work or is it free ha ha
|
|
Unfortunately yes, I am paying for every bloody penny to rectify someone else's bodge welding  |
|
| Logged |
|
|
|
Reply: 68 - 333 |
|
|
| lord |
| Posted on: Monday, March 19th, 2012, 6:32:23pm |
|
|
|
Ouch !!
You know its worth it though. |
|
| Logged |
|
|
|
Reply: 69 - 333 |
|
|
| ycming |
| Posted on: Tuesday, March 20th, 2012, 1:42:50pm |
|
|
|
| How much would one expect to pay for this type of job ~? |
|
| Logged |
|
|
|
Reply: 70 - 333 |
|
|
| lord |
| Posted on: Tuesday, March 20th, 2012, 2:59:03pm |
|
|
|
|
| Logged |
|
|
|
Reply: 71 - 333 |
|
|
| ycming |
| Posted on: Monday, March 26th, 2012, 9:28:57am |
|
|
|
“ |
Quoted from lord, posted Tuesday, March 20th, 2012, 2:59:03pm at here |
” |
about 500 squid!
|
|
I would happily pay that ! Job looks good and car be minted!
Ming |
|
| Logged |
|
|
|
Reply: 72 - 333 |
|
|
| nikki |
| Posted on: Sunday, April 1st, 2012, 9:10:41pm |
|
|
|
Just a little update this week. Kei dropped off some JDM spec clear side repeaters the other day. After some cutting, soldering of wires, some mounting point adjustments as they are slightly different to the UK ones, I got them fitted.
 |
Last modified Sunday, April 1st, 2012, 9:12:52pm by nikki |
|
| Logged |
|
|
|
Reply: 73 - 333 |
|
|
| lord |
| Posted on: Sunday, April 1st, 2012, 9:16:59pm |
|
|
|
people did nothing in their caps today!!
all about driving!!! |
|
| Logged |
|
|
|
Reply: 74 - 333 |
|
|
| nikki |
| Posted on: Saturday, April 7th, 2012, 11:11:48pm |
|
|
|
Finished up the welding on the passenger side.
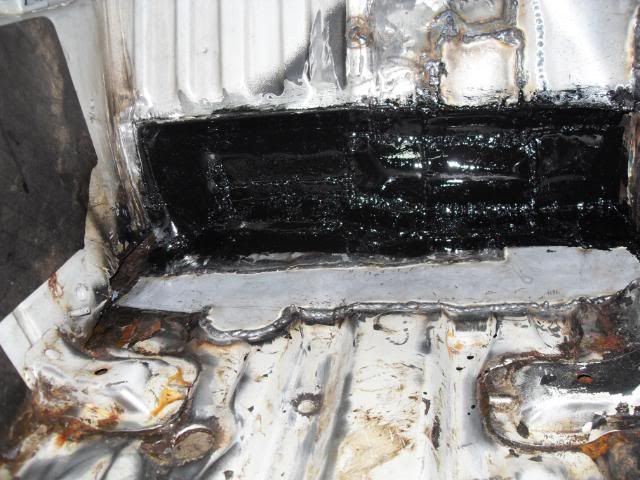
Then tidied the welds and added lots of seam sealer.....
And lots of Por 15
Finished it off by tieing the whole area together (notice its starting to go black?)
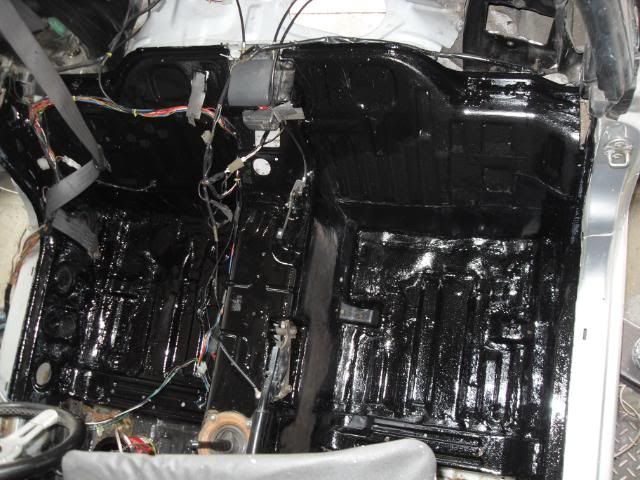
I also carried on with more Por 15 in the wheel arches to complete the rear end protection

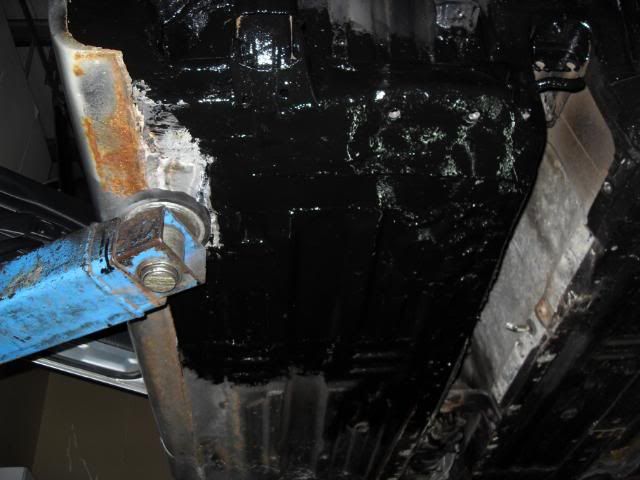
Underneath got a similar treatment
I prepped the inside of the the fuel cap area too.

Then it went black.

I also decided to change the filler cap from matt black to a Volkswagen Orca Schwartz black. It looks like this most of the time
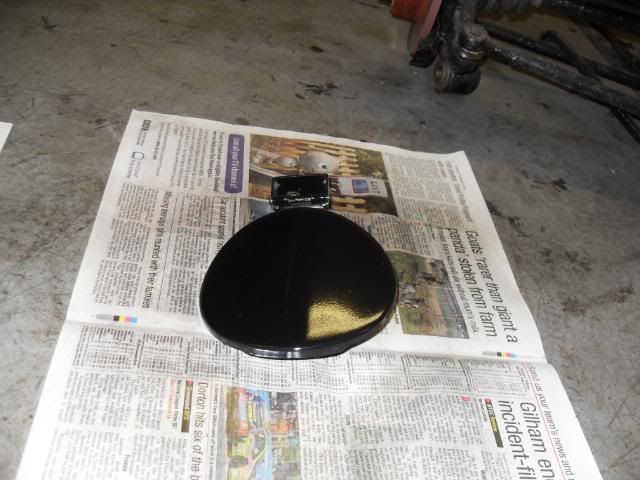
But when the sun hits it you get a slight gold tinge to it, best captured by me in this blurry photo pre laquer.

I also started but didn't finish the boot in Por 15
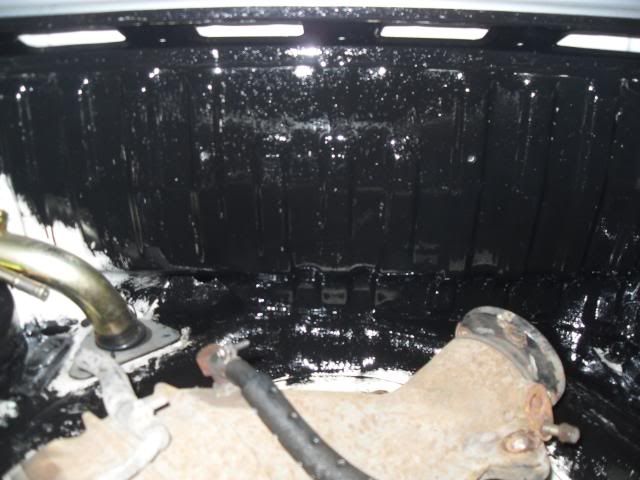
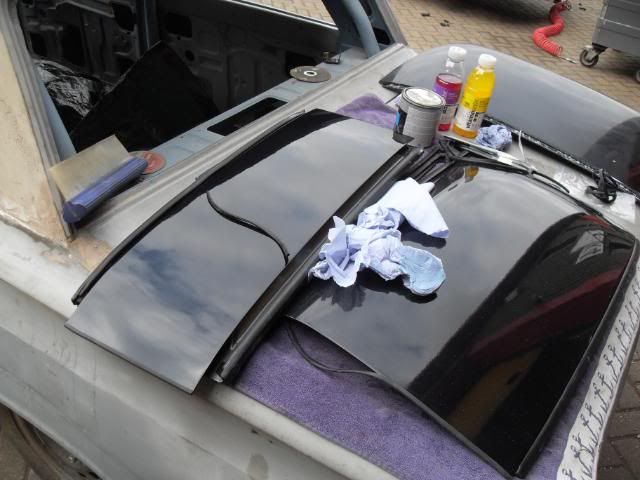
And then got on with prepping the roof panels

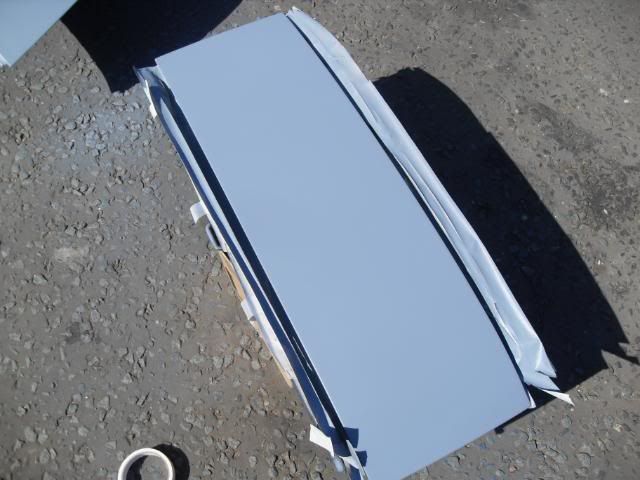
In paint and laquer, although still a bit flat and orange peely

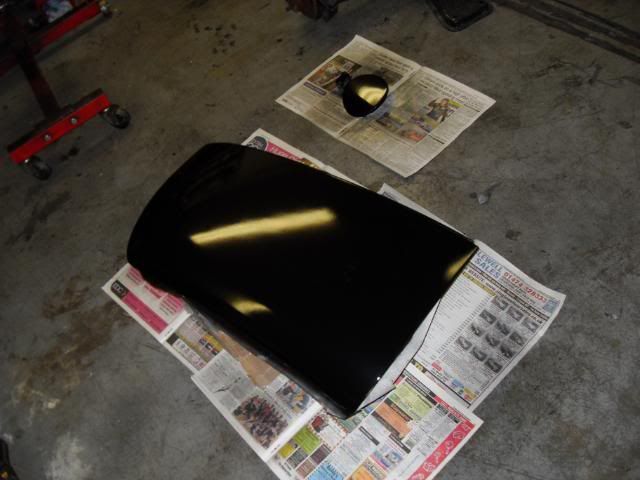
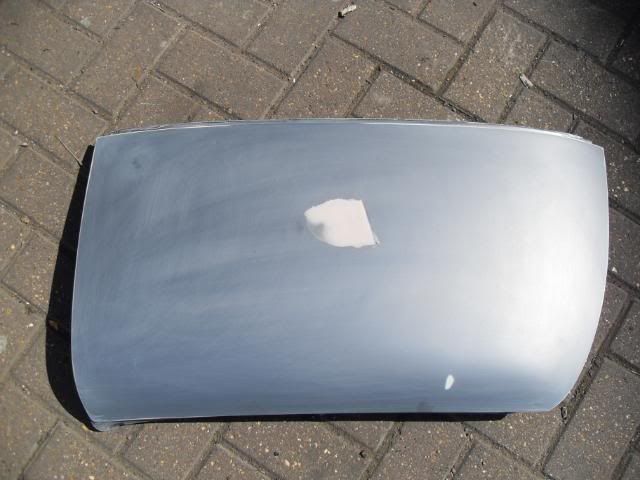
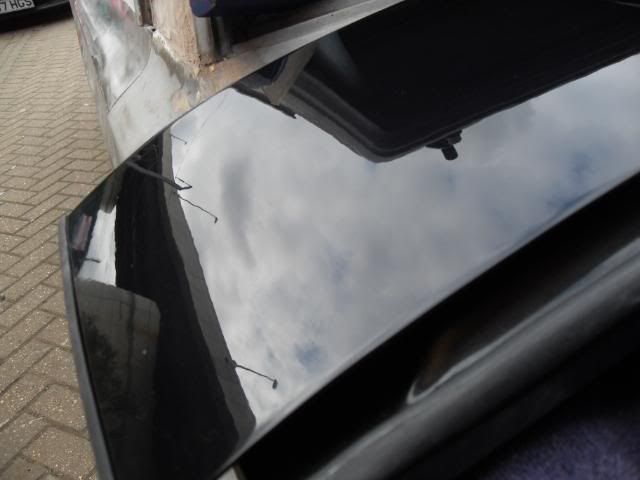
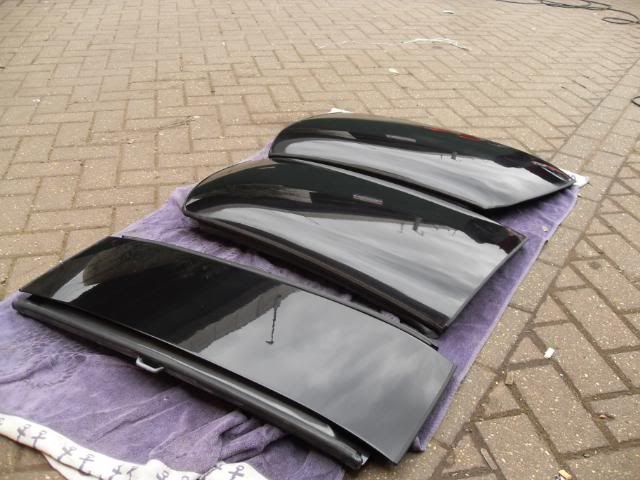
So I Wet sanded them down with 1200 grade and 2000 then mopped them with G3 and G10 and refitted the seals and rubbers
Looking alot better close up
Back on the car at the end of the day
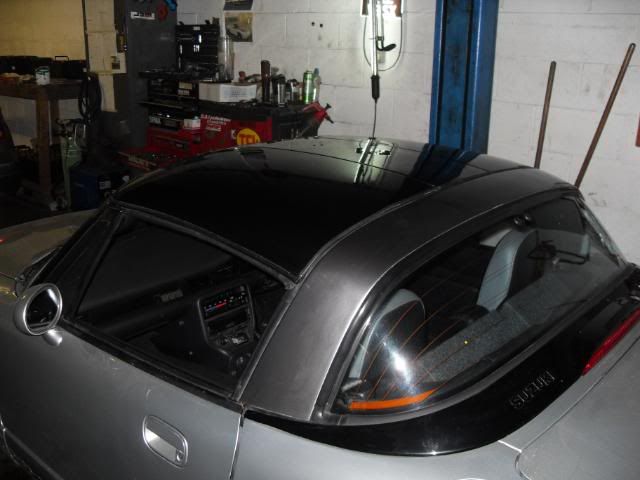
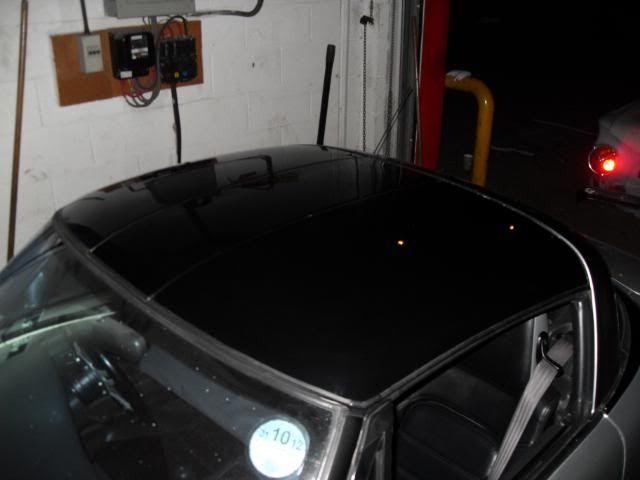
Best bit of paint on the car IMHO. This will be the last bit of welding work and hopefully it should make it through the MOT now. A little bit more painting will happen though, hopefully with the roof bar next.
Thanks for lookng
|
Last modified Saturday, April 7th, 2012, 11:15:00pm by nikki |
|
| Logged |
|
|
|
Reply: 75 - 333 |
|
|
| Ricou |
| Posted on: Saturday, April 7th, 2012, 11:33:11pm |
|
|
Maximum Member
Posts: 1110
Posts Per Day: 0.65 |
|
| Nice work. Glad you're keeping it |
|
| Logged |
|
|
| |
Reply: 76 - 333 |
|
|
| lord |
| Posted on: Sunday, April 8th, 2012, 11:39:01am |
|
|
|
| This cappo is getting some serious TLC!! |
|
| Logged |
|
|
|
Reply: 77 - 333 |
|
|
| nikki |
| Posted on: Wednesday, April 11th, 2012, 4:58:00pm |
|
|
|
| MOT'd today too |
|
| Logged |
|
|
|
Reply: 78 - 333 |
|
|
| Andy |
| Posted on: Wednesday, April 18th, 2012, 10:39:39am |
|
|
Official C.O.C Contributor
Gender: Male
Posts: 23604
Posts Per Day: 3.48 |
|
“ |
Quoted from Andy, posted Tuesday, December 27th, 2011, 3:14:45pm at here |
” |
Did Black Diamond have those hoses available off the shelf or did you have them make them up for you? They aren't listed on the product lists I've got...
|
|
Finally I have a part number for the Black Diamond brake hoses - DHK621 |
Drop me a PM if you would like to be added to the ClubCappo Member Map. More details can be found here.
We now have an official Facebook group as well as a page! See here |
|
| Logged |
|
|
| |
Reply: 79 - 333 |
|
|
|
 Cappuccino Owners Club › Gallery › Cappo Related Album › The Whole 3.6 Yards (Moderators: )


 Locked Board