|
|
 Author Author |
 KOF 33 Mod's (currently 6573 views) KOF 33 Mod's (currently 6573 views) |
| grant4561 |
Posted on: Sunday, March 2nd, 2008, 11:13:37am
 Attachment: dsc01535.jpg - 59.59 KB (1486 views) Attachment: dsc01535.jpg - 59.59 KB (1486 views) |
  |
|
Maximum Member

Posts: 1719
Posts Per Day: 0.99 |
|
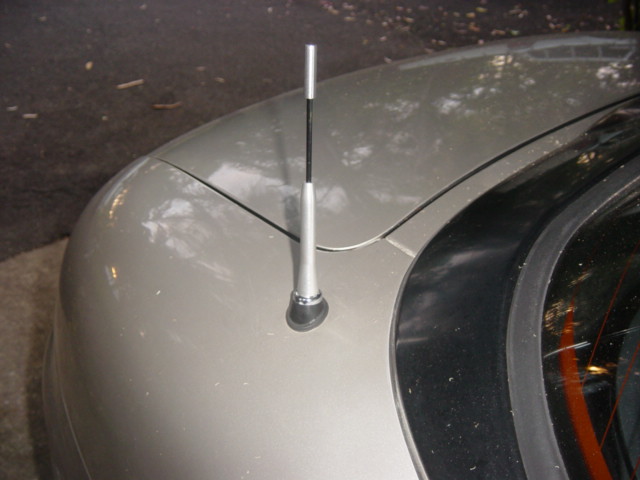
Done the home work I think. (THanks to be able to get a workshop manuel).
Anyway, fist moed is aerial of course. |
 |
|
 Logged Logged |
|
|
|
|
| grant4561 |
Posted on: Sunday, March 2nd, 2008, 11:18:27am
Attachment: dsc01528.jpg - 60.15 KB (1485 views) |
|
|
Maximum Member
Posts: 1719
Posts Per Day: 0.99 |
|
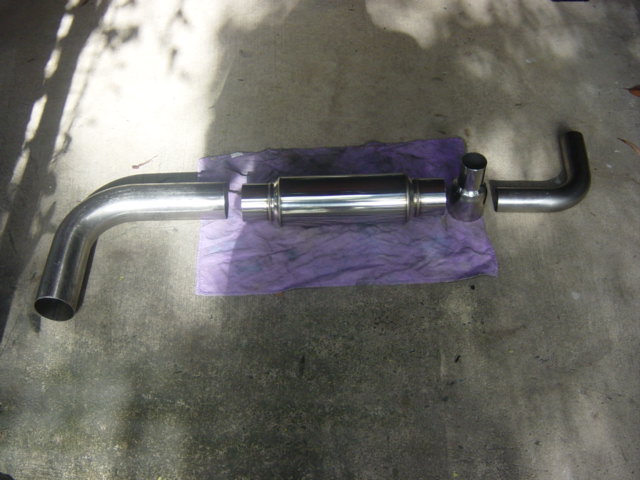
So next I thought the exhaust would need sone attenton. Starting from he back. The bits before fabrication.
|
 |
|
| Logged |
|
|
  |
Reply: 1 - 294 |
|
|
| grant4561 |
Posted on: Sunday, March 2nd, 2008, 11:21:03am
Attachment: dsc01532.jpg - 61.51 KB (1485 views) |
|
|
Maximum Member
Posts: 1719
Posts Per Day: 0.99 |
|
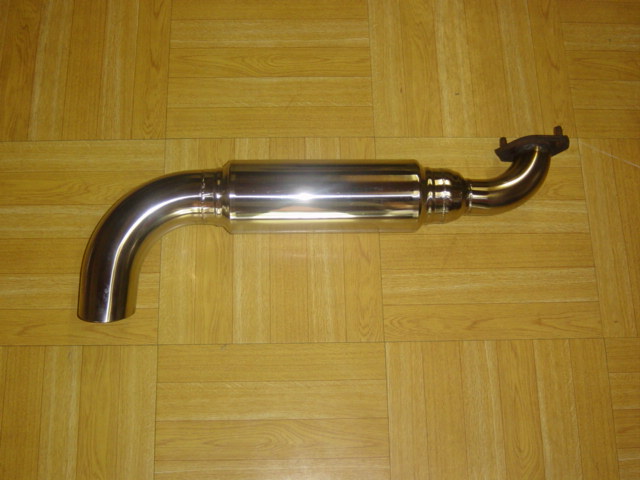
| All finished and polished. |
 |
|
| Logged |
|
|
| |
Reply: 2 - 294 |
|
|
| grant4561 |
Posted on: Sunday, March 2nd, 2008, 11:24:34am
Attachment: dsc01559.jpg - 59.90 KB (1481 views) |
|
|
Maximum Member
Posts: 1719
Posts Per Day: 0.99 |
|
| Fitted, two inch into a three inch straight through muffler with a three inch tail pipe. |
 |
|
| Logged |
|
|
| |
Reply: 3 - 294 |
|
|
| grant4561 |
Posted on: Sunday, March 2nd, 2008, 11:31:47am
Attachment: dsc01546.jpg - 59.86 KB (1484 views) |
|
|
Maximum Member
Posts: 1719
Posts Per Day: 0.99 |
|
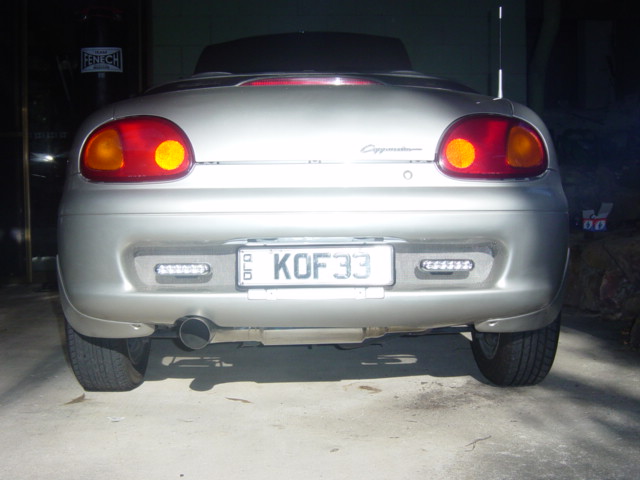
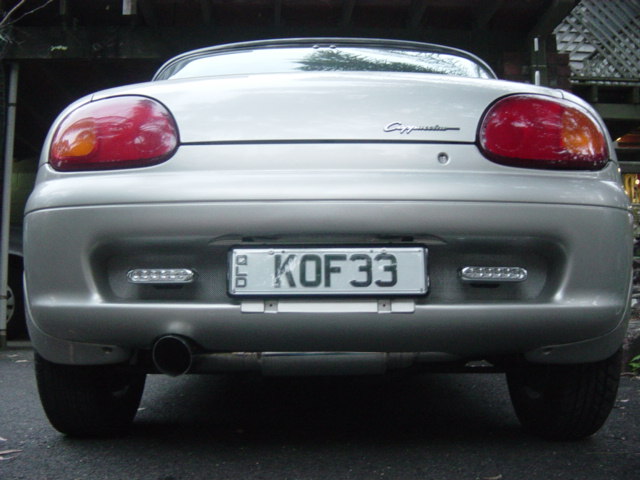
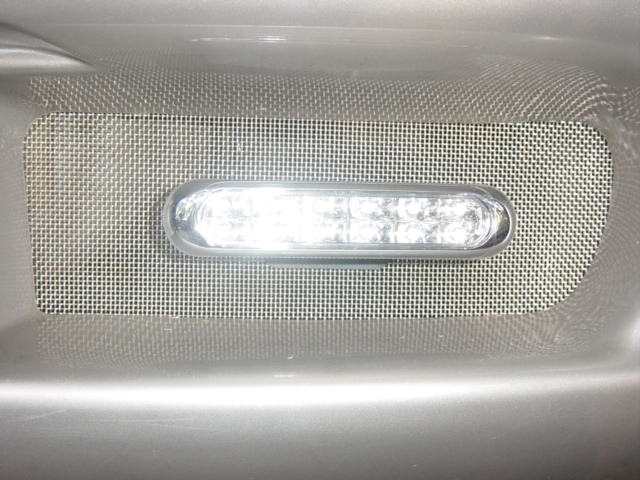
| While I had the rear exhaust off I replaced the rear black mesh wih stainless steel mesh and fitted LED rear reversing lights, two of them just to even things up. (Blue/white) No need for a fog light in OZ................. Whats fog? |
 |
|
| Logged |
|
|
| |
Reply: 4 - 294 |
|
|
| grant4561 |
Posted on: Sunday, March 2nd, 2008, 11:34:34am
Attachment: dsc01556.jpg - 58.79 KB (1480 views) |
|
|
Maximum Member
Posts: 1719
Posts Per Day: 0.99 |
|
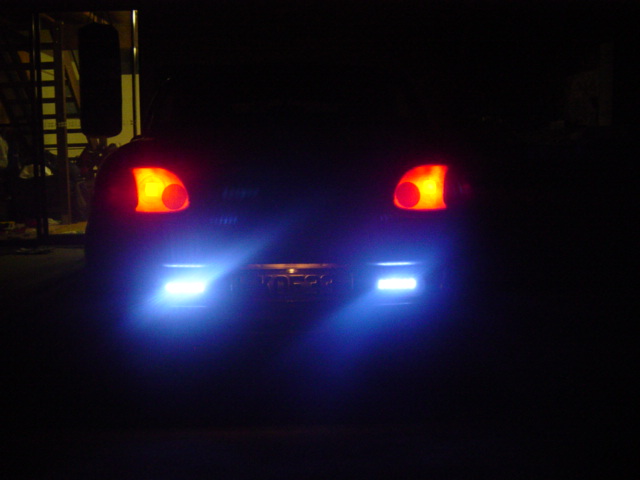
| Tried to take a photo at night but I suck. Cant work the camera out. |
 |
|
| Logged |
|
|
| |
Reply: 5 - 294 |
|
|
| Andy |
| Posted on: Sunday, March 2nd, 2008, 11:42:59am |
|
|
Official C.O.C Contributor

Gender:  Male Male
Posts: 23604
Posts Per Day: 3.49 |
|
Excellent. Keep 'em coming as you do more  |
Drop me a PM if you would like to be added to the ClubCappo Member Map. More details can be found here.
We now have an official Facebook group as well as a page! See here |
|
| Logged |
|
|
| |
Reply: 6 - 294 |
|
|
| capgun |
| Posted on: Sunday, March 2nd, 2008, 12:36:58pm |
|
|
|
Great work Grant  Did you weld the exhaust together too? Have you got a close up pic of the mesh where the lights are? Did you weld the exhaust together too? Have you got a close up pic of the mesh where the lights are? |
|
| Logged |
|
|
|
Reply: 7 - 294 |
|
|
| grant4561 |
| Posted on: Sunday, March 2nd, 2008, 12:44:14pm |
|
|
Maximum Member
Posts: 1719
Posts Per Day: 0.99 |
|
| Yes and I will take a close up photo of the mesh and rear lights during the week when I get time. I do have to work to to pay for all of this. |
|
| Logged |
|
|
| |
Reply: 8 - 294 |
|
|
| capgun |
| Posted on: Sunday, March 2nd, 2008, 1:40:39pm |
|
|
|
Nice welding, look forward to the pics!
|
|
| Logged |
|
|
|
Reply: 9 - 294 |
|
|
| Dean_Shields |
| Posted on: Sunday, March 2nd, 2008, 6:40:31pm |
|
|
|
|
| Logged |
|
|
|
Reply: 10 - 294 |
|
|
| grant4561 |
| Posted on: Sunday, March 2nd, 2008, 11:52:40pm |
|
|
Maximum Member
Posts: 1719
Posts Per Day: 0.99 |
|
| Didnt do all the welding, I owned a sheetmetal shop some time ago and am a bit rusty now. I had a mate of mine at the sheet shop weld it (freeby). I just set it up ready to go. |
|
| Logged |
|
|
| |
Reply: 11 - 294 |
|
|
| crisp |
| Posted on: Wednesday, March 5th, 2008, 7:41:10pm |
|
|
|
Nightime shots?
Is it a digital camera?
If so it's probably got some presets like "nightime" (no I'm NOT being sarcy!) or "fireworks" or "Sunset" or "Natural" that might work better?
Go on, have a play! |
|
| Logged |
|
|
|
Reply: 12 - 294 |
|
|
| chriskiejda |
| Posted on: Thursday, March 6th, 2008, 5:47:12am |
|
|
|
looks great man, good work so far! keep it up.
that picture to me looks like theres some grease or something on the lense? as what crisp said, check for special functions like "nighttime" or perhaps "candlelight". if it's a sony, these will be pictures on the turntable thingy used to switch mode |
|
| Logged |
|
|
|
Reply: 13 - 294 |
|
|
| grant4561 |
| Posted on: Thursday, March 6th, 2008, 5:55:08am |
|
|
Maximum Member
Posts: 1719
Posts Per Day: 0.99 |
|
| Yep, Its a Sony so Ill check. Substance on lense could be rum, Ill check that to. |
|
| Logged |
|
|
| |
Reply: 14 - 294 |
|
|
| Andy |
| Posted on: Thursday, March 6th, 2008, 7:51:56pm |
|
|
Official C.O.C Contributor
Gender: Male
Posts: 23604
Posts Per Day: 3.49 |
|
lol 
Very good! |
Drop me a PM if you would like to be added to the ClubCappo Member Map. More details can be found here.
We now have an official Facebook group as well as a page! See here |
|
| Logged |
|
|
| |
Reply: 15 - 294 |
|
|
| grant4561 |
Posted on: Friday, March 7th, 2008, 12:37:28pm
Attachment: dsc01560.jpg - 60.70 KB (1379 views) |
|
|
Maximum Member
Posts: 1719
Posts Per Day: 0.99 |
|
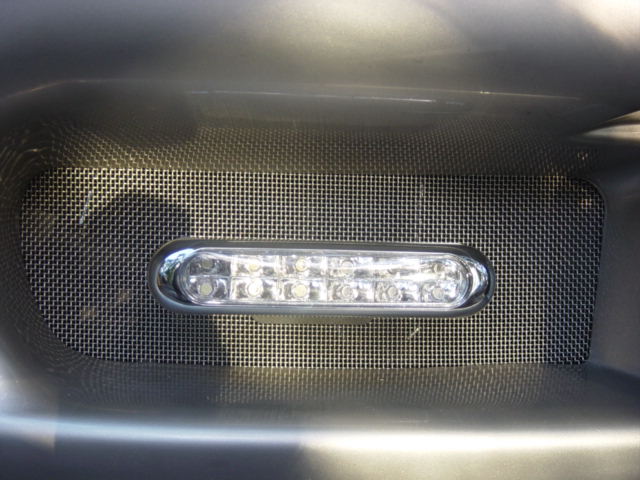
Ok capgun heres your close ups. I had to wait for some daylight, been getting home a bit late from work this wek.
304 grade 16 gauge stainless steel mesh with each light having 12 blue white/white blue(whatever) led's. Lights are from Repco auto parts. Looked for about 2 weeks to find something I thought was suitable.
If you use stainless steel mesh dont get 316 grade as it can basically only be cut with a friction disc and is too dificult to work or put small holes in for screws/bolts. Sheetmetal shops wont even cut it in there guillotine.
Left side no flsah. |
 |
|
| Logged |
|
|
| |
Reply: 16 - 294 |
|
|
| grant4561 |
Posted on: Friday, March 7th, 2008, 12:38:23pm
Attachment: dsc01562.jpg - 60.51 KB (1378 views) |
|
|
Maximum Member
Posts: 1719
Posts Per Day: 0.99 |
|
| From the rear. |
 |
|
| Logged |
|
|
| |
Reply: 17 - 294 |
|
|
| grant4561 |
Posted on: Friday, March 7th, 2008, 12:39:15pm
Attachment: dsc01566.jpg - 59.18 KB (1377 views) |
|
|
Maximum Member
Posts: 1719
Posts Per Day: 0.99 |
|
| Right side with flash. |
 |
|
| Logged |
|
|
| |
Reply: 18 - 294 |
|
|
| capgun |
|
|
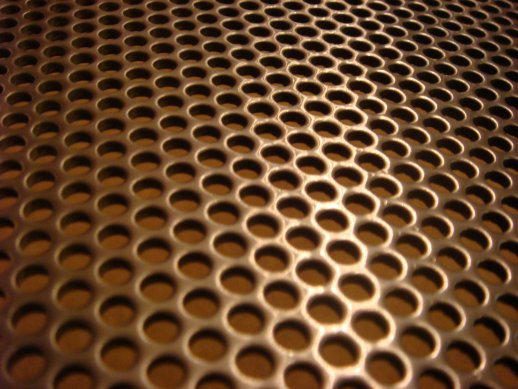
Nice and heavy-duty Suit the silver too!
This is the stainless mesh I am using for Smashie :
|
 |
|
| Logged |
|
|
|
Reply: 19 - 294 |
|
|
| grant4561 |
| Posted on: Friday, March 7th, 2008, 1:09:14pm |
|
|
Maximum Member
Posts: 1719
Posts Per Day: 0.99 |
|
| Perforated metal. Be carefull on any air intakes as it doesnt have a very big free area compared to mesh or expanded metal even though it looks like it. |
|
| Logged |
|
|
| |
Reply: 20 - 294 |
|
|
| capgun |
| Posted on: Friday, March 7th, 2008, 1:18:37pm |
|
|
|
I see what you mean Must create more turbulence as it enters the pipe/duct. It was from a sidestep from a 4wd (about 2mm thick stainless).
Are you going to have an airflow meter on your capp somewhere (Is that affilated with your line of work?) |
|
| Logged |
|
|
|
Reply: 21 - 294 |
|
|
| grant4561 |
| Posted on: Saturday, March 8th, 2008, 10:57:01am |
|
|
Maximum Member
Posts: 1719
Posts Per Day: 0.99 |
|
My line of work encompasses pretty well every thing to do with air flow that we need for our Cappos.
Perforated mesh does not have a very big free area even though it may look so.
Put it this way you could liken it to a brick wall with a few gaps in it, whereis expanded metal and mesh have far greater air flow characteristics due to there more aerodynamic shapes.
Perforated metal is very deceiving, mainly due to its appearance as far as air flow is concerned.
|
|
| Logged |
|
|
| |
Reply: 22 - 294 |
|
|
| capgun |
| Posted on: Saturday, March 8th, 2008, 11:01:21am |
|
|
|
| As long as my capp doesn't boil over I should be ok I hope What about the original mesh is that good - maybe if you're bored one day you could do a comparison of mesh! (I have no idea how long it takes to set up something like that though!) |
|
| Logged |
|
|
|
Reply: 23 - 294 |
|
|
| grant4561 |
Posted on: Sunday, March 9th, 2008, 11:03:18am
Attachment: dsc01524.jpg - 57.10 KB (1337 views) |
|
|
Maximum Member
Posts: 1719
Posts Per Day: 0.99 |
|
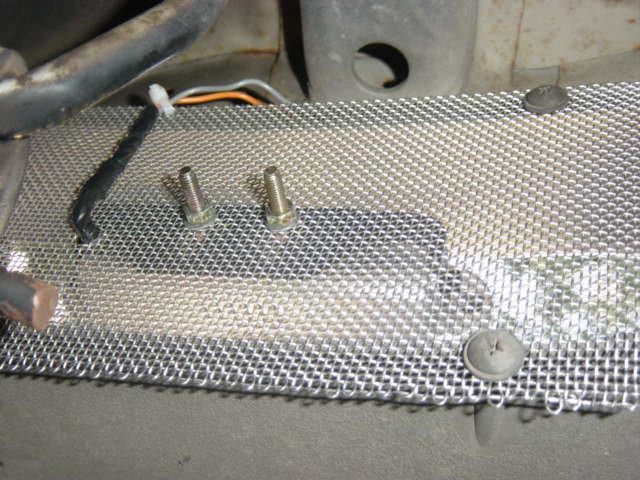
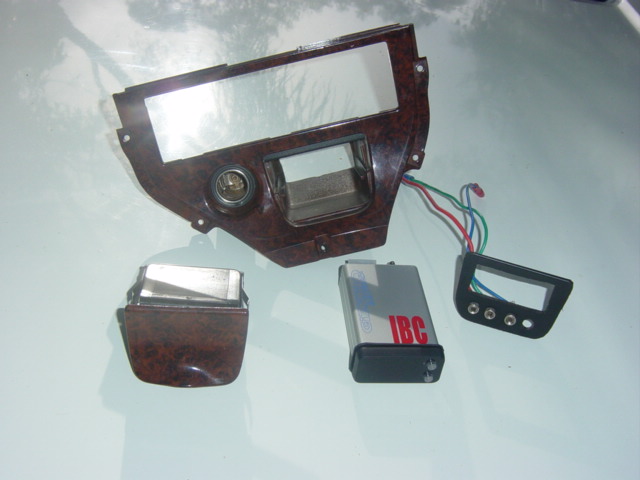
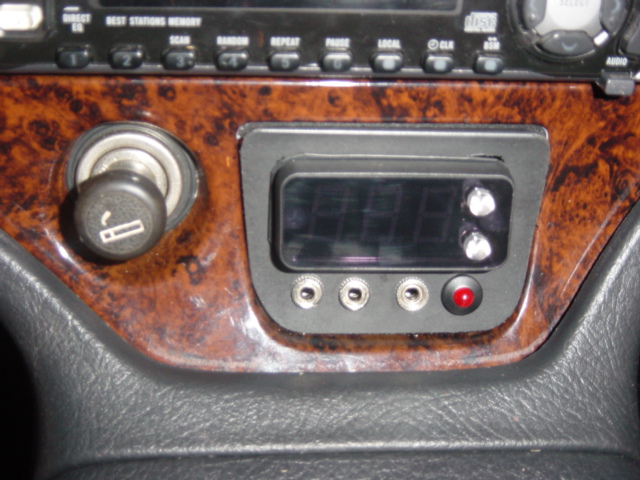
Boost Controller fitted now. Its a GIZZMO IBC (intelligent boost controoler) made in New Zealand.
Quite small, only about 24mm x 53mm x 125mm long. I selected this one due to the size and its characteristics. It can show BAR or PSI.
The rear part of the ash tray slide has to be cut out as the photo shows with the parts ready to assemble. |
 |
|
| Logged |
|
|
| |
Reply: 24 - 294 |
|
|
| grant4561 |
Posted on: Sunday, March 9th, 2008, 11:04:55am
Attachment: dsc01525.jpg - 58.46 KB (1337 views) |
|
|
Maximum Member
Posts: 1719
Posts Per Day: 0.99 |
|
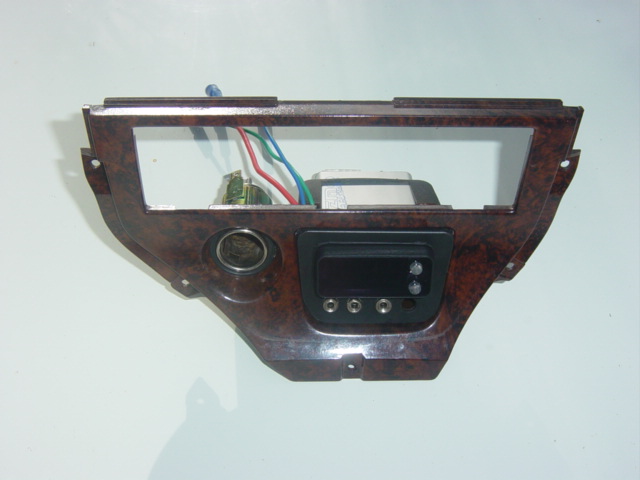
| Hers everything together from the font. |
 |
|
| Logged |
|
|
| |
Reply: 25 - 294 |
|
|
| grant4561 |
Posted on: Sunday, March 9th, 2008, 11:06:16am
Attachment: dsc01530.jpg - 58.99 KB (1335 views) |
|
|
Maximum Member
Posts: 1719
Posts Per Day: 0.99 |
|
| From the rear. |
 |
|
| Logged |
|
|
| |
Reply: 26 - 294 |
|
|
| grant4561 |
Posted on: Sunday, March 9th, 2008, 11:07:29am
Attachment: dsc01527.jpg - 60.01 KB (1333 views) |
|
|
Maximum Member
Posts: 1719
Posts Per Day: 0.99 |
|
| Boost control vale in the engine bay. |
 |
|
| Logged |
|
|
| |
Reply: 27 - 294 |
|
|
| grant4561 |
Posted on: Sunday, March 9th, 2008, 11:09:09am
Attachment: dsc01588.jpg - 149.09 KB (1336 views) |
|
|
Maximum Member
Posts: 1719
Posts Per Day: 0.99 |
|
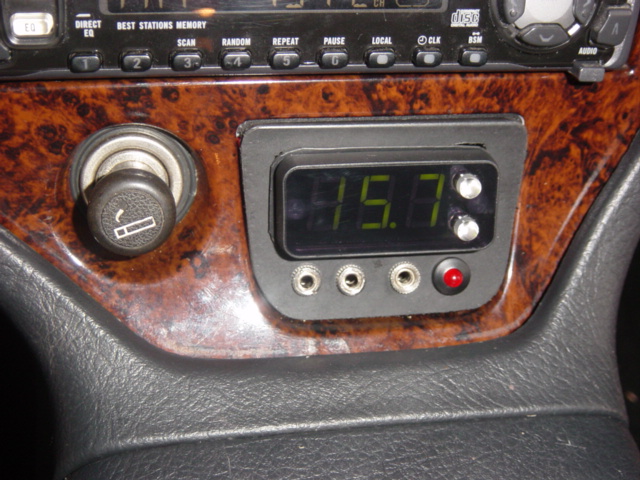
| Installed. |
 |
|
| Logged |
|
|
| |
Reply: 28 - 294 |
|
|
| grant4561 |
Posted on: Sunday, March 9th, 2008, 11:10:25am
Attachment: dsc01590.jpg - 141.57 KB (1332 views) |
|
|
Maximum Member
Posts: 1719
Posts Per Day: 0.99 |
|
| In action. |
 |
|
| Logged |
|
|
| |
Reply: 29 - 294 |
|
|
| grant4561 |
Posted on: Sunday, March 9th, 2008, 11:15:52am
Attachment: dsc01583.jpg - 141.35 KB (1334 views) |
|
|
Maximum Member
Posts: 1719
Posts Per Day: 0.99 |
|
| Yes I have fitted an overbost fuel cut defeater. So it dont get sny nasty lean outs i have fitted a Malpassi rising rate 1:1 adjustable fuel pressure regulator. |
 |
|
| Logged |
|
|
| |
Reply: 30 - 294 |
|
|
| grant4561 |
Posted on: Sunday, March 9th, 2008, 11:18:49am
Attachment: dsc01584.jpg - 140.72 KB (1330 views) |
|
|
Maximum Member
Posts: 1719
Posts Per Day: 0.99 |
|
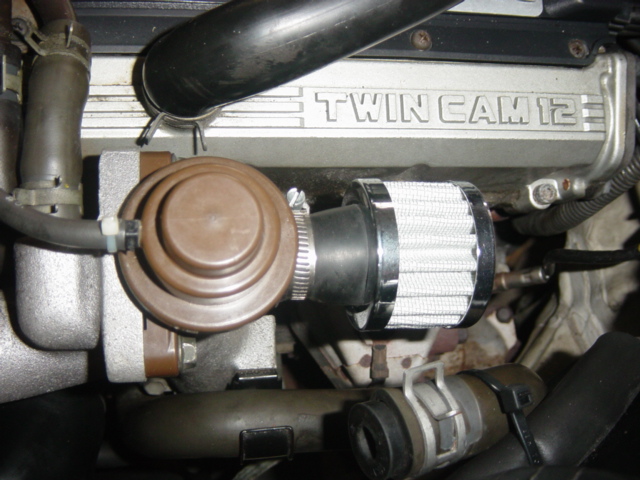
| Oh yea, whilst in tha engine bay I thought I might like to get a bit of the "wet fart" sound so made some adjustments |
 |
|
| Logged |
|
|
| |
Reply: 31 - 294 |
|
|
| Dean_Shields |
| Posted on: Sunday, March 9th, 2008, 11:28:12am |
|
|
|
“ |
Quoted from capgun, posted Friday, March 7th, 2008, 1:00:44pm at here |
” |
Nice and heavy-duty Suit the silver too!
This is the stainless mesh I am using for Smashie :
|
|
It's the same as I have on mine capgun but mines is alloy not stainless |
|
| Logged |
|
|
|
Reply: 32 - 294 |
|
|
| capgun |
| Posted on: Sunday, March 9th, 2008, 11:36:51am |
|
|
|
It looks very neat Grant what are the 3 phono plugs for? PC tweaking?
I want the moths to be dead after they hit the mesh Dean  (they dent the normal stuff sometimes!) (they dent the normal stuff sometimes!) |
|
| Logged |
|
|
|
Reply: 33 - 294 |
|
|
| Dean_Shields |
| Posted on: Sunday, March 9th, 2008, 11:40:30am |
|
|
|
| lol... you have must have big big moths over there... |
|
| Logged |
|
|
|
Reply: 34 - 294 |
|
|
| grant4561 |
| Posted on: Sunday, March 9th, 2008, 11:44:08am |
|
|
Maximum Member
Posts: 1719
Posts Per Day: 0.99 |
|
Left to Right.
Map sensor output.
Oxygen Sensor output.
Fuel injector duty cyle output.
The hole on the far right is for the immobilers light
Makes it easy to check what happens with mods and I use the meters/instruments with what ever car. |
|
| Logged |
|
|
| |
Reply: 35 - 294 |
|
|
| capgun |
| Posted on: Sunday, March 9th, 2008, 11:48:09am |
|
|
|
Very nice
Jaycar have those 'wind speed' meters, don't know what they could be used for in a capp but might be fun too! |
|
| Logged |
|
|
|
Reply: 36 - 294 |
|
|
| grant4561 |
| Posted on: Sunday, March 9th, 2008, 11:50:38am |
|
|
Maximum Member
Posts: 1719
Posts Per Day: 0.99 |
|
|
| Logged |
|
|
| |
Reply: 37 - 294 |
|
|
| capgun |
| Posted on: Sunday, March 9th, 2008, 11:56:36am |
|
|
|
| I could put one in the exhaust pipe outlet and measure the air velocity! Did you have to solder the meter together (a kit) ? |
|
| Logged |
|
|
|
Reply: 38 - 294 |
|
|
| grant4561 |
| Posted on: Sunday, March 9th, 2008, 12:05:19pm |
|
|
Maximum Member
Posts: 1719
Posts Per Day: 0.99 |
|
| No, one meter is a kit from jaycar, but there are others that i use |
|
| Logged |
|
|
| |
Reply: 39 - 294 |
|
|
|
 Cappuccino Owners Club › Gallery › Cappo Related Album › KOF 33 Mod's (Moderators: )


 Locked Board