|
|
 Author Author |
 The Whole 3.6 Yards (currently 11415 views) The Whole 3.6 Yards (currently 11415 views) |
| ycming |
| Posted on: Saturday, April 21st, 2012, 11:15:55pm |
  |
|
|
You have done everything I have planned to do in a year in like 3 months lol!
Good progress and great pictures  . .
Did you find it hard removing the mani turbo and cat?
Thanks
Ming |
|
 Logged Logged |
|
|
 |
Reply: 80 - 333 |
|
|
| nikki |
| Posted on: Saturday, April 28th, 2012, 10:57:06pm |
|
|
|
“ |
Quoted from ycming, posted Saturday, April 21st, 2012, 11:15:55pm at here |
” |
You have done everything I have planned to do in a year in like 3 months lol!
Good progress and great pictures .
Did you find it hard removing the mani turbo and cat?
Thanks
Ming
|
|
Thanks The mani turbo and cat came off fine, no rusty snapped bolts like some cars, its just a little bit more fidly getting to some nuts as there is less room.
These turned up the other day
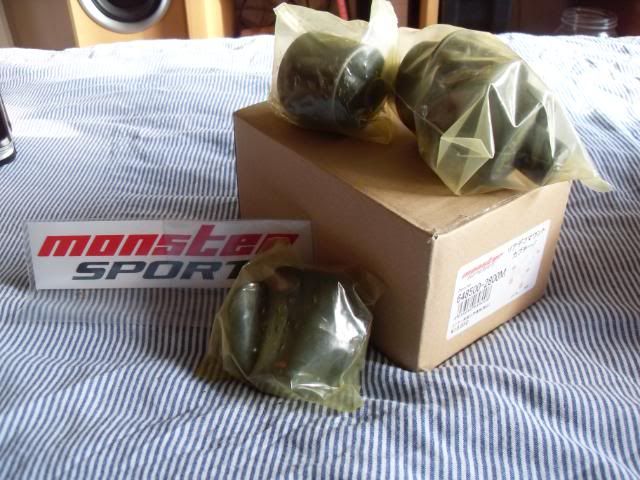
Monster Sport diff mounts 
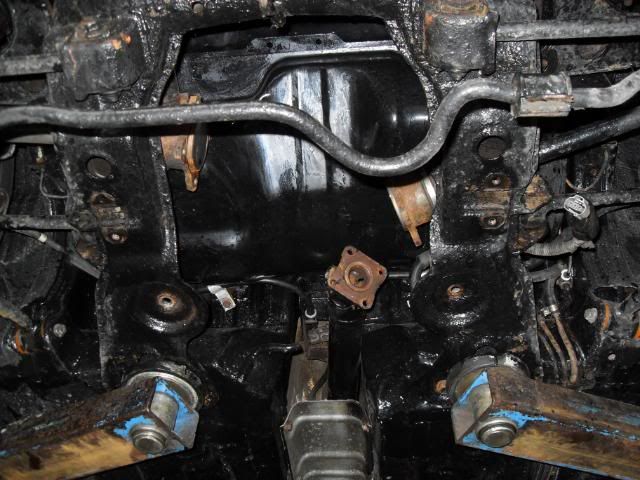
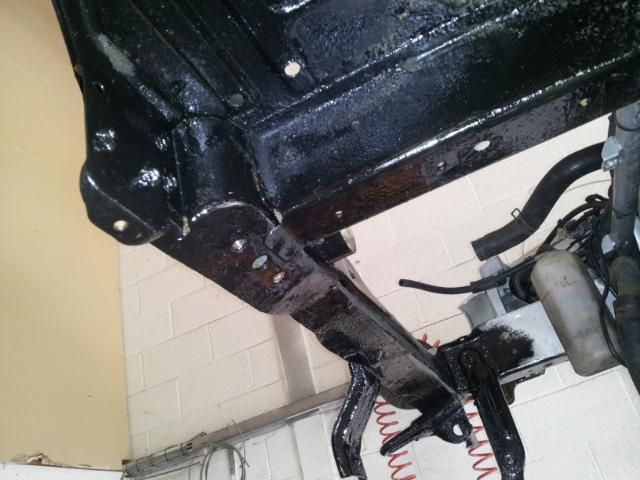
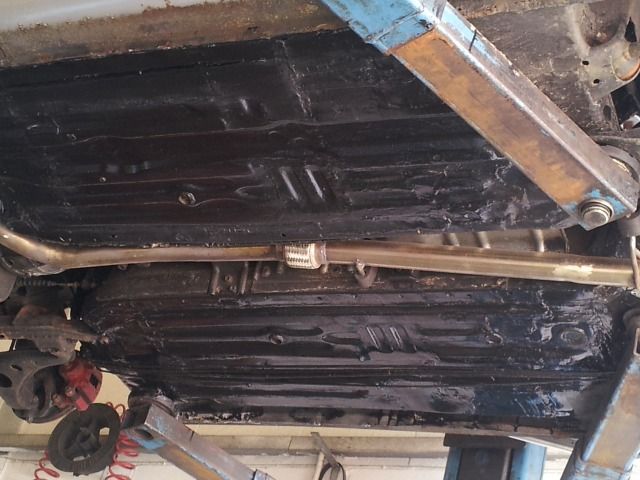
While it was up on the ramp I had a chance to check up on the underside. all seems well no signs of any rust coming back for now. The subframe still has a few bits here and there but nothing major. The shell is looking good though. Got on and got the diff out
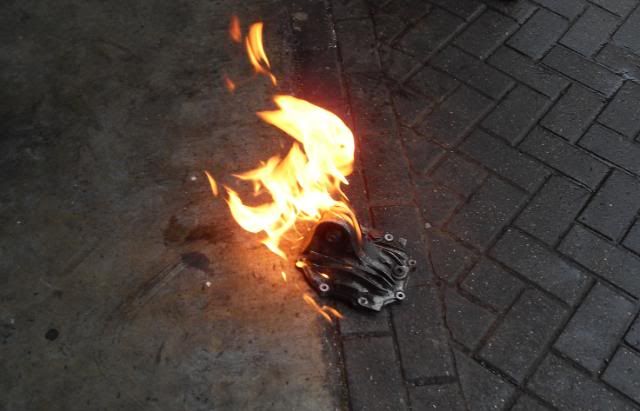
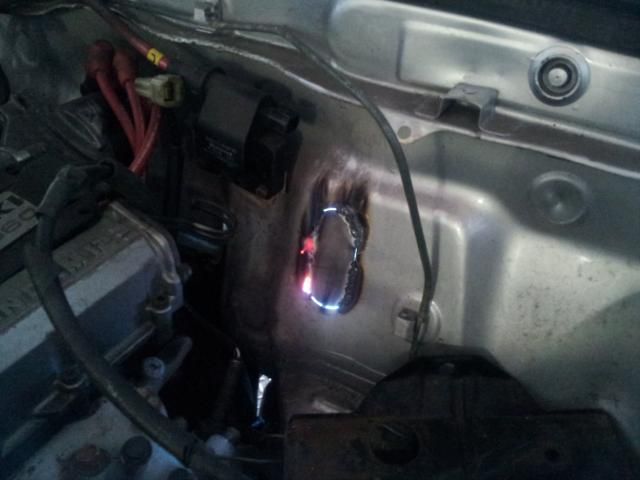
Then set about removing the rear bush with a bit of flame action
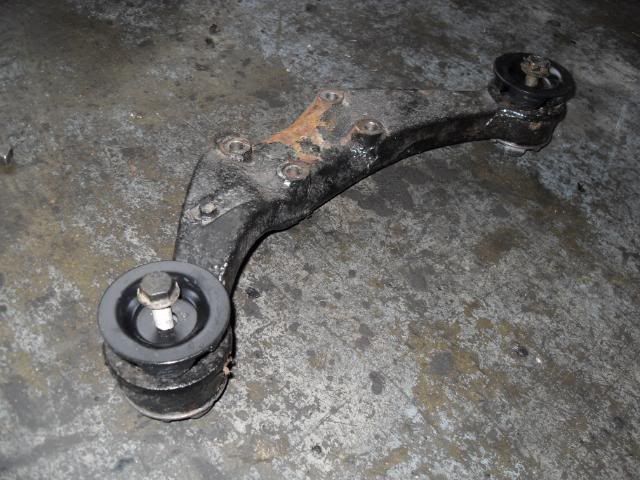
Diff ready to go back in

And the brace with new bushes fitted
I had a little clonk going from 1st to second which has disappeared and it feels alot tighter all round, certainly alot tighter than the Ferrari I past on my way home that had spun out in the fast lane 
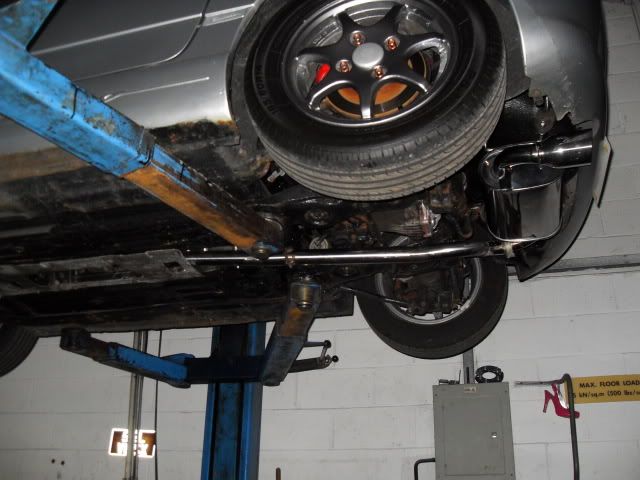
I also had a quick chance to test fit my new back box.

Need to order some 2" T304 stainless tubes and a few bends to make up my downpipe and centre section first though, so the old one got stuck back on for now. |
Last modified Saturday, April 28th, 2012, 11:00:54pm by nikki |
|
| Logged |
|
|
|
Reply: 81 - 333 |
|
|
| steve |
| Posted on: Saturday, April 28th, 2012, 11:33:26pm |
|
|
|
| Mmm Suzuki sport silencer. Nice .... |
|
| Logged |
|
|
|
Reply: 82 - 333 |
|
|
| lord |
| Posted on: Sunday, April 29th, 2012, 1:38:02am |
|
|
|
| This cappuccino is getting some nikki loving. looking. good. love your commitment and desire to keep your cappo in optimum health. im just waiting for my sub frame then not far off. so can't wait. but there's people on here who can inspire others and youre one of them |
Last modified Sunday, April 29th, 2012, 1:39:41am by lord |
|
| Logged |
|
|
|
Reply: 83 - 333 |
|
|
| Avar |
| Posted on: Sunday, April 29th, 2012, 6:55:44am |
|
|
|
| It sure is getting some lovin, i'd get on those fuel and brake lines soon, an unfreindly mot'er would love scratching away at them trying to find metal. |
|
| Logged |
|
|
|
Reply: 84 - 333 |
|
|
| nikki |
| Posted on: Saturday, May 12th, 2012, 8:59:40pm |
|
|
|
“ |
Quoted from Avar, posted Sunday, April 29th, 2012, 6:55:44am at here |
” |
It sure is getting some lovin, i'd get on those fuel and brake lines soon, an unfreindly mot'er would love scratching away at them trying to find metal.
|
|
I will be looking into these soon, only just got my MOT so I have another year until I have to worry
|
|
| Logged |
|
|
|
Reply: 85 - 333 |
|
|
| nikki |
| Posted on: Saturday, May 12th, 2012, 9:15:49pm |
|
|
|
I was away last weekend so nothing much happened but this weeks installments are as follows
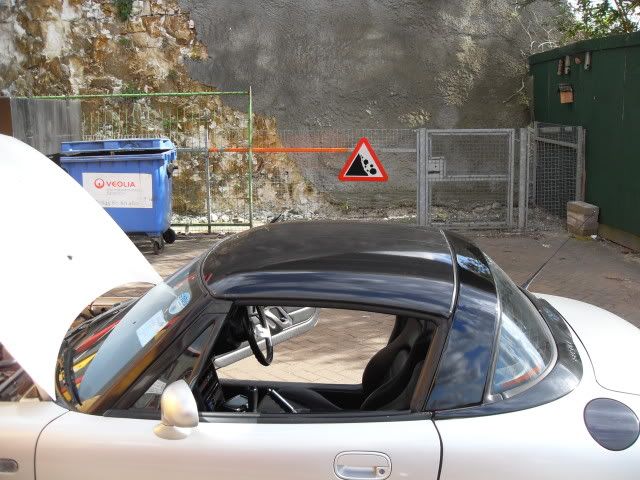
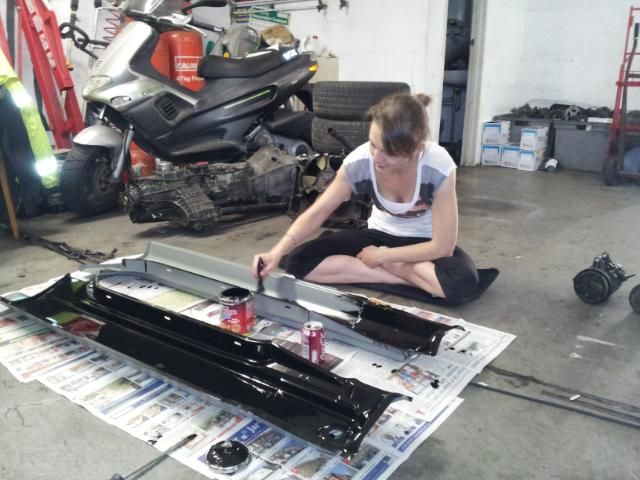
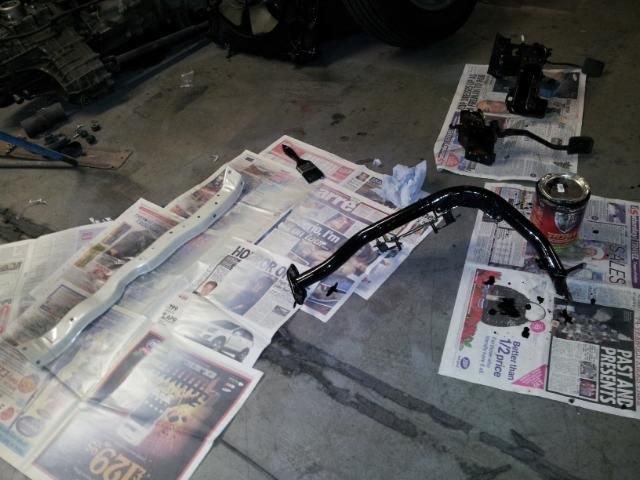
Been waiting for the weather to improve before I painted the roof bar black to match the roof, as it was a lovely day today I finally managed to get round to it. Looks like it should always have been black
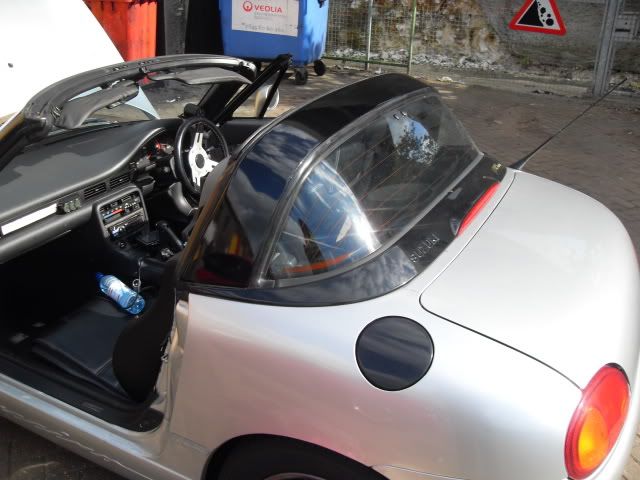
Next was to remove the Cappuccino badge off the boot, think it looks so much better

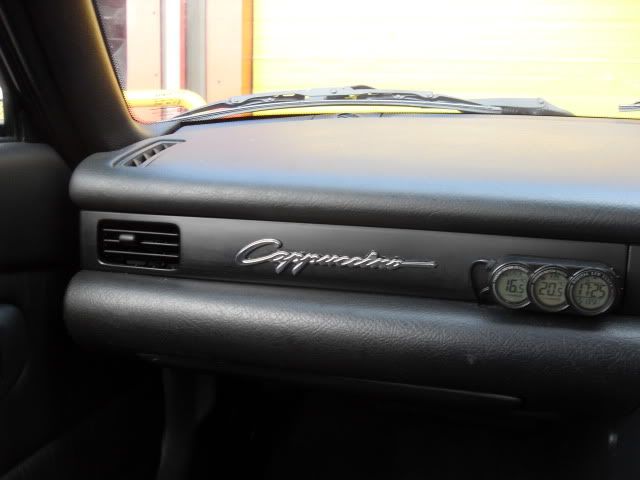
I then re-used the badge on my dashboard as seen on one of those links on another thread
 |
|
| Logged |
|
|
|
Reply: 86 - 333 |
|
|
| nikki |
| Posted on: Sunday, May 20th, 2012, 12:59:54am |
|
|
|
Well I took the plunge and bought myself some arches. Manged to have a quick test fit today.
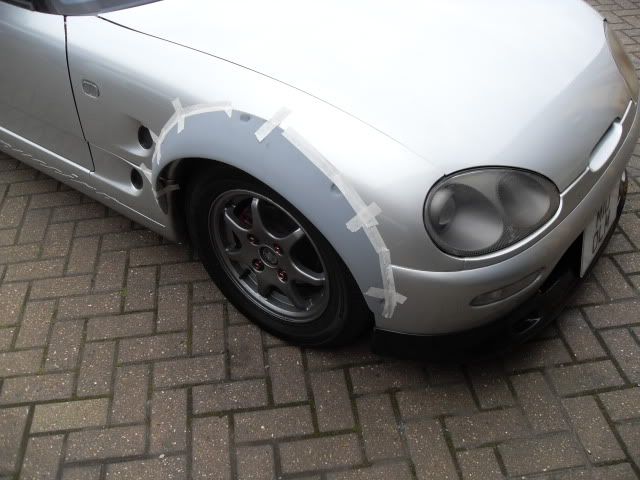
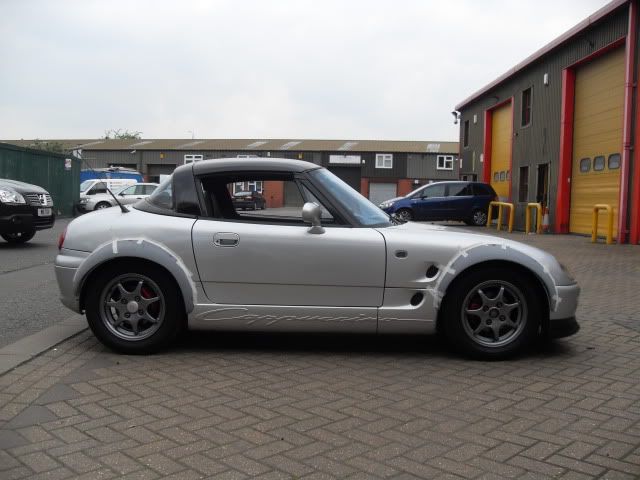

Meant to be for an MX5, but look like they should work well and the rears give me 80mm extra room, which is enough to get the wheels I want to fit.......to fit
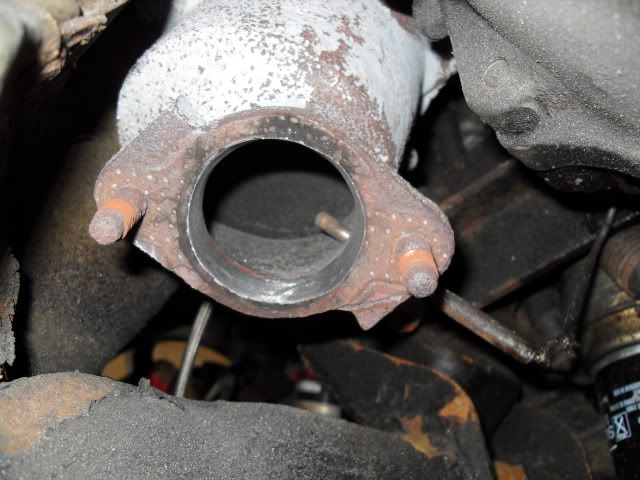
Everything to make my exhaust arrived last week so we made a start today. First things first I came back to the Cat section and measured the exit that I enlarged when I did the turbo gaskets earlier on. It measured 1.75" which was fine for the old exhaust, but not the new. I re-attacked it and got it to a 2" diameter.
Then we began mocking and tacking
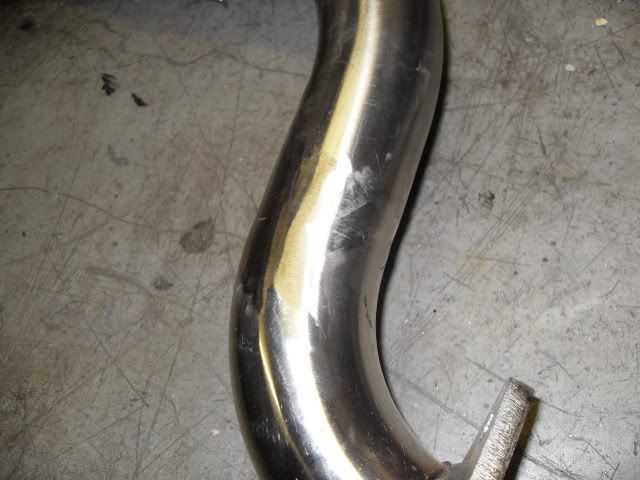
Welding
No TIG available so all the welds that could be, got ground back after. Like this:
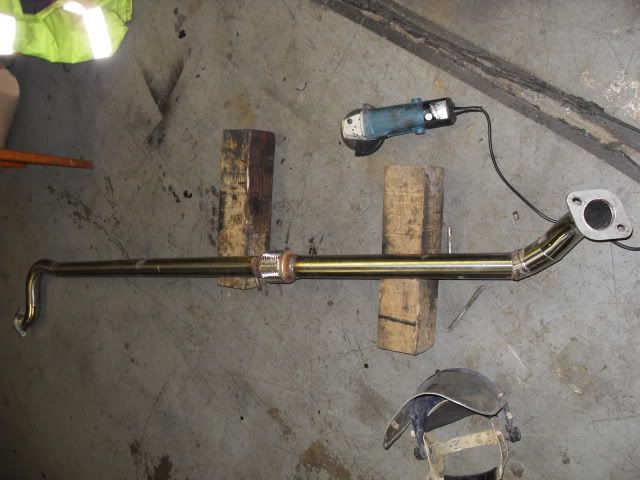
And all said an done, old next to new
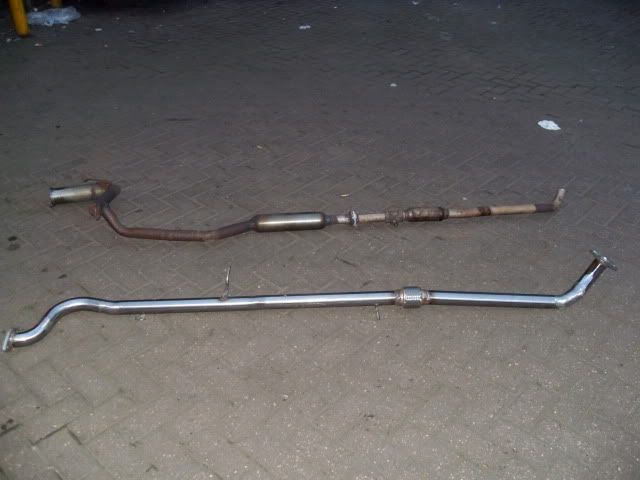
Both could be said are home brew examples, but one is much nicer than the other
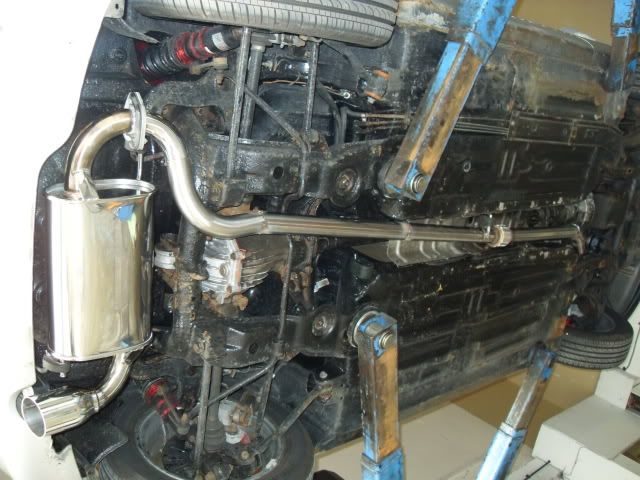
All fitted with the Suzuki Sport back box
Sounds good  |
|
| Logged |
|
|
|
Reply: 87 - 333 |
|
|
| nikki |
| Posted on: Sunday, June 3rd, 2012, 6:11:35pm |
|
|
|
Got a few quick comparison videos of the old and new exhaust for you all:
Old
http://www.youtube.com/watch?v=IrQuVfrWqqM
Suzuki Sport
http://youtu.be/yG-npBtGZGQ
Did a few more slight tweeks over the weekend, have a look...

As you can see I'm in need of some new mesh, but pleased with the results |
Last modified Tuesday, August 28th, 2012, 8:26:08pm by nikki |
|
| Logged |
|
|
|
Reply: 88 - 333 |
|
|
| Andy |
| Posted on: Sunday, June 3rd, 2012, 6:28:30pm |
|
|
Official C.O.C Contributor


Gender:  Male Male
Posts: 23604
Posts Per Day: 3.48 |
|
They do sound nice the Monster/Suzuki Sport exhausts and the note will only further improve over time - result  |
Drop me a PM if you would like to be added to the ClubCappo Member Map. More details can be found here.
We now have an official Facebook group as well as a page! See here |
|
| Logged |
|
|
 |
Reply: 89 - 333 |
|
|
| lord |
| Posted on: Monday, June 4th, 2012, 3:40:50am |
|
|
|
| How have you fixed our plate? Looks fantastic. Seriously. X |
|
| Logged |
|
|
|
Reply: 90 - 333 |
|
|
| nikki |
| Posted on: Monday, June 4th, 2012, 2:45:55pm |
|
|
|
| Cheers. Its just sticky pads holding it on. |
|
| Logged |
|
|
|
Reply: 91 - 333 |
|
|
| mitogeri |
| Posted on: Tuesday, June 5th, 2012, 12:03:02am |
|
|
Big Member

Posts: 192
Posts Per Day: 0.12 |
|
is your front lip the heartland type?
Exhaust sounds really nice,I like it when you can kinda hear the turbo spooling |
|
| Logged |
|
|
| |
Reply: 92 - 333 |
|
|
| nikki |
| Posted on: Tuesday, June 5th, 2012, 7:00:53pm |
|
|
|
Thanks
It's a Take Off Cross Type lip. |
Last modified Tuesday, June 5th, 2012, 7:13:17pm by nikki |
|
| Logged |
|
|
|
Reply: 93 - 333 |
|
|
| nikki |
| Posted on: Sunday, June 24th, 2012, 4:46:52pm |
|
|
|
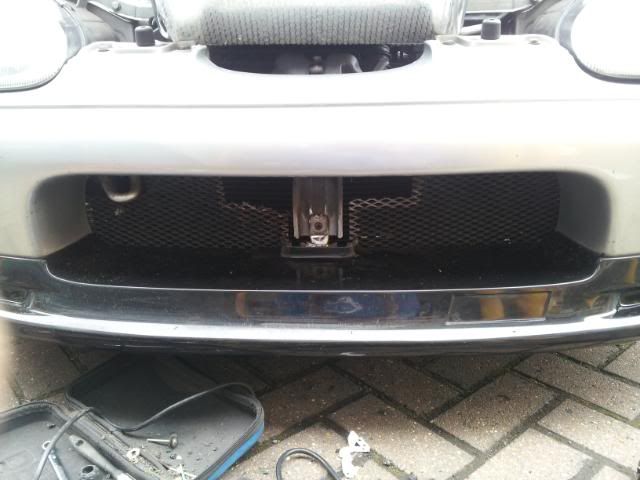
Just a little update today. I got some replacement mesh for the front, It's in, but needs a bit more adjustment and fixing in place to be perfect.

I also added this little guy to join me in my travels. Sort of a lucky charm I guess

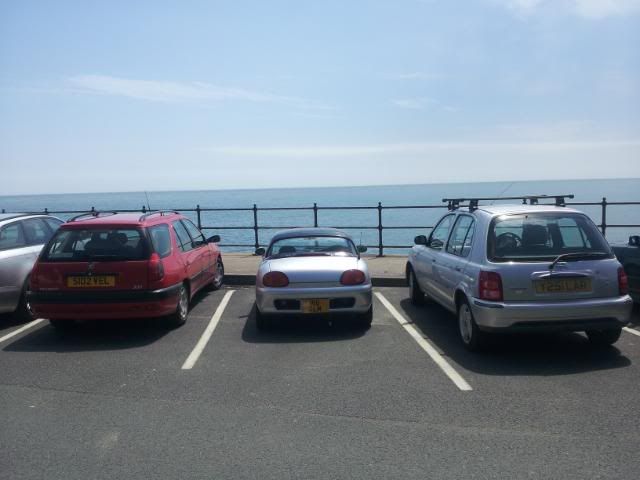
And he proved a good addition as last week I went on a little 5 day break to the Isle of Wight with my other half. Thankfully all our bits we needed we got in, crucially packed in soft flexible bags for maximum room. Drinks and laptop in the roof cavity too, and she performed well Here she is sunning herself at Ventnor.
Only thing to report was that my drivers front indicator stopped working on the drive down. Bought a bulb for it but it didn't fix it, so I'm expecting it to be a loose wire somewhere or something similar. Other than that she was faultless. One thing we have been doing was soften the suspension in the past month or two. Since the monster sport diff mounts were fitted things were a bit firmer, so we backed it off a bit after that. The Isle of Wight roads are quite bumpy we culminated the process there getting back down to the softest setting at the back for a while and ending up 1 click from soft, front slightly stiffer at around 3 or 4 clicks from soft. We even spotted a Suzuki dealership on the island so anyone planning a trip down there in a cappo is catered for |
|
| Logged |
|
|
|
Reply: 94 - 333 |
|
|
| nikki |
| Posted on: Friday, August 10th, 2012, 7:00:37pm |
|
|
|
Don't worry, I'm still here!  I have been accumulating some parts I have been accumulating some parts
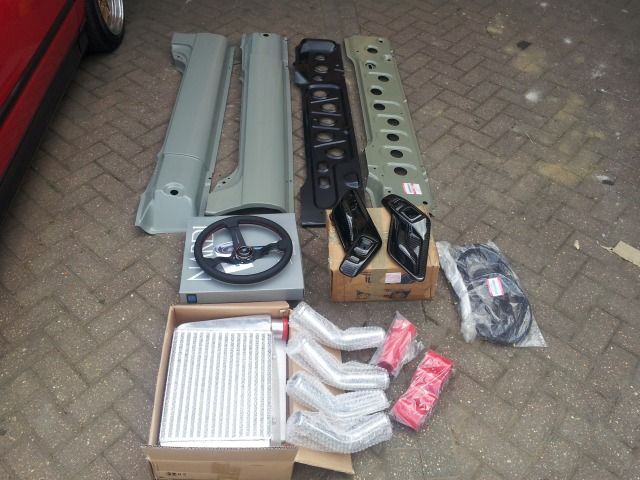
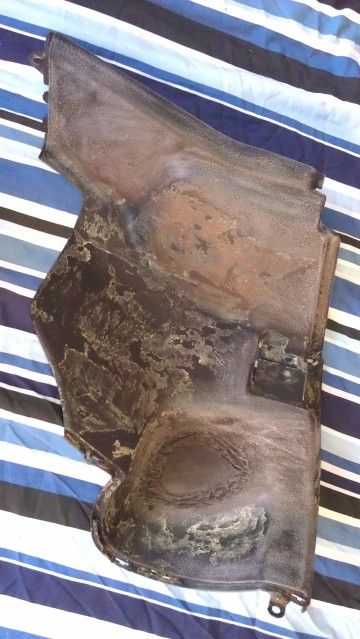
I had also re-covered my rear interior plastics in a leather/vinyl materal but wasn't happy with how they came out. I have since pulled it all back off, cleaned the adhesive off it all, plastic welded holes that had been cut in them for speakers and began flocking them. 2 down just the last one to go, which I will finish off once if post this
I have also ordered some new wheels that should arrive in the country before the month is out too, so although not much has been posted recently, things are still moving along nicely 
|
|
| Logged |
|
|
|
Reply: 95 - 333 |
|
|
| lord |
| Posted on: Friday, August 10th, 2012, 8:15:17pm |
|
|
|
| Wow. Looking good. What wheels are they? So where did you manage to get your sills from in the end? |
|
| Logged |
|
|
|
Reply: 96 - 333 |
|
|
| nikki |
| Posted on: Friday, August 10th, 2012, 8:34:13pm |
|
|
|
| Thanks. Outer sills are from Suzuki, inners got sourced off the bay and the wheels are XXR 002 but finished in a colour you cant get hold of in the UK. |
|
| Logged |
|
|
|
Reply: 97 - 333 |
|
|
| Capposteve |
| Posted on: Friday, August 10th, 2012, 9:27:50pm |
|
|
|
That's the wheels I was going to get. Let me no how they fit. Did you get the 7 or 8' wide ones??
Steve |
|
| Logged |
|
|
|
Reply: 98 - 333 |
|
|
| nikki |
| Posted on: Sunday, August 12th, 2012, 11:19:27am |
|
|
|
Originally I was gonna go for a 7j on the front and a 8j on the back, but the in finish I've gone for the wheels are only available in 8j and 9j flavours. So, I have been daring and gone for 8j all around fully expecting to have some trouble up front. I'll try my best with tyre choices to get them to work on lock, maybe even look into some kind of camber adjustment mods. If all that fails then I'll just have to sell a pair buy some 7j's and get them refurbed in the right colour to match the rears.
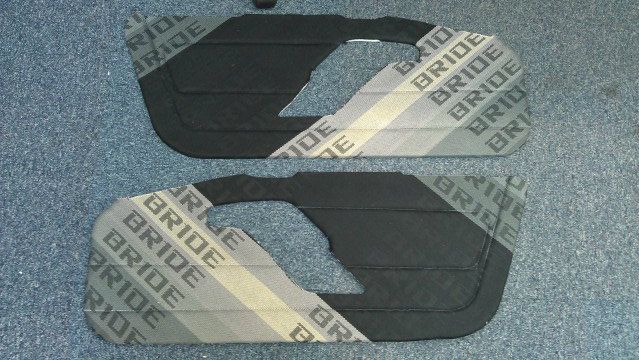
Here is a quick one of my rear panels for you all.
One before flock
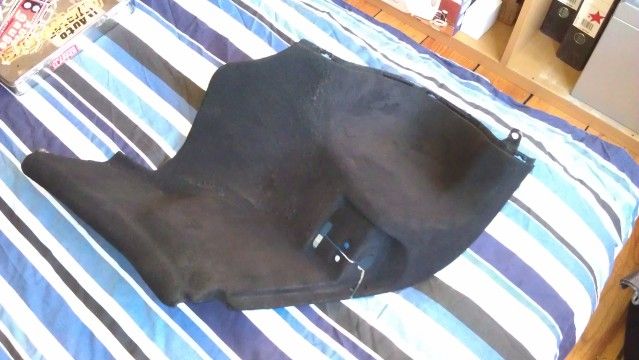
And a finished example
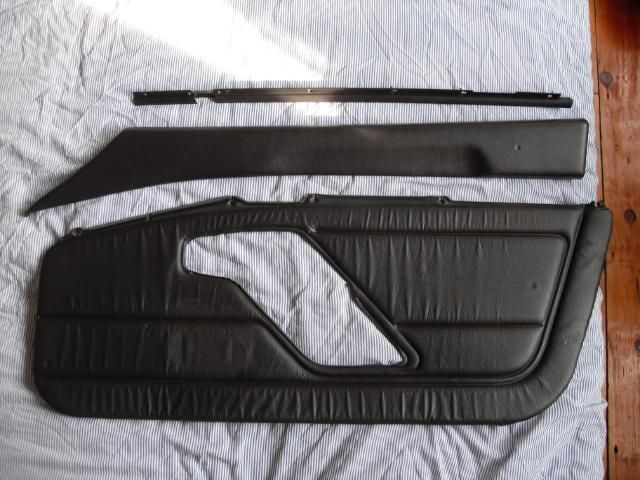
I also took my door cards off yesterday

And then took them to pieces ready for a rebuild
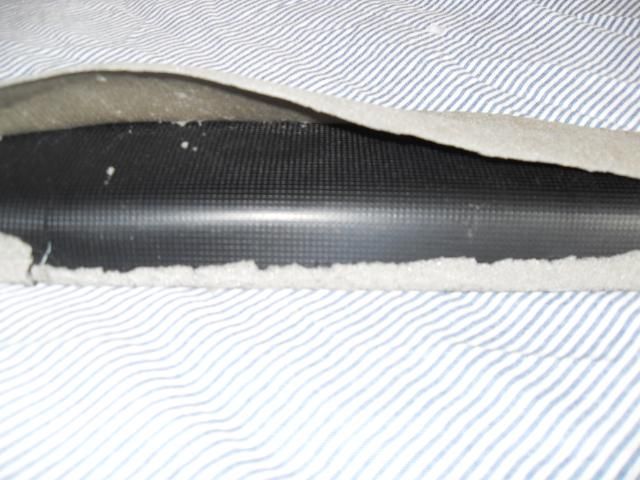
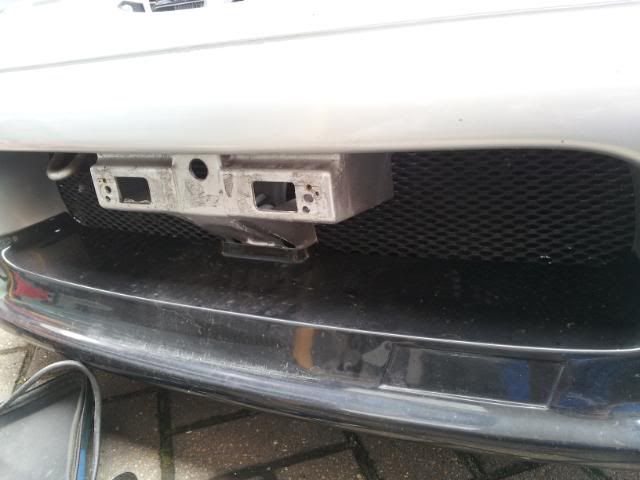
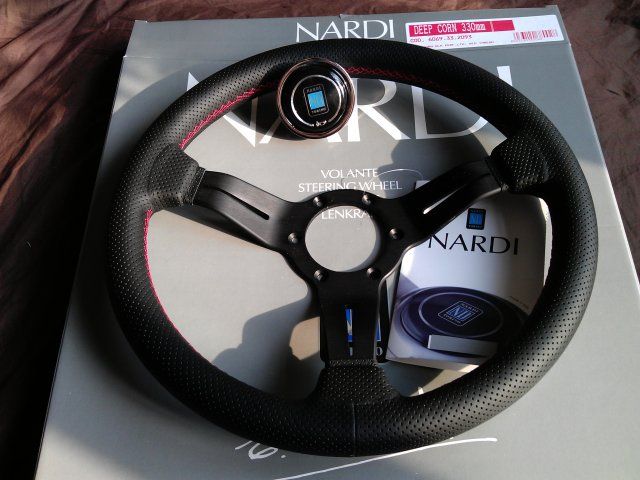
I'll leave you with a snap of my new wheel that I can't fit yet due having a random boss currently bolted to my car 
 |
Last modified Sunday, August 12th, 2012, 11:28:41am by nikki |
|
| Logged |
|
|
|
Reply: 99 - 333 |
|
|
| lord |
| Posted on: Sunday, August 12th, 2012, 1:34:51pm |
|
|
|
What's that intercooler then ?? Have you tried to fit it yet?
The flocking looks good. Is that a difficult process. Is it durable though? |
|
| Logged |
|
|
|
Reply: 100 - 333 |
|
|
| nikki |
| Posted on: Sunday, August 12th, 2012, 4:06:30pm |
|
|
|
The intercooler is the one from the universal intercooler thread, the one that has scared a few people off due to its size I will be tackling it next weekend, its not going to be an easy fit by any stretch of the imagination.
Flocking is pretty simple its just adhesive, followed by flock, job done It should be pretty durable I know of a few people with flocked dash's, and they look just the same to me two years on. |
|
| Logged |
|
|
|
Reply: 101 - 333 |
|
|
| nikki |
| Posted on: Sunday, August 12th, 2012, 4:19:41pm |
|
|
|
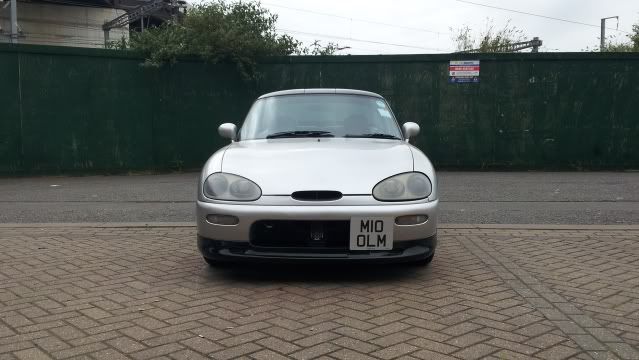
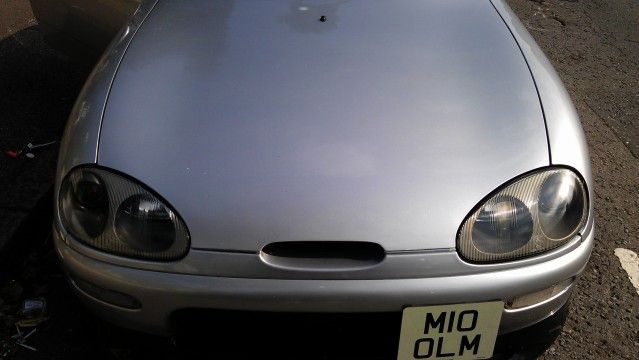
Also been outside today working on the headlights. Its been nearly a year since I de-yellowed them and they looked like they needed another pass. I used G10 by hand It looked better but not great so I followed that with some Poorboys 2.5SSR, 3m Finesse it, and waxed in the shiny ness
 |
|
| Logged |
|
|
|
Reply: 102 - 333 |
|
|
| nikki |
| Posted on: Saturday, August 18th, 2012, 11:26:06pm |
|
|
|
Back down the garage today. In fact I have left the old girl there for some loving over next week to get as much of the welding done and dusted as possible.
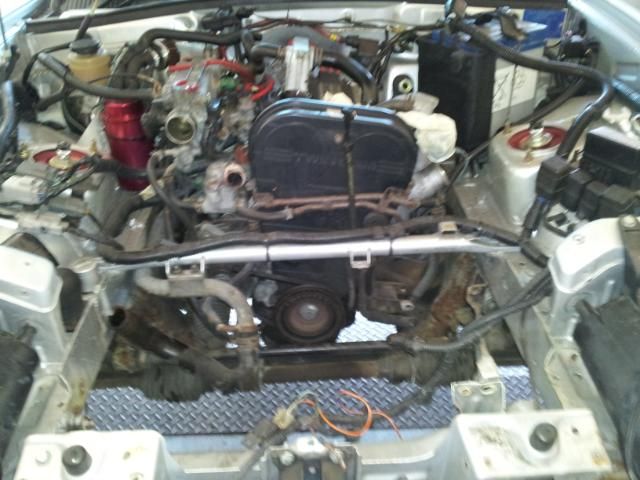
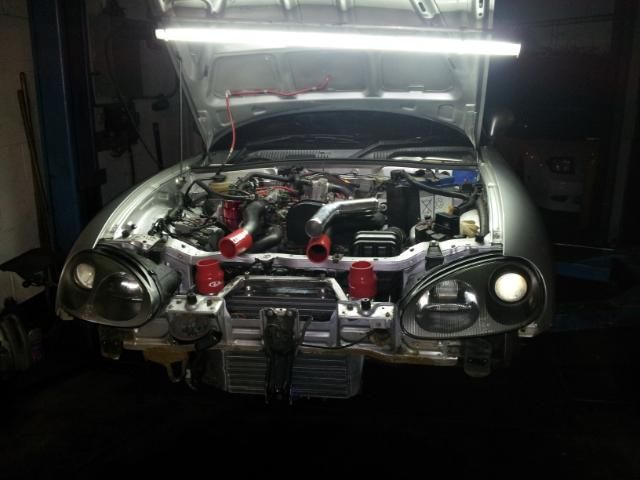
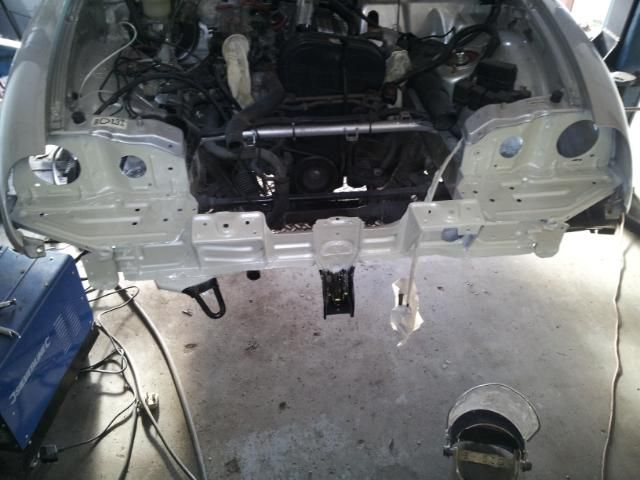
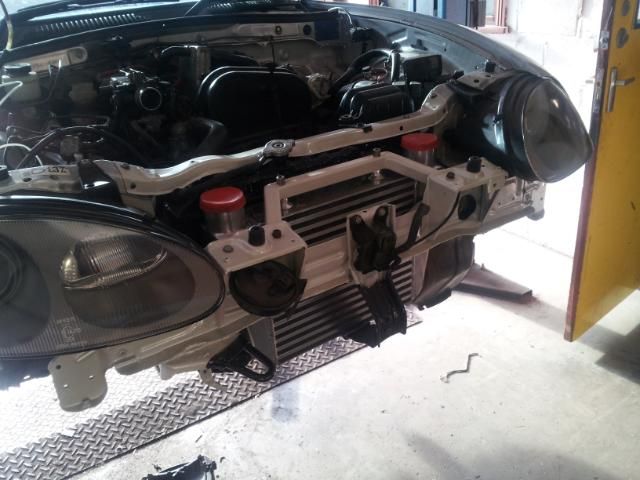
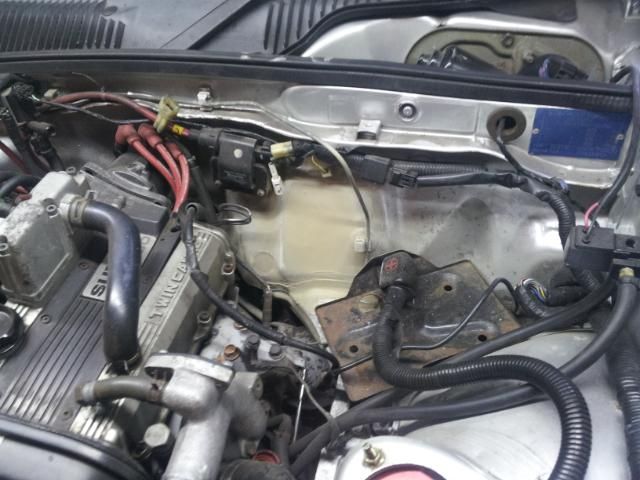
But firstly it was time to attempt the intercooler fitting,
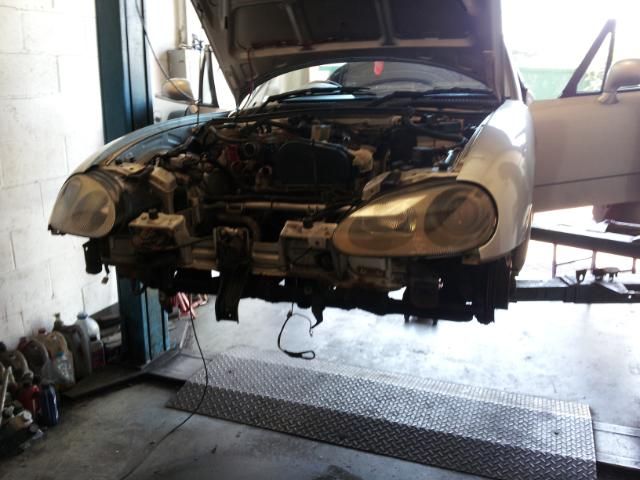
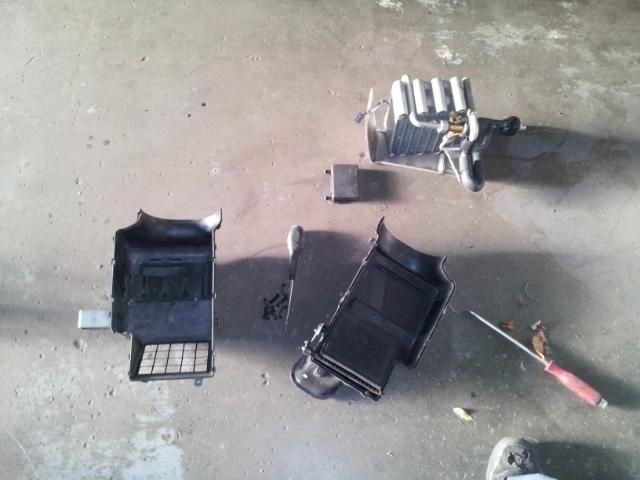
Emptied everything out the way including removing the air con stuff. Nice warm day to do it, but it never worked so was just un-needed weight really.
I wasn't much help myself while all the fabricating was going on,
so I spent my time painting the insides of my new sills with Por 15
The rad mounts were extended like so
fabbed this nifty bracket up for the top and another for the bottom.
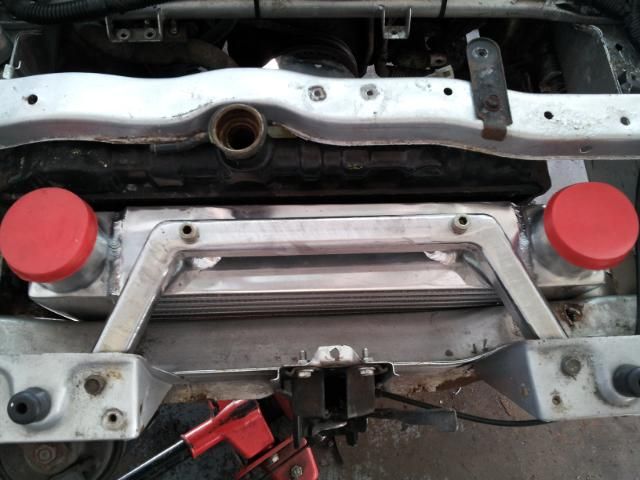
Everything else fits back in behind still too
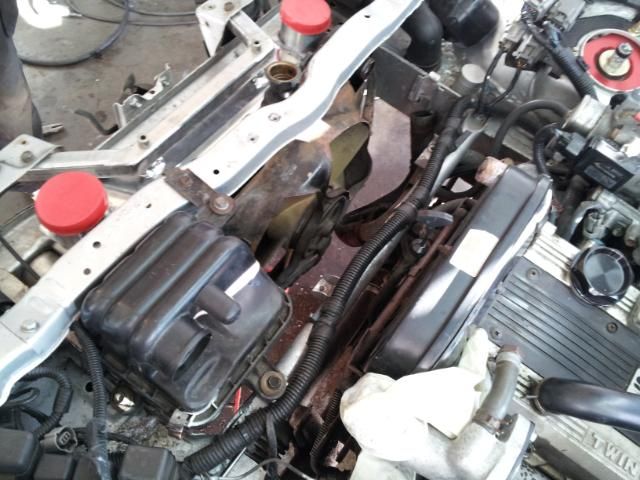
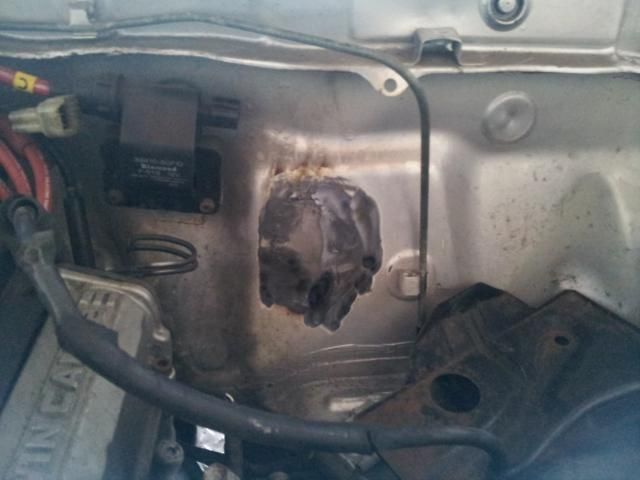
Also noticed the "intake" for the airbox didn't actually go anywhere.....

it does now
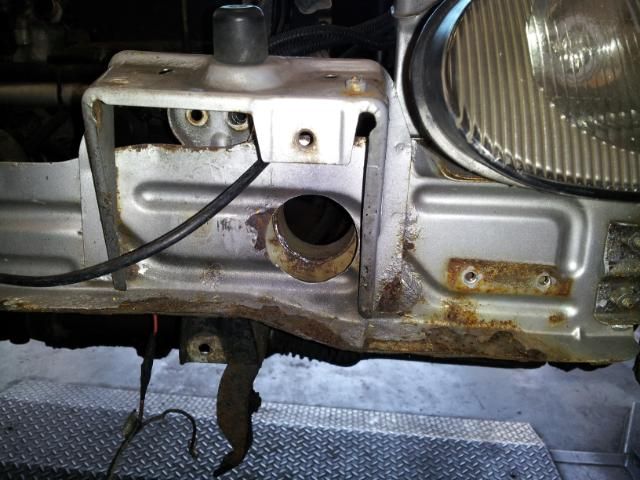
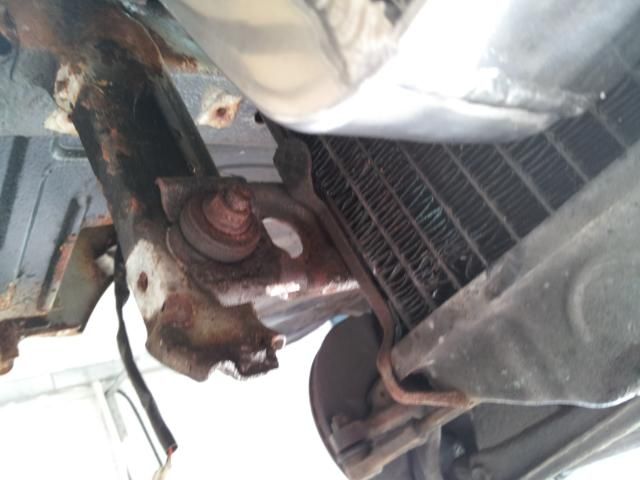
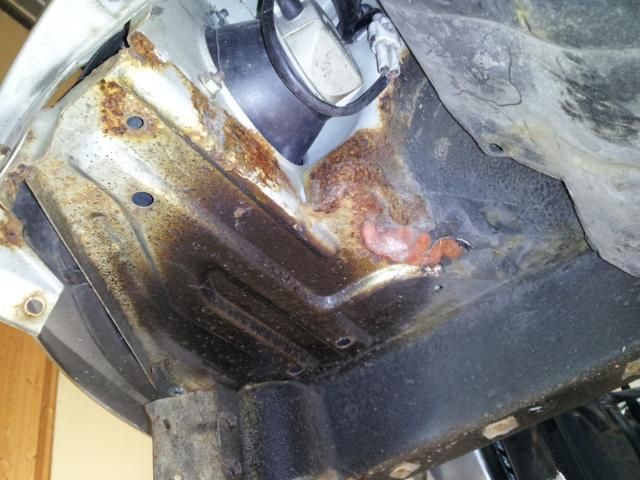
First time we have had the front bumper off and there are lots of little rusty areas in need of some help. I especially like the "lets put some filler over the rust" bodges on the inner wings 
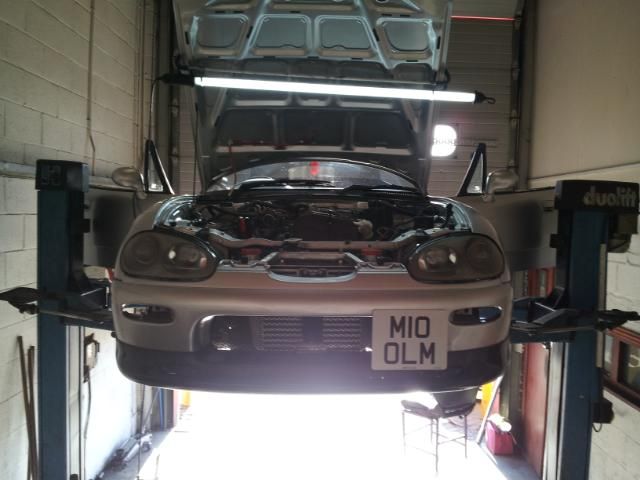
That's for another day though. I hung the bumper on to give you an idea of how it will look
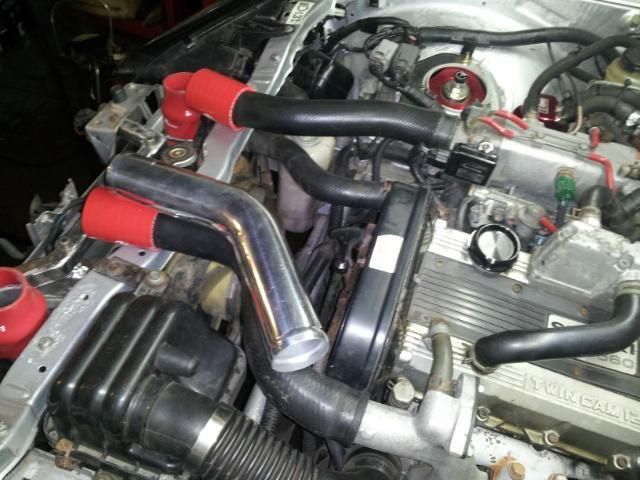
Began mocking the boost pipes, but I really need to order some 90 degree bits to complete
And that s how we left it. I'm car-less till next week, but I have been promised some pictures of progress to tide me over in the meantime
 |
|
| Logged |
|
|
|
Reply: 103 - 333 |
|
|
| Avar |
| Posted on: Sunday, August 19th, 2012, 8:21:37am |
|
|
|
Is your welder happy to weld with the panels with por on them? i had a quick search and general consensus is that it will either burn or give of nasty fumes when heated during welding. I've welded hamerite'd metal but stopped after a small panel fire in a really hard to get area (used up a whole extinguisher to cool everything off) i didn't know if por does the same.
Also, that intake for the airbox normally draws air from the cool side of the engine just behind the drivers head light.
Cooler looks good!!! |
|
| Logged |
|
|
|
Reply: 104 - 333 |
|
|
| nikki |
| Posted on: Sunday, August 19th, 2012, 10:51:59am |
|
|
|
Thanks Kei. General consensus is correct and it will catch fire, but we have practiced this method a few times on other cars now and have it down to a T The sill's lip will be drilled out for spot welding (with a normal welder) and welded from the outside which should help minimise fire risks. Welding itself is always a two person affair, one doing the welding, the other with an air line ready for instant cooling of the area and extinguishing of any flames. We'll make a spot in one area, cool off with air and then move to another area on the sill to let it cool down fully before returning back and spotting near by. The outside it not painted, just the bits you can get to to minimise any problems and then once fitted finish off what you can get to. Possibly Por 15 may have slightly more resistance to fire than Hammerite, but you do have to keep right on top of it and take you time.
So is that little black funnel part behind the headlight part of the original intake system? My plan with it is to get the take off vents for my bumper and make a direct ram intake from outside with them that will link into that tube. |
|
| Logged |
|
|
|
Reply: 105 - 333 |
|
|
| r32z32 |
| Posted on: Sunday, August 19th, 2012, 12:40:23pm |
|
|
|
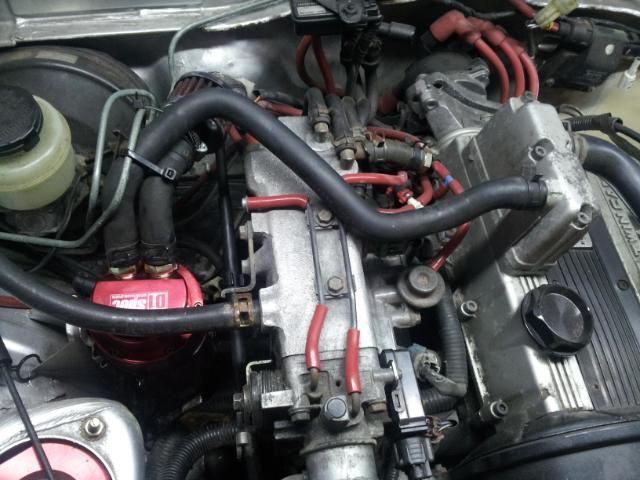
| Just thought i would give a little engineering advice. Your catch tank isnt doing you any good the way it is installed. It should be in series with the line from the valve cover to the intake manifold. The way you have it, the oil is still going to drain into the intake, therefore defeting the purpose of having the catch tank. Also, if you are going to have the catch tank vented to the atmosphere, you dont need to attach the hose to the intake manifold anyways. The hose should go from the valve cover directly to the catch tank then the your filter. You can just cap off the hole on the intake manifold. Good luck with your build, the car is looking great!! |
Last modified Sunday, August 19th, 2012, 12:46:16pm by r32z32 |
|
| Logged |
|
|
|
Reply: 106 - 333 |
|
|
| nikki |
| Posted on: Sunday, August 19th, 2012, 5:18:40pm |
|
|
|
| Thanks for that, I'll certainly give it a go that way around |
|
| Logged |
|
|
|
Reply: 107 - 333 |
|
|
| nikki |
| Posted on: Tuesday, August 21st, 2012, 11:01:33pm |
|
|
|
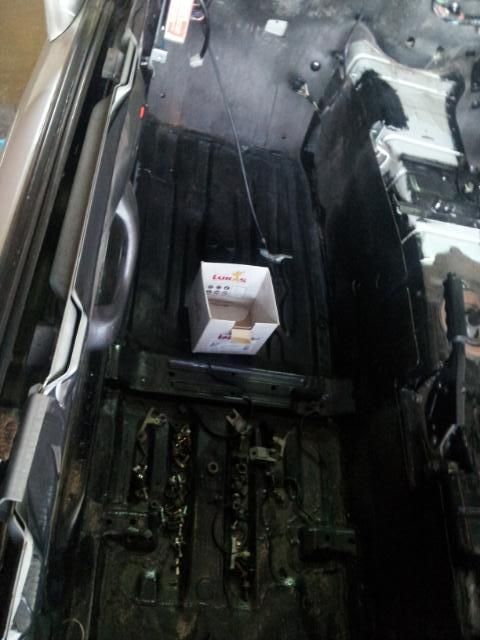
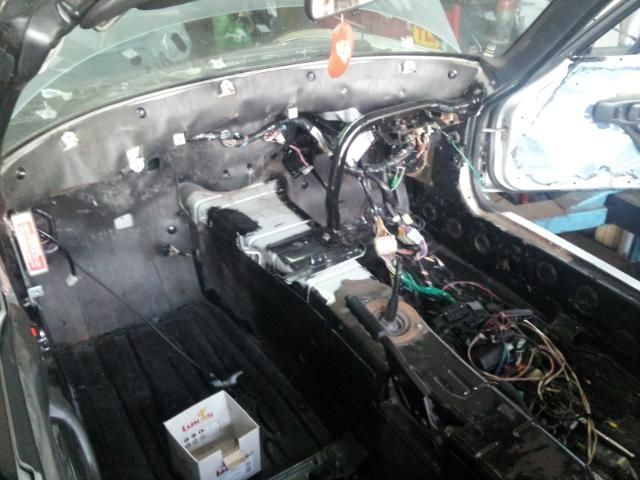
Things are moving on nicely. Removed the dash.
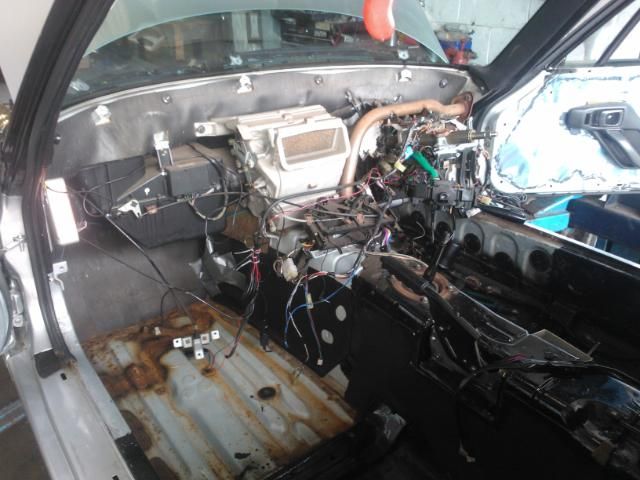
And a few wires

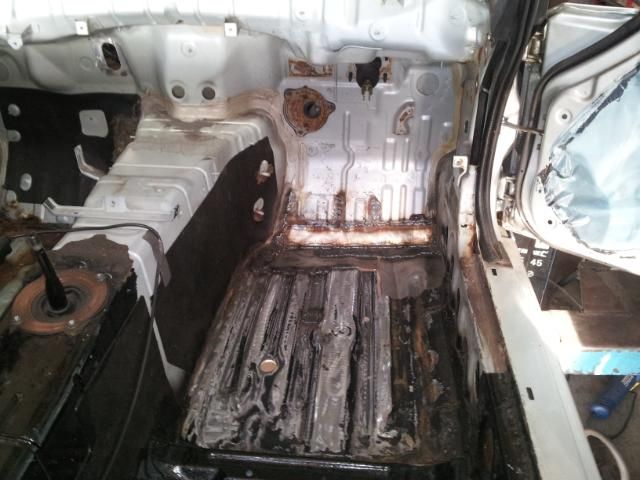
Everything in fact, and then got on with the welding of the footwells
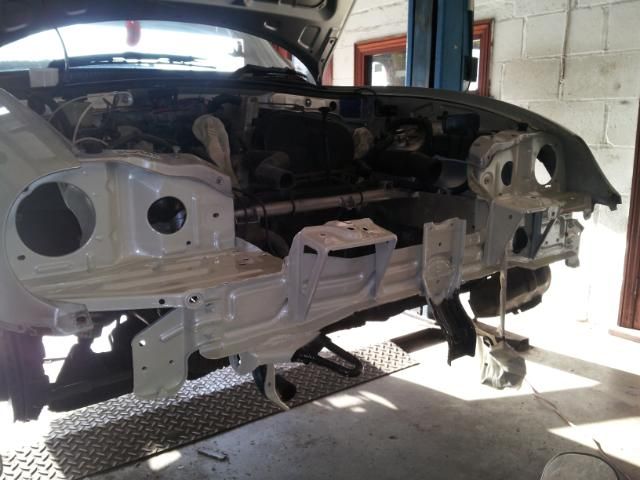
Strip down and de rustifaction of the front end via wire brushes, metal ready, and Por 15. Warning, what follows is like and advert for Por 15 and I appologise in advance
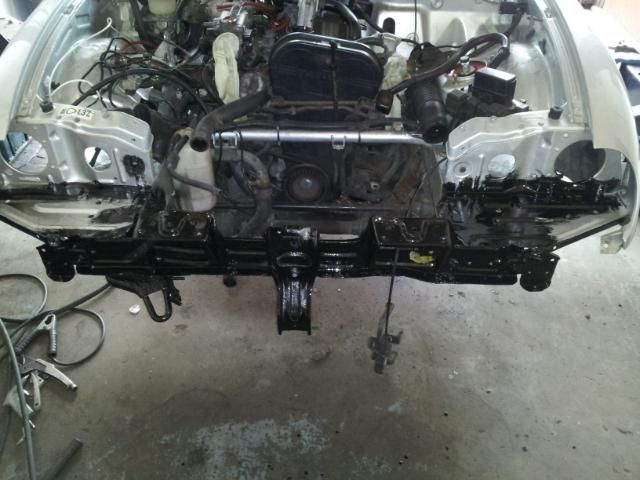
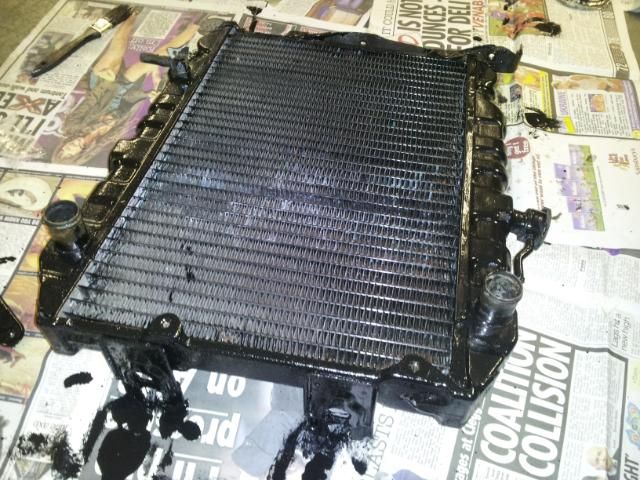
Tidied the outside edge of the rad
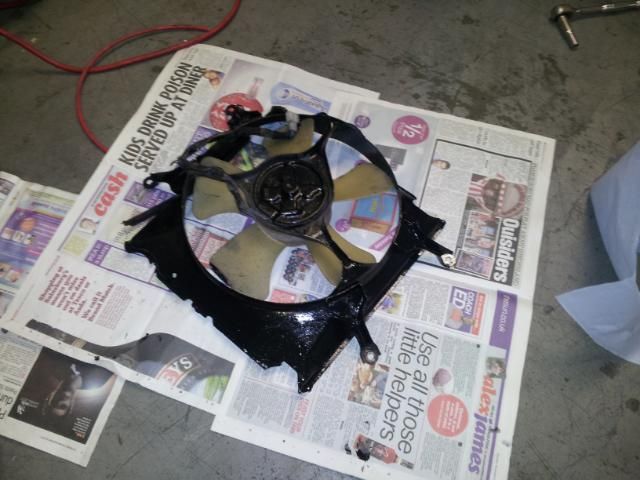
Fan got it too
Oh, and today I got my re trimed door cards back. They look great and I'm over the moon with them. The foam backing has been replaced and the stiching follows the original lines, have a lookie,
Can't wait to get them back together |
|
| Logged |
|
|
|
Reply: 108 - 333 |
|
|
| lord |
| Posted on: Tuesday, August 21st, 2012, 11:46:53pm |
|
|
|
Getting some serious love!!
I wish I was your cappo!
The door cards are looking good. Very different and sporty looking. |
Last modified Wednesday, August 22nd, 2012, 9:37:03am by lord |
|
| Logged |
|
|
|
Reply: 109 - 333 |
|
|
| nikki |
| Posted on: Wednesday, August 22nd, 2012, 9:56:47pm |
|
|
|
Cheers lord
Some more progress today. The air con evaporator was removed from the heating system for even less weight.
Tidied up the pedal boxes and a few other bits too
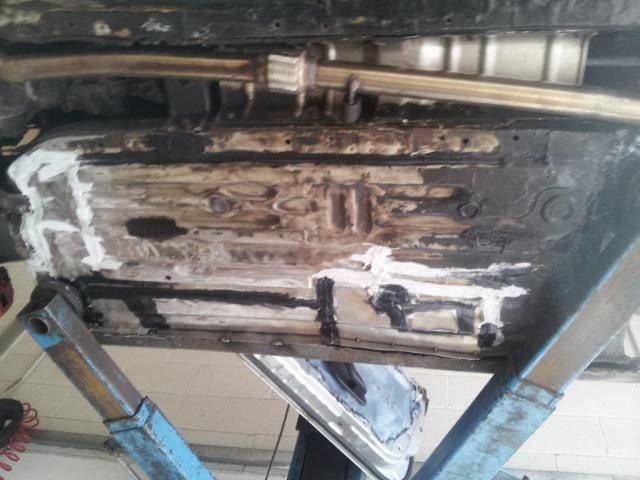
New floor at the front

Complete with reinforced jacking point
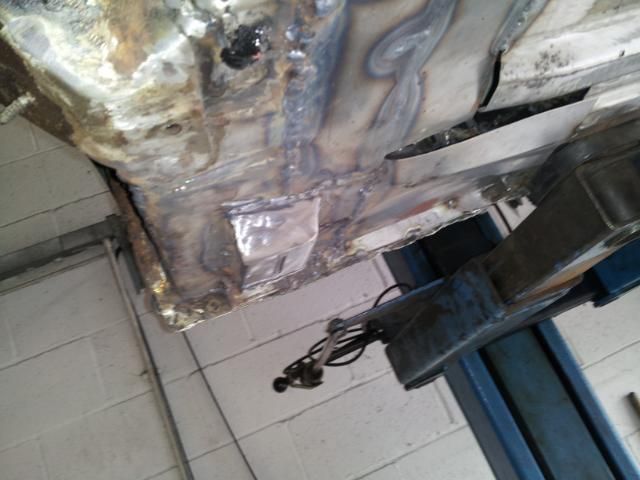
It was looking nearly complete
Then had to cut out more bodged welding

The front end got a lick of paint to complete

|
|
| Logged |
|
|
|
Reply: 110 - 333 |
|
|
| Ricou |
| Posted on: Wednesday, August 22nd, 2012, 9:58:27pm |
|
|
Maximum Member
Posts: 1110
Posts Per Day: 0.65 |
|
|
| Logged |
|
|
| |
Reply: 111 - 333 |
|
|
| nikki |
| Posted on: Wednesday, August 22nd, 2012, 10:12:55pm |
|
|
|
| Thanks |
|
| Logged |
|
|
|
Reply: 112 - 333 |
|
|
| half-9 |
| Posted on: Wednesday, August 22nd, 2012, 11:12:45pm |
|
|
Big Member
Posts: 453
Posts Per Day: 0.32 |
|
Nikki,
This is going to be one seriously nice cappo! Can't wait to see those Mx5 arches on, how much wider are they at the front?
I stuck 17x7 on the front and had the suspension arms extended 1.5" to both fill the take off arches, and reduce the arc that the wheel would travel thru if I had used spacers.
What size wheels you planning on running?
Cheers
H |
|
| Logged |
|
|
| |
Reply: 113 - 333 |
|
|
| lord |
| Posted on: Wednesday, August 22nd, 2012, 11:33:39pm |
|
|
|
This is getting some serious love again. lol
man this is an obsession. It's a shame you didnt look at getting whole new floors. There are people who are or might even have had a go at doing the MX5 route of using their floors and welding them inn. |
|
| Logged |
|
|
|
Reply: 114 - 333 |
|
|
| nikki |
| Posted on: Thursday, August 23rd, 2012, 9:31:38am |
|
|
|
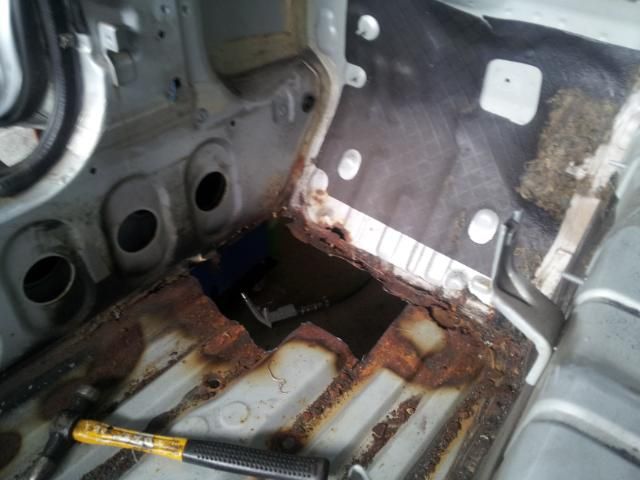
Thank you half-9, the arches give 75mm extra room at the front and 80mm at the rear. The wheels are 15x8 et0 so I doubt I'll need to extend the arms, but it sounds like a good fix. All being well the wheels should be getting dispatched from the US tomorrow finally
Yeah lord, if I knew that all the original welding on the car was just plating over the rust rather than removing it, I may well have ordered complete new floors. We are too far into it now though and doing it this way means we can be intricate and build up different layers and reinforce areas like the jacking points for extra strength. All we have left is the section to fill on the drivers side floor and that is done. The passenger side currently looks less work, but until it gets uncovered who knows what it will have in store! |
|
| Logged |
|
|
|
Reply: 115 - 333 |
|
|
| nikki |
| Posted on: Thursday, August 23rd, 2012, 9:53:58pm |
|
|
|
Driver side is complete just needs paint
Started on passenger side
No air con here
The front has started to go back together
|
|
| Logged |
|
|
|
Reply: 116 - 333 |
|
|
| nikki |
| Posted on: Sunday, August 26th, 2012, 3:42:13pm |
|
|
|
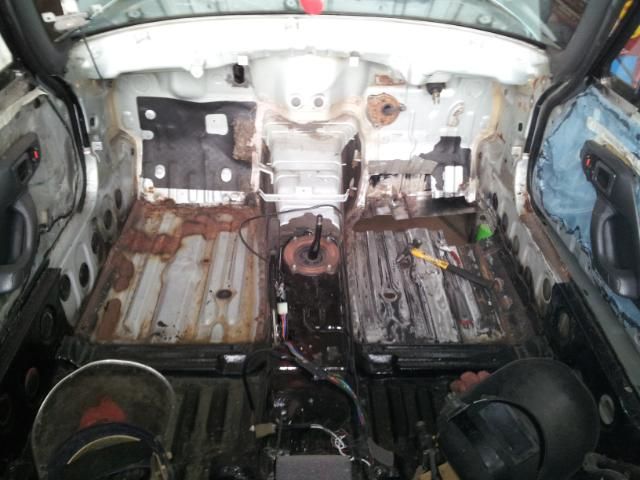
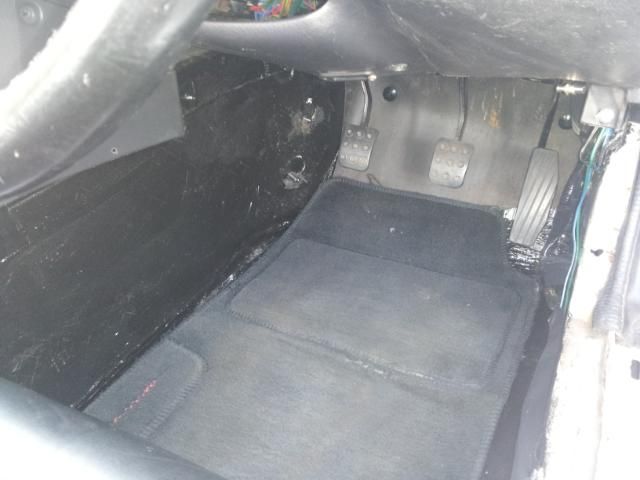
I CAN HAS FLOOR!!!
All metal on both sides and everything
Ground the aircon blank back a bit
Started to tidy but not quite finished
Things started to go back inside
Held off with the door cards and wheel. I'm still waiting on some screws for the Nardi and sills will get started next week so want to keep the nice stuff out the car until then at least. Got to here
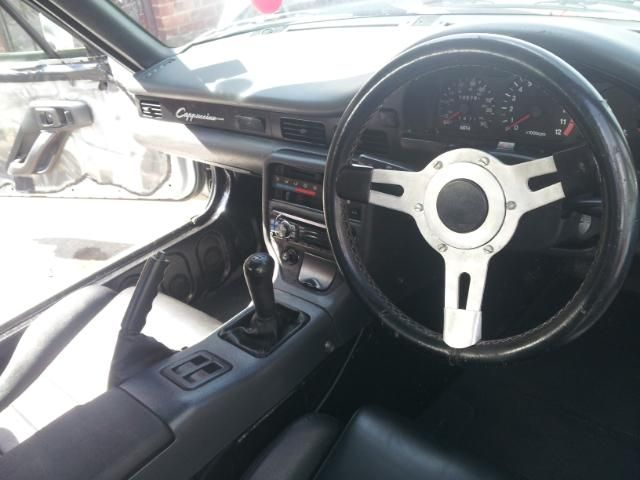
No carpet, but mats. Perfectly liveable
Bumper went back on, you can see we still get a bit of 'cooler at the top where the original went
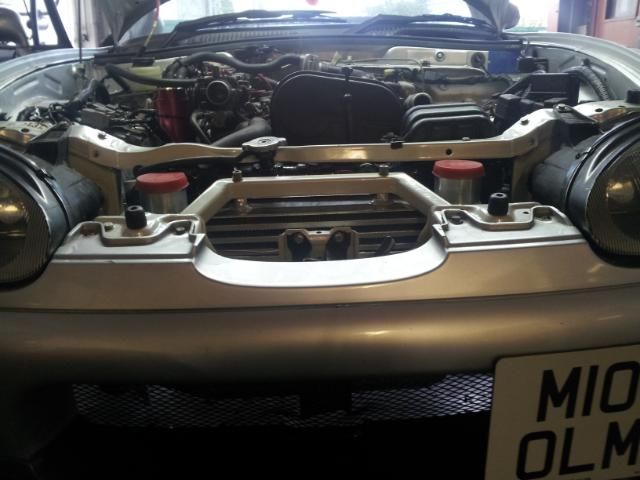
but most of it is down here
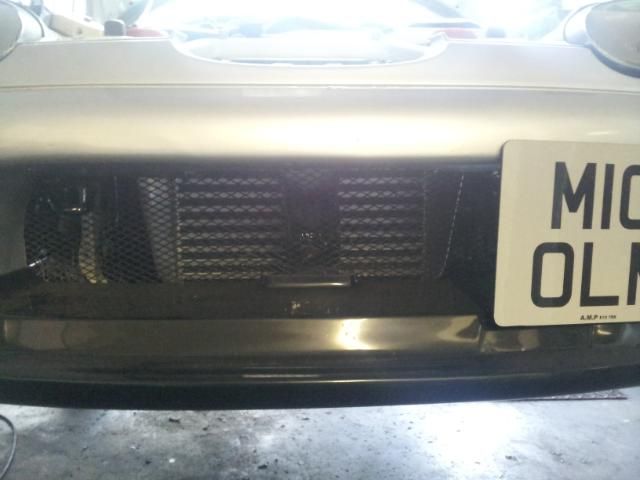
R32Z32, I hope this meets your approval
The boost hoses were made up with what we had, some further adjustments will follow later
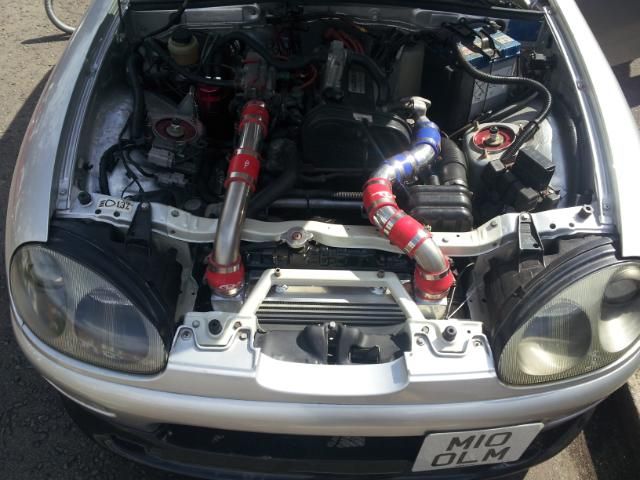
Feels quite a bit different now, more eager to please and I have gained some wastgate chatter too which is something I have been wanting for a while so very pleased |
Last modified Sunday, August 26th, 2012, 3:44:50pm by nikki |
|
| Logged |
|
|
|
Reply: 117 - 333 |
|
|
| Capposteve |
| Posted on: Sunday, August 26th, 2012, 5:34:56pm |
|
|
|
| Looking good nikki. You managed to get that interior back In quick. Was it easy?? |
|
| Logged |
|
|
|
Reply: 118 - 333 |
|
|
| nikki |
| Posted on: Sunday, August 26th, 2012, 5:43:50pm |
|
|
|
Its pretty simple to remove and refit. There isn't a great deal to it to be fair.
The electrics can be a bit confusing as some plugs are the same as others so you may accidentally plug things in wrong if you don't have the manual to refer to. |
Last modified Sunday, August 26th, 2012, 5:45:21pm by nikki |
|
| Logged |
|
|
|
Reply: 119 - 333 |
|
|
|
 Cappuccino Owners Club › Gallery › Cappo Related Album › The Whole 3.6 Yards (Moderators: )


 Locked Board